• Holiday Cheese Ball - Glory Kitchen

    HOLIDAY CHEESE BALL

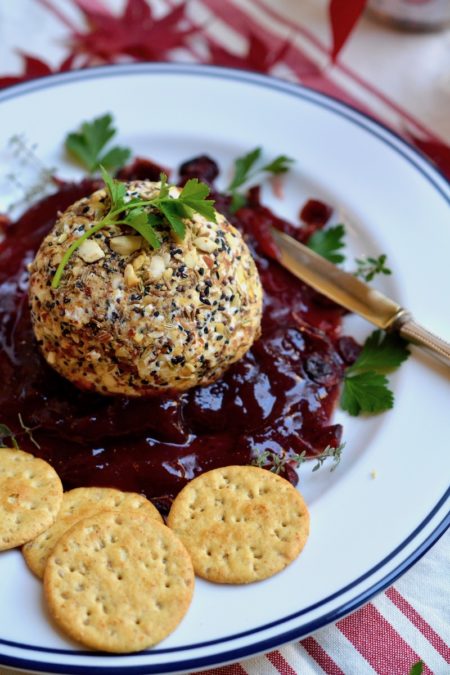
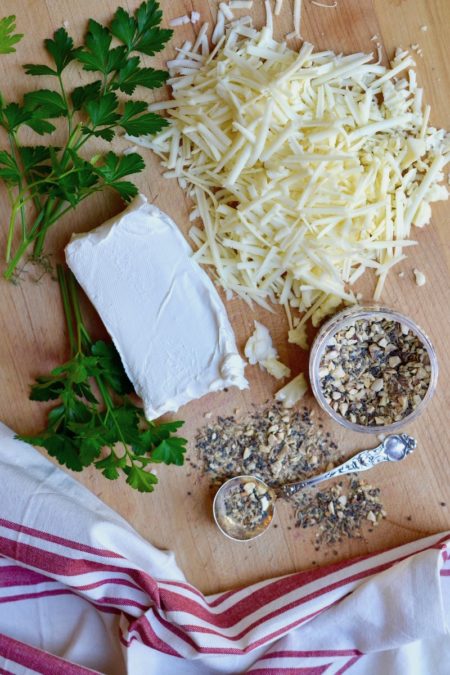
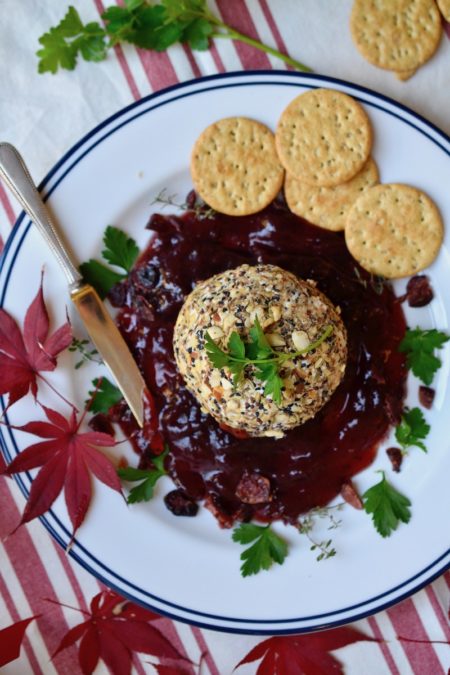
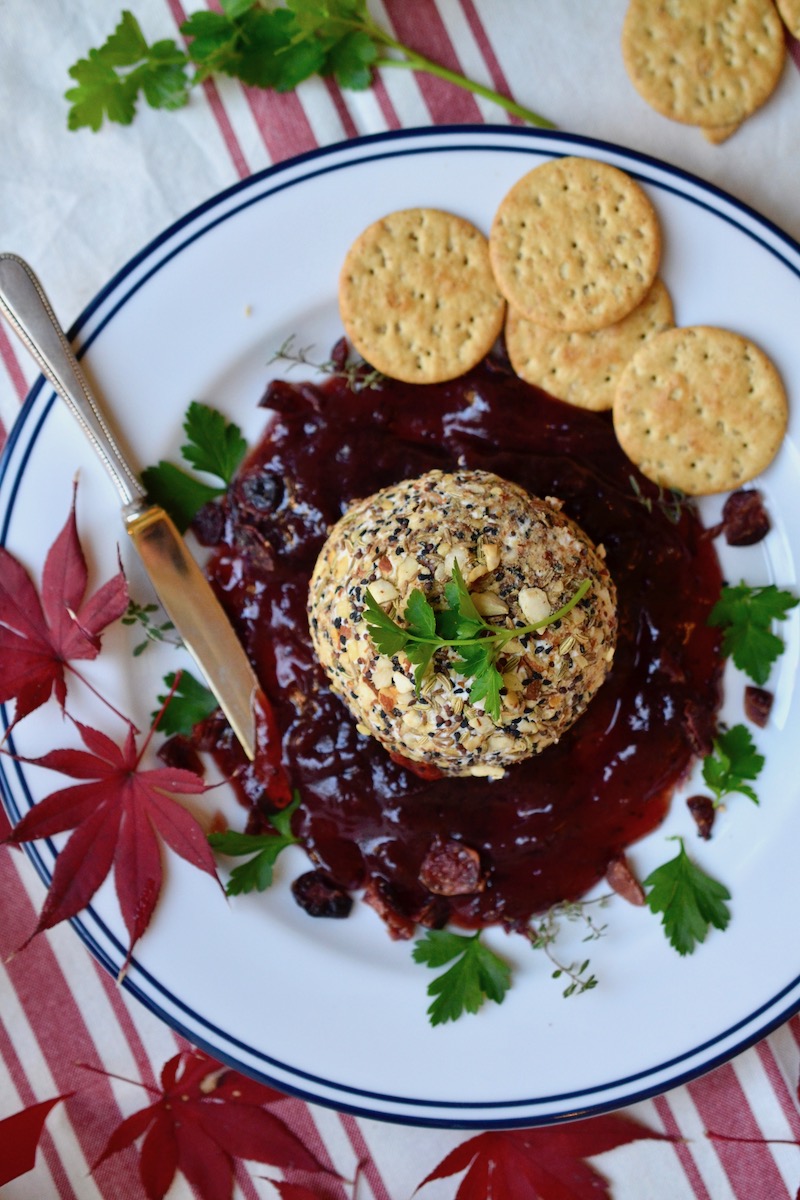
    This Holiday Cheese Ball is the perfect appetizer for upcoming parties and gatherings.  It is always a hit because really, who doesn’t love creamy cheese loaded with crunchy flavor?  The best part about this appetizer is threefold: first, it is made with only three ingredients; second, it takes no time at all to put together, and finally, you can make it ahead and serve at room temperature when guests arrive.  That is what I call perfect party fare.

    I call this a Holiday Cheese Ball because it seems so appropriate for winter party gatherings but don’t be fooled by the name, it is just as good served at all times of the year.  For spring or summer seasons I would pair it with sweet strawberry, peach, or blackberry jam but during the Christmas season I love serving this spicy and flavorful Holiday Cheese Ball alongside a cranberry compote or fig jam.  The sweet, fruity jam, the creaminess of the cheese, and the pungent notes of seeds and herbs from the Indian flavors of our Mumbai nut & spice mix make for a tasty combination.

    This Holiday Cheese Ball is made by mixing cream cheese and Monterrey Jack cheese, then crusted with our spicy Indian nut mix, but all flavors of our Glory Kitchen nut & spice mixes work beautifully crusted on a cheese ball.

    For a different twist you could try a mix of cream cheese and Manchego or Queso Fresco and then crust it with our Mexican flavors of San Miguel nut & spice mix.  Or take it in a Mediterranean direction with a cream cheese and feta combination crusted with our Cairo nut & spice mix.  Another fabulous cheese combination (and one I make often) is cream cheese and goat cheese crusted with our Provence nut & spice mix.  There are so many combinations; each one has its own delicious flavor twist and they make a lovely presentation crusted in colorful seeds, nuts, herbs and spices.
    I like to make the cheese ball ahead, refrigerate wrapped in plastic wrap, then serve at room temperature when the guests arrive so the cheese is soft and creamy for spreading.  My favorite pairing is with fresh baguette slices but any type of cracker works perfectly as well.

    With our Glory Kitchen spice blends on hand, you’ll always be ready to throw together a true crowd-pleasing appetizer.  You don’t even need a recipe.  It’s just that simple.

    Margie Bruner - Glory Kitchen

    Margie Bruner
    owner of Glory Kitchen

    instagram
    facebook

    Holiday Cheese Ball

    Yield: about 6-8 persons

    Ingredients

    • about 1/4 cup Mumbai nut & spice mix
    • 1 block (8 ounce) cream cheese
    • 1 block Monterrey Jack cheese, shredded
    • fresh parsley, for garnish
    • 1 jar cranberry jam or preserves (also would be great with fig jam, strawberry jam, or blackberry jam)
    • crackers or slices of fresh baguette

    Instructions

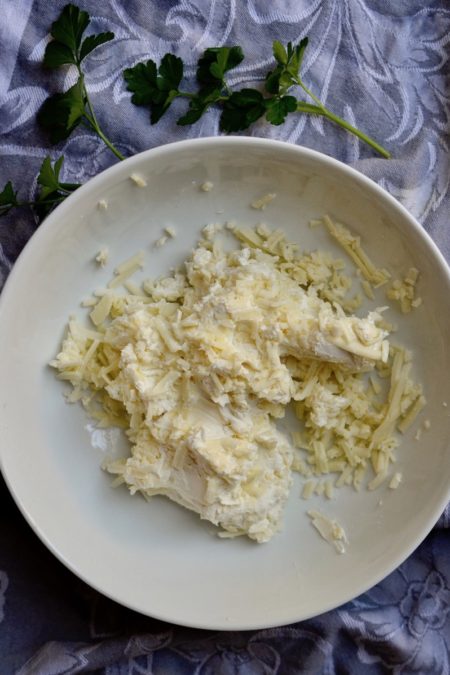
    1. In a large mixing bowl, combine the cream cheese and Monterrey Jack cheese until they are incorporated well. I like to use my hands to get it well mixed together. Form into a ball.
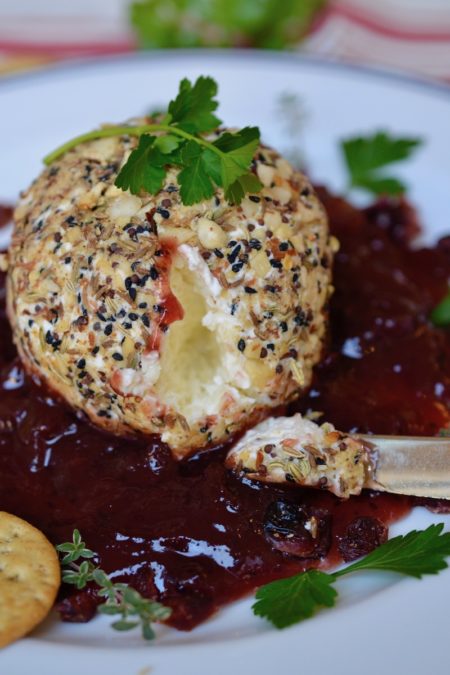
    2. Take the Mumbai nut & spice mix and sprinkle it out onto a flat countertop, cutting board, or flat surface. Take the cheese ball and press it down firmly into the Mumbai nut & spice mix to crust the exterior of the ball. Move it around and continue pressing the cheese into the nut mix until the entire ball is completely covered in the blend. Wrap the cheese ball with plastic wrap and store in the refrigerator until ready to serve.
    3. I like to bring the cheese to room temperature before serving so it is creamy and easy to spread. Place the ball into the center of a serving dish and spoon a seasonal jam (I love cranberry at Christmas time but fig is delicious as well) all around the base of the cheese ball. Serve with slices of fresh baguette or with your favorite crackers.

    Holiday Cheese Ball - Glory Kitchen
    Holiday Cheese Ball - Glory Kitchen
    Holiday Cheese Ball - Glory Kitchen
    Holiday Cheese Ball - Glory Kitchen
    Holiday Cheese Ball - Glory Kitchen
  • Butternut, Brussels, and Walnut Salad with Tangerine Dressing -Glory Kitchen

    BUTTERNUT, BRUSSELS, & WALNUT SALAD

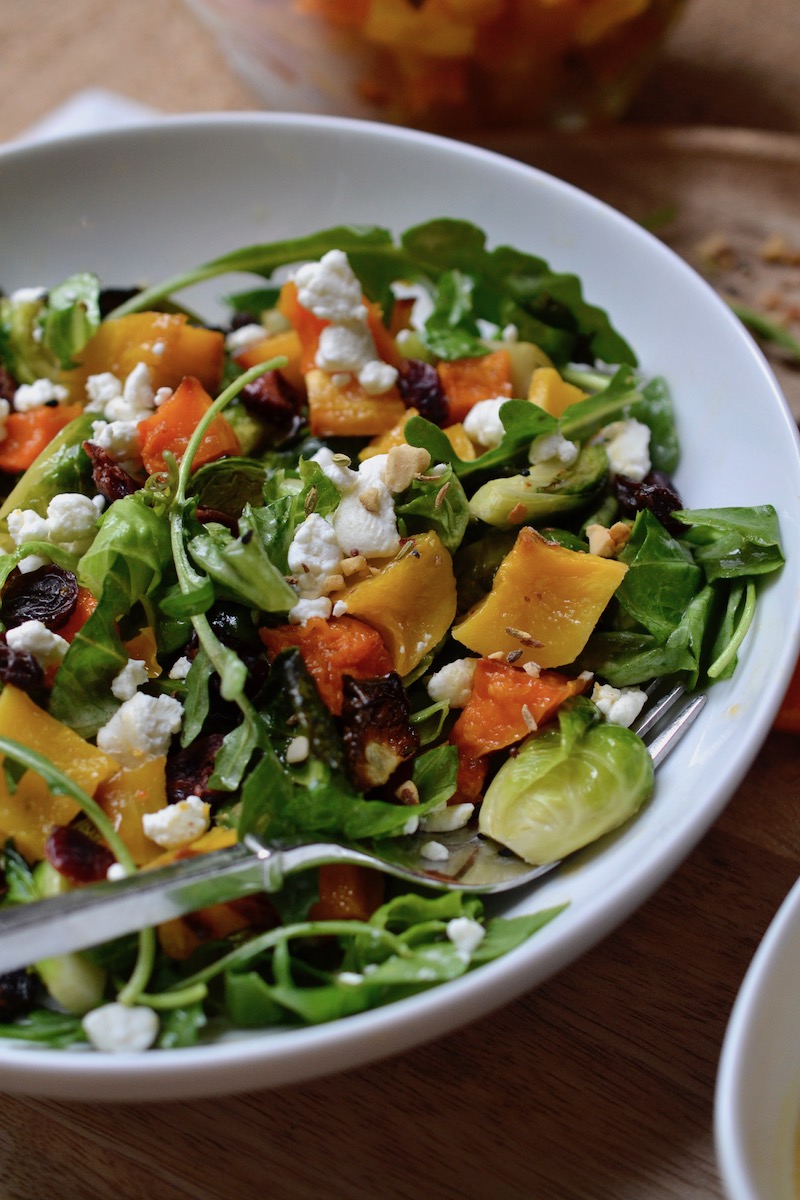
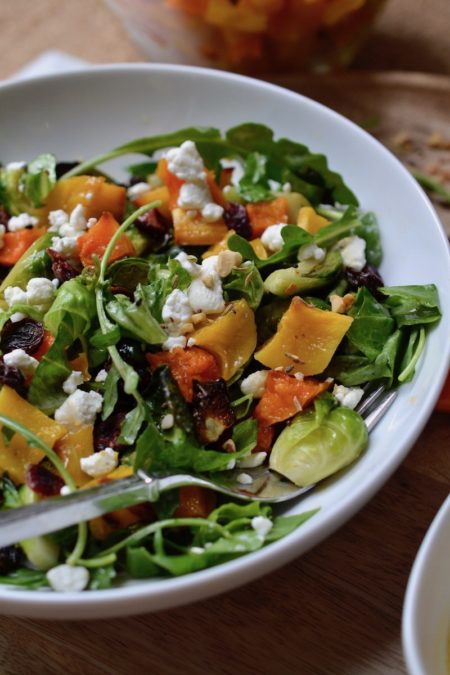
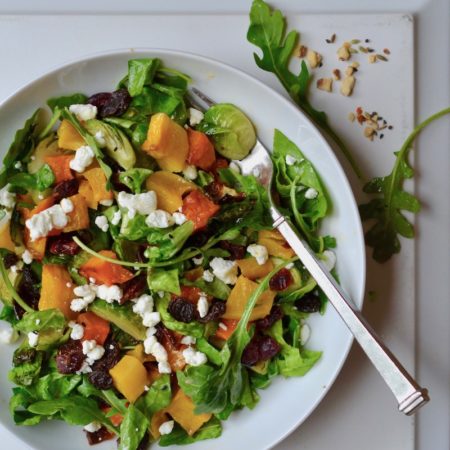
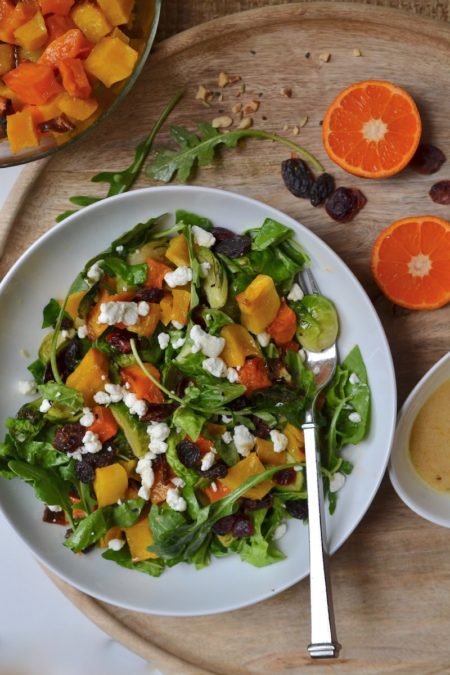
    This Butternut, Brussels, and Walnut Salad with a Tangerine Vinaigrette is a delicious way to ring in the fall season.  It’s everything tasty about fall tossed together into one big bowl and it has all types of flavor –  roasted squash, crunchy brussels sprouts, tart cranberries, nutty walnuts, and creamy goat cheese.  This combination of ingredients makes a mighty flavorful salad that you’ll want to repeat over and over.  I’ve already made this salad twice and I’m serving it again for a gathering this week.

    This is a simple recipe but to make it quickly I recommend roasting both the butternut squash and the brussels sprouts the day before and store them in the refrigerator until you are ready to assemble your salad.  The tangerine dressing could also be made ahead and stored in a mason jar in your fridge until you are just about to serve.  My best advice is to roast plenty of butternut squash and brussels sprouts because it is difficult to resist the temptation of snacking on them as they come out of the hot oven… better than candy!

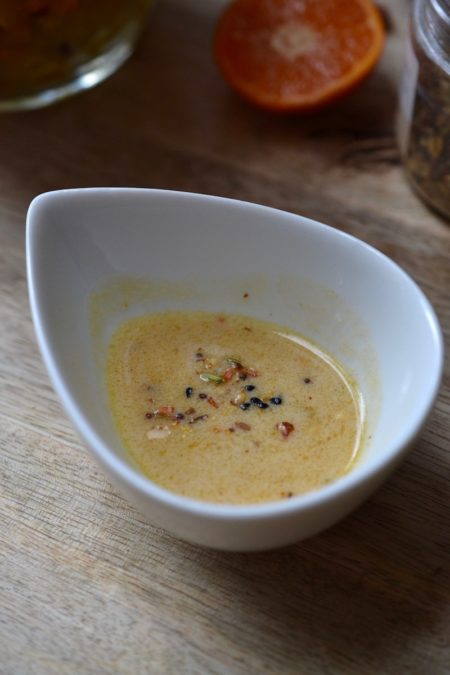
    The dressing has a surprise ingredient of fresh tangerine juice which gives it a bright and citrusy flavor.  A drizzle of honey adds more sweetness but the best part is the surprise pinch of cinnamon and the Indian flavors from our Glory Kitchen Mumbai nut & spice mix.   This recipe will make plenty of dressing  so you may have some leftover for drizzling on raw veggies later or even to use as a marinade for salmon.  Hope you enjoy this Butternut, Brussels, and Walnut Salad with a Tangerine Vinaigrette as much as I have.

    Margie Bruner - Glory Kitchen

    Margie Bruner
    owner of Glory Kitchen

    instagram
    facebook

    Butternut, Brussels, & Walnut Salad with a Tangerine Vinaigrette

    serves about 6 salads

    Ingredients

      For the dressing:
    • 1 teaspoon Mumbai nut & spice mix
    • 1/2 cup olive oil
    • 1/4 cup white wine vinegar
    • 1/4 cup tangerine juice, fresh squeezed
    • 1/2 cup greek yogurt
    • 1/4 cup organic mayonnaise
    • 1 teaspoon honey
    • good pinch of salt
    • good pinch of cracked pepper
    • good pinch of cinnamon
    • For the salad:
    • 1 butternut squash, cubed & roasted
    • 3-4 cups brussels sprouts, quartered & roasted
    • romaine lettuce, chopped
    • arugula lettuce
    • 1/2 cup (or less) dried cranberries
    • 1/2 cup goat cheese crumbles
    • 1 cup walnuts, toasted & coarsely chopped
    • extra Mumbai nut & spice mix
    • for topping

    Instructions

      dressing:
    1. Place all of the dressing ingredients into a small mason jar and shake very well until it is completely emulsified together. Taste the dressing and adjust the seasonings. You may want to add a bit more honey if you prefer it a bit sweeter.
    2. salad:
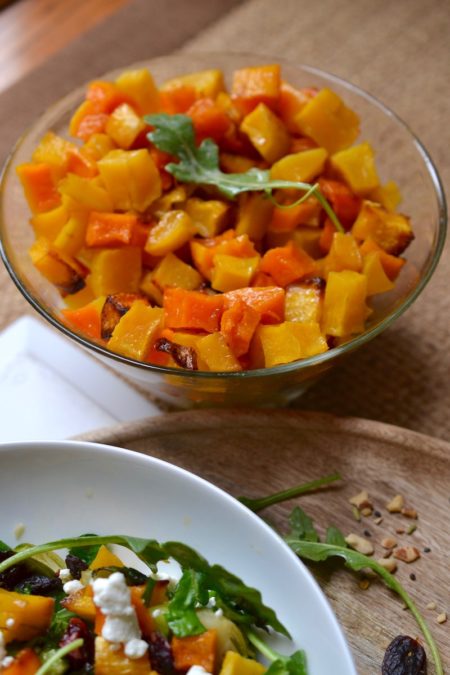
    3. Peel and cube the butternut squash and place onto a baking sheet lined with parchment paper. To allow for easier peeling & slicing I like to place the entire butternut squash into the microwave and run it for 5 minutes or so, on high. Remove and allow to cool a bit. Cut in half, cut the ends off, then peel. Slice each piece in half, clean out the cavity with a spoon (I like to use a grapefruit spoon which has serrated edges). Then slice the butternut and cut into cubes. Drizzle the cubed squash with olive oil & sprinkle with sea salt. Place into a hot 450° oven for about 30 minutes or until the squash is a bit browned on the edges. Remove and cool completely. This can be done the day before and stored in the refrigerator.
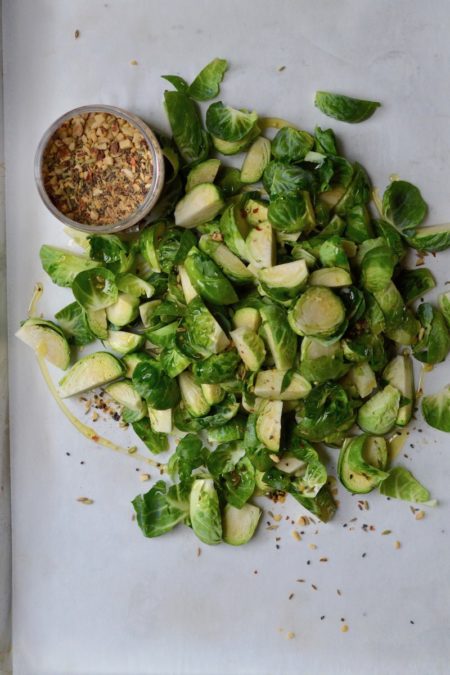
    4. Take the brussels sprouts and cut off the ends, slice them into quarters then place on a parchment lined baking sheet and do the same as you did the squash; drizzle with olive oil, sprinkle with a pinch of sea salt, and throw into a hot oven, 450°, for a bit less time than the squash. You don't want to burn them so keep a close eye on your oven. I like to bake both sheets of vegetables at the same time. I also like to do this step well before I plan on assembling the salads.
    5. Slice up your romaine lettuce & toss together with the arugula (about equal parts of each). I typically like to toss them together with just a bit of dressing to lightly dress the lettuces but only use a bit so they don't wilt.
    6. Add the lettuces to each individual bowl or plate, top with butter nut squash, brussels sprouts, & dried cranberries. Top with toasted walnuts & goat cheese crumbles. You can finish with an additional sprinkle of Mumbai nut & spice mix.
    7. Serve the salads with the dressing on the side.

    Notes

    This dressing would also be wonderful with our Cairo, San Miguel, or Provence nut & spice mix.

    Butternut, Brussels, and Walnut Salad with Tangerine Dressing -Glory Kitchen
    Butternut, Brussels, and Walnut Salad with Tangerine Dressing -Glory Kitchen
    Butternut, Brussels, and Walnut Salad with Tangerine Dressing -Glory Kitchen
    Butternut, Brussels, and Walnut Salad with Tangerine Dressing -Glory Kitchen
    Butternut, Brussels, and Walnut Salad with Tangerine Dressing -Glory Kitchen
    Butternut, Brussels, and Walnut Salad with Tangerine Dressing -Glory Kitchen
  • Roasted Corn and Avocado Dip - Glory Kitchen

    ROASTED CORN AND AVOCADO DIP

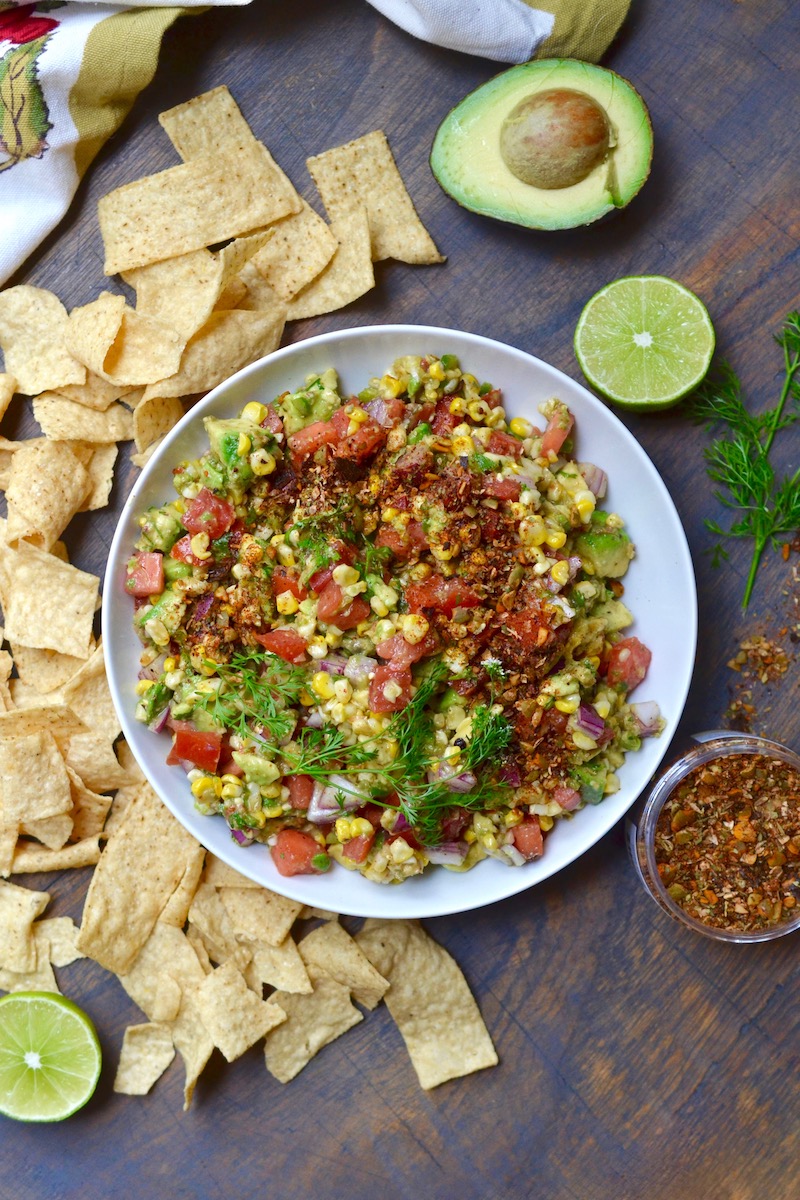
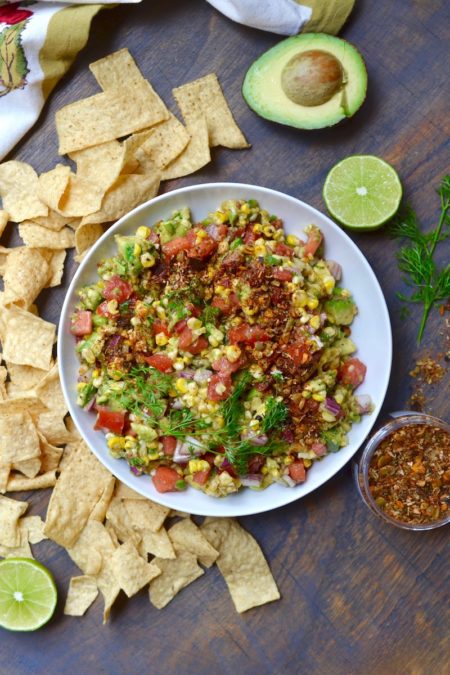
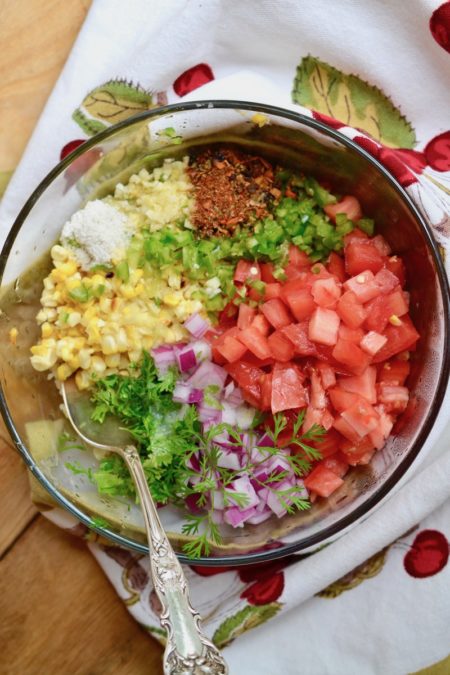
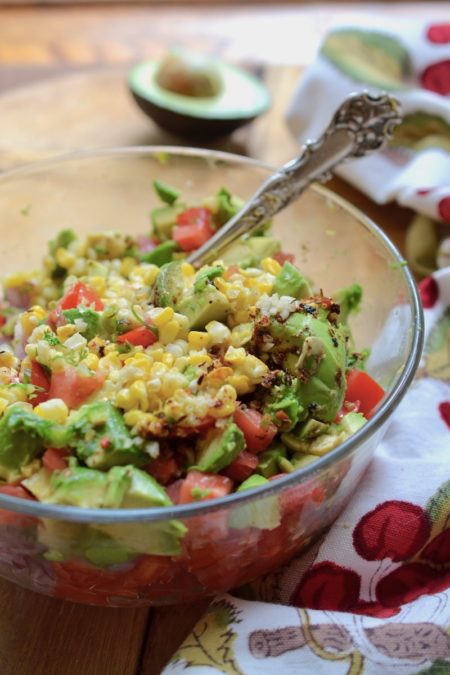
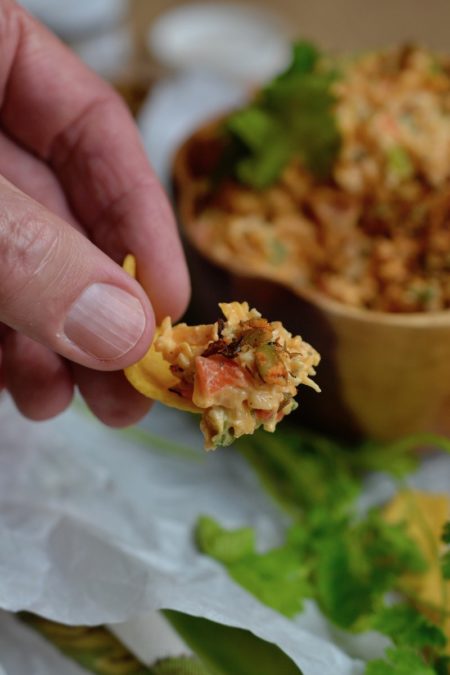
    My Roasted Corn and Avocado Dip is a crowd favorite that I have been making for over 20 years and it gets requested for a party time and time again.  It’s fresh, crisp, and oh-so-tasty!  Of course the best time of year to make Roasted Corn and Avocado Dip is summertime, when fresh corn is abundant in the markets, but don’t let that hold you back from making this dish during the off-season.  I have been known to grab a bag of frozen corn, toss it with a touch of olive oil, and roast it in the oven when you just can’t get your hands on a fresh ear of corn – not quite as crispy but still delicious. The added crunch from our Glory Kitchen San Miguel nut & spice mix gives it an extra kick of flavor and crunchy goodness.

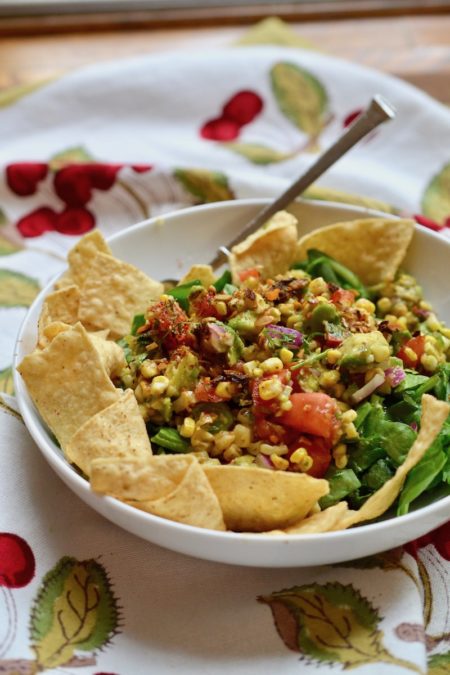
    This is a perfect dip to serve to a crowd paired with tostada chips but it is also wonderful spooned over lettuce greens to make a fresh salad or tucked into tacos as a fresh topping.

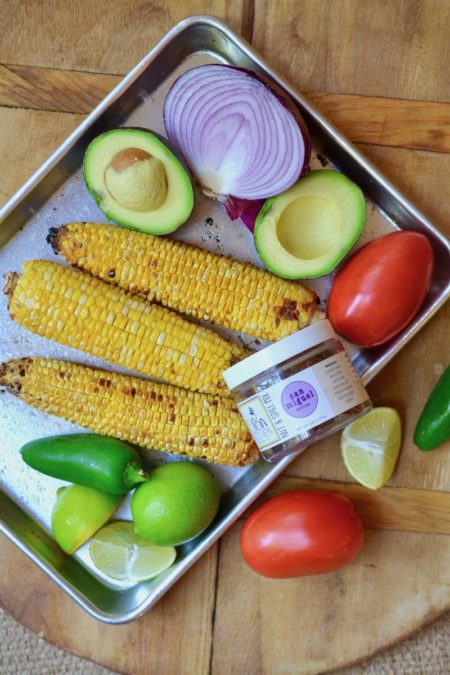
    Once you know the main ingredients, it is easy to throw together from memory, but don’t skip the roasting of the corn because although it’s an extra step that takes a bit of time, it adds such an intense and smoky flavor to the dish.

    You can make this dip and serve it immediately or make it a few hours before your guests arrive, the flavors only intensify as it melds together.  I hope you make this Roasted Corn and Avocado Dip before the summer gets away from you.

    Margie Bruner
    owner of Glory Kitchen

    instagram
    facebook

    Corn and Avocado Dip

    Ingredients

    • 2 teaspoons San Miguel nut & spice mix
    • 3 ears of corn
    • 2 tablespoons olive oil
    • 3-4 roma tomatoes, diced
    • 3 avocados, diced
    • ½ cup red onion, chopped
    • ¼ cup fresh cilantro, chopped
    • 2-3 cloves fresh garlic, minced
    • 1 fresh jalapeño pepper, minced
    • 1 small lime, juiced (about 1 1/2 tablespoons)
    • 1 tsp cider vinegar
    • 1 tsp. sea salt

    Instructions

    1. Peel and clean the ears of corn, drizzle with a bit of olive oil, and using your hands, rub the olive oil over all the corn, distributing it evenly. Place them on a baking sheet, sprinkle with sea salt and place in the oven under the broil. Keep a close watch on the corn and using tongs, turn the ears as they begin to lightly brown on the top. Once they are lightly toasted, remove from the oven and allow them to cool. Slice the kernels off the cob and place the corn into a large mixing bowl.
    2. Add all of the remaining ingredients into the bowl of corn and mix well. You can either serve immediately or refrigerate for up to 3 - 6 hours. Just before serving, sprinkle the top with more San Miguel nut & spice mix and serve with tostada chips as a dip. You can also spoon the corn dip over fresh lettuce greens, top with crushed tostada chips and enjoy a Mexican corn & avocado salad.

    Roasted Corn and Avocado Dip - Glory Kitchen
    Roasted Corn and Avocado Dip - Glory Kitchen
    Roasted Corn and Avocado Dip - Glory Kitchen
    Roasted Corn and Avocado Dip - Glory Kitchen
    Roasted Corn and Avocado Dip - Glory Kitchen
  • Homemade Pimento Cheese - Glory Kitchen

    HOMEMADE PIMENTO CHEESE

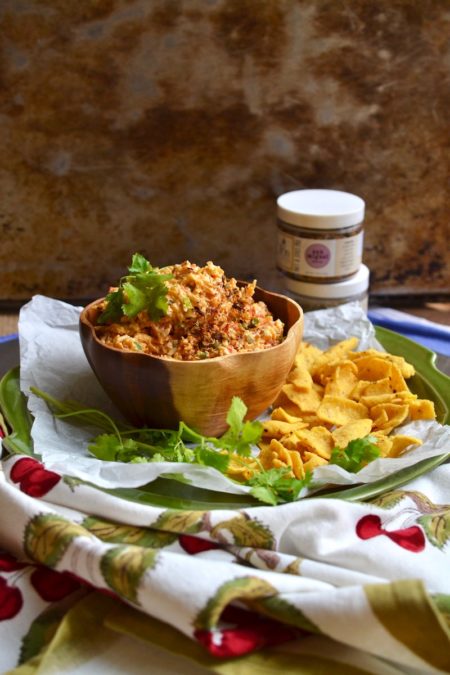
    Homemade pimento cheese is a staple for me when I throw a party. I love a good pimento cheese dip, especially at a gathering or a picnic.  However, I’ve always struggled to find one that is not loaded with artificial ingredients.  If you’ve ever taken a close look at the packaging of most prepared pimento cheeses available at the grocery store you’ll notice a litany of ingredients; the majority include chemicals, preservatives, and very few “real food” ingredients.  Making your own homemade pimento cheese allows you to use better, fresher ingredients like organic cheese, organic yogurt, and crunchy peppers.

    Most pimento cheeses are loaded with mayonnaise and although I add it to my recipe, I use very little because I’ve never been a big fan.  Instead I use Greek yogurt which still gives you the creaminess but doesn’t overpower the dish.  I think a pimento cheese dip should taste like cheese – not cream and mayo.  Another tip when making my homemade pimento cheese is I typically use a combination of monterrey jack and white cheddar cheese.  We often think of cheddar cheese as orange in color, however, many people don’t realize the traditional orange is often added artificial coloring so I typically stick to a white cheddar.

    I was able to find a natural, organic cheddar which was colored with paprika, a natural spice which gave it that orange hue.  Even if you use white cheddar and white jack cheeses, the recipe calls for smoked paprika which will give your cheese dip a slight orange color.

    Another part of this recipe I love is the crunchy addition of fresh red bell pepper and fresh jalapeno.  I often add more jalapeno because I love a bit of heat with the creamy cheese.  You may want to begin with 1/2 jalapeno and after mixing, give it a taste and, if it is a mild pepper, add more until you get a bit of heat with each bite.

    And one more tip… when shredding large amounts of cheese, try using the shredding attachment on your food processor.  It makes the process so snappy – it literally took 30 seconds to shred 4 cups.

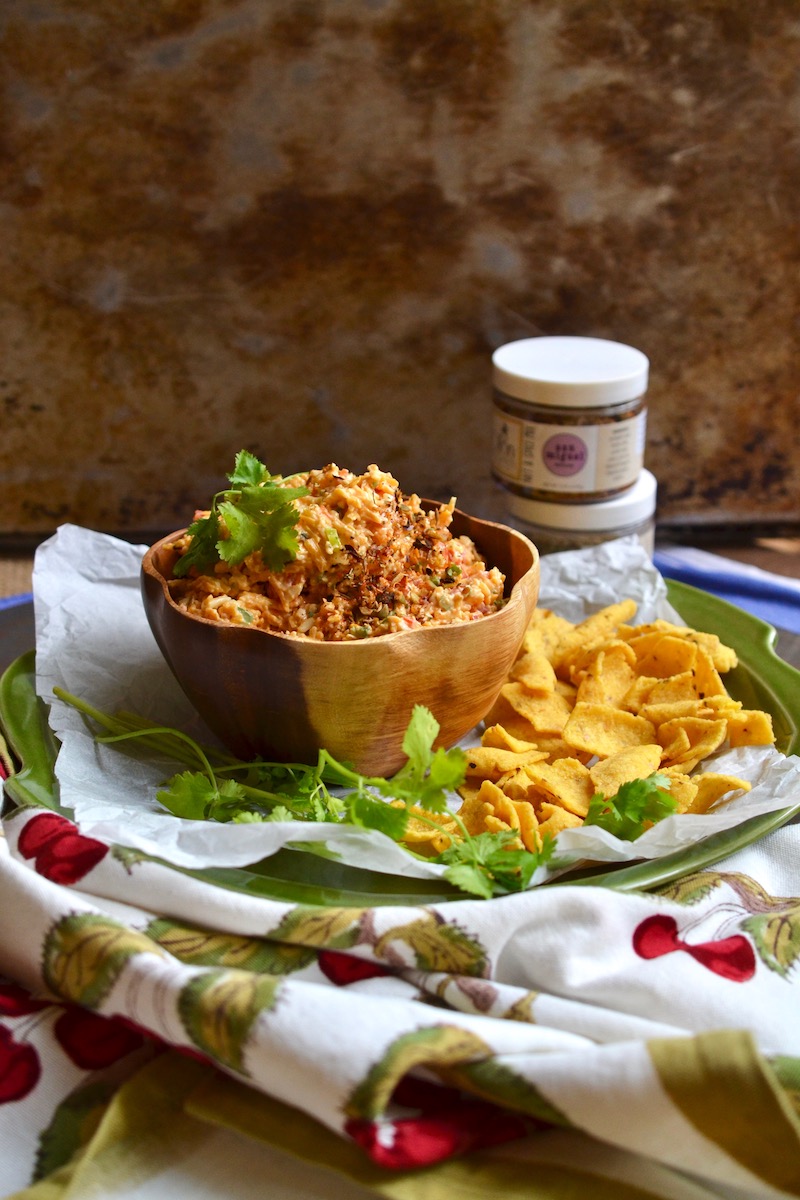
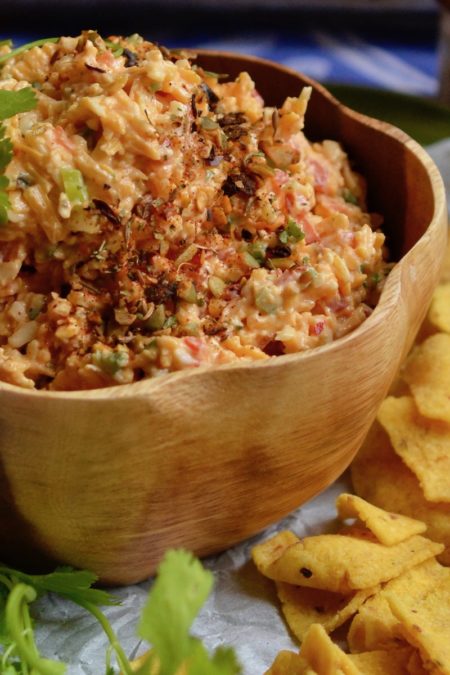
    I like to serve this dip at room temperature with corn chips, crackers or tostada chips and right before it goes out to your guests, sprinkle it with plenty of San Miguel nut & spice mix to give it a bit of crunchy pizazz.

    I hope you make this homemade pimento cheese your go-to recipe.  Once you’ve made it a few times, it’s easy to whip up – even without a recipe. Enjoy!

    Margie Bruner
    owner of Glory Kitchen

    instagram
    facebook

    Homemade Pimento Cheese

    Yield: serves about 6 people

    Ingredients

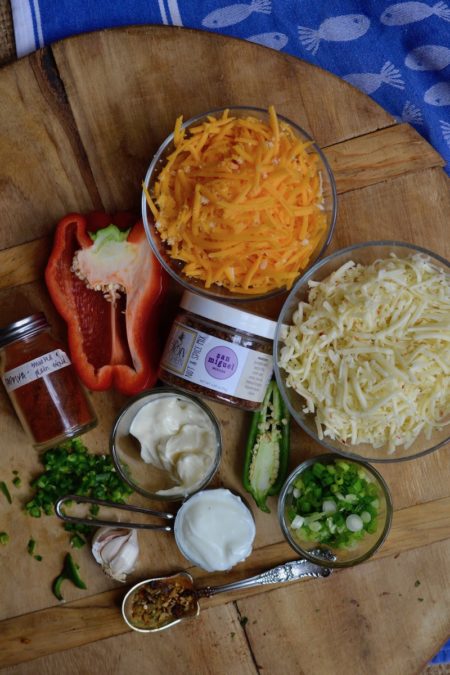
    • 2 teaspoons San Miguel nut & spice mix
    • 2 cups monterrey jack cheese, shredded
    • 2 cups cheddar cheese, shredded (white or orange)
    • 2/3 cup Greek yogurt
    • 1/4 cup mayonnaise
    • 3 scallions, chopped (about 1/3 cup)
    • 1/2 red bell pepper, chopped (about 1/2 cup)
    • 1/2 jalapeño, fresh & minced, more if you like it spicy
    • 1 garlic clove, minced
    • 1/2 teaspoon smoked paprika
    • 1/8 teaspoon salt

    Instructions

    1. Shred both the monterrey jack & cheddar cheese and place in a very large mixing bowl.
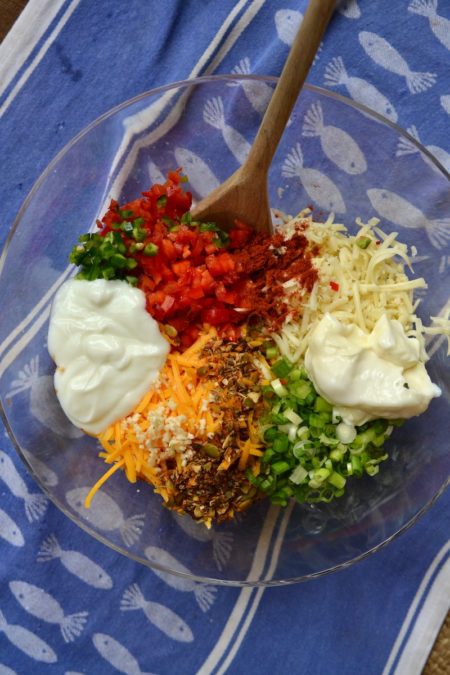
    2. To the cheese, add the mayo, yogurt, San Miguel nut & spice mix, scallions, red bell pepper, jalapeño, garlic, paprika, and salt. Using a wooden spoon, combine all ingredients.
    3. Taste and adjust the seasonings and ingredients according to your preferences. If the jalapeño is not very hot I like to add the entire pepper and sometimes even more - I like a bit of heat in the cheese spread.
    4. Serve at room temperature with corn chips, tostadas or crackers. This can be made the day before and then brought to room temperature just before serving.

    Homemade Pimento Cheese - Glory Kitchen
    Homemade Pimento Cheese - Glory Kitchen
    Homemade Pimento Cheese - Glory Kitchen
    Homemade Pimento Cheese - Glory Kitchen
    Homemade Pimento Cheese - Glory Kitchen
    Homemade Pimento Cheese - Glory Kitchen
  • Easy Peasy Mac and Cheesy - Glory Kitchen

    EASY PEASY MAC AND CHEESY

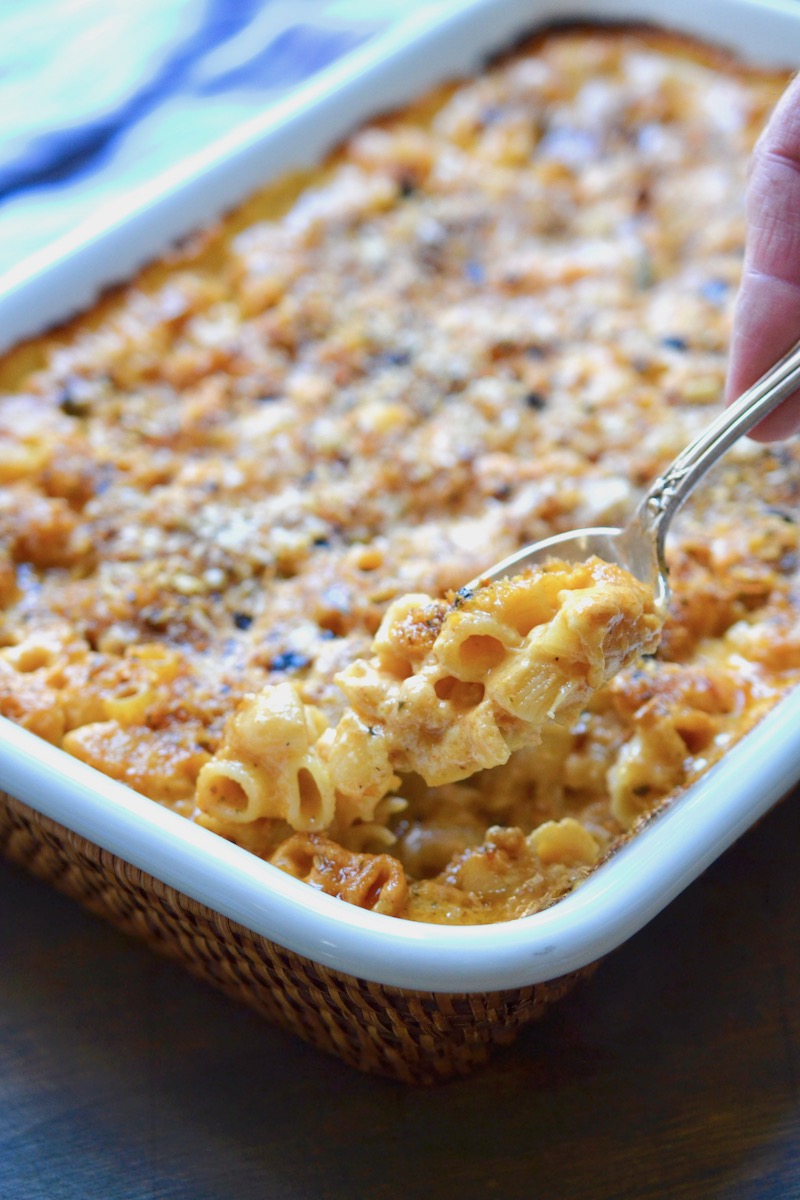
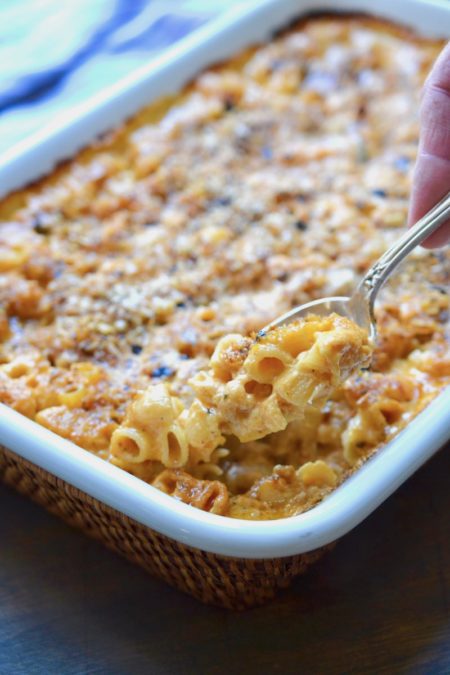
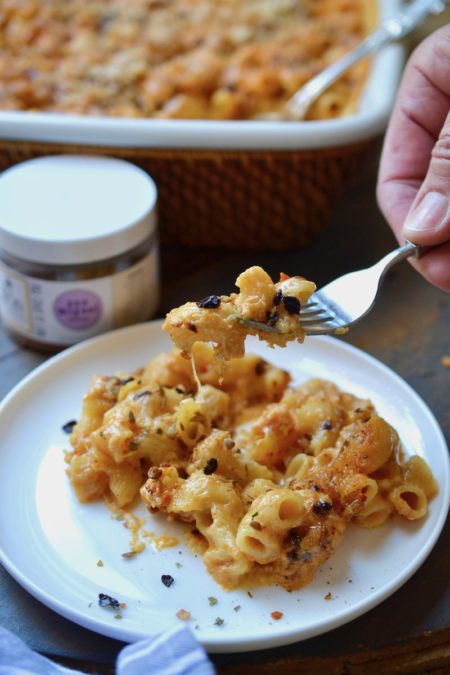
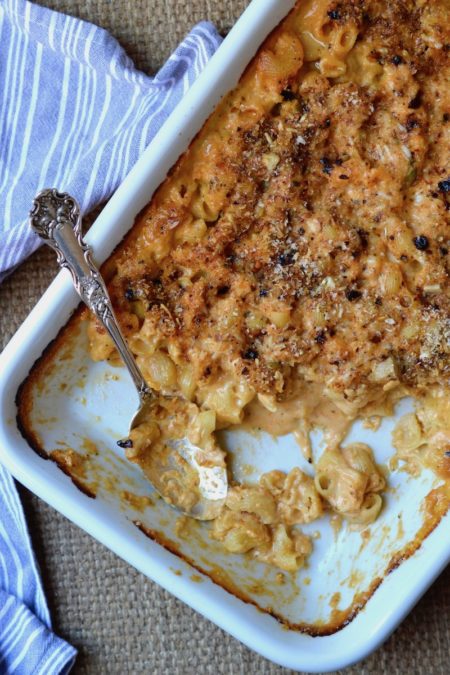
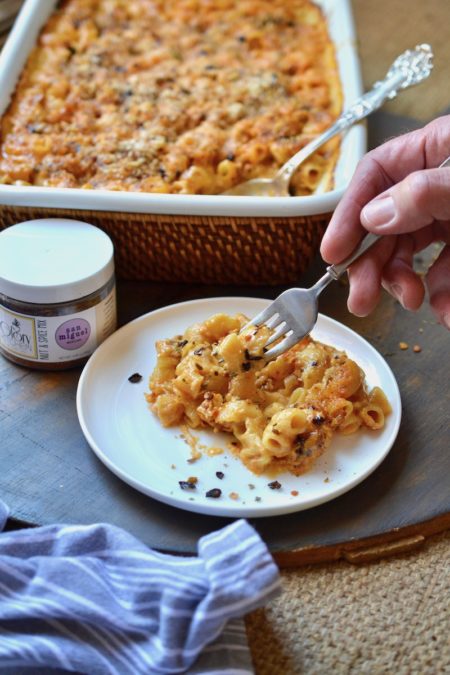
    I just could not resist the “cheesy” title of this recipe but the name “Easy Peasy Mac & Cheesy” truly describes this terrific mac & cheese hack. No noodles to boil.  No butter & flour roux to prepare.  Just blend up a few ingredients, add in the dry noodles and bake.  Truly, it’s that easy – who knew?  I’m amazed I never before knew of this quick method.  It works beautifully and tastes delicious.  And who doesn’t love a hot macaroni & cheese with a crispy topping of panko bread crumbs and our San Miguel Mexican nut & spices?

    I can’t remember the last time I made homemade macaroni & cheese.  True confessions, I used to make the infamous Kraft Mac & cheese out of the box for my kids when they were young – often.  Knowing now what goes in to that powdered orange “cheese” I cringe at the thought, yikes.

    Now that my boys are grown, my husband and I don’t typically eat foods like mac & cheese but every so often there is an occasion that calls for a delicious casserole of hot cheesy goodness.  It is a great side to serve to a crowd and because it is a well loved favorite, it is typically the first dish to empty out.

    The next time you need a large casserole to serve a crowd, try this simple mac & cheese.  This recipe can serve 10-14 persons so you can always half the portions to make a smaller casserole.  Or make one and freeze the other.  Enjoy!

    Margie Bruner - Glory Kitchen

    Margie Bruner
    owner of Glory Kitchen

    instagram
    facebook

    Easy Peasy Mac and Cheesy

    Yield: 10 - 14 servings

    Ingredients

      For the topping:
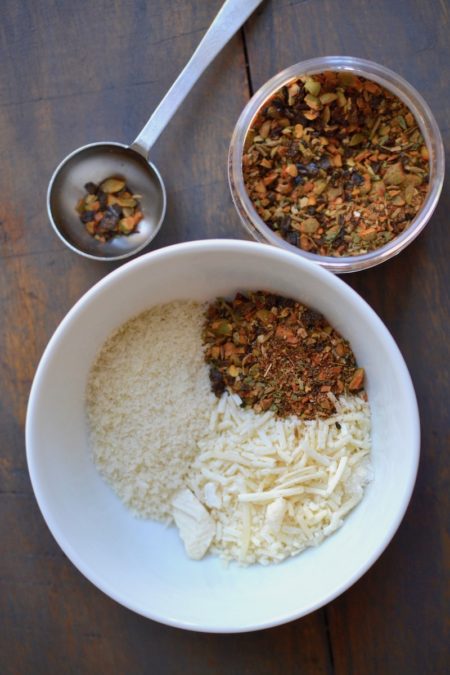
    • 1 tablespoon San Miguel nut & spice mix
    • 1/4 cup panko bread crumbs
    • 1/4 cup grated parmesan cheese
    • For the mac & cheese:
    • 2 cups cottage cheese (I like full fat, organic)
    • 4 cups whole milk (I like to use organic)
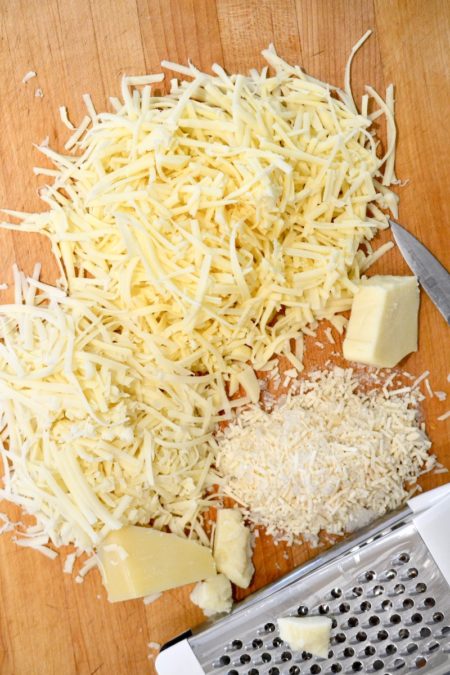
    • 1 1/2 pounds shredded cheeses; a combination of gruyere, parmesan, & cheddar
    • 1 pound elbow pasta, uncooked
    • 2 tablespoons butter, melted
    • 2 teaspoons dry mustard
    • 1 1/2 teaspoon sea salt
    • 1/2 teaspoon black pepper
    • 1 1/2 - 2 teaspoons smoked paprika
    • drizzle of olive oil (to oil the inside of baking dish)
    • bake in a 9x13 rectangular casserole dish or a 3 qt. dutch oven

    Instructions

    1. In a small bowl combine all the topping ingredients and set aside.
    2. Heat oven to 375° and position the rack in upper third of oven. Use a small amount of olive oil to coat the sides of a 9x13 baking dish or a 3 quart dutch oven. I use my hands to coat all around.
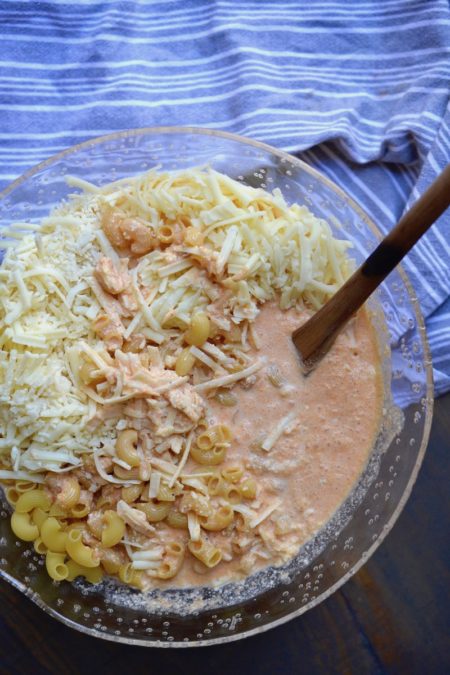
    3. Using a blender, puree together 2 tablespoons of melted butter, cottage cheese, 1 cup milk, mustard, smoked paprika, salt & pepper. Using a very large mixing bowl stir together the blender ingredients, remaining 3 cups milk, uncooked pasta, and the 3 grated cheeses. Pour it all into the buttered baking dish, cover with aluminum foil, and bake in the oven for 30 minutes.
    4. Uncover the pan, sprinkle the top with the topping mixture which was set aside and bake, uncovered, for 30 minutes more, or until the top is lightly browned and bubbly. Remove from the oven and allow to cool for a few minutes before serving.

    Notes

    This recipe makes a large casserole to serve a crowd. You can half the recipe to serve 6-8 persons.

    Easy Peasy Mac and Cheesy - Glory Kitchen
    Easy Peasy Mac and Cheesy - Glory Kitchen
    Easy Peasy Mac and Cheesy - Glory Kitchen
    Easy Peasy Mac and Cheesy - Glory Kitchen
    Easy Peasy Mac and Cheesy - Glory Kitchen
    Easy Peasy Mac and Cheesy - Glory Kitchen
    Easy Peasy Mac and Cheesy - Glory Kitchen
  • Honey Roasted Carrots - Glory Kitchen

    HONEY ROASTED CARROTS

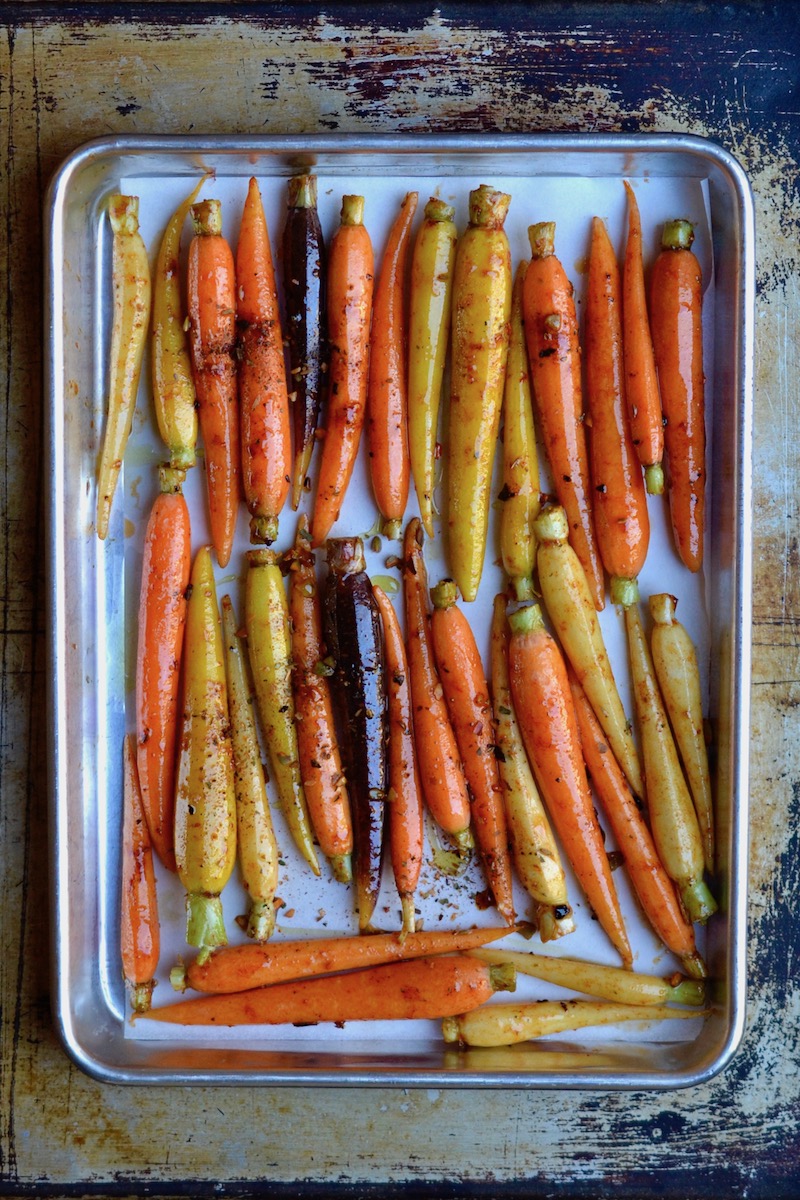
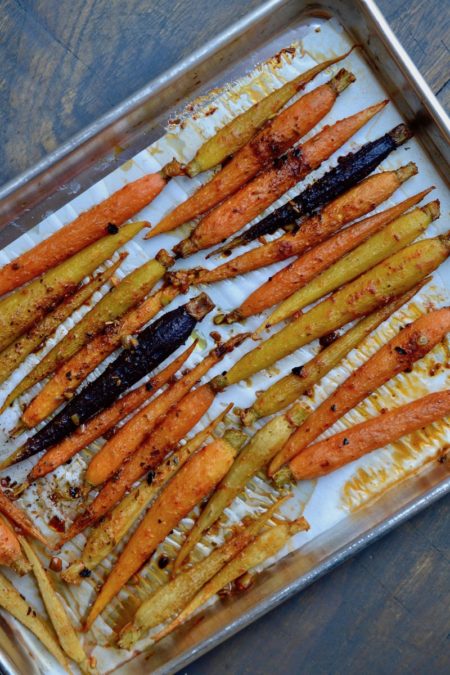
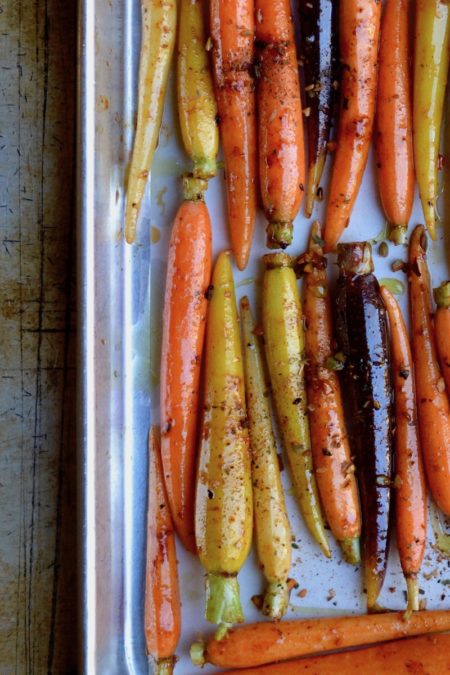
    When I made my very first batch of our Glory Kitchen nut & spice mix, I created the Middle Eastern blend (now called Cairo) and used it to season a simple batch of oven roasted carrots.  As the hot, caramelized carrots came out of the oven, covered in crunchy spices and nuts, the smell was intoxicating and the flavor was even better – one bite and I was hooked.  Not only were the sweet carrots amazing but the crunchy seasoning that coated them gave them texture and a kick of flavor.

    We proceeded to finish the entire batch of carrots straight from the baking sheet, even before they had the chance to cool from the hot oven.  This simple Honey Roasted Carrot Recipe quickly became ingrained in my memory and became a routine side dish and sometimes snack in our home.  I change the variety of nut & spice mix just to keep things interesting and change up the flavor profile.  These roasted carrots are spiced up with our San Miguel nut & spice mix made of Mexican flavors  – the perfect combination of sweet, savory and a little spicy kick.

    All 6 of our Glory Kitchen varieties are perfect for roasted carrots, it just depends upon your mood of the day and flavor direction you wish to take.  My go-to flavors for carrots are the San Miguel, Cairo, Mumbai and Penang blends.

    Once they’re roasted you can serve them as a side to any protein, top them on salads, dip them in a sauce and eat as an appetizer, add them to a cheese platter, use in rice or quinoa bowls, they’re just plain good on everything.

    Margie Bruner
    owner of Glory Kitchen

    instagram
    facebook

    Honey Roasted Carrots

    Yield: serves 4-8

    Ingredients

    • 1 tablespoon San Miguel nut & spice mix
    • 2-3 lbs carrots
    • 2 tablespoons olive oil
    • 1 1/2 tablespoons honey
    • sea salt
    • 1 teaspoon smoked paprika or ground chipotle

    Instructions

    1. Preheat the oven to 425°.
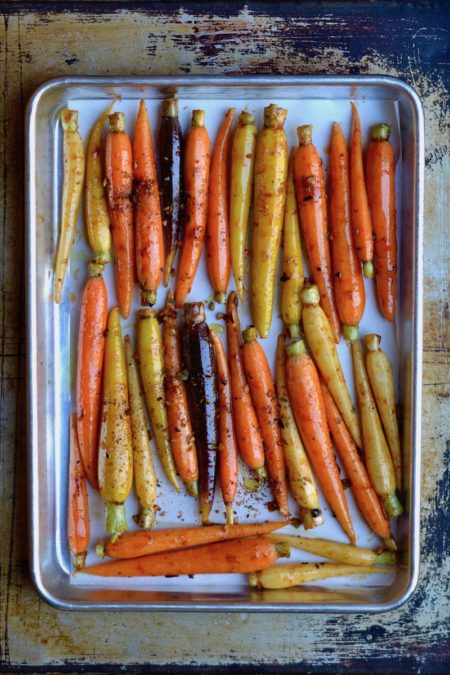
    2. Prep the carrots by peeling and slicing into sticks, slicing in half, or leaving whole, depending upon how large they are and how you want to present them on the plate. In this photograph I used very small heirloom carrots, however, if they are quite large, I often cut them into sticks (much like french fries), or if they are medium sized, I might slice them in half lengthwise because this can present very well on a plate.
    3. Arrange all of the carrots onto a parchment or foil lined baking tray, close together. Drizzle the carrots with the honey and the olive oil, sprinkle with sea salt, paprika (or chipotle) and the San Miguel nut & spice mix. Using your hands, toss them gently to coat the carrots well. Spread them out on the tray. If the carrots are very crowded, you might want to consider using two trays. If you place them too close together, the carrots will steam a bit and will not brown and caramelize as well... that is the best part!
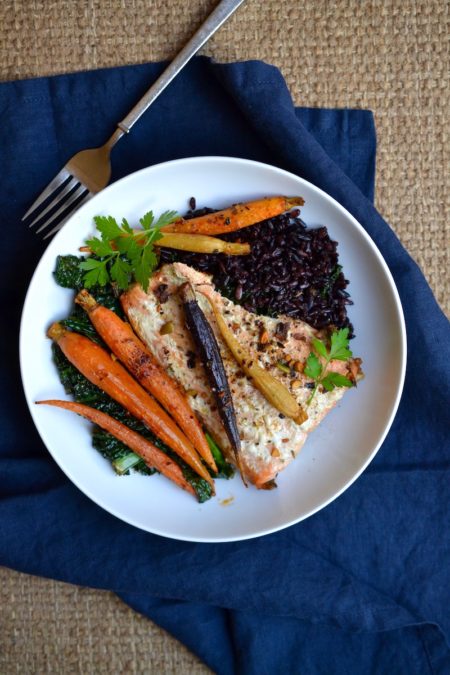
    4. Place the baking tray into the hot oven and roast for about 40 minutes. You might want to check on them after 25 minutes and toss them around a bit to brown them evenly. Remove from oven and enjoy hot or let them come to room temperature and add them into salads, rice bowls, as a side for proteins or use decoratively over a lovely piece of salmon or baked fish. You can sprinkle them with fresh chopped herbs just before serving.

    Notes

    Once you've made these a few times and get a feel for the ingredient ratios, you can just drizzle the oil and honey and add the seasonings without even measuring.

    Honey Roasted Carrots - Glory Kitchen
    Honey Roasted Carrots - Glory Kitchen
    Honey Roasted Carrots - Glory Kitchen
    Honey Roasted Carrots - Glory Kitchen
  • Baked Fish with Cara Cara Orange Salsa - Glory Kitchen

    BAKED FISH WITH CARA CARA ORANGE SALSA

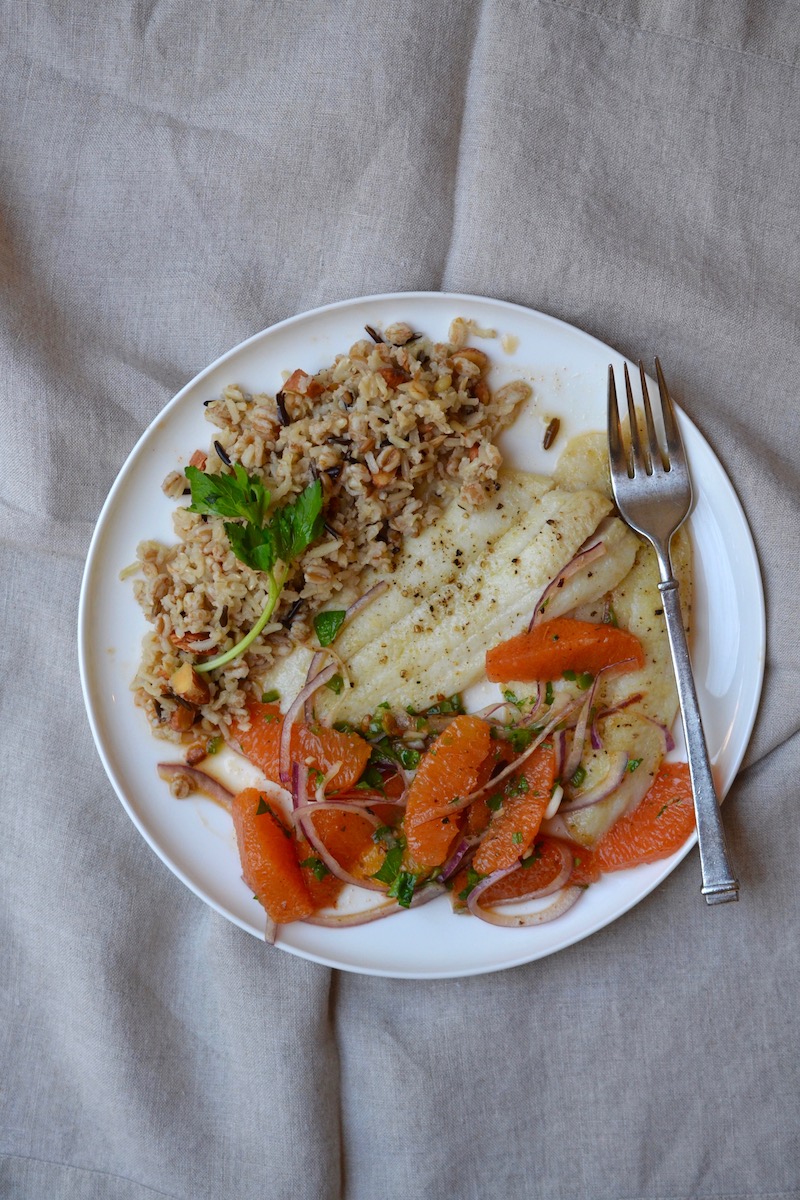
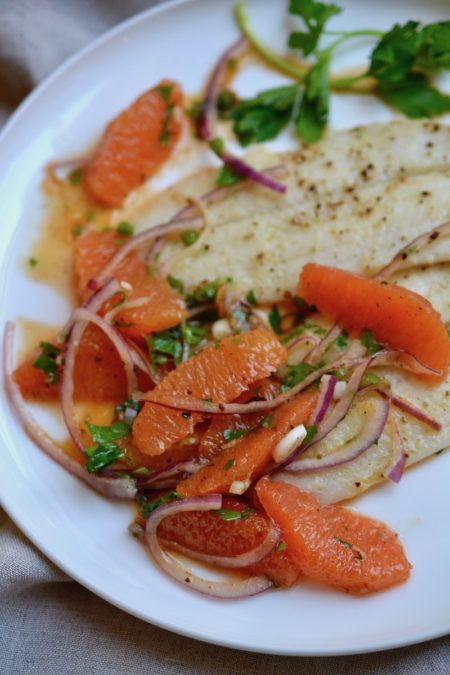
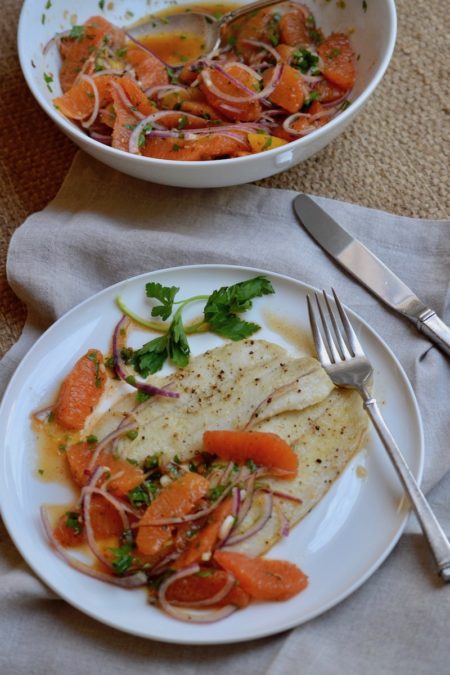
    It’s time to celebrate citrus before it moves out of season.  This Baked Fish with Cara Cara Orange Salsa Recipe is a keeper for sure – you feel so good after having a meal which is light and tasty but bursting with flavor.  I chose Cara Cara Oranges for this salsa because the color has a beautiful deep orange hue.  Of course this salsa can be made with any variety of sweet and tangy orange.  As a matter of fact, it would be equally delicious using grapefruit.

    Winter is definitely the season to make this dish because of the abundance of citrus but don’t let this hold you back – try it again this spring using local strawberries or in the summer with cantaloupe or honeydew melon.  Just thinking about the many seasonal fruit possibilities makes me anxious to make it all over again.

    Learning to supreme cut a piece of citrus can be somewhat tricky but once you have the basics down, it is not difficult at all, it just takes a bit of patience.  You can actually google “how to supreme an orange” and get a quick tutorial on youtube.

    My biggest advice is to use a very sharp knife and work carefully.  I’ve also supremed a citrus fruit using a small serrated knife (one you would use for slicing tomatoes) and this too works, maybe even better than a large chef’s knife because it is small, easy to manipulate, and cuts through the membranes easily.

    Once you’re salsa is made, the fish only takes a few minutes and you have a light and tasty meal with a stunner presentation.  In this recipe I used our Mexican blend, San Miguel, however, others that would add great flavor as well are the Cairo, Mumbai, Provence or Penang blends.

    Margie Bruner - Glory Kitchen

    Margie Bruner
    owner of Glory Kitchen

    instagram
    facebook

    Baked Fish with Cara Cara Orange Salsa

    Yield: about 4 servings

    Ingredients

    • 2 teaspoons San Miguel nut & spice mix
    • 6-8 cara cara oranges, or other type of orange
    • 1/4 red onion, sliced very thin
    • 1/4 jalapeño, fresh, diced
    • 2 cloves garlic, minced
    • handful parsley, chopped
    • 2 tablespoons olive oil
    • 1 tablespoon apple cider vinegar
    • 1/4 teaspoon salt
    • 1 1/2 - 2 lbs dover sole filets or other white fish

    Instructions

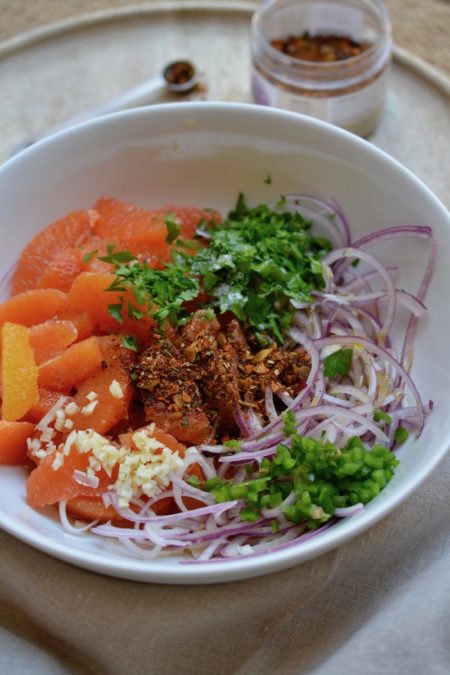
    1. To make the orange salsa, take the oranges and "supreme" cut them, sectioning out each orange membrane. Work over a large bowl to capture the juices as you work. After cutting all around each orange, squeeze the membranes into the bowl to release as much juice as possible. If you've never supreme cut a citrus fruit it is a great cutting technique to learn because it leaves the most tender parts of the orange (or grapefruit). Here's a good quick video on utube: supreming an orange. Slice all the oranges in the same way.
    2. To the bowl of cut oranges, add the onion, garlic, jalapeño, parsley, olive oil, apple cider, salt, and San Miguel nut & spice mix. Set this bowl of orange salsa aside at room temperature to macerate and infuse all the flavors together.
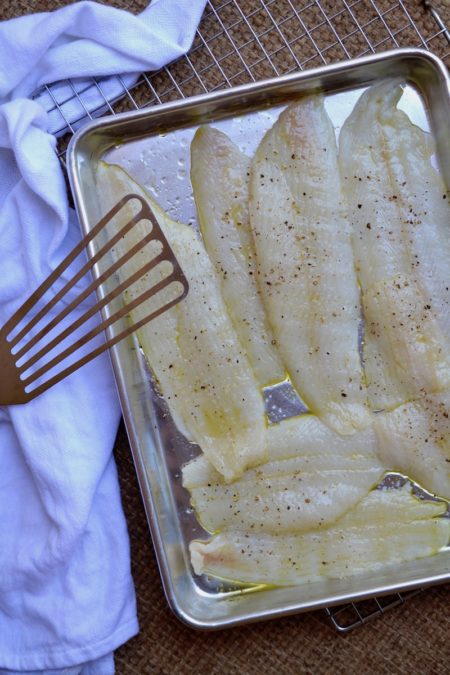
    3. Place the fish in a baking dish and rub the flesh on both sides with a bit of olive oil. Add salt and pepper then place under the broiler for about 8 minutes until it flakes. Do not overcook.
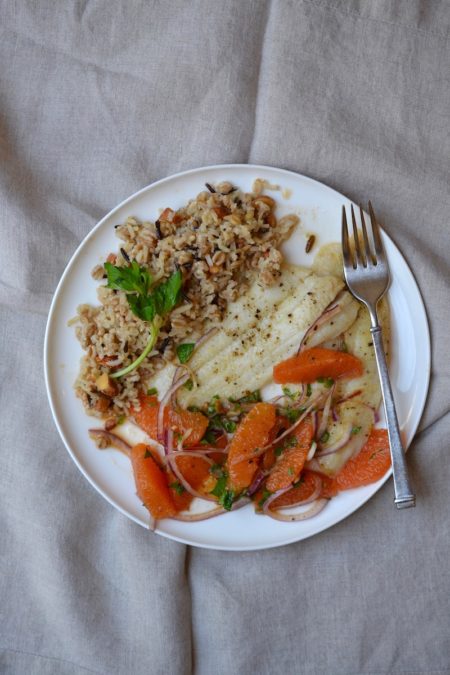
    4. Remove from the oven and serve with cara cara orange salsa either on the side or on the top.

    Notes

    This orange salsa would also be wonderful using our Glory Kitchen Asian blend-Penang, the Middle Eastern Blend-Cairo, our French blend-Provence, or our Indian blend-Mumbai.

    Baked Fish with Cara Cara Orange Salsa - Glory Kitchen
    Baked Fish with Cara Cara Orange Salsa - Glory Kitchen
    Baked Fish with Cara Cara Orange Salsa - Glory Kitchen
    Baked Fish with Cara Cara Orange Salsa - Glory Kitchen
    Baked Fish with Cara Cara Orange Salsa - Glory Kitchen
  • Chicken Slaw with Pomegranate - Glory Kitchen

    CHICKEN SLAW WITH POMEGRANATE

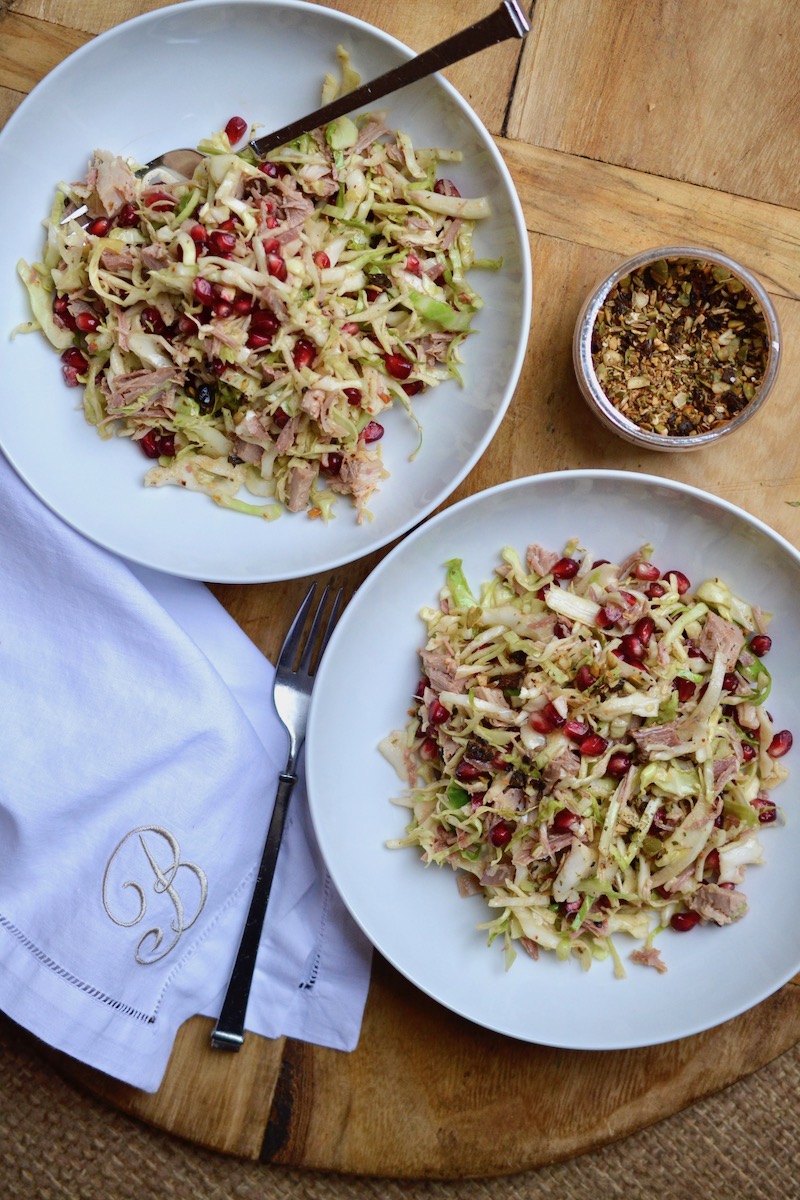
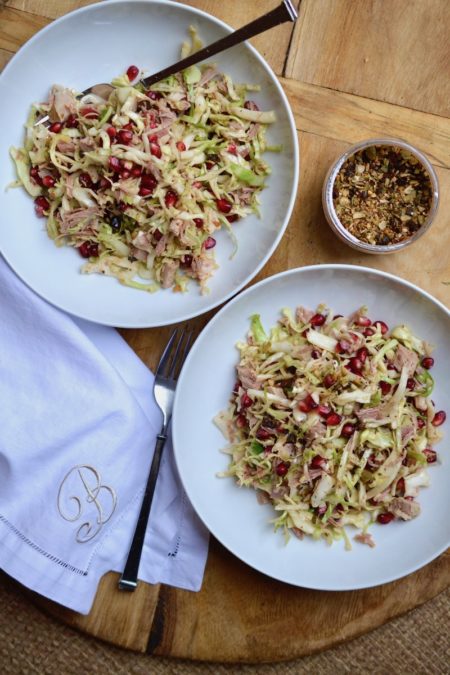
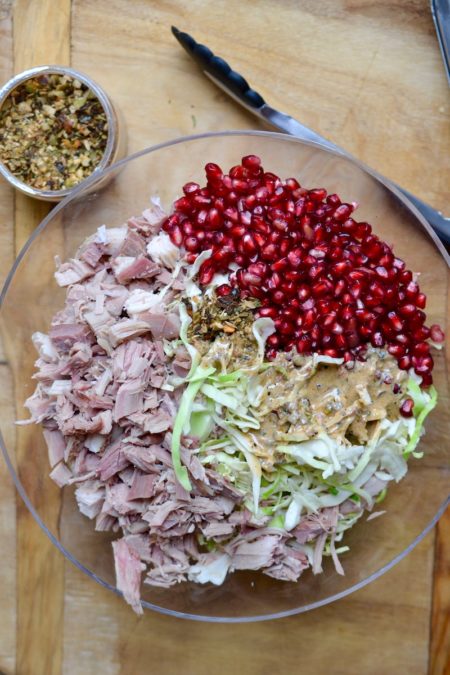
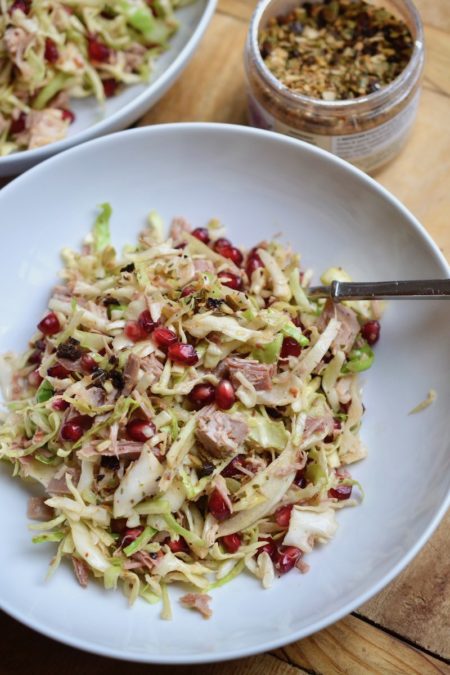
    This 3-ingredient Chicken Slaw with Pomegranate is a salad that gives you crunchy, healthy and filling satisfaction.  If you like crisp and cool coleslaw, you’ll love this quick and easy salad that includes chicken as your protein and a sweet, tangy surprise with pomegranate seeds.  The Glory Kitchen Mexican flavors of San Miguel nut & spice mix add a little bit of smoky chili spice as well as additional crunch from the chopped pumpkin seeds in the  nut blend.  I love the combination of the crisp cabbage with sweet and juicy pomegranate seeds.

    If you really want to throw this tasty meal together in no time at all, you can buy a pre-cooked rotisserie chicken, a pre-shredded bag of cabbage, and a pomegranate which has already been seeded – talk about a quick meal!  The dressing is made up of ingredients most likely sitting in your refrigerator right now.  I hope you’ll give this delicious and crunchy salad a try – it was a great meal made in a matter of minutes.

    I think this salad would be equally delicious using the Provence,  Mumbai, Cairo, or Penang nut mixes.  A little extra flavor and crunch is always a good thing.

    Margie Bruner - Glory Kitchen

    Margie Bruner
    owner of Glory Kitchen

    instagram
    facebook

    Chicken Slaw with Pomegranate

    Ingredients

      For the dressing:
    • 1 teaspoon San Miguel nut & spice mix
    • 2 tablespoons olive oil
    • 1 tablespoon apple cider vinegar
    • 1 tablespoon greek yogurt, plain
    • 1 teaspoon honey
    • good pinch of salt
    • For the slaw salad:
    • 1 tablespoon San Miguel nut & spice mix
    • 6 cups cabbage, shredded
    • 2 cups cooked chicken, chopped
    • 1 pomegranate, seeded

    Instructions

    1. Whisk together all the ingredients for the dressing and set aside.
    2. In a very large bowl, toss together the cabbage slaw, the cooked chicken and the pomegranate. Add the dressing and toss well to incorporate. Taste and season to your preference. Serve soon after it is incorporated to keep the slaw crunchy.

    Notes

    I used shredded turkey since I had some in my freezer leftover from the holidays, however, I specified chicken in this recipe because it's so easy to purchase a store-bought rotisserie chicken, shred it into small pieces and throw it into your salad. Obviously, either turkey or chicken works beautifully.

    Chicken Slaw with Pomegranate - Glory Kitchen
    Chicken Slaw with Pomegranate - Glory Kitchen
    Chicken Slaw with Pomegranate - Glory Kitchen
  • Broccolini with Chipotle Drizzle

    BROCCOLINI WITH CHIPOTLE DRIZZLE

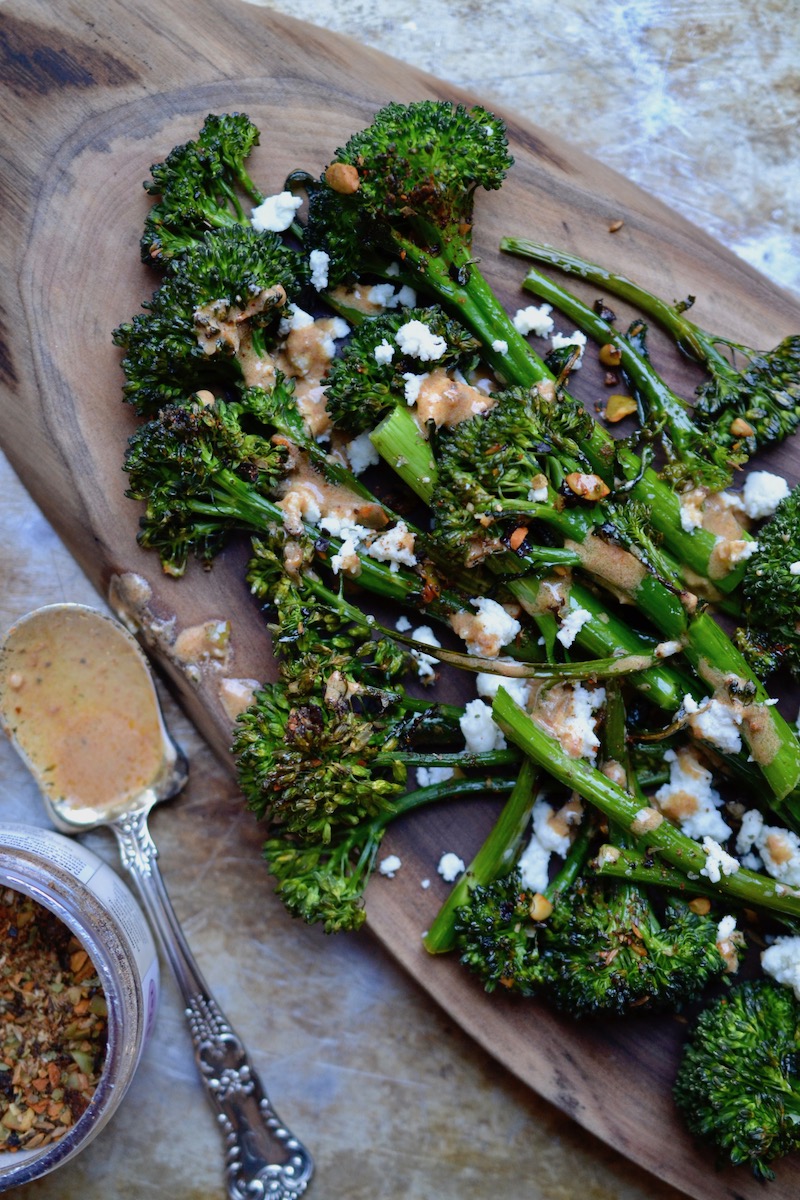
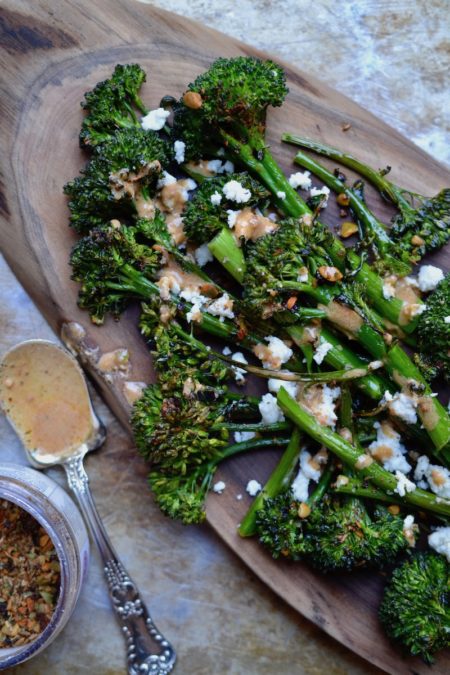
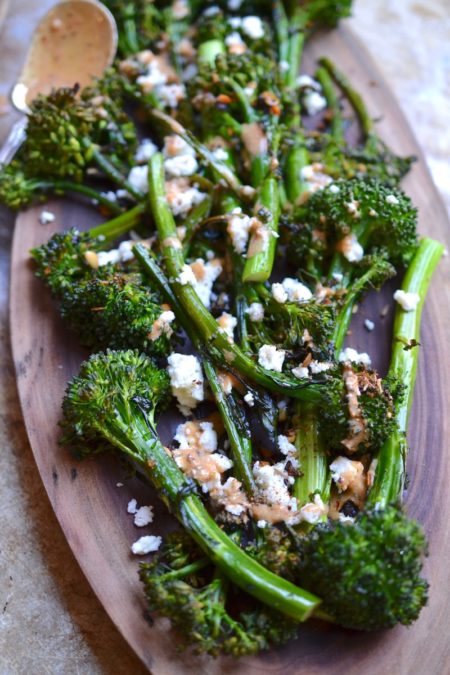
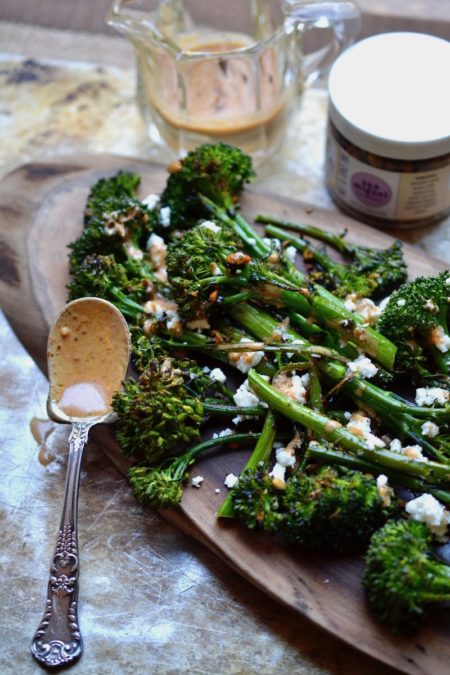
    Broccoli is a favorite vegetable for many but this Broccolini With Chipotle Drizzle is almost like eating junk food – you just can’t get enough.  The good news?  It is good for you, it is quick and it is simple to prepare.

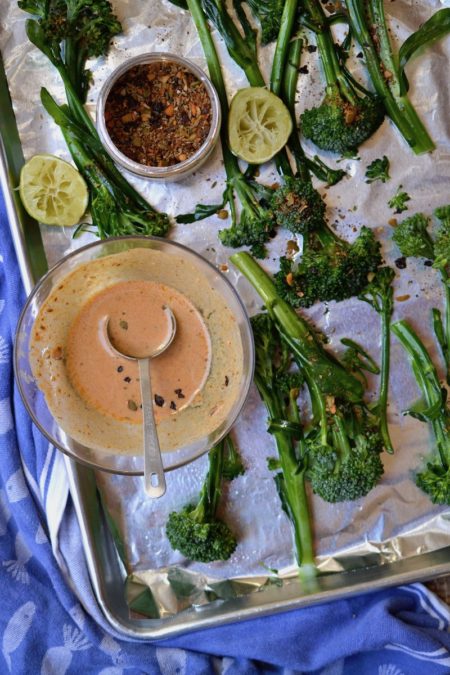
    All you need is plenty of baby broccoli, a few basic ingredients, and of course, our Glory Kitchen San Miguel nut & spice mix.  I have to admit I had this Broccolini with Chipotle Drizzle as my entire meal because it was just so delicious I did not want to bother with anything else.  If only I had added some shredded chicken on top it could have sufficed as a complete meal.

    I’ve heard this called both broccolini and baby broccoli.  It is a relatively new natural hybrid of the old standby of basic broccoli.  Hybrid, as opposed to genetically modified, and created by a Japanese company in California in the early 1990’s.  Broccolini has smaller, looser florets and longer, thinner stalks than typical broccoli.  Overall, the stalks are more tender and I believe, tastier when cooked.  I always cook broccolini in its entirety – florets, stalks, leaves and all.  The only thing I do to prepare it after washing and drying, is to slice off the ends to expose the fresh stalk. Once you do this, you are ready to cook.

    This has become one of my very favorite vegetables as of late and I enjoy interchanging the recipe with a variety of our Glory Kitchen nut mixes.  After trying it with the San Miguel, try making it again and altering the nut blend – the Cairo, Mumbai, Penang, Umbria or Provence blends would all be wonderful used in a similar way (just remove the chipotle and paprika from the recipe).

    And as a side note, if you are not one to handle spicy sauces, you may want to reduce the amount of ground chipotle added to the sauce, or you could always leave it out altogether.  Don’t leave out the paprika, however, it adds nice color to your drizzle.  Hope you enjoy as much as I did.

    Margie Bruner
    owner of Glory Kitchen

    instagram
    facebook

    Broccolini with Chipotle Drizzle

    Yield: serves 6-8

    Ingredients

      For the chipotle drizzle:
    • 4 tablespoons olive oil
    • 2 tablespoons lime juice, fresh
    • 2 tablespoons greek yogurt
    • 1 teaspoon San Miguel nut & spice mix
    • 1/2 teaspoon chipotle pepper, ground (or cayenne)
    • 1/2 teaspoon paprika
    • 1/4 teaspoon salt
    • 2 pinches sugar
    • For the broccolini:
    • 16 oz, broccolini (also called baby broccoli)
    • San Miguel nut & spice mix
    • olive oil
    • pinch of salt
    • chipotle drizzle (recipe above)
    • queso fresco (for garnish)

    Instructions

    1. Set the oven to 450°.
    2. Whisk together the ingredients for the chipotle drizzle. Taste for flavor and add additional ingredients, such as more heat from the chipotle, as preferred. Set aside.
    3. After washing and drying the broccolini, cut a bit of the ends, place it on a foil lined baking sheet and drizzle with a bit of olive oil, a sprinkle of sea salt, and a sprinkle of San Miguel nut & spice mix. I do not remove any of the leaves but instead roast the stalk in its entirety. Using your hands, work the olive oil and seasonings into the baby broccoli so it is lightly coated. Spread the broccolini out onto the baking sheet so the stalks are not crowding each other and place into the hot oven for about 10 minutes. Be careful not to let them burn, but you do want some of the tips browned - this adds to the flavor.
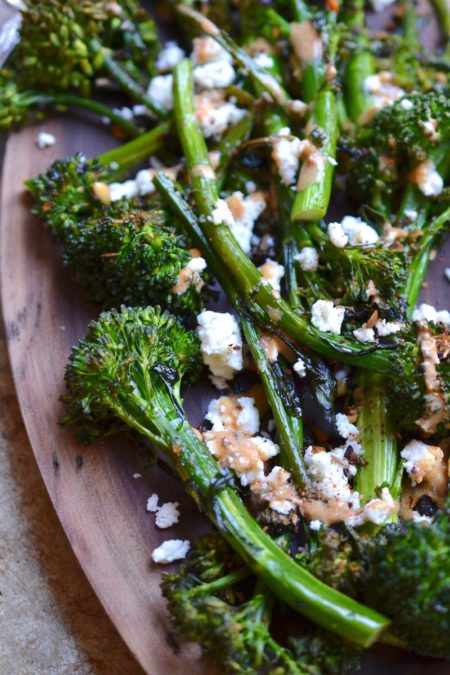
    4. Remove from the oven, allow to cool a bit and place them on a serving platter. Drizzle the broccolini with a bit of the chipotle sauce, sprinkle all over with queso fresco, and add a bit more sprinkling of the San Miguel nut & spice mix. These can be served warm but I often will serve the broccoli at room temperature along with a simple entrée such as grilled fish or chicken.

    Broccolini with Chipotle Drizzle
    Broccolini with Chipotle Drizzle
    Broccolini with Chipotle Drizzle
    Broccolini with Chipotle Drizzle
    Broccolini with Chipotle Drizzle
Updating…
  • No products in the cart.

JOIN US !
JOIN
close-link