• Spring Orzo Salad - Glory Kitchen

    SPRING ORZO SALAD

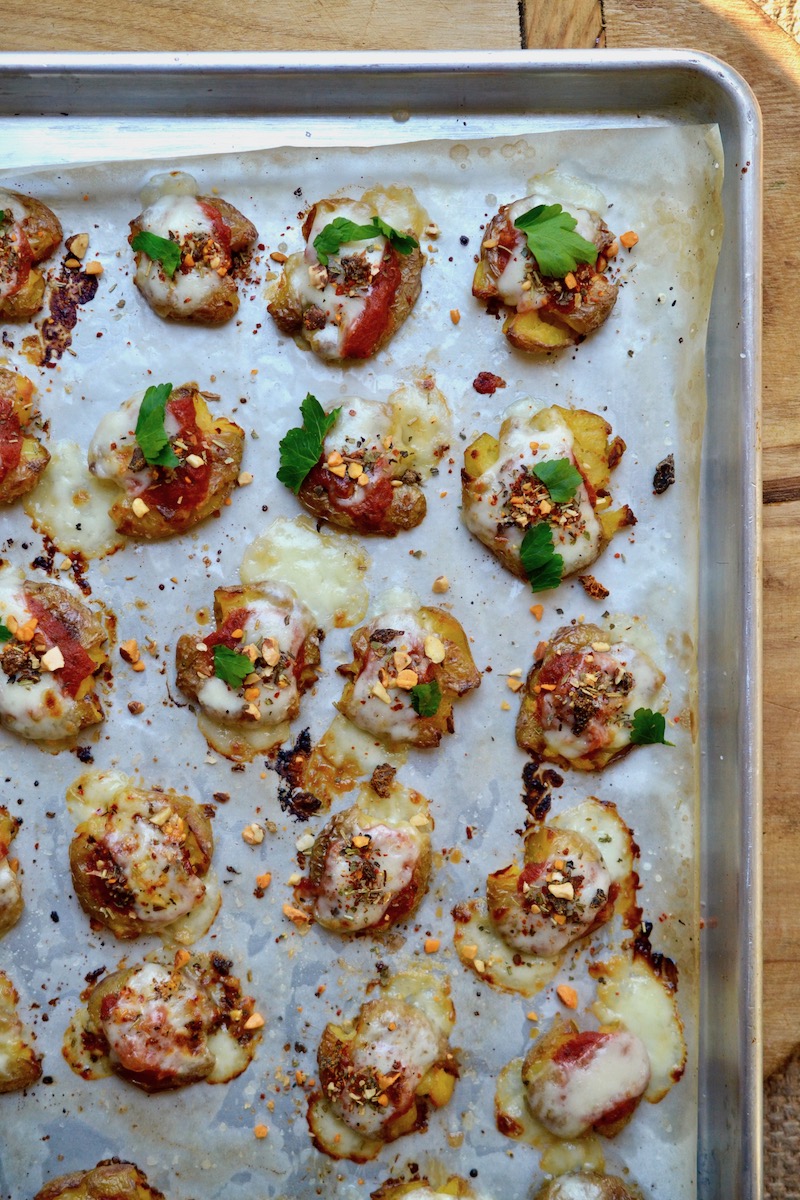
    A fresh, crisp, and light salad is the perfect way to welcome the warmer spring weather.  This Spring Orzo Salad recipe is filled with crisp green beans, English peas, radishes, shallots and crunchy nuts from Umbria nut & spice mix, our Glory Kitchen Italian blend of flavors.  The almonds in the Umbria blend add great texture and the touch of rosemary, oregano and basil add just the right amount of Italian herb flavoring.

    This salad is not only flavorful & satisfying but the blanched spring veggies give it a wonderful freshness that feels like light, springtime food.  Little tiny orzo pasta cooked just until barely soft (al dente) is paired with English peas and larger chunks of green beans.  The many variations of size, texture, and color make it a beautiful salad to present on a large serving platter.  And of course thin radish slices (I like to slice them on a mandoline for perfect size consistency) and shredded radicchio lettuce add a pop of pretty red color and a peppery flavor.

    This is a perfect salad to serve for a luncheon, to deliver as a food gift to a friend, or just to make for your family.  The best part about making this Spring Orzo Salad is if you are lucky enough to have leftovers.  It keeps beautifully in the refrigerator and is great for snacking on when you need a few bites to stave away afternoon hunger pangs.  Happy Spring!

    Margie Bruner
    owner of Glory Kitchen

    instagram
    facebook

    Spring Orzo Salad

    Ingredients

      For the dressing:
    • 1 teaspoon Umbria nut & spice mix
    • 1/4 cup white wine vinegar
    • 1 tablespoon shallot, chopped small
    • 1 teaspoon dijon mustard
    • 1 teaspoon honey
    • 1/4 teaspoon salt
    • 1/4 teaspoon pepper
    • 1/2 cup extra virgin olive oil
    • For the salad:
    • 1-2 teaspoons Umbria nut & spice mix
    • 1 1/2 cups chopped cucumber
    • 1 tablespoon shallot, chopped small
    • 2 cups green beans, fresh
    • 1 cup radicchio, fresh
    • 2-3 radishes, sliced thin
    • 1 1/2 cup English peas, fresh
    • 2 cups uncooked orzo

    Instructions

    1. Mix all the ingredients for the dressing except the olive oil. When well mixed, slowly drizzle in the olive oil and whisk while adding to help it emulsify.
    2. Cook the orzo pasta according to package directions and leave just a bit aldente. Drain and rinse. Add the orzo to a very large mixing bowl and mix in about 1/2 of the dressing. Toss and set aside.
    3. In a pot of boiling water, blanch the fresh green beans for about two minutes. Remove from water and add to a cold ice bath to cool quickly and lock in the bright green color. If they are small and slender beans you can leave them whole; if very large, slice them in half. Set the beans aside. To the same water, blanch the peas for about 1 minute, remove in the same way, set aside.
    4. Very thinly slice the radicchio lettuce leaving a few of the pretty curly parts of the leaves for garnish. Chop the cucumber and the shallot. Slice the radish very thin. I like to use a mandolin to get a very even and thin slice.
    5. Into the large orzo pasta bowl, add in the green beans, shallot, cucumber, radicchio, peas, radishes, and the remaining dressing. Toss well then serve on a pretty platter and top with additional Umbria nut & spice mix and garnish with extra radish slices.

    Spring Orzo Salad - Glory Kitchen
    Spring Orzo Salad - Glory Kitchen
    Spring Orzo Salad - Glory Kitchen
    Spring Orzo Salad - Glory Kitchen
    Spring Orzo Salad - Glory Kitchen
    Spring Orzo Salad - Glory Kitchen
    Spring Orzo Salad - Glory Kitchen
  • Mozzarella Potato Bites - Glory Kitchen

    MOZZARELLA POTATO BITES

    An Italian twist to an old favorite – potato skins.  This Mozzarella Potato Bites Recipe makes a delicious tasting appetizer and can be quite addicting for your guests.  They’re the perfect little finger food for watching the Oscar awards, basketball game gatherings, or any fun get-together with friends.  Using only a few, simple ingredients, these Mozzarella Potato Bites are easy to make for the inexperienced or novice cook or the I-don’t-like-to-get-into-the-kitchen cook.  And to make things even easier, take the shortcut and prep the potatoes the day before so they are ready to smash and throw into the oven when the guests arrive.

    The most difficult part of this Mozzarella Potato Bite Recipe is finding the perfect little potato.  Any type of small potato will work, but a fingerling or other type of very small potato (I found these at Trader Joe’s) work best.  I bought ready-made, good quality marinara sauce and a block of fresh mozzarella cheese which I sliced into small pieces to top the potato.  And finally, these tender little potato bites are topped with crunchy deliciousness from our Glory Kitchen Umbria nut & spice mix.  It adds the perfect flavor of garlic, onion and almond crunch.  Here’s a warning – make plenty because they’re always a big hit and are likely to disappear quickly.

    Margie Bruner
    owner of Glory Kitchen

    instagram
    facebook

    Mozzarella Potato Bites

    Yield: serves 4-6

    Ingredients

    • Umbria nut & spice mix
    • 1 bag very small potatoes
    • olive oil
    • sea salt
    • 1 small block mozzarella cheese
    • 1 small jar marinara sauce, pasta or pizza sauce will do
    • basil or parsley, fresh

    Instructions

    1. Bring a large pot of salted water to a boil. Add the little potatoes and allow them to boil until they become soft and a fork can pierce through easily. Remove from the heat, drain, and allow the potatoes to cool.
    2. Place the potatoes back into the same pot (since it is already used, you won't have to get an extra bowl dirty), drizzle the softened & cooled potatoes with olive oil and sprinkle with sea salt. Using your hands, toss the potatoes so they are lightly covered with olive oil.
    3. Preheat the oven to 400°. Using a parchment or foil lined baking sheet, arrange the lightly oiled potatoes onto the sheet and with the back of a coffee cup or other small flat surface (a small plate, small pot, etc.), smash each potato so it is cracked and somewhat flat (see photo). Place the sheet pan of potatoes into the hot oven and bake them until the edges are brown and crispy.
    4. Remove from the oven. Layer each crispy potato with a spoonful of marinara sauce then top with a small slice of mozzarella. Add a good pinch of Umbria nut & spice mix and a sprinkle of sea salt to the top. Place back into the oven, this time on broil, and heat just until the cheese on top melts. Remove from the oven, sprinkle with fresh herbs and serve immediately. These potato bites are so tasty they disappear quickly, so make plenty.

    Notes

    Although I used chopped, fresh parsley to top the potato bites (because that is what I had on hand), I think fresh slivers of basil would be even better!

    Mozzarella Potato Bites - Glory Kitchen
    Mozzarella Potato Bites - Glory Kitchen
    Mozzarella Potato Bites - Glory Kitchen
    Mozzarella Potato Bites - Glory Kitchen
    Mozzarella Potato Bites - Glory Kitchen
    Mozzarella Potato Bites - Glory Kitchen
    Mozzarella Potato Bites - Glory Kitchen
  • Valentine Salad Recipe - Glory Kitchen

    VALENTINE SALAD

    Enough with chocolates and candy – here’s a beautiful pink and red salad you can serve to your family for a Valentine holiday meal.  This Valentine Salad Recipe from Glory Kitchen mixes all types of pretty veggies and tosses them together with a variety of white tender beans – cannellini and garbanzos.

    Although I do love the sweet treats on Valentine’s Day, it’s not often you get the gift of a pretty pink and red bean salad.

    The ingredients are quite basic and by using canned cannellini and garbanzo beans, this salad can be thrown together in no time at all.  Although I did roast the beets myself for this meal, most grocery stores carry pre-roasted beets in the produce department (they are typically stocked near the fresh mushrooms, fresh peas, and other small packaged specialty vegetables).

    Not only can you bypass the roasting process, they are already peeled and ready to slice – how easy is that?   I often buy them pre-cooked and they are quite tasty –  this also make beets readily accessible when you don’t have an extra hour to go through the roasting process.  Not to mention, they are pretty messy to peel and stain both hands and cutting boards.

    Although I used parmesan cheese in this particular salad, I think a salty feta would be a wonderful flavor addition as well.  And finally, our Glory Kitchen Umbria nut & spice mix gives this salad some added Italian flavored crunch with chopped almonds and the herbal flavors of rosemary, basil and thyme.  Happy Valentine’s Day!

    Margie Bruner - Glory Kitchen

    Margie Bruner
    owner of Glory Kitchen

    instagram
    facebook

    Valentine Salad

    makes 3-4 servings

    Ingredients

      For the dressing:
    • 1 teaspoon Umbria nut & spice mix
    • 3 tablespoons olive oil
    • 1 tablespoon white wine vinegar
    • 1 teaspoon dijon mustard (I like whole grain but either works)
    • good pinch of salt
    • For the salad:
    • 1 can (15.5 oz) cannellini beans (also called white kidney beans)
    • 1 can (15.5 oz) garbanzo beans (also called chickpeas)
    • 2 roasted beets
    • 2 radishes, sliced thin
    • 1 head radicchio lettuce, shredded
    • 1 red pepper
    • parmesan cheese or feta cheese
    • fresh parsley, for garnish
    • Umbria nut & spice mix, for garnish

    Instructions

    1. Whisk together the dressing ingredients and set aside. To roast the beets, place them in aluminum foil and drizzle them with olive oil. Using your hands, rub the oil all around the flesh. Sprinkle them with sea salt, wrap the foil tightly around the beets and place in a 400° oven until they are fork tender. This may take 30-40 minutes. Remove from the oven and allow to cool. As a side note, I have found pre-roasted beets before at Trader Joe's. This certainly makes a wonderful short cut.
    2. Once the beets are cooled, peel them carefully using a small paring knife, cut them into cubes and toss them into the dressing. Allow these to marinate for a while you begin chopping the veggies.
    3. Rinse both cans of cannellini beans and garbanzos and rinse them well. Slice the radishes very thin. I like to use a mandolin to get even slices, however, if you don't have one, just use your knife skills and slice them evenly 🙂
    4. Shred the radicchio into very thin slices. Thinly slice the red pepper.
    5. Using a large bowl, toss together the beans, radicchio lettuce, radishes and red pepper. Gently toss in the beets and do not over mix because the beets will bleed quickly onto the rest of the salad. Some of the juices mixing together can be pretty because the beans will turn pink as the beet juices bleed over the salad, however, too much mixing might overdo it. Taste the salad to see if the beet dressing is enough flavoring for the salad. Add more olive oil, wine vinegar and salt if it needs more seasoning. To top off the salad, add thick slices of fresh parmesan cheese or for a salty twist, use white feta cheese crumbles. Garnish the salad with a generous sprinkle of Umbria nut & spice mix and fresh parsley. Enjoy!

    Valentine Salad Recipe - Glory Kitchen
    Valentine Salad Recipe - Glory Kitchen
    Valentine Salad Recipe - Glory Kitchen
    Valentine Salad Recipe - Glory Kitchen
    Valentine Salad Recipe - Glory Kitchen
    Valentine Salad Recipe - Glory Kitchen
    Valentine Salad Recipe - Glory Kitchen
  • Spinach and Tomato Spaghetti Squash - Glory Kitchen

    SPINACH AND TOMATO SPAGHETTI SQUASH

    Spaghetti Squash doesn’t get as much attention as I believe it deserves.   If you’ve never made spaghetti squash you are probably wondering if it really IS like spaghetti.  Well,  yes, and no.  Once baked and tender, the strands are long and stringy as you scrape a fork across the flesh of the squash.  They are long and spaghetti-like but a bit more delicate than pasta – and of course, it is a vegetable after all,  not an actual noodle made from flour.

    The flavor is sweet and earthy, especially when it is rubbed with olive oil, seasoned with sea salt, and roasted in a hot oven.  I like to roast them face side up so the edges of the open squash get a bit brown and caramelized.

    Once it is cooked and tender, the stands just tenderly pull apart to create a deliciously stringy base for flavorful toppings.  Some like to treat this bright yellow squash like real spaghetti and top it with marinara sauce but I prefer to top it with flavorful and colorful veggies and then top that with toasty breadcrumbs and the nutty Italian flavors of our Umbria nut & spice mix.  The chopped almonds, rosemary, aleppo peppers and sundried tomatoes give this dish a robust and tangy flavor.

    This is one vegetarian meal you just can’t get enough of.  Each half squash makes one serving but we found ourselves scraping to the bottom of the cavity to get every last morsel.  The capers added a nice vinegar tang to counterbalance the rich roasted tomatoes.  I also loved the crunchy breadcrumb & Umbria blend  topping which gave it a wonderful and textural crunch.  This is definitely a recipe to repeat over and over.

    Margie Bruner
    owner of Glory Kitchen

    instagram
    facebook

    Spinach and Tomato Spaghetti Squash

    serves 2

    Ingredients

      For the breadcrumb topping:
    • 2 teaspoons Umbria nut & spice mix
    • 2 teaspoons olive oil
    • 1/2 cup panko bread crumbs
    • 2 tablespoons shredded parmesan cheese
    • sea salt
    • For the spaghetti squash:
    • 1 spaghetti squash
    • olive oil
    • Umbria nut & spice mix
    • 1 lb (16 oz) grape tomatoes
    • 1 bag fresh spinach (or 4 handfuls)
    • olive oil
    • 4 garlic cloves, minced
    • 1 tablespoon capers & their juice
    • sea salt

    Instructions

    1. Slice the grape tomatoes lengthwise, spread them onto a parchment lined baking sheet, drizzle with olive oil & sea salt and place them into a 350° oven to roast for about 15 minutes. Check after 15 minutes, some may be a bit crispy but do not let them burn. Remove from the oven as soon as they are browned a bit but not completely dry. Allow them to cool completely.
    2. Heat a sauté pan on the stove top, add 2 teaspoons of olive oil to the bottom, then add the panko bread crumbs, a pinch of salt, 2 teaspoons of Umbria nut & spice mix and stir over the heat until they lightly toast. Remove from the heat, allow to cool a bit, then add the shredded parmesan, toss and set aside to use as a topping over the prepared spaghetti squash.
    3. Take the spaghetti squash and place in the microwave for about 2-3 minutes to soften the flesh enough to slice through with a large chef's knife. When it is cooled a bit from the microwave, slice it lengthwise into two pieces. Clean the seeds out of the cavity (hint: I always use a grapefruit spoon which has serrated edges and it helps with the scraping). Using your hands, rub the inside cavity with a drizzle of olive oil and rub it well. Sprinkle the inside cavity with a bit of sea salt and a bit of Umbria nut & spice mix. Place the squash face up on a baking sheet and bake in a 400° oven for about 20-30 minutes. Remove and allow it to cool a bit. Scrape the inside to loosen the strands of squash but leave them in the squash cavity.
    4. In a saucepan, add a bit of olive oil & heat through. Add the minced garlic and cook a bit without burning. Add the fresh spinach, the capers, about 2-3 teaspoons of the caper liquid and a sprinkle of Umbria nut & spice mix. Add the roasted tomatoes which were set aside. Remove from heat and mix well. Toss the tomato/spinach mixture into the cavity of the spaghetti squash, top with the crunchy panko crumb mixture, a bit more of Umbria nut & spice mix, and serve. This only serves 2 persons but can be doubled or tripled to serve 4-6. Enjoy!

    Spinach and Tomato Spaghetti Squash - Glory Kitchen
    Spinach and Tomato Spaghetti Squash - Glory Kitchen
    Spinach and Tomato Spaghetti Squash
  • Ravioli with Butter Sauce - Glory Kitchen

    RAVIOLI WITH BUTTER SAUCE

    This Ravioli with Butter Sauce seasoned with Umbria, our Italian blend of nuts & spices, is a great go-to meal when life gets busy… AND because there are only a few days left before Christmas, I want to share my quick and delicious pasta dish – one that satisfies every time.

    Last minute shopping, preparing for family gatherings and attending holiday events can keep you running, but your meals shouldn’t have to suffer.  This pasta dish is melt-in-your-mouth good and pleases young and old alike.

    I apologize to any pasta purists who make their own homemade pasta and scoff at the idea of buying a box of ready-made ravioli.  Although I am in awe of those out there who lovingly make their own, the reality is, I just don’t have the time.

    I always keep a box of ravioli in the freezer waiting for that busy day when I only have a few minutes to prepare a quick meal at home.  This one is absolutely delicious and can be prepared in about 15-20 minutes (or less!) with very few ingredients.

    All you need is our Umbria nut blend, some handfuls of fresh spinach, parmesan, a bit of butter and some ravioli tucked away in the freezer.  That’s it.  Enjoy every bite of this deliciously satisfying Italian meal.

    Margie Bruner
    owner of Glory Kitchen

    instagram
    facebook

    Ravioli with Butter Sauce

    Ingredients

    • Umbria nut & spice mix
    • 9 oz. package ravioli (I used mushroom & cheese)
    • 2 tablespoons butter
    • 1 1/2 cups pasta water
    • 1 5oz. bag fresh spinach
    • block of fresh parmesan cheese
    • pinch of salt

    Instructions

    1. Following the package directions, cook the ravioli in salted water (I add a drizzle of olive oil to keep the raviolis from sticking together). Cook until al dente, do not over cook. Just before draining, reserve 1 1/2 cups of the pasta water. Drain the pasta.
    2. In a sauce pan, melt the butter, add the Umbria nut & spice mix and toast for a minute. Add 1 cup pasta water, about 2 tablespoons shredded parmesan, pinch of salt and stir quickly until it is a nice, buttery sauce. Add more pasta water if needed. Toss in the fresh spinach and stir just until wilted. Add the ravioli into the saucepan and incorporate into the butter sauce. Serve immediately on a platter and top with additional Umbria nut & spice mix and large shaves of parmesan. Enjoy!

    Ravioli with Butter Sauce - Glory Kitchen
    Ravioli with Butter Sauce - Glory Kitchen
    Ravioli with Butter Sauce - Glory Kitchen
    Ravioli with Butter Sauce - Glory Kitchen
  • Charred Romaine with Green Goddess Dressing - Glory Kitchen

    CHARRED ROMAINE WITH GREEN GODDESS DRESSING

    If you love a good salad but want something new and different, try serving this Charred Romaine with Green Goddess Dressing.  The slight wilting of the romaine lettuce and charred leaves give it a nice, smoky, and intense flavor.

    This salad is garnished with fresh toasted corn and a creamy, herb flavored Green Goddess dressing with hints of Indian spices from our Glory Kitchen Mumbai nut & spice mix.  Sprinkled on the lettuce before it goes under the broiler, the nuts & spices intensify in flavor and they add a nice crunch to the salad.

    Trendy restaurants have recently popularized grilled romaine lettuce salads, however, here I’ve bypassed the grill and placed it under a hot broiler for just a few minutes to char the delicate edges and give the firm romaine just a bit of a wilt.  Once it is browned, I quickly remove it from the oven, allow it to slightly cool, and serve the salad right away topped with corn and some crunchy nut flavor from our nut blends.

    If you happen to have any leftover Green Goddess dressing it is also great for raw veggie dipping, a sauce drizzled over fish, or a spread on a sandwich.  I love the bright green color from the avocado and fresh herbs and the flavor is fresh and creamy.

    Experiment with this recipe and toss it with any of our other Glory Kitchen nut blends if you wish to move it in another flavor direction.  Enjoy!

    Margie Bruner - Glory Kitchen

    Margie Bruner
    owner of Glory Kitchen

    instagram
    facebook

    Charred Romaine with Green Goddess Dressing

    Yield: serves 4

    Ingredients

      For the dressing:
    • 1/2 avocado, ripe
    • 1/2 clove garlic
    • 1 1/2 tablespoons apple cider or white wine vinegar
    • 1/2 lemon
    • 2 teaspoons honey
    • 1 anchovy (or not if you dislike)
    • 1 cup fresh herbs (any combination) parsley, thyme, tarragon, cilantro, basil, chives, oregano
    • 1 teaspoon sea salt
    • 1/2 teaspoon pepper
    • water (1/4 -1/2 cup)
    • 1/2 cup olive oil
    • 1 tablespoon red onion, chopped very small
    • For the charred salad:
    • Mumbai nut & spice mix
    • 2 heads of romaine lettuce
    • 2 ears of corn
    • red onion, sliced very thin (for garnish)
    • olive oil
    • sea salt

    Instructions

      for the dressing:
    1. In a blender, mix together avocado, garlic, vinegar, lemon juice, honey, anchovy, herbs, water, salt & pepper until smooth. If you are not a fan of anchovies, you can certainly leave these out but I think they add a great salty flavor to the dressing. Slowly add in the olive oil until it is smooth. If it is too thick, add a bit more water (1 tablespoon at a time) until the right consistency is achieved for a creamy dressing. Taste and season with more salt and pepper if needed. Toss the chopped red onion into the blended dressing and stir in with a spoon. Set the dressing aside and allow to sit at room temperature while the salad is being prepared.
    2. for the charred salad:
    3. Set the oven to broil and place the oven rack on the upper third of the oven. Not the very top, but close.
    4. Clean the ears of corn and place them on a foil lined baking sheet. Drizzle with a bit of olive oil and a sprinkle them with a bit of sea salt. Place them in the oven, under the broiler, and allow them to brown a bit (but not burn). Using tongs, turn them a bit so all sides get a bit toasted. If they are put into a hot oven, this process should only take a few minutes so stay close to the oven. Remove from the oven and allow to cool completely. Using a large knife, cut the kernels off each ear. Place the toasted corn in a bowl.
    5. Leaving the cores intact, and using a large chef's knife, slice each head of romaine lettuce in half lengthwise. Place them cut side up on a foil lined baking sheet and drizzle each one with olive oil. Sprinkle with a bit of sea salt and some Mumbai nut & spice mix. Place in the oven, under the broiler and keep a close eye to make certain they do not burn. When the edges are charred and just a bit wilted, remove from the oven and let them cool.
    6. Arrange the charred romaine on a serving platter or on individual serving plates. Sprinkle the toasted corn across the lettuce heads. Top with very thin slices of red onion and then drizzle with the Green Goddess dressing. Top them with a sprinkle of Mumbai nut & spice mix and enjoy!

    Notes

    These charred romaine leaves would be wonderful with any of the other Glory Kitchen blends. If you choose to try the Provence blend, I would add a few sprinkles of currants or raisins over the whole dish which would add a nice sweetness to the salad.

    Charred Romaine with Green Goddess Dressing - Glory Kitchen
    Charred Romaine with Green Goddess Dressing
    Charred Romaine with Green Goddess Dressing - Glory Kitchen
    Charred Romaine with Green Goddess Dressing - Glory Kitchen
    Charred Romaine with Green Goddess Dressing - Glory Kitchen
  • Roasted Garlic - Glory Kitchen

    ROASTED GARLIC

    Roasted Garlic is a great ingredient to use in dips, dressings, soups, hummus, cheese trays, bread, pizzas, or just topped on tasty crackers.

    Garlic in its raw state can be pungent and leave a strong after taste, however, once it is roasted, it becomes sweet, creamy, and deliciously caramelized.

    Sister to onions, shallots and leeks, garlic has many proven health benefits and medicinal properties.  It’s often touted as one of “the world’s healthiest foods”, so roasting it in large batches and keeping it on hand to be ready to throw into recipes is a great routine to have.

    I’ve seasoned this batch of garlic with the Asian nutty flavors of our Glory Kitchen Penang nut & spice mix which adds a bit of red pepper heat and a hint of ginger.  I think any of our Glory Kitchen nut blend flavors would make a great seasoning enhancer to Roasted Garlic – it just depends upon the flavor that moves you, Mexican, Asian, Indian, Italian, French or Middle Eastern.  The process is easy and the rewards are delicious. 

    Margie Bruner
    owner of Glory Kitchen

    instagram
    facebook

    Roasted Garlic

    Ingredients

    Instructions

    1. Heat the oven to 450°.
    2. Take the bulb (full head) of garlic and slice off the entire top to expose a flat layer of each clove. (see photo). Arrange the full bulbs with skins on, face up in a baking dish & drizzle the tops with olive oil. Sprinkle all the bulbs with sea salt and a generous amount of Penang nut & spice mix.
    3. Cover the baking dish tightly with aluminum foil and place in the hot oven for 30 minutes. Remove from the oven, uncover, and allow them to cool completely.
    4. Take each head of garlic, and with your hands, squeeze out each individual garlic clove into a bowl (see photo). Some cloves might be a bit soft and will squish out. Divide these up into what you will use now and place the leftovers into small freezer-safe bags to have ready for future recipes. I usually package each baggie with 10-15 cloves each.
    5. Use the Roasted Garlic cloves when making dips, pizza, sauces, soups, casseroles, or hummus... the sky's the limit.

    Notes

    Any of the Glory Kitchen nut & spice blends would be a great seasoning to Roasted Garlic.

    Roasted Garlic - Glory Kitchen
    Roasted Garlic - Glory Kitchen
    Roasted Garlic - Glory Kitchen
    Roasted Garlic - Glory Kitchen
    Roasted Garlic - Glory Kitchen
    Roasted Garlic - Glory Kitchen
  • Tomato Pie - Glory Kitchen

    TOMATO PIE

    When I first heard the term “Tomato Pie” it sounded unfamiliar and a bit strange.  I often think of sweet fruits like peach, blueberry, etc. for pie fillings but this savory pie is such a great dish to make utilizing fresh, homegrown tomatoes.  It’s a veggie pie that goes great with a side green salad but I also love that it yields leftovers for breakfast in the morning or lunch the next day.  A slice of warm tomato pie with a fried egg on top would make a delicious breakfast.

    I’ve been experimenting with homemade pie crusts, and to be honest, they can be tasty but time consuming.  After much trial and error, I feel as though I have finally perfected a great homemade pie crust (the recipe which I will share in a future post), however, I am certainly not opposed to using a store bought ready-made crust or a roll-out pie crust.

    I try to peruse the ingredient list and find one with straight-forward and clean ingredients.  I also prefer to use the roll-out type because after crimping and forming your edges, it looks a bit more rustic and homemade.

    If making your own pie crust sounds laborious and keeps you away from baking pies at home, then by all means, use a store bought one because there’s nothing better than homemade pies. I always buy two and keep one on hand in the freezer.

    The ingredients for this Tomato Pie are straightforward – tomatoes, onion, basil and our Glory Kitchen Umbria nut & spice mix for a bit of extra tomato flavor and a crunchy topping.  Once you have the pie crust pre-baked, the rest is quite simple.  I hope you’ll give this Tomato Pie recipe a try while homegrown tomatoes are still abundant.

    Margie Bruner - Glory Kitchen

    Margie Bruner
    owner of Glory Kitchen

    instagram
    facebook

    Tomato Pie

    Ingredients

    • Umbria nut & spice mix
    • 1 par-baked pie crust, homemade or store bought
    • 2 tablespoons dijon mustard
    • 1/2 cup white or yellow onion, chopped small
    • 3-4 tomatoes, rough chop
    • 1 egg, whisked
    • 1 tablespoons fresh basil, chiffonade
    • 1 cup gruyere cheese, shredded
    • 1 cup white cheddar cheese, shredded (can substitute with mozzarella or monterrey jack)
    • olive oil, just a drizzle
    • salt and pepper

    Instructions

    1. Slice a few tomatoes (about 5 slices), somewhat thin, and lay them on a paper towel to drain - these slices will be the decorative topping. Set these aside to allow them to dry out a bit. Chop the remaining tomatoes into a rough chop. Place them into a colander which has been placed into a large bowl to catch and drain the juices. Sprinkle the tomatoes with a bit of salt and set the colander aside to drain the tomatoes of their juices.
    2. Pre-bake the pie crust. Preheat your oven to 425°F. If you are making a homemade pie crust, make certain the crust is very cold (I put it in the freezer for about 15 minutes) lightly lay aluminum foil or parchment paper over the crust, fill it with weights (I use several cups of dry beans) and bake for 10-15 minutes or until the crust is lightly baked. Use the tines of a fork to prick to bottom of the crust so it does not bubble up. Do not let the edges turn brown. Remove and allow to cool a bit.
    3. Add the dijon mustard to the bottom of the cooled crust and spread it out evenly. Next, layer the chopped onions over the mustard.
    4. Take the tomatoes which were set aside in the colander, and with your hands, squeeze as much moisture as you can out of the tomatoes. You don't want a soggy pie crust so try and squeeze out as much as possible. I never throw out the tomato juice - it's delicious. I either drink it or save it to add into a soup or smoothie. Take the squeezed tomatoes and mix in the whisked egg. Layer these chopped tomato/egg mixture over the onions in the crust. Now add the basil chiffonade over the chopped tomatoes.
    5. Sprinkle the top of the tomato mixture with both types of shredded cheeses. Arrange the reserved and drained tomato slices (see photo) on top of the pie. Drizzle just a bit of olive oil over the tomatoes and rub the top with your fingers to distribute lightly over each tomato. Sprinkle the top with Umbria nut & spice mix.
    6. Bake the pie in a 425° oven until it is lightly browned and bubbly, anywhere from 25 to 45 minutes. Remove and allow to cool. Top with fresh basil and serve with a side salad.

    Tomato Pie - Glory Kitchen
    Tomato Pie - Glory Kitchen
    Tomato Pie - Glory Kitchen
    Tomato Pie - Glory Kitchen
    Tomato Pie - Glory Kitchen
    Tomato Pie - Glory Kitchen
    Tomato Pie - Glory Kitchen
  • SUMMER TOMATO STRATA

    This Summer Tomato Strata recipe can feed a crowd and takes advantage of the abundance of beautiful tomatoes during this season.  It is perfect for those lazy summer mornings where you need only remove your strata from the fridge and pop it into the oven – most of the work is done the day or evening before.

    A “strata” is almost like a savory bread pudding, and it’s really a fancy name for the humble breakfast casserole.  The rich tomatoes paired with sourdough bread, cheese and an egg custard make this a perfect breakfast or dinner dish.  For breakfast, I like to pair it with a fresh fruit salad.  For dinner or lunch, I would add a crisp green salad on the side for a perfectly balanced meal.

    Taking advantage of so many beautiful local tomatoes, I used a variety of heirloom tomatoes, topped it with cheese, and finally our Glory Kitchen Italian nut & spice flavors from our Umbria blend.  This is a simple, make-ahead dish that can really satisfy.  Don’t hesitate to make the full dish or double the recipe – it makes great leftovers for a quick lunch or dinner.  A zap in the microwave and you’re ready to go!

    Margie Bruner
    owner of Glory Kitchen

    instagram
    facebook

    Summer Tomato Strata

    Ingredients

    • Umbria nut & spice mix
    • olive oil
    • 1 large red onion, cut in half then sliced thin
    • 3 garlic cloves, peeled & chopped
    • 5 cups sourdough bread, cut into cubes
    • 4 cups fresh tomatoes, cut into large pieces
    • pinch of salt
    • pinch of sugar
    • 10 eggs
    • 1 cup fresh parmigiano-reggiano cheese, grated
    • fresh basil, oregano or thyme leaves

    Instructions

    1. With your fingers, rub olive oil around all sides of a 9 x 13 baking dish. Spread the sourdough cubes evenly into the prepared and oiled baking dish and set aside.
    2. In a large saucepan, heat about 1 tablespoon olive oil and add the sliced red onions. Cook until lightly browned and wilted. Add the chopped garlic and sauté until lightly browned. Remove from the pan and set aside.
    3. Add a bit more olive oil into the same sauté pan and then add the chopped tomatoes. Add a pinch of salt and a pinch of sugar. Cook at medium heat until they are soft and saucy. Add in the onion & garlic mixture into the tomatoes and combine. Gently pour the tomato mixture over the cubed bread and spread until it is evenly dispersed in the baking dish.
    4. Break all 10 eggs into a large bowl and beat them until well mixed, the whites and yokes should be well incorporated. Pour the beaten eggs over the tomato and bread mixture. Cover the baking dish with aluminum foil and place into the refrigerator to sit overnight.
    5. When you are ready to bake, preheat the oven to 350°. Remove the prepared strata from the refrigerator and top with the grated parmigiano-reggiano cheese. Sprinkle generously with Umbria nut & spice mix. Place in the hot and bake for about 20 minutes or until the eggs have gently set - do not over bake. The eggs will continue to set as it cools outside the oven.
    6. Let the strata rest for at least 10 minutes before slicing and serving. If you wish, you may sprinkle with additional Umbria nut & spice mix just before serving. Top with fresh basil, thyme or oregano, either hand torn or chopped.

    Notes

    Begin preparing this onion & tomato strata the night before you plan on serving. Let it sit overnight to soak up the bread and meld the tomato and Italian flavors. Bake in the oven and serve the next day - perfect for a late morning brunch when you want to sleep in and pop something into the oven the next morning.

    Summer Tomato Strata - Glory Kitchen
    Tomato Strata
    Tomato Strata
    Summer Tomato Strata - Glory Kitchen
Updating…
  • No products in the cart.

JOIN US !
JOIN
close-link