• Chicken Thighs with Honeydew and Cucumber Salsa - Glory Kitchen

    CHICKEN THIGHS WITH HONEYDEW AND CUCUMBER SALSA

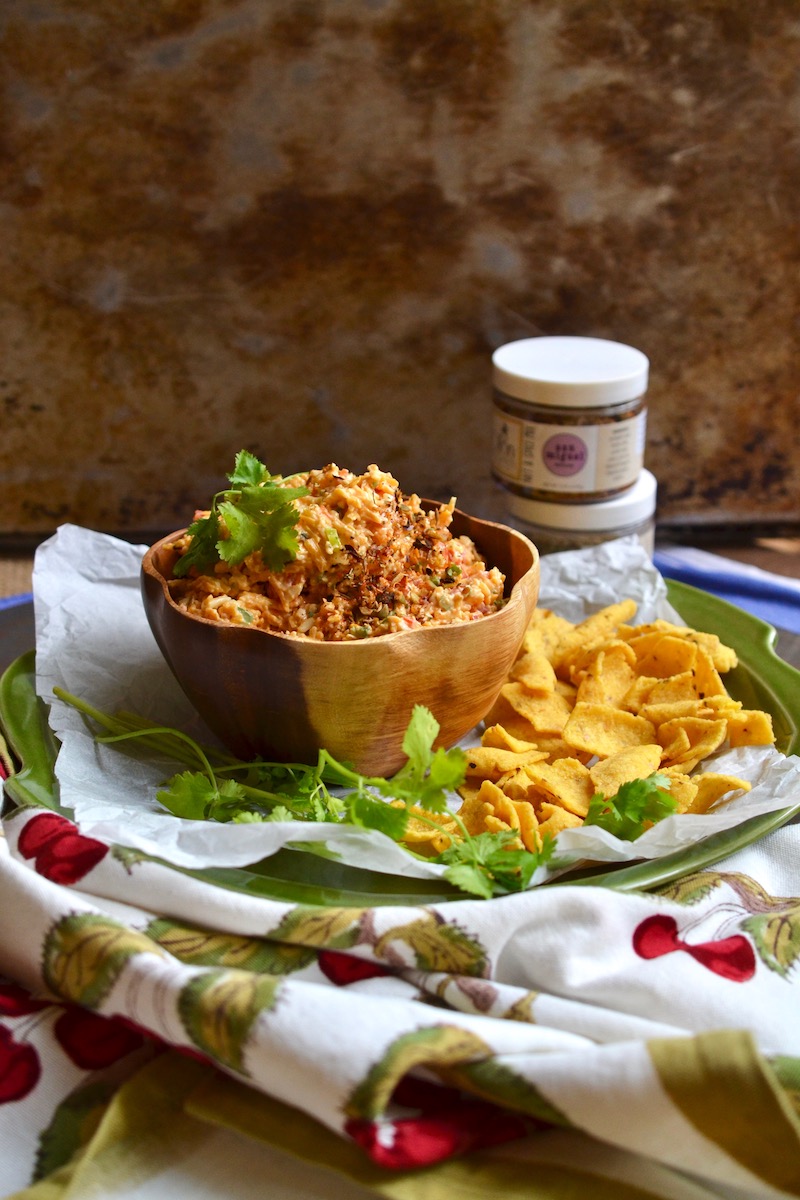
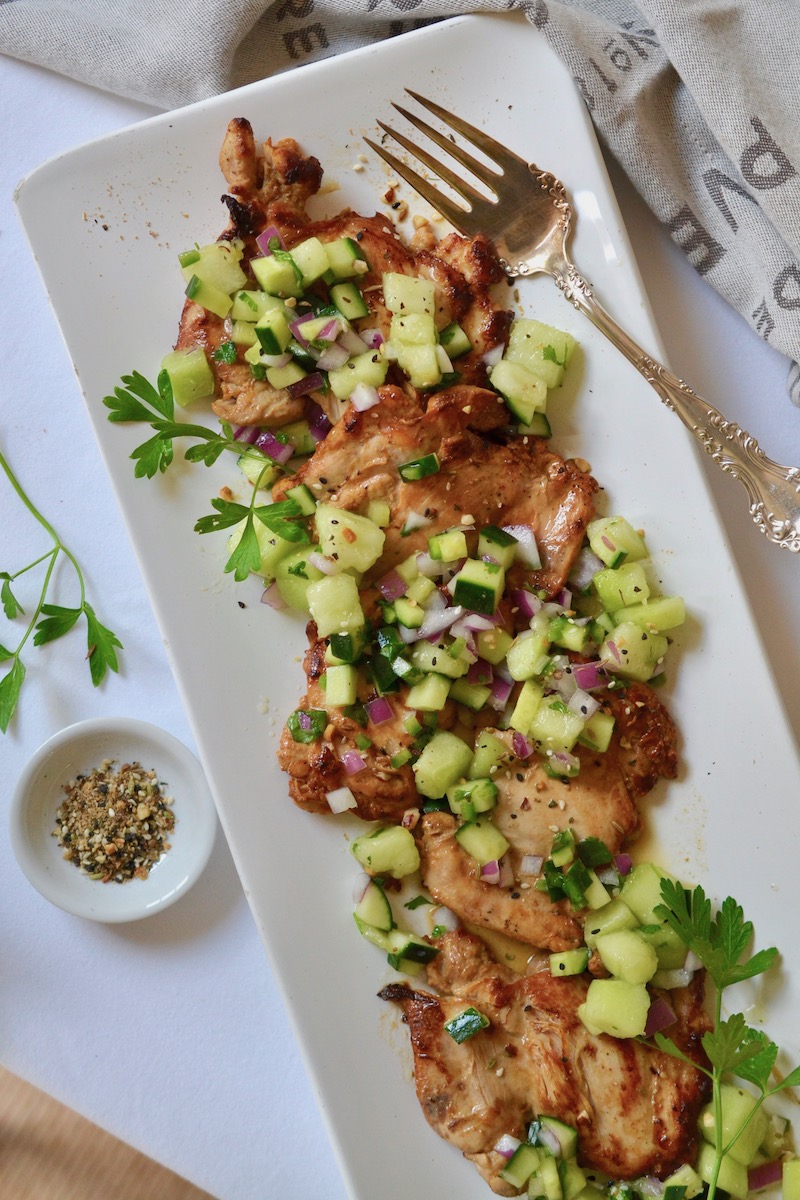
    Chicken Thighs with Honeydew and Cucumber Salsa is the ultimate summer meal.  It is light, fresh, spicy, a little sweet and a little savory.  Talk about a feel-good meal!  I love the hues of green from the honeydew, the english cucumber, the jalapeño, and the cilantro.  This chicken dish has all kinds of flavor components going on; sweet, spicy, salty, and smoky flavors from the cumin, coriander, and sesame seeds of our Glory Kitchen Cairo nut & spice mix.

    Summer freshness oozes out of this dish filled with juicy fresh fruit, garden herbs, and vegetables.  You can pile the salsa on high to get plenty of flavor on a nice tender piece of chicken.  After a quick marinade, the chicken is pounded thin with a meat mallet between two pieces of plastic wrap which helps it to cook evenly and quickly.  With this quick-cook process, the chicken stays perfectly fork tender.  Once pounded and marinated, I grilled the chicken thighs but an oven can get the job done just as easily.  I would probably broil them just a bit at the end to get a bit of color on the top.

    If you like things spicy you can certainly add more jalapeño than the recipe calls for – even a bit more onion would have added additional heat.  The salsa can be made a few hours before serving.  Even the chicken could be baked beforehand and warmed up just a bit or served at room temperature.  I think this chicken dish makes a beautiful presentation with all of the pretty green colorations so take advantage of the wow factor and serve it on a large platter.  Enjoy!

    Margie Bruner
    owner of Glory Kitchen

    instagram
    facebook

    Chicken Thighs with Honeydew and Cucumber Salsa

    Yield: serves 4-6 persons

    Ingredients

      for the honeydew salsa:
    • 3 cups honeydew, cubed
    • 2 1/2 cups english cucumber, chopped (about 1 large cucumber)
    • 1 cup red onion, chopped
    • 1/2 cup cilantro, fresh, chopped
    • 1 large jalapeño, minced
    • 1 tablespoon lime juice, fresh
    • 2 tablespoons olive oil
    • 1 teaspoon honey
    • 1 teaspoon Cairo nut & spice mix
    • 1/2 teaspoon sea salt
    • for the chicken:
    • 6 chicken thighs
    • 1/4 cup lime juice, fresh squeezed
    • 1/4 cup olive oil
    • 1/8 cup soy sauce
    • 1 tablespoon dijon mustard

    Instructions

    1. In a large mixing bowl, mix together the chopped honeydew, cucumber, onion, cilantro, jalapeño, 1 tablespoon lime juice, olive oil, honey, 1 teaspoon Cairo nut & spice mix, and sea salt. Stir together and set aside to marinade the flavors at room temperature.
    2. Allow the chicken thighs to come to room temperature then place the thighs between two large pieces of plastic wrap and pound them with a meat mallet (also called a meat tenderizer) to flatten so they become thin and even. Place the pounded chicken into a large bowl and add the marinade of 1/4 cup lime juice, 1/4 cup olive oil, soy sauce and dijon mustard. Toss them in the marinade and let them sit for about 10 minutes. At this point you can remove them from the marinade and place them on a hot grill to cook through. Alternatively, you can place them into a baking dish, along with the marinade, and bake in a 350° oven for about 25 minutes until it is cooked through. Be careful not to overcook because the chicken has been pounded thin and will cook more quickly. Just before removing from the oven, I like to set them under the broiler for a few moments to brown the tops.
    3. Place the thighs on a serving platter and spoon the honeydew cucumber salsa over the chicken. Sprinkle with a bit more 1 teaspoon Cairo nut & spice mix and serve.

    Chicken Thighs with Honeydew and Cucumber Salsa - Glory Kitchen
    Chicken Thighs with Honeydew and Cucumber Salsa - Glory Kitchen
    Chicken Thighs with Honeydew and Cucumber Salsa - Glory Kitchen
    Chicken Thighs with Honeydew and Cucumber Salsa - Glory Kitchen
    Chicken Thighs with Honeydew and Cucumber Salsa - Glory Kitchen
    Chicken Thighs with Honeydew and Cucumber Salsa - Glory Kitchen
    Chicken Thighs with Honeydew and Cucumber Salsa - Glory Kitchen
    Chicken Thighs with Honeydew and Cucumber Salsa - Glory Kitchen
  • Homemade Pimento Cheese - Glory Kitchen

    HOMEMADE PIMENTO CHEESE

    Homemade pimento cheese is a staple for me when I throw a party. I love a good pimento cheese dip, especially at a gathering or a picnic.  However, I’ve always struggled to find one that is not loaded with artificial ingredients.  If you’ve ever taken a close look at the packaging of most prepared pimento cheeses available at the grocery store you’ll notice a litany of ingredients; the majority include chemicals, preservatives, and very few “real food” ingredients.  Making your own homemade pimento cheese allows you to use better, fresher ingredients like organic cheese, organic yogurt, and crunchy peppers.

    Most pimento cheeses are loaded with mayonnaise and although I add it to my recipe, I use very little because I’ve never been a big fan.  Instead I use Greek yogurt which still gives you the creaminess but doesn’t overpower the dish.  I think a pimento cheese dip should taste like cheese – not cream and mayo.  Another tip when making my homemade pimento cheese is I typically use a combination of monterrey jack and white cheddar cheese.  We often think of cheddar cheese as orange in color, however, many people don’t realize the traditional orange is often added artificial coloring so I typically stick to a white cheddar.

    I was able to find a natural, organic cheddar which was colored with paprika, a natural spice which gave it that orange hue.  Even if you use white cheddar and white jack cheeses, the recipe calls for smoked paprika which will give your cheese dip a slight orange color.

    Another part of this recipe I love is the crunchy addition of fresh red bell pepper and fresh jalapeno.  I often add more jalapeno because I love a bit of heat with the creamy cheese.  You may want to begin with 1/2 jalapeno and after mixing, give it a taste and, if it is a mild pepper, add more until you get a bit of heat with each bite.

    And one more tip… when shredding large amounts of cheese, try using the shredding attachment on your food processor.  It makes the process so snappy – it literally took 30 seconds to shred 4 cups.

    I like to serve this dip at room temperature with corn chips, crackers or tostada chips and right before it goes out to your guests, sprinkle it with plenty of San Miguel nut & spice mix to give it a bit of crunchy pizazz.

    I hope you make this homemade pimento cheese your go-to recipe.  Once you’ve made it a few times, it’s easy to whip up – even without a recipe. Enjoy!

    Margie Bruner
    owner of Glory Kitchen

    instagram
    facebook

    Homemade Pimento Cheese

    Yield: serves about 6 people

    Ingredients

    • 2 teaspoons San Miguel nut & spice mix
    • 2 cups monterrey jack cheese, shredded
    • 2 cups cheddar cheese, shredded (white or orange)
    • 2/3 cup Greek yogurt
    • 1/4 cup mayonnaise
    • 3 scallions, chopped (about 1/3 cup)
    • 1/2 red bell pepper, chopped (about 1/2 cup)
    • 1/2 jalapeño, fresh & minced, more if you like it spicy
    • 1 garlic clove, minced
    • 1/2 teaspoon smoked paprika
    • 1/8 teaspoon salt

    Instructions

    1. Shred both the monterrey jack & cheddar cheese and place in a very large mixing bowl.
    2. To the cheese, add the mayo, yogurt, San Miguel nut & spice mix, scallions, red bell pepper, jalapeño, garlic, paprika, and salt. Using a wooden spoon, combine all ingredients.
    3. Taste and adjust the seasonings and ingredients according to your preferences. If the jalapeño is not very hot I like to add the entire pepper and sometimes even more - I like a bit of heat in the cheese spread.
    4. Serve at room temperature with corn chips, tostadas or crackers. This can be made the day before and then brought to room temperature just before serving.

    Homemade Pimento Cheese - Glory Kitchen
    Homemade Pimento Cheese - Glory Kitchen
    Homemade Pimento Cheese - Glory Kitchen
    Homemade Pimento Cheese - Glory Kitchen
    Homemade Pimento Cheese - Glory Kitchen
    Homemade Pimento Cheese - Glory Kitchen
  • Summer Rolls - Glory Kitchen

    SUMMER ROLLS

    Every time I make Summer Rolls topped with our  Glory Kitchen Asian nut & spice blend called Penang I pledge to make them often because they are deliciously fresh, extremely filling, and good for you.  I’m not exactly certain how these crunchy rolls received their name but I do know this  – they are not just good in the summer.  Maybe it’s because we typically like to eat lighter in the summer, or because there is an abundance of fresh veggies available during the warm season.  Regardless, these rolls are certainly a year-round recipe.  And now that it is officially summer… it is time to roll!

    I was a bit intimidated to make these Summer Rolls for the first time but once I located the rice paper rolls, which by the way I discovered are easily available at most grocery stores, sometimes by the name of “spring rice paper”,  you just need a bit of creativity with ingredients and patience to learn the art of working with rice paper.   It is definitely something you get better at the more often you make them.

    There are so many choices of ingredients to fill up Summer Rolls, so feel free to substitute from this list but I probably wouldn’t do without the carrot or cucumber.  The refreshing crunch and color from these two veggies are perfect.  I also love the addition of fresh herbs, namely mint and basil.  There’s something about their freshness that adds a light, crisp flavor.  Other ingredient choices for Summer Rolls include radishes, sugar snap peas, enoki mushrooms, noodles or brown rice (either one in place of the quinoa), shrimp, ground pork, shredded chicken, and the list goes on.

    And by the way, if your first go at Summer Rolls produces messy results, don’t get discouraged.  Even a messy Summer Roll can be absolutely delicious and you’ll get better as you go, promise.  Let’s get rolling!

    Margie Bruner
    owner of Glory Kitchen

    instagram
    facebook

    Summer Rolls

    Yield: about 16 rolls

    Ingredients

      For the dipping sauce:
    • 2 tablespoons peanut butter (I used almond butter)
    • 1 tablespoon soy sauce
    • 1 tablespoon rice wine vinegar
    • 1 teaspoon oyster sauce
    • 2 teaspoons gochujang sauce (or other hot sauce like sriracha)
    • 2 teaspoons sesame oil
    • 1 teaspoon fresh ginger, minced
    • a few teaspoons water (or more)
    • For the rolls:
    • Penang nut & spice mix
    • 16 6-inch rounds rice paper
    • 3 carrots, julienned
    • 2 cucumbers, julienned
    • 2 cups shredded kale, red cabbage, or other lettuce
    • 2 cups green beans, slightly cooked or raw
    • 2 cups quinoa, cooked
    • 1/4 cup mint leaves
    • 1/4 cup basil leaves
    • 1/4 cup cilantro leaves
    • other items such as: shrimp, pork, green beans, radish, sugar snap peas, zucchini

    Instructions

    1. Mix all of the ingredients for the dipping sauce and set aside. Taste as you go and add a bit more of this or that depending upon your taste. I added a teaspoon of water at a time to get the right consistency - the peanut butter will make it creamy so you can thin it out with a touch of water, little bits at a time. You want to make it a bit creamy, but you also don't want it too thick.
    2. Cook the quinoa according to the package instructions and allow to cool. Prep all of the veggies, set each one in its own bowl and set up in an assembly line to make the rolling process systematic. I peeled the carrots, then cut into thin match sticks. Same with the cucumber. The green beans were left whole and roasted just a bit in the oven but you can certainly leave them raw for additional crunch.
    3. Get a pie dish and fill it almost half way with warm water. Take a rice paper round and dip it completely into the water for just a few seconds; this will soften the rice paper. Take it out and place it flat on a clean wooden cutting board. When you remove from the water it will be thin and sticky; work carefully, it is pretty forgiving. You may need to throw a few away if they rip, but you will get better as you go.
    4. Working on the bottom third of rice paper, spread a bit of quinoa, carrots, cucumber, lettuces, herbs and anything else you have prepped for the roll. Fold up bottom edge to cover, then fold in the sides, just like you would a burrito. Roll tightly all the way.
    5. Place the rolls on a serving platter, drizzle the top with a bit of sesame oil and then sprinkle the tops with Penang nut & spice mix. Garnish with fresh cilantro or mint. Serve the rolls right away, alongside the peanut dipping sauce. You can refrigerate, lightly covered, for up to 2 hours.

    Summer Rolls - Glory Kitchen
    Summer Rolls - Glory Kitchen
    Summer Rolls - Glory Kitchen
    Summer Rolls - Glory Kitchen
    Summer Rolls - Glory Kitchen
    Summer Rolls - Glory Kitchen
  • Strawberry Balsamic Crostini - Glory Kitchen

    STRAWBERRY BALSAMIC CROSTINI

    The beginning of spring is always marked by an abundance of beautiful strawberries – on restaurant menus, in markets, and certainly on Instagram.  In my opinion, there is absolutely no better way to celebrate the simple strawberry than on top of a deliciously sweet and savory crostini.  This recipe for Strawberry Balsamic Crostini melds together the sweet tang of balsamic vinegar, fresh strawberries, creamy mascarpone cheese, and the crunchy flavors of our Glory Kitchen Indian flavors of Mumbai nut & spice mix.

    Fresh sliced  strawberries are mixed with honey and balsamic vinegar then boiled down until a thick, irresistible syrup is created.  The flavor is rich and tangy goodness and when paired with our Indian spices, it makes a perfect sweet and savory bite.  I’ve used mascarpone cheese as a base to this crostini because it adds a wonderful rich creaminess.  Mascarpone is an Italian cream cheese that is smoother and creamier than your typical American cream cheese.  It is delicious spread on a toasted crostini.

    In my opinion, this Strawberry Balsamic Crostini is one of the most perfect bites anyone could make.  And when strawberry season sadly comes to an end, you need to make this all over again using black or blueberries (which typically harvest after strawberries).  And then how about plums, or peaches?  Yes, summertime is definitely the time for fruit topped crostini and Glory Kitchen nut & spice mixes.

    Margie Bruner - Glory Kitchen

    Margie Bruner
    owner of Glory Kitchen

    instagram
    facebook

    Strawberry Balsamic Crostini

    Yield: makes about 6-8 servings

    Ingredients

    • Mumbai nut & spice mix
    • 3 1/2 - 4 cups fresh strawberries, sliced
    • 1/2 cup balsamic vinegar
    • 1/2 cup honey
    • 1 french baguette
    • olive oil
    • sea salt
    • mascarpone cheese
    • fresh thyme, for garnish

    Instructions

    1. Heat the oven to 400°. Slice the baguette on the bias, arrange slices on a baking sheet, drizzle each slice with a bit olive oil, sprinkle with sea salt, and place into the oven for about 10-15 minutes or until the edges are lightly browned and toasted. Remove from oven and allow to cool completely. You can toast these the day before and place them in a ziplock baggie to use when ready.
    2. Slice a few strawberries in half, lengthwise; you will want 1/2 strawberry to place on top of each crostini. With the remaining strawberries, slice them up to make into strawberry balsamic reduction. Take the remaining sliced berries and place them into a saucepan with balsamic vinegar & honey. Bring to a boil and boil for at least 25 minutes to reduce down until it is thick and syrupy. Allow this to cool completely.
    3. When ready to serve, smear each crostini with mascarpone cheese (allow it to get to room temperature first). Then place 1/2 of a fresh sliced strawberry on each crostini center. Drizzle the strawberry balsamic glaze on each toast, top with a sprinkle of Mumbai nut & spice mix, and finally with a sprig of fresh thyme.

    Notes

    You can skip the fresh strawberry slice on each crostini and instead just top the mascarpone smeared crostini with the strawberry balsamic glaze and Mumbai nut & spice mix. You can also use this same recipe with blueberries, blackberries or raspberries. Make plenty of berry glaze because it is delicious on just about everything.

    Strawberry Balsamic Crostini - Glory Kitchen
    Strawberry Balsamic Crostini - Glory Kitchen
    Strawberry Balsamic Crostini - Glory Kitchen
    Strawberry Balsamic Crostini - Glory Kitchen
    Strawberry Balsamic Crostini - Glory Kitchen
  • Freekeh, Red Lentil and Roasted Veggie Bowl

    FREEKEH, RED LENTIL, AND ROASTED VEGGIE BOWL

    This bright and colorful Freekeh, Red Lentil and Roasted Veggie Bowl incorporates unique flavors from countries far and wide.  I used a Middle Eastern grain called Freekeh (pronounced “free-kah”), often considered a supergrain, and made from green durum wheat.  Freekeh is popular in Middle Eastern cuisines and can be compared to farro or brown rice but often greenish in color.  The texture of the grain is not smooth and rounded like that of rice and farro but is a bit frayed on the edges.  Freekeh is a popular grain often seen in Egypt, Syria, Tunisia and Jordan but it is gaining popularity and becoming more familiar here in America.  It can now be found in many popular grocery stores.

    This Freekeh, Red Lentil and Roasted Veggie Bowl recipe incorporates lentils and the pretty red leaves of shredded radicchio, tossed in for color and a for a subtle bitter note.  Adding to the colorful dish, cauliflower is roasted and seasoned with turmeric and our Glory Kitchen Mumbai nut & spice mix to create a bright yellow color and robust flavor.  The cauliflower had a delicious flavor and would make a terrific side dish on its own.  I also added roasted broccoli, a family favorite, which added a bright green color to this full-flavored dish.

    Although there are several steps to making this dish, none of them are complex, it just takes a bit of time and planning.  You could always make the roasted scallion dressing and roast the cauliflower & broccoli the day before.  Or cook the lentils and freekeh ahead and refrigerate overnight.

    Once all of the prep work is done and each ingredient is placed in its own bowl, it’s just a matter of tossing together and arranging it nicely on a serving plate.  If I were making this for guests I would prepare all of the ingredients ahead, store in the refrigerator, bring them all to room temperature when ready to serve, then toss together.  Hope you enjoy!

    Margie Bruner - Glory Kitchen

    Margie Bruner
    owner of Glory Kitchen

    instagram
    facebook

    Freekeh, Red Lentil & Roasted Veggie Bowl

    Yield: serves 4

    Ingredients

      For the dressing:
    • 1 tsp Mumbai nut & spice blend
    • 1/4 cup extra virgin olive oil
    • 1/8 cup apple cider vinegar
    • 1 bunch fresh scallions, roasted & chopped
    • 1 heaping teaspoon whole grain dijon mustard
    • 1/2 tsp cinnamon
    • 1 tablespoon fresh lemon juice
    • 1-2 teaspoon honey
    • good pinch of salt
    • For the salad:
    • Mumbai nut & spice blend
    • 2 cups uncooked freekeh
    • 1 cup uncooked red lentils
    • 2 cups cauliflower florets
    • 1 teaspoon ground turmeric (or fresh if you have)
    • 2 cups broccoli florets
    • 1 small head radicchio lettuce, torn or sliced into small pieces
    • 1/2 shallot, chopped
    • 1/4 cup fresh parsley, chopped
    • 1/4 cup golden raisins
    • 1/2 cup walnuts, lightly toasted
    • sea salt & pepper

    Instructions

    1. Heat the oven to 420ºF. Line 2 baking sheets with parchment paper or aluminum foil. Spread the cauliflower onto one of the baking sheets, drizzle with olive oil, turmeric, sea salt and 2 teaspoons Mumbai nut & spice blend. Toss together well, spread the cauliflower out onto the sheet and place into the hot oven to roast until golden and caramelized. Remove to cool. This takes about 20 minutes.
    2. On another sheet, add the broccoli drizzled with olive oil, sprinkled with sea salt and tossed. On the other side of the broccoli baking sheet, add the scallions for the dressing (leave whole). Also drizzle the scallions with oil, sea salt and spread out onto the tray alongside the broccoli. Place this tray into the oven and bake until all are caramelized (about 20 minutes). The onions will brown first, so as soon as they are lightly browned, using tongs, remove them from the oven and allow them to cool.
    3. Take the roasted onions and chop into small pieces, add to a mixing bowl. To the onions, add all the ingredients for the dressing. Whisk together and set aside.
    4. Meanwhile, place the lentils and a few pinches of salt into a saucepan and add enough cold water to cover by at least an inch. Bring to a boil, then turn down the heat and simmer until al dente tender, 15 to 20 minutes. Once tender, rinse and set aside.
    5. Cook the freekeh according to package directions and then set aside to cool.
    6. Lightly toast the walnuts in a medium sauté pan and toast over low heat until golden brown. Transfer nuts to a board and coarsely chop.
    7. In a large bowl, toss together the cooled lentils & freekeh, golden raisins, shallots, walnuts, parsley, a good pinch of sea salt, pepper, radicchio (keep a few for garnishing at the end) 1-2 teaspoons of Mumbai nut & spice blend, and 1 tablespoon of the dressing. Toss gently then place some into the bottom of each serving plate or bowl. If serving this on a large platter, place all of the freekeh/lentil mixture onto the platter. Arrange the roasted broccoli and turmeric cauliflower on top of the freekeh. Top with a few more radicchio leaves and extra walnuts & parsley. Serve warm or at room temperature.

    Notes

    Our Glory Kitchen Cairo nut & spice mix would also work well with this beautiful dish. If you can't find freekeh you could always substitute farro, quinoa or brown rice. I used red lentils but of course you could use any type of lentil you have on hand. As always, improvise as you cook! If you don't have an ingredient or have trouble finding, always get creative and substitute with something else.

    Freekeh, Red Lentil and Roasted Veggie Bowl
    Freekeh, Red Lentil and Roasted Veggie Bowl
    Freekeh, Red Lentil and Roasted Veggie Bowl
    Freekeh, Red Lentil and Roasted Veggie Bowl
    Freekeh, Red Lentil and Roasted Veggie Bowl
    Freekeh, Red Lentil and Roasted Veggie Bowl
    Freekeh, Red Lentil and Roasted Veggie Bowl
  • Spring Orzo Salad - Glory Kitchen

    SPRING ORZO SALAD

    A fresh, crisp, and light salad is the perfect way to welcome the warmer spring weather.  This Spring Orzo Salad recipe is filled with crisp green beans, English peas, radishes, shallots and crunchy nuts from Umbria nut & spice mix, our Glory Kitchen Italian blend of flavors.  The almonds in the Umbria blend add great texture and the touch of rosemary, oregano and basil add just the right amount of Italian herb flavoring.

    This salad is not only flavorful & satisfying but the blanched spring veggies give it a wonderful freshness that feels like light, springtime food.  Little tiny orzo pasta cooked just until barely soft (al dente) is paired with English peas and larger chunks of green beans.  The many variations of size, texture, and color make it a beautiful salad to present on a large serving platter.  And of course thin radish slices (I like to slice them on a mandoline for perfect size consistency) and shredded radicchio lettuce add a pop of pretty red color and a peppery flavor.

    This is a perfect salad to serve for a luncheon, to deliver as a food gift to a friend, or just to make for your family.  The best part about making this Spring Orzo Salad is if you are lucky enough to have leftovers.  It keeps beautifully in the refrigerator and is great for snacking on when you need a few bites to stave away afternoon hunger pangs.  Happy Spring!

    Margie Bruner
    owner of Glory Kitchen

    instagram
    facebook

    Spring Orzo Salad

    Ingredients

      For the dressing:
    • 1 teaspoon Umbria nut & spice mix
    • 1/4 cup white wine vinegar
    • 1 tablespoon shallot, chopped small
    • 1 teaspoon dijon mustard
    • 1 teaspoon honey
    • 1/4 teaspoon salt
    • 1/4 teaspoon pepper
    • 1/2 cup extra virgin olive oil
    • For the salad:
    • 1-2 teaspoons Umbria nut & spice mix
    • 1 1/2 cups chopped cucumber
    • 1 tablespoon shallot, chopped small
    • 2 cups green beans, fresh
    • 1 cup radicchio, fresh
    • 2-3 radishes, sliced thin
    • 1 1/2 cup English peas, fresh
    • 2 cups uncooked orzo

    Instructions

    1. Mix all the ingredients for the dressing except the olive oil. When well mixed, slowly drizzle in the olive oil and whisk while adding to help it emulsify.
    2. Cook the orzo pasta according to package directions and leave just a bit aldente. Drain and rinse. Add the orzo to a very large mixing bowl and mix in about 1/2 of the dressing. Toss and set aside.
    3. In a pot of boiling water, blanch the fresh green beans for about two minutes. Remove from water and add to a cold ice bath to cool quickly and lock in the bright green color. If they are small and slender beans you can leave them whole; if very large, slice them in half. Set the beans aside. To the same water, blanch the peas for about 1 minute, remove in the same way, set aside.
    4. Very thinly slice the radicchio lettuce leaving a few of the pretty curly parts of the leaves for garnish. Chop the cucumber and the shallot. Slice the radish very thin. I like to use a mandolin to get a very even and thin slice.
    5. Into the large orzo pasta bowl, add in the green beans, shallot, cucumber, radicchio, peas, radishes, and the remaining dressing. Toss well then serve on a pretty platter and top with additional Umbria nut & spice mix and garnish with extra radish slices.

    Spring Orzo Salad - Glory Kitchen
    Spring Orzo Salad - Glory Kitchen
    Spring Orzo Salad - Glory Kitchen
    Spring Orzo Salad - Glory Kitchen
    Spring Orzo Salad - Glory Kitchen
    Spring Orzo Salad - Glory Kitchen
    Spring Orzo Salad - Glory Kitchen
  • Perfect Deviled Eggs - Glory Kitchen

    PERFECT DEVILED EGGS

    Around Easter time each spring I get the urge to serve deviled eggs and I always rely on what I feel is the Best Deviled Egg Recipe.  This is one I keep handy always – I’ve used this as my base recipe for years and it never fails.  The creamy yolk mixture has a bit of tangy dijon mustard, it is lightened up with a touch of greek yogurt, and the splash of worcestershire sauce gives it great depth of flavor.  This version of deviled eggs has a bit of Asian flare with the Penang nut & spice mix topping which gave it a bit of heat and added crispy texture.

    The finishing touch with a prosciutto crisp is one of the best and adds great flare to the presentation, not to mention the added flavor of crispy cured ham.  I often use crisped up proscuitto because it is very thin and almost translucent once it is baked in the oven but bacon adds more of a punch and works great as well.  Another topping I like to use is a slice of fresh jalapeno which can give a note of heat to the egg bite.

    The sky’s the limit with deviled eggs and any of our Glory Kitchen nut and spice mixes works as a beautiful topping on deviled eggs.  If using the Mumbai blend, you could add turmeric to the yolk mixture.  If using the San Miguel blend, I would add guajillo pepper to the yolk mix and also add a sliver of fresh jalapeno on top alongside a chard of bacon.  Whichever blend you use, they all add great flavor and a pizazz to the presentation.  This Perfect Deviled Egg recipe is simple and a great choice when entertaining for a crowd.

    Margie Bruner
    owner of Glory Kitchen

    instagram
    facebook

    Perfect Deviled Eggs

    Yield: makes 12 deviled eggs

    Ingredients

    • Penang nut & spice mix
    • 6 slices proscuitto or bacon
    • 6 eggs, hardboiled & sliced in half
    • 1 tablespoon greek yogurt
    • 2 tablespoons mayonnaise
    • 1 tablespoon dijon mustard
    • 1 teaspoon worscestershire sauce
    • pinch of sea salt
    • pinch of pepper

    Instructions

    1. Place the prosciutto onto a baking sheet and bake in the oven at 375° until crispy. You can substitute bacon if you wish. Remove and allow to cool completely. Break into irregular shards and set aside to insert at the top of each finished deviled egg.
    2. Hardboil the eggs and then cool to room temperature. Do not overcook the eggs, I like to boil for about 8-9 minutes, then remove and place into an ice bath to stop the cooking. Carefully slice each egg in half & remove the center yolks into a mixing bowl.
    3. Using a fork, mash all the yolks well. To this add yogurt, mayonnaise, dijon mustard, worcestershire, good pinch of salt & pepper. Mix well. Add into a pastry bag and snip the end off. You can also place the mixture into a ziplock baggie, zip it tight, snip off one corner, and use this as your piping bag.
    4. Carefully pipe each egg white shell with the yolk mixture. Top with Penang nut & spice mix and add a sliver of bacon or prosciutto to the top.

    Notes

    Any of our Glory Kitchen nut blends would be wonderful on our deviled eggs. If you used the Mumbai blend, it would be great to add a bit of turmeric to the yolk mixture. If you used San Miguel, you could add a bit of guajillo pepper to the yolk mixture. Get creative and add a bit of interest to your typical deviled egg!

    Perfect Deviled Eggs - Glory Kitchen
    Perfect Deviled Eggs - Glory Kitchen
    Perfect Deviled Eggs - Glory Kitchen
    Perfect Deviled Eggs - Glory Kitchen
    Perfect Deviled Eggs - Glory Kitchen
    Perfect Deviled Eggs - Glory Kitchen
    Perfect Deviled Eggs - Glory Kitchen
    Perfect Deviled Eggs - Glory Kitchen
  • Easy Peasy Mac and Cheesy - Glory Kitchen

    EASY PEASY MAC AND CHEESY

    I just could not resist the “cheesy” title of this recipe but the name “Easy Peasy Mac & Cheesy” truly describes this terrific mac & cheese hack. No noodles to boil.  No butter & flour roux to prepare.  Just blend up a few ingredients, add in the dry noodles and bake.  Truly, it’s that easy – who knew?  I’m amazed I never before knew of this quick method.  It works beautifully and tastes delicious.  And who doesn’t love a hot macaroni & cheese with a crispy topping of panko bread crumbs and our San Miguel Mexican nut & spices?

    I can’t remember the last time I made homemade macaroni & cheese.  True confessions, I used to make the infamous Kraft Mac & cheese out of the box for my kids when they were young – often.  Knowing now what goes in to that powdered orange “cheese” I cringe at the thought, yikes.

    Now that my boys are grown, my husband and I don’t typically eat foods like mac & cheese but every so often there is an occasion that calls for a delicious casserole of hot cheesy goodness.  It is a great side to serve to a crowd and because it is a well loved favorite, it is typically the first dish to empty out.

    The next time you need a large casserole to serve a crowd, try this simple mac & cheese.  This recipe can serve 10-14 persons so you can always half the portions to make a smaller casserole.  Or make one and freeze the other.  Enjoy!

    Margie Bruner - Glory Kitchen

    Margie Bruner
    owner of Glory Kitchen

    instagram
    facebook

    Easy Peasy Mac and Cheesy

    Yield: 10 - 14 servings

    Ingredients

      For the topping:
    • 1 tablespoon San Miguel nut & spice mix
    • 1/4 cup panko bread crumbs
    • 1/4 cup grated parmesan cheese
    • For the mac & cheese:
    • 2 cups cottage cheese (I like full fat, organic)
    • 4 cups whole milk (I like to use organic)
    • 1 1/2 pounds shredded cheeses; a combination of gruyere, parmesan, & cheddar
    • 1 pound elbow pasta, uncooked
    • 2 tablespoons butter, melted
    • 2 teaspoons dry mustard
    • 1 1/2 teaspoon sea salt
    • 1/2 teaspoon black pepper
    • 1 1/2 - 2 teaspoons smoked paprika
    • drizzle of olive oil (to oil the inside of baking dish)
    • bake in a 9x13 rectangular casserole dish or a 3 qt. dutch oven

    Instructions

    1. In a small bowl combine all the topping ingredients and set aside.
    2. Heat oven to 375° and position the rack in upper third of oven. Use a small amount of olive oil to coat the sides of a 9x13 baking dish or a 3 quart dutch oven. I use my hands to coat all around.
    3. Using a blender, puree together 2 tablespoons of melted butter, cottage cheese, 1 cup milk, mustard, smoked paprika, salt & pepper. Using a very large mixing bowl stir together the blender ingredients, remaining 3 cups milk, uncooked pasta, and the 3 grated cheeses. Pour it all into the buttered baking dish, cover with aluminum foil, and bake in the oven for 30 minutes.
    4. Uncover the pan, sprinkle the top with the topping mixture which was set aside and bake, uncovered, for 30 minutes more, or until the top is lightly browned and bubbly. Remove from the oven and allow to cool for a few minutes before serving.

    Notes

    This recipe makes a large casserole to serve a crowd. You can half the recipe to serve 6-8 persons.

    Easy Peasy Mac and Cheesy - Glory Kitchen
    Easy Peasy Mac and Cheesy - Glory Kitchen
    Easy Peasy Mac and Cheesy - Glory Kitchen
    Easy Peasy Mac and Cheesy - Glory Kitchen
    Easy Peasy Mac and Cheesy - Glory Kitchen
    Easy Peasy Mac and Cheesy - Glory Kitchen
    Easy Peasy Mac and Cheesy - Glory Kitchen
  • Belgian Endive with Walnuts and Blue cheese - Glory Kitchen

    BELGIAN ENDIVE WITH WALNUTS AND BLUE CHEESE

    I’ve always thought little Belgian endive leaves made a pretty and graceful presentation because of their delicate shape.  This Belgian Endive with Walnuts and Blue Cheese Recipe is wonderfully flavorful and uniquely different – it would make a great first course at a dinner party.  When these little lettuces are baked in the oven, the tender and somewhat bitter endive leaves turn a buttery, salty flavor, a bit like the flavor of a tender steamed artichoke dipped in butter.  The blue cheese, walnut pieces, and Provence nut & spice mix add a nutty crunch and a sharp note of herb flavor which together with the buttery endive create a mouth watering combination.

    Belgian endive is a bitter lettuce from the chicory genus.  It has a small, narrow shape, white inner leaves and either yellow or red ruffled tips.  In this recipe I’ve used both the red and the yellow tipped varieties although the baking fades away some of the bright colorations you see when raw.  Sliced in half and baked, the bitter leaves mellow in flavor and become soft and tender.

    This Belgian Endive with Walnuts and Blue Cheese Recipe was a pleasant surprise because it is such a diversion from your typical salad flavors.  I served it directly on small salad plates as a first course to our meal but you could add a few delicate greens such as arugula or bibb lettuce to the base and place these endive halves right on top.  Hope you’ll try this uniquely flavorful recipe.

    Margie Bruner
    owner of Glory Kitchen

    instagram
    facebook

    Belgian Endive with Walnuts and Bluecheese

    Ingredients

    • 1 teaspoon Provence nut & spice mix
    • 6 Belgian Endives
    • 1/8 cup clarified butter (ghee), melted
    • 1/2 cup walnuts, coarsely chopped
    • 1/2 blue cheese, crumbled
    • salt & pepper

    Instructions

    1. Preheat the oven to 375°. In a small bowl, toss together chopped walnuts, blue cheese crumbles and 1 teaspoon of Provence nut & spice mix. Mix well with your hands and then set this aside to use as a topping later.
    2. Carefully trim the endive, was and dry with a paper towel. Slice each bundle in half, lengthwise. Lay them in a baking dish, cut side up, and then drizzle with the melted ghee. Using your hands, gently ruby each endive half so the clarified butter coats it completely. Sprinkle them with salt and pepper then cover the baking dish with foil and place into the oven for 30 minutes.
    3. Remove the endive from the oven, uncover the foil, add the cheese/walnut topping onto each endive half. Place back into the oven, uncovered, for about 8-10 more minutes. At the very end, turn the oven on broil and stand by for about 1-2 minutes so the nuts will lightly brown and the blue cheese is melted. Remove and serve warm or allow to cool slightly and serve at room temperature. These are buttery delicious and would work in place of a salad at the dinner table.

    Belgian Endive with Walnuts and Blue cheese - Glory Kitchen
    Belgian Endive with Walnuts and Blue cheese - Glory Kitchen
    Belgian Endive with Walnuts and Blue cheese - Glory Kitchen
    Belgian Endive with Walnuts and Blue cheese - Glory Kitchen
    Belgian Endive with Walnuts and Blue cheese - Glory Kitchen
Updating…
  • No products in the cart.

JOIN US !
JOIN
close-link