• Honey Roasted Carrots - Glory Kitchen

    HONEY ROASTED CARROTS

    When I made my very first batch of our Glory Kitchen nut & spice mix, I created the Middle Eastern blend (now called Cairo) and used it to season a simple batch of oven roasted carrots.  As the hot, caramelized carrots came out of the oven, covered in crunchy spices and nuts, the smell was intoxicating and the flavor was even better – one bite and I was hooked.  Not only were the sweet carrots amazing but the crunchy seasoning that coated them gave them texture and a kick of flavor.

    We proceeded to finish the entire batch of carrots straight from the baking sheet, even before they had the chance to cool from the hot oven.  This simple Honey Roasted Carrot Recipe quickly became ingrained in my memory and became a routine side dish and sometimes snack in our home.  I change the variety of nut & spice mix just to keep things interesting and change up the flavor profile.  These roasted carrots are spiced up with our San Miguel nut & spice mix made of Mexican flavors  – the perfect combination of sweet, savory and a little spicy kick.

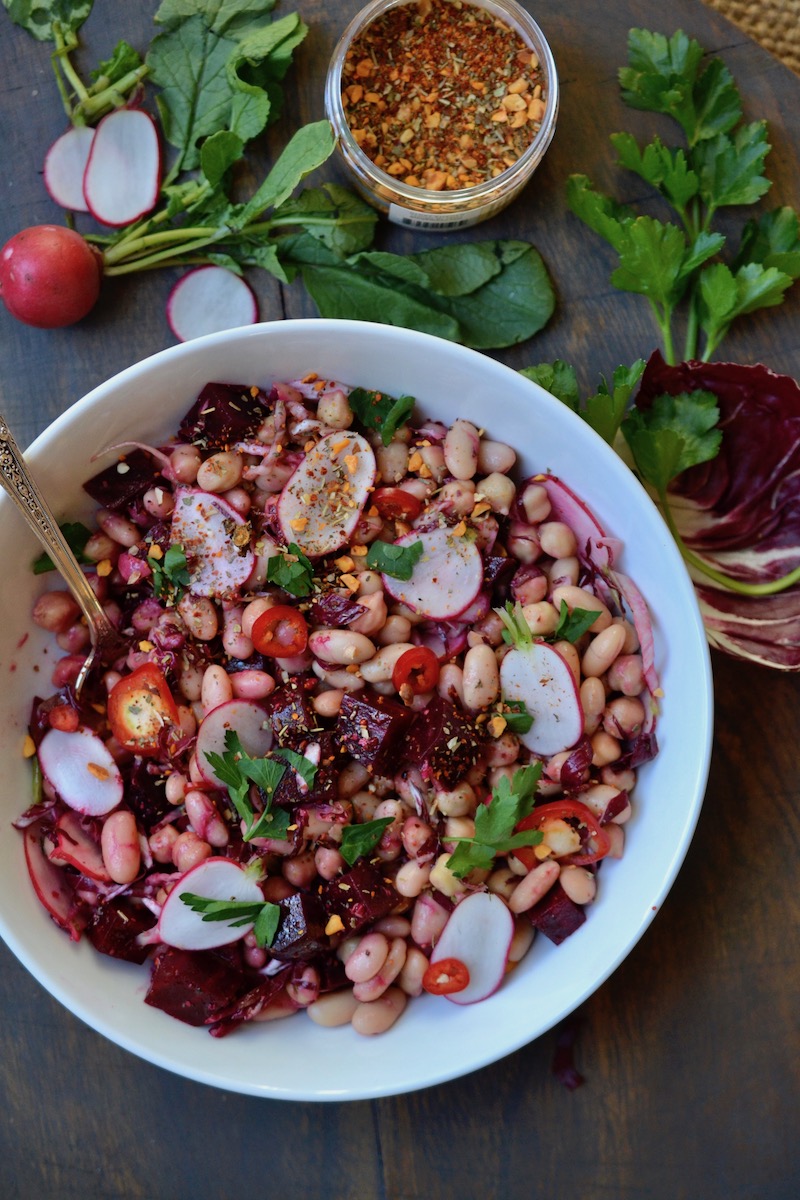
    All 6 of our Glory Kitchen varieties are perfect for roasted carrots, it just depends upon your mood of the day and flavor direction you wish to take.  My go-to flavors for carrots are the San Miguel, Cairo, Mumbai and Penang blends.

    Once they’re roasted you can serve them as a side to any protein, top them on salads, dip them in a sauce and eat as an appetizer, add them to a cheese platter, use in rice or quinoa bowls, they’re just plain good on everything.

    Margie Bruner
    owner of Glory Kitchen

    instagram
    facebook

    Honey Roasted Carrots

    Yield: serves 4-8

    Ingredients

    • 1 tablespoon San Miguel nut & spice mix
    • 2-3 lbs carrots
    • 2 tablespoons olive oil
    • 1 1/2 tablespoons honey
    • sea salt
    • 1 teaspoon smoked paprika or ground chipotle

    Instructions

    1. Preheat the oven to 425°.
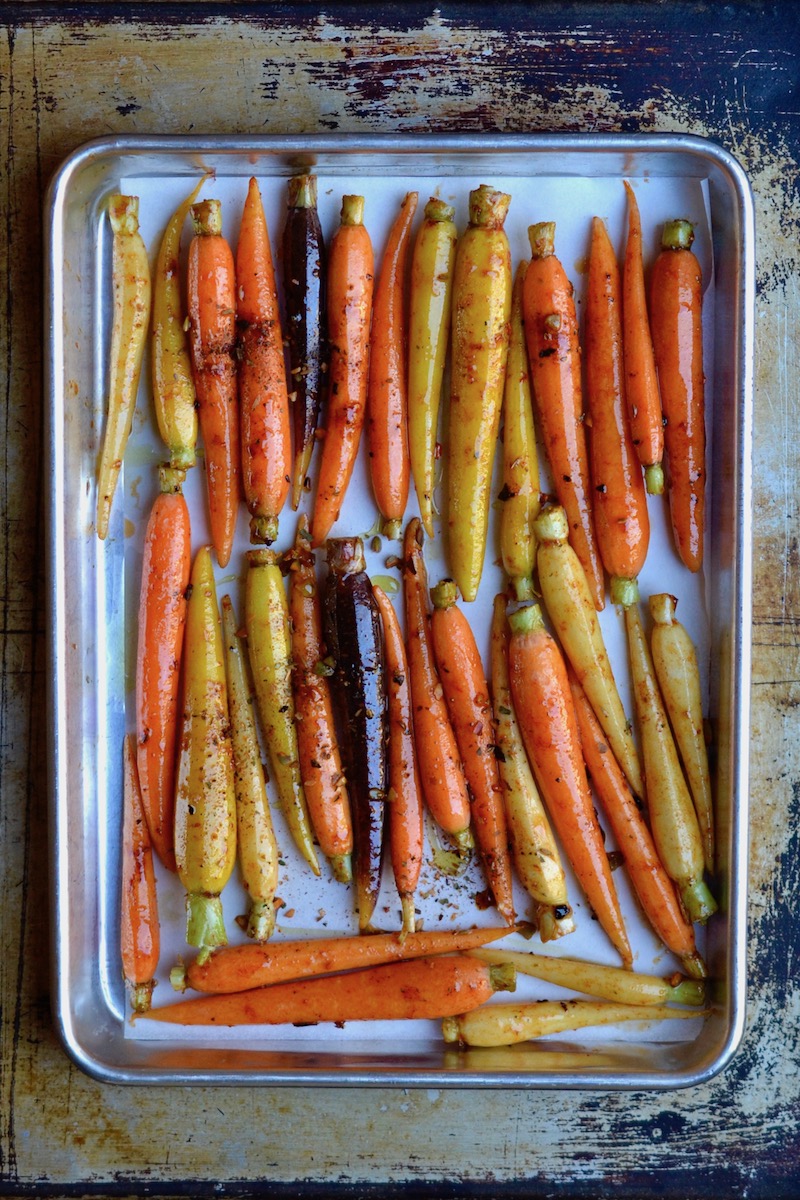
    2. Prep the carrots by peeling and slicing into sticks, slicing in half, or leaving whole, depending upon how large they are and how you want to present them on the plate. In this photograph I used very small heirloom carrots, however, if they are quite large, I often cut them into sticks (much like french fries), or if they are medium sized, I might slice them in half lengthwise because this can present very well on a plate.
    3. Arrange all of the carrots onto a parchment or foil lined baking tray, close together. Drizzle the carrots with the honey and the olive oil, sprinkle with sea salt, paprika (or chipotle) and the San Miguel nut & spice mix. Using your hands, toss them gently to coat the carrots well. Spread them out on the tray. If the carrots are very crowded, you might want to consider using two trays. If you place them too close together, the carrots will steam a bit and will not brown and caramelize as well... that is the best part!
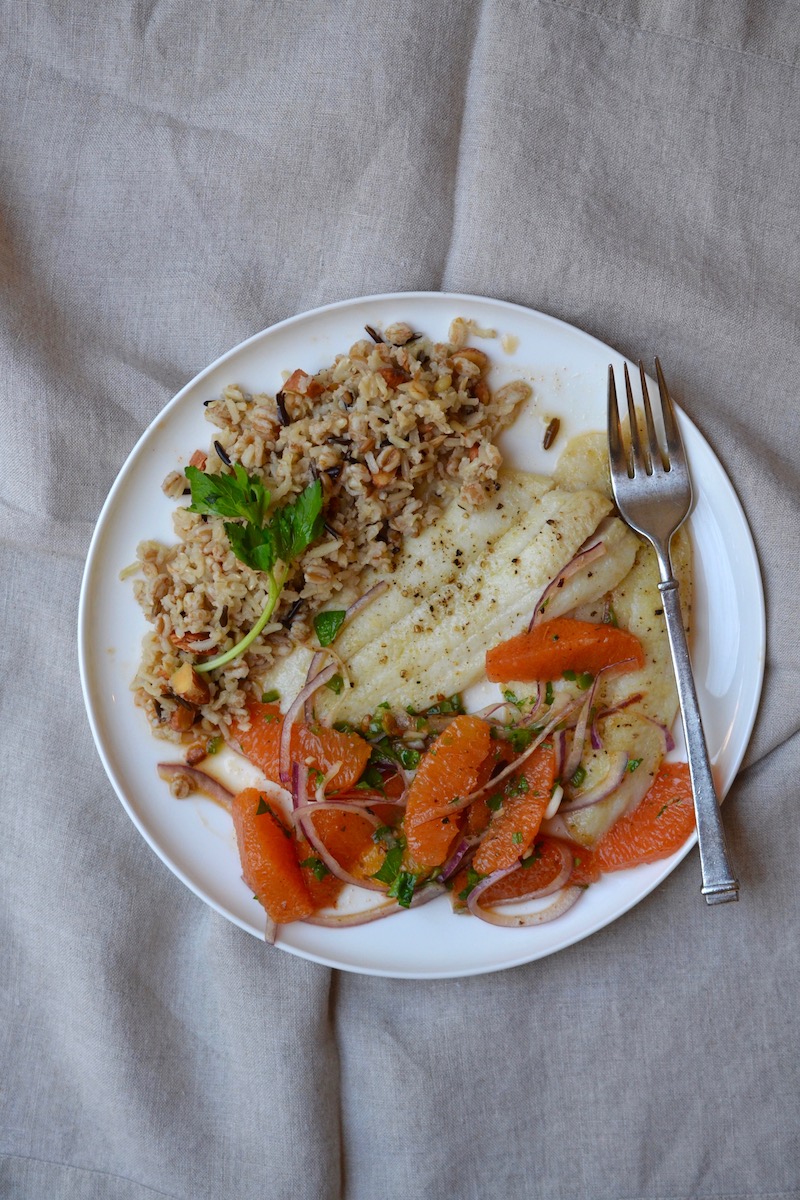
    4. Place the baking tray into the hot oven and roast for about 40 minutes. You might want to check on them after 25 minutes and toss them around a bit to brown them evenly. Remove from oven and enjoy hot or let them come to room temperature and add them into salads, rice bowls, as a side for proteins or use decoratively over a lovely piece of salmon or baked fish. You can sprinkle them with fresh chopped herbs just before serving.

    Notes

    Once you've made these a few times and get a feel for the ingredient ratios, you can just drizzle the oil and honey and add the seasonings without even measuring.

    Honey Roasted Carrots - Glory Kitchen
    Honey Roasted Carrots - Glory Kitchen
    Honey Roasted Carrots - Glory Kitchen
    Honey Roasted Carrots - Glory Kitchen
  • Baked Fish with Cara Cara Orange Salsa - Glory Kitchen

    BAKED FISH WITH CARA CARA ORANGE SALSA

    It’s time to celebrate citrus before it moves out of season.  This Baked Fish with Cara Cara Orange Salsa Recipe is a keeper for sure – you feel so good after having a meal which is light and tasty but bursting with flavor.  I chose Cara Cara Oranges for this salsa because the color has a beautiful deep orange hue.  Of course this salsa can be made with any variety of sweet and tangy orange.  As a matter of fact, it would be equally delicious using grapefruit.

    Winter is definitely the season to make this dish because of the abundance of citrus but don’t let this hold you back – try it again this spring using local strawberries or in the summer with cantaloupe or honeydew melon.  Just thinking about the many seasonal fruit possibilities makes me anxious to make it all over again.

    Learning to supreme cut a piece of citrus can be somewhat tricky but once you have the basics down, it is not difficult at all, it just takes a bit of patience.  You can actually google “how to supreme an orange” and get a quick tutorial on youtube.

    My biggest advice is to use a very sharp knife and work carefully.  I’ve also supremed a citrus fruit using a small serrated knife (one you would use for slicing tomatoes) and this too works, maybe even better than a large chef’s knife because it is small, easy to manipulate, and cuts through the membranes easily.

    Once you’re salsa is made, the fish only takes a few minutes and you have a light and tasty meal with a stunner presentation.  In this recipe I used our Mexican blend, San Miguel, however, others that would add great flavor as well are the Cairo, Mumbai, Provence or Penang blends.

    Margie Bruner - Glory Kitchen

    Margie Bruner
    owner of Glory Kitchen

    instagram
    facebook

    Baked Fish with Cara Cara Orange Salsa

    Yield: about 4 servings

    Ingredients

    • 2 teaspoons San Miguel nut & spice mix
    • 6-8 cara cara oranges, or other type of orange
    • 1/4 red onion, sliced very thin
    • 1/4 jalapeño, fresh, diced
    • 2 cloves garlic, minced
    • handful parsley, chopped
    • 2 tablespoons olive oil
    • 1 tablespoon apple cider vinegar
    • 1/4 teaspoon salt
    • 1 1/2 - 2 lbs dover sole filets or other white fish

    Instructions

    1. To make the orange salsa, take the oranges and "supreme" cut them, sectioning out each orange membrane. Work over a large bowl to capture the juices as you work. After cutting all around each orange, squeeze the membranes into the bowl to release as much juice as possible. If you've never supreme cut a citrus fruit it is a great cutting technique to learn because it leaves the most tender parts of the orange (or grapefruit). Here's a good quick video on utube: supreming an orange. Slice all the oranges in the same way.
    2. To the bowl of cut oranges, add the onion, garlic, jalapeño, parsley, olive oil, apple cider, salt, and San Miguel nut & spice mix. Set this bowl of orange salsa aside at room temperature to macerate and infuse all the flavors together.
    3. Place the fish in a baking dish and rub the flesh on both sides with a bit of olive oil. Add salt and pepper then place under the broiler for about 8 minutes until it flakes. Do not overcook.
    4. Remove from the oven and serve with cara cara orange salsa either on the side or on the top.

    Notes

    This orange salsa would also be wonderful using our Glory Kitchen Asian blend-Penang, the Middle Eastern Blend-Cairo, our French blend-Provence, or our Indian blend-Mumbai.

    Baked Fish with Cara Cara Orange Salsa - Glory Kitchen
    Baked Fish with Cara Cara Orange Salsa - Glory Kitchen
    Baked Fish with Cara Cara Orange Salsa - Glory Kitchen
    Baked Fish with Cara Cara Orange Salsa - Glory Kitchen
    Baked Fish with Cara Cara Orange Salsa - Glory Kitchen
  • Radicchio Fish Cups - Glory Kitchen

    RADICCHIO FISH CUPS

    These Radicchio Fish Cups are a great way to enjoy fish tacos without the tortilla – a lighter version but just as satisfying and quite filling as well.  They are bright, colorful, and make a beautiful presentation when they are arranged on a platter and served tableside with a bowl of delicious peanut dressing and some crunchy Glory Kitchen Penang nut & spice mix to adorn the top of the little lettuce tacos.

    Radicchio is a bitter lettuce, sometimes called Italian chicory.  It is often confused with red cabbage, however, is actually quite different and much more delicate than cabbage.  The leaves separate and are more similar to Boston, butter, or iceberg lettuce.  You can gently separate the whole leaves individually and they are shaped in a cup-like manner which will hold a small amount of filling – in this case, delicate fish, rice and small cut veggies.

    Most of the work in making these colorful Radicchio Fish Cups is in the preparation of the rice and veggies.  A great way to shortcut the preparation is to bake the fish, make the rice, mix the dressing and prep all of the vegetables a day ahead.  Store all of the veggies individually in the refrigerator and when it’s time to eat, you’ll be ready to gather all of your ingredients and assemble.  Doing all of the pre-work ahead makes these Radicchio Fish Cups a snap and you’ll be quite surprised at how light and tasty they are.

    Margie Bruner - Glory Kitchen

    Margie Bruner
    owner of Glory Kitchen

    instagram
    facebook

    Radicchio Fish Cups

    Yield: about 4 servings

    Ingredients

      For the dressing:
    • 3 tablespoons sesame oil
    • 1 tablespoon soy sauce
    • 1.5 tablespoon creamy peanut butter
    • 1 tablespoon soy sauce
    • 2 teaspoons mirin
    • 2 tablespoons rice wine vinegar
    • For the fish cups:
    • Penang nut & spice mix
    • 1 - 1.5 lbs white fish, wild alaskan cod
    • 2 heads fresh radicchio
    • cooked jasmine rice (2 cups water, 1 cup rice)
    • handful of carrots, shredded
    • 1 fresh jalapeño, thinly sliced
    • 4-6 radishes, sliced into thin wedges
    • 3 tablespoons rice wine vinegar (for radish pickling)
    • pinch of salt & pinch of sugar (for radish pickling)
    • handful of snow peas
    • 1 scallion, chopped
    • handful of peanuts, barely chopped
    • peanut butter dressing (see recipe above)

    Instructions

    1. Take one cup of jasmine rice and add it into a saucepan with lid. Add 2 cups of water. Bring to a boil, then reduce to a low simmer for 10-15 minutes. Remove from the heat and allow the rice to steam in the saucepan with the lid on until it becomes tender. Flake with a fork and allow to come to room temperature by removing the lid.
    2. Whisk together all ingredients for the dressing. Taste first to make certain the ratios taste correct - add a bit more lime juice if additional acid is needed. Place the dressing into a small serving bowl with a small serving spoon for drizzling on the lettuce cups at the table. Set aside.
    3. On a baking tray or small baking dish, place the white fish and drizzle with a bit of olive oil or sesame oil, sprinkle it generously with Penang nut & spice mix and place into oven at 425° for 15-20 minutes or until the fish flakes. Although I used Alaskan cod, any type of white fish can be used: haddock, halibut, tilapia, sole, etc. If you overcook, it gets very tough - you want it to be light and flaky, so don't leave it in the oven too long. Remove from the oven and allow to cool.
    4. While the fish is baking in the oven, quick-pickle the radishes. Using about 4-6 radishes, slice them into small wedges and add them into a bowl with 3 tablespoons white wine vinegar or rice wine vinegar, a good pinch of salt and a good pinch of sugar. Let them marinate in this liquid while you are preparing the rest of the ingredients and this will quick-pickle the radishes.
    5. Slice the snow peas into long, thin slices, shred the carrots (I bought pre-shredded carrots), chop the scallions, rough chop the peanuts, and thinly slice about 1/2 a jalapeño. Prep all of these ingredients and place into their own small bowls to have ready when assembling the lettuce cups.
    6. Take the heads of radicchio and slice off the core end with a knife. Using your hands, gently remove each leaf, trying to keep them whole & intact so they create small cups to hold the fish and fillings.
    7. To assemble, take a radicchio cup & add in a scoop of jasmine rice, add a bit of baked fish, top with carrots, radishes, snow peas, scallions, peanuts, a slice of jalapeño and a generous sprinkle of Penang nut & spice mix. Arrange the little cups on a platter and serve with the peanut dressing for each person to drizzle over their lettuce cups.

    Radicchio Fish Cups - Glory Kitchen
    Baked Fish Radicchio Cups - Glory Kitchen
    Radicchio Fish Cups - Glory Kitchen
    Radicchio Fish Cups - Glory Kitchen
    Radicchio Fish Cups - Glory Kitchen
    Radicchio Fish Cups - Glory Kitchen
    Radicchio Fish Cups - Glory Kitchen
    Radicchio Fish Cups - Glory Kitchen
  • Peanut Butter and Chocolate Drizzle Cookie Recipe - Glory

    PEANUT BUTTER AND CHOCOLATE DRIZZLE COOKIES

    Chocolate and Peanut Butter are a match made in heaven.  These Peanut Butter and Chocolate Drizzle Cookies topped with a little sprinkle of our Glory Kitchen Cairo nut & spice mix are delicious tasting cookies with a surprise note of unique flavors. The finishing touch of crunchy sesame seeds, pepper, fennel, and almonds from the nut blend takes the ordinary cookie to an elevated and sophisticated level.  This is a peanut butter cookie recipe to make when you want something with surprise flavors.

    Although I’m not the biggest fan of peanut butter alone, I think my favorite type of cookie might be a peanut butter one paired with a touch of chocolate.  They’re not overly sweet and they have a bit of a chewy, soft center from the nut butter which makes them irresistible.  The drizzle on top adds a bit of flare and of course that chocolatey touch makes the cookie a bit more decadent.  I used dark chocolate, however, they would be equally delicious if you like a sweeter version such as semi-sweet or even milk chocolate.

    And one more thing, I loved these so much I made them a second time and doubled the recipe batch so I could freeze the dough and have some slice-and-bake cookies at anytime our sweet tooth acted up.

    Just take the dough and place it into parchment paper.  Then roll it into a log (just like the shape of slice-and-bake cookies from the grocery store), wrap tightly in plastic wrap and freeze.  When you’re ready to bake, defrost just a bit and slice your cookies for a quick and easy fresh baked cookie.

    Margie Bruner
    owner of Glory Kitchen

    instagram
    facebook

    Peanut Butter and Chocolate Drizzle Cookies

    Ingredients

    • Cairo nut & spice mix
    • 2 ½ cups 100% whole wheat flour
    • ½ teaspoon baking soda
    • ½ teaspoon baking powder
    • ½ teaspoon salt
    • ½ pound (2 sticks) butter, room temp.
    • 2 cups brown sugar, dark or light
    • 1 cup creamy peanut butter
    • 2 large eggs
    • 2 teaspoons vanilla extract
    • 3/4 cup dark chocolate bits or chips

    Instructions

    1. Heat oven to 350° and set the rack in the center of the oven. Sift together flour, salt, baking soda & powder and set aside.
    2. Beat the butter until it is creamy. Add the sugar and beat together until it is creamy. I used 1 cup organic sugar and 1 cup coconut palm sugar. Add the peanut butter and continue to beat to combine. Add in eggs, one at a time, followed by the vanilla. Turn the beater on low and add in the flour mixture which was set aside earlier.
    3. Using tray with a silpat liner (a washable liner used for easy removal in baking), or a parchment lined baking sheet, scoop out dough a bit smaller than the size of a golf ball - I like to use a very small ice cream scoop to achieve a consistent size for the entire batch. Place them about two inches apart on the baking sheet. After they are all scooped, using a fork, dip the fork into a glass of cold water and then using the back side, press the dough to make the tongs imprint. Then turn the fork and repeat the imprint so it makes a crisscross on the surface of each cookie.
    4. Bake at 350° until the cookies are ever-so-slightly browned, about 15-18 minutes. Each oven temperature is a bit different, so keep an eye out and make certain they do not over cook. Remove from the oven and allow to cool completely. After about 4 minutes out of the oven, I like to transfer them to a wire rack to crisp and cool completely... this allows air to completely circulate around the cookie.
    5. While the cookies are cooling, place the chocolate chips into a small glass mixing bowl and place into the microwave set for 30 seconds. Remove the chocolate and stir well with a wooden spoon. If they do not melt completely while stirring, place back into the microwave and heat for another 15-20 seconds. Repeat this until the chocolate is completely melted (you do not want to overheat the chocolate, just melt enough it so it becomes softened and can be drizzled) Taking a small spoonful and using a quick sweeping motion, drizzle the chocolate over the cookies (placed tightly side by side on the cooling rack or baking sheet) Criss Cross the motion and drizzle in the opposite direction as well. Now sprinkle the tops with a pinch ful of Cairo nut & spice mix. Allow the chocolate to harden and cool completely. Enjoy!

    Notes

    I used dark chocolate for the drizzle, however, if you prefer semi-sweet or even milk chocolate these would be delicious as well.

    This recipe is adapted from the NYTimes.

    Peanut Butter and Chocolate Drizzle Cookie Recipe - Glory
    Peanut Butter and Chocolate Drizzle Cookie Recipe - Glory
    Peanut Butter and Chocolate Drizzle Cookie Recipe - Glory
    Peanut Butter and Chocolate Drizzle Cookie Recipe - Glory
  • Mozzarella Potato Bites - Glory Kitchen

    MOZZARELLA POTATO BITES

    An Italian twist to an old favorite – potato skins.  This Mozzarella Potato Bites Recipe makes a delicious tasting appetizer and can be quite addicting for your guests.  They’re the perfect little finger food for watching the Oscar awards, basketball game gatherings, or any fun get-together with friends.  Using only a few, simple ingredients, these Mozzarella Potato Bites are easy to make for the inexperienced or novice cook or the I-don’t-like-to-get-into-the-kitchen cook.  And to make things even easier, take the shortcut and prep the potatoes the day before so they are ready to smash and throw into the oven when the guests arrive.

    The most difficult part of this Mozzarella Potato Bite Recipe is finding the perfect little potato.  Any type of small potato will work, but a fingerling or other type of very small potato (I found these at Trader Joe’s) work best.  I bought ready-made, good quality marinara sauce and a block of fresh mozzarella cheese which I sliced into small pieces to top the potato.  And finally, these tender little potato bites are topped with crunchy deliciousness from our Glory Kitchen Umbria nut & spice mix.  It adds the perfect flavor of garlic, onion and almond crunch.  Here’s a warning – make plenty because they’re always a big hit and are likely to disappear quickly.

    Margie Bruner
    owner of Glory Kitchen

    instagram
    facebook

    Mozzarella Potato Bites

    Yield: serves 4-6

    Ingredients

    • Umbria nut & spice mix
    • 1 bag very small potatoes
    • olive oil
    • sea salt
    • 1 small block mozzarella cheese
    • 1 small jar marinara sauce, pasta or pizza sauce will do
    • basil or parsley, fresh

    Instructions

    1. Bring a large pot of salted water to a boil. Add the little potatoes and allow them to boil until they become soft and a fork can pierce through easily. Remove from the heat, drain, and allow the potatoes to cool.
    2. Place the potatoes back into the same pot (since it is already used, you won't have to get an extra bowl dirty), drizzle the softened & cooled potatoes with olive oil and sprinkle with sea salt. Using your hands, toss the potatoes so they are lightly covered with olive oil.
    3. Preheat the oven to 400°. Using a parchment or foil lined baking sheet, arrange the lightly oiled potatoes onto the sheet and with the back of a coffee cup or other small flat surface (a small plate, small pot, etc.), smash each potato so it is cracked and somewhat flat (see photo). Place the sheet pan of potatoes into the hot oven and bake them until the edges are brown and crispy.
    4. Remove from the oven. Layer each crispy potato with a spoonful of marinara sauce then top with a small slice of mozzarella. Add a good pinch of Umbria nut & spice mix and a sprinkle of sea salt to the top. Place back into the oven, this time on broil, and heat just until the cheese on top melts. Remove from the oven, sprinkle with fresh herbs and serve immediately. These potato bites are so tasty they disappear quickly, so make plenty.

    Notes

    Although I used chopped, fresh parsley to top the potato bites (because that is what I had on hand), I think fresh slivers of basil would be even better!

    Mozzarella Potato Bites - Glory Kitchen
    Mozzarella Potato Bites - Glory Kitchen
    Mozzarella Potato Bites - Glory Kitchen
    Mozzarella Potato Bites - Glory Kitchen
    Mozzarella Potato Bites - Glory Kitchen
    Mozzarella Potato Bites - Glory Kitchen
    Mozzarella Potato Bites - Glory Kitchen
  • Valentine Salad Recipe - Glory Kitchen

    VALENTINE SALAD

    Enough with chocolates and candy – here’s a beautiful pink and red salad you can serve to your family for a Valentine holiday meal.  This Valentine Salad Recipe from Glory Kitchen mixes all types of pretty veggies and tosses them together with a variety of white tender beans – cannellini and garbanzos.

    Although I do love the sweet treats on Valentine’s Day, it’s not often you get the gift of a pretty pink and red bean salad.

    The ingredients are quite basic and by using canned cannellini and garbanzo beans, this salad can be thrown together in no time at all.  Although I did roast the beets myself for this meal, most grocery stores carry pre-roasted beets in the produce department (they are typically stocked near the fresh mushrooms, fresh peas, and other small packaged specialty vegetables).

    Not only can you bypass the roasting process, they are already peeled and ready to slice – how easy is that?   I often buy them pre-cooked and they are quite tasty –  this also make beets readily accessible when you don’t have an extra hour to go through the roasting process.  Not to mention, they are pretty messy to peel and stain both hands and cutting boards.

    Although I used parmesan cheese in this particular salad, I think a salty feta would be a wonderful flavor addition as well.  And finally, our Glory Kitchen Umbria nut & spice mix gives this salad some added Italian flavored crunch with chopped almonds and the herbal flavors of rosemary, basil and thyme.  Happy Valentine’s Day!

    Margie Bruner - Glory Kitchen

    Margie Bruner
    owner of Glory Kitchen

    instagram
    facebook

    Valentine Salad

    makes 3-4 servings

    Ingredients

      For the dressing:
    • 1 teaspoon Umbria nut & spice mix
    • 3 tablespoons olive oil
    • 1 tablespoon white wine vinegar
    • 1 teaspoon dijon mustard (I like whole grain but either works)
    • good pinch of salt
    • For the salad:
    • 1 can (15.5 oz) cannellini beans (also called white kidney beans)
    • 1 can (15.5 oz) garbanzo beans (also called chickpeas)
    • 2 roasted beets
    • 2 radishes, sliced thin
    • 1 head radicchio lettuce, shredded
    • 1 red pepper
    • parmesan cheese or feta cheese
    • fresh parsley, for garnish
    • Umbria nut & spice mix, for garnish

    Instructions

    1. Whisk together the dressing ingredients and set aside. To roast the beets, place them in aluminum foil and drizzle them with olive oil. Using your hands, rub the oil all around the flesh. Sprinkle them with sea salt, wrap the foil tightly around the beets and place in a 400° oven until they are fork tender. This may take 30-40 minutes. Remove from the oven and allow to cool. As a side note, I have found pre-roasted beets before at Trader Joe's. This certainly makes a wonderful short cut.
    2. Once the beets are cooled, peel them carefully using a small paring knife, cut them into cubes and toss them into the dressing. Allow these to marinate for a while you begin chopping the veggies.
    3. Rinse both cans of cannellini beans and garbanzos and rinse them well. Slice the radishes very thin. I like to use a mandolin to get even slices, however, if you don't have one, just use your knife skills and slice them evenly 🙂
    4. Shred the radicchio into very thin slices. Thinly slice the red pepper.
    5. Using a large bowl, toss together the beans, radicchio lettuce, radishes and red pepper. Gently toss in the beets and do not over mix because the beets will bleed quickly onto the rest of the salad. Some of the juices mixing together can be pretty because the beans will turn pink as the beet juices bleed over the salad, however, too much mixing might overdo it. Taste the salad to see if the beet dressing is enough flavoring for the salad. Add more olive oil, wine vinegar and salt if it needs more seasoning. To top off the salad, add thick slices of fresh parmesan cheese or for a salty twist, use white feta cheese crumbles. Garnish the salad with a generous sprinkle of Umbria nut & spice mix and fresh parsley. Enjoy!

    Valentine Salad Recipe - Glory Kitchen
    Valentine Salad Recipe - Glory Kitchen
    Valentine Salad Recipe - Glory Kitchen
    Valentine Salad Recipe - Glory Kitchen
    Valentine Salad Recipe - Glory Kitchen
    Valentine Salad Recipe - Glory Kitchen
    Valentine Salad Recipe - Glory Kitchen
  • Citrus and Arugula Salad - Glory Kitchen

    CITRUS AND ARUGULA SALAD

    There is hardly anything prettier than the bright orange hues of winter oranges – this citrus salad recipe highlights their beauty.  I love to mix them up: tangerines, blood oranges, Cara-Cara oranges, grapefruits, Valencia oranges, and the list goes on.  They all have that signature bright, tangy flavor but each one has its own sweetness level and color profile.

    This Citrus and Arugula Salad is the perfect way to highlight the different varieties and create a bright, sunny platter during a cold and grey season.  Combined with tender arugula greens, sharp blue cheese, and a french vinaigrette infused with our Provence nut & spice mix, this salad can be a showstopper.

    Every winter I pull out my juicer and routinely make fresh squeezed citrus juice, a combination of squeezed grapefruits and various oranges.  It is the most energizing way to begin the morning.  Even better than juicing, however, is making this bright and cheery Citrus and Arugula Salad.  The presentation of these warm, sunny colors gets your mouth watering.

    I’ve kept the ingredients very simple so the oranges and grapefruit can take center stage.  Marjoram, savory, basil, and thyme are the perfect herbal addition to a typical French vinaigrette.  This dressing recipe is my go-to homemade dressing.  If you always have these basic staples in your pantry you can throw together the perfect salad dressing in just a few minutes.

    Commit to memory these dressing ingredients and their approximate ratios and you’ll always have perfect dressing for salads, proteins, fruits, and so much more.  I hope you’ll brighten up your winter with this bright and tasty salad.

    Margie Bruner
    owner of Glory Kitchen

    instagram
    facebook

    Citrus and Arugula Salad

    Yield: serves 4

    Ingredients

      For the dressing:
    • 4 tablespoons olive oil
    • 2 tablespoons white wine vinegar
    • 2 teaspoons Provence nut & spice mix
    • 1 teaspoon dijon mustard
    • 1 teaspoon honey
    • good pinch of salt
    • pinch of pepper
    • For the citrus salad:
    • 2 grapefruits
    • 4-6 oranges, a variety
    • 2 cups arugula, fresh
    • 1 very small block blue cheese
    • 1/4 cup pine nuts
    • olive oil

    Instructions

    1. Whisk together the ingredients for the dressing and set aside to allow the dry herbs in the Provence nut & spice mix to soften and reconstitute.
    2. Using a very sharp knife (I like to use a large chef's knife), cut each citrus on both ends to get a flat surface to place the fruit down and steady it. Now cut around the skin of each citrus fruit and carefully remove the skin around the entire fruit. Try to leave as much fruit intact but also remove all of the white pith around the flesh. (see photo for instruction). Now place the orange on its side and make even slices, about 1/4 - 1/2" thick. Place all of the sliced fruit in a bowl and set aside. I like to place each variety into its own small glass bowl to aid in the arranging of the platter. I also like to buy a variety of oranges such as Valencia, Cara-Cara, Blood, tangerine, etc. Each one has its own unique color and flavor and this adds to the presentation of the salad.
    3. Arrange the oranges and grapefruit on a large, pretty platter overlapping a bit and alternating colors. Using a large mixing bowl, take the arugula and drizzle it with a bit of olive oil and sprinkle it with a pinch of salt. Toss it gently with your hands. Arrange the dressed arugula around the citrus. Sprinkle it all with crumbles of blue cheese and toasted pine nuts.
    4. Drizzle the entire salad with the french dressing and serve.

    Citrus and Arugula Salad - Glory Kitchen
    Citrus and Arugula Salad - Glory Kitchen
    Citrus and Arugula Salad - Glory Kitchen
    Citrus and Arugula Salad - Glory Kitchen
  • Vegetable, Chicken and Orzo Soup - Glory Kitchen

    VEGETABLE, CHICKEN AND ORZO SOUP

    Most everyone loves a brothy, soothing, chicken soup filled with tender vegetables.  This Vegetable, Chicken and Orzo Soup certainly fits the bill.  It is filled with carrots, mushrooms, english peas and tender shreds of chicken.  Instead of the typical noodle, I’ve added orzo, a tiny little pasta shaped like a large grain of rice.  I used orzo just to add a different twist to a traditional soup, however, an egg noodle or even brown rice would be equally delicious in this brothy soup.

    My favorite part of this soup is the surprise element of shiitake mushrooms – the Asian mushroom that has a lovely shape and even better deep, mushroom flavor.  The name “shiitake” hails from Japan, where they cultivated the popular mushroom by cutting logs from “shii trees” and placing them close to existing trees which sprouted shiitake spores.  If you are not able to find shiitake mushrooms at your local market, you can always substitute with a button or other type of mushroom.

    I also like to add the English peas at the very end of the cooking time so they stay bright and plump.  If you boil a pea too long, it becomes dark and shriveled – not pretty!

    And finally, just before serving, give it a finishing crunch by adding an additional sprinkle of Glory Kitchen’s Cairo nut & spice mix.  It adds the perfect peppery flavor and a nice texture on top.  Everyone needs to have a delicious chicken soup in their recipe archives and this one certainly fits the bill.  Serve this soup alongside a grilled cheese sandwich and you’ll have the perfect tummy warming meal.  Enjoy!

    Margie Bruner
    owner of Glory Kitchen

    instagram
    facebook

    Vegetable, Chicken and Orzo Soup

    Ingredients

    • 1 teaspoon Cairo nut & spice mix
    • 2 chicken breasts, skinless
    • 3 carrots, peeled & sliced
    • 3 celery stalks, sliced
    • 1/2 - 1 yellow onion, chopped
    • 1 cup english peas, fresh
    • 1 4oz box shiitake mushrooms, sliced
    • olive oil
    • 32 ounces (1 qt) chicken stock
    • 1/8 teaspoon nutmeg
    • salt & pepper to taste
    • 1 1/2 cups orzo, uncooked
    • 3 cups water

    Instructions

    1. Add a drizzle of olive oil to the bottom of a large, heavy stock pot and heat through. Add the chopped onion and cook until translucent. Add the carrots and celery and cook a few minutes until they soften just a bit. Add all the chicken stock and water to the pot and bring it to a boil. Once the stock is simmering add in the shiitake mushrooms, 1 teaspoon Cairo nut & spice mix, nutmeg, a good pinch of salt and pepper. To the liquid, gently drop in the two chicken breasts, cover the pot, and allow to simmer for 6 minutes. Turn off the heat and leave the chicken resting in the pot of hot stock for 30 minutes. Make certain the lid remains on so the heat stays trapped in the pot. After 30 minutes, remove the breasts from the stock and allow to cool completely. Once cooled, shred the chicken.
    2. Bring the stock back to a simmer, add in the shredded chicken, the orzo and the peas. Cook just until the orzo pasta is al dente to taste and no longer or they will get mushy. Taste for seasoning and add more salt, pepper or nutmeg as needed.
    3. Serve warm topped with a sprinkle of Cairo nut & spice mix and fresh herbs.

    Vegetable, Chicken and Orzo Soup - Glory Kitchen
    Vegetable, Chicken and Orzo Soup - Glory Kitchen
    Vegetable, Chicken and Orzo Soup - Glory Kitchen
    Vegetable, Chicken and Orzo Soup - Glory Kitchen
    Vegetable, Chicken and Orzo Soup - Glory Kitchen
  • Chicken Slaw with Pomegranate - Glory Kitchen

    CHICKEN SLAW WITH POMEGRANATE

    This 3-ingredient Chicken Slaw with Pomegranate is a salad that gives you crunchy, healthy and filling satisfaction.  If you like crisp and cool coleslaw, you’ll love this quick and easy salad that includes chicken as your protein and a sweet, tangy surprise with pomegranate seeds.  The Glory Kitchen Mexican flavors of San Miguel nut & spice mix add a little bit of smoky chili spice as well as additional crunch from the chopped pumpkin seeds in the  nut blend.  I love the combination of the crisp cabbage with sweet and juicy pomegranate seeds.

    If you really want to throw this tasty meal together in no time at all, you can buy a pre-cooked rotisserie chicken, a pre-shredded bag of cabbage, and a pomegranate which has already been seeded – talk about a quick meal!  The dressing is made up of ingredients most likely sitting in your refrigerator right now.  I hope you’ll give this delicious and crunchy salad a try – it was a great meal made in a matter of minutes.

    I think this salad would be equally delicious using the Provence,  Mumbai, Cairo, or Penang nut mixes.  A little extra flavor and crunch is always a good thing.

    Margie Bruner - Glory Kitchen

    Margie Bruner
    owner of Glory Kitchen

    instagram
    facebook

    Chicken Slaw with Pomegranate

    Ingredients

      For the dressing:
    • 1 teaspoon San Miguel nut & spice mix
    • 2 tablespoons olive oil
    • 1 tablespoon apple cider vinegar
    • 1 tablespoon greek yogurt, plain
    • 1 teaspoon honey
    • good pinch of salt
    • For the slaw salad:
    • 1 tablespoon San Miguel nut & spice mix
    • 6 cups cabbage, shredded
    • 2 cups cooked chicken, chopped
    • 1 pomegranate, seeded

    Instructions

    1. Whisk together all the ingredients for the dressing and set aside.
    2. In a very large bowl, toss together the cabbage slaw, the cooked chicken and the pomegranate. Add the dressing and toss well to incorporate. Taste and season to your preference. Serve soon after it is incorporated to keep the slaw crunchy.

    Notes

    I used shredded turkey since I had some in my freezer leftover from the holidays, however, I specified chicken in this recipe because it's so easy to purchase a store-bought rotisserie chicken, shred it into small pieces and throw it into your salad. Obviously, either turkey or chicken works beautifully.

    Chicken Slaw with Pomegranate - Glory Kitchen
    Chicken Slaw with Pomegranate - Glory Kitchen
    Chicken Slaw with Pomegranate - Glory Kitchen
Updating…
  • No products in the cart.

JOIN US !
JOIN
close-link