• INDIAN SPICED CHICKEN SKEWERS

    Asha Shivakumar is a creative cook from San Francisco who takes the spices and flavors from her native country and modernizes them in amazing and flavorful ways.  Once you get to know her warmth and see her creations, you’ll understand why she has drawn so many to her social media sites and has won over many culinary hearts.

    Because I love the flavors of India but have always been a bit intimidated about creating them on my own, I’m always eager to learn from this sweet friend.  -Margie    (food and photos created by Asha)

    Asha Shivakumar,
    wife, mother, food blogger
    editor of @feedfeed

    @foodfashionparty
    www.foodfashionparty.com

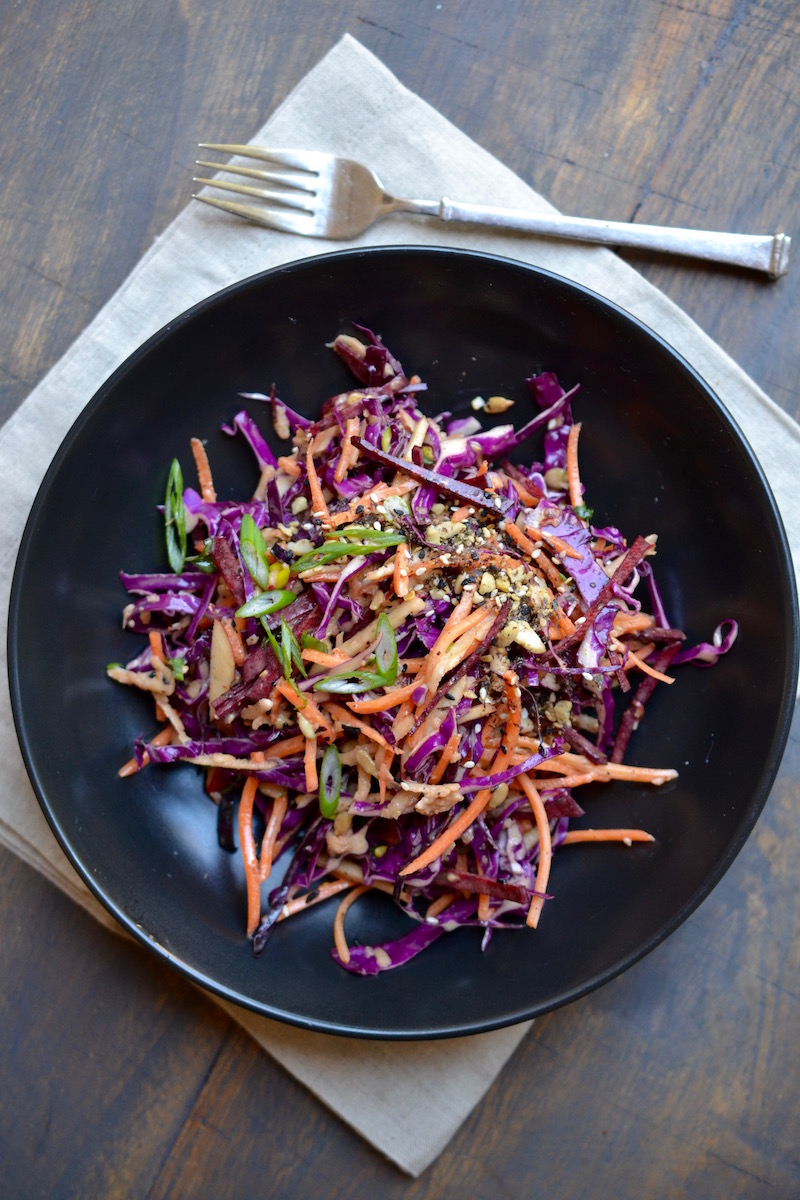
    Chicken is very versatile and I make it often.  Chicken Tikka and tandoori chicken are quite popular and I love to make versions of that all the time. With spice and nut mixes like the Bombay mix (Mumbai), the crunch and flavor elevates a dish. 

    It is not only easy, but using yogurt in your marinades tenderizes and coats the chicken so well.  The best thing about recipes like this is, the marinade takes minutes and all you do is add the chicken, let it sit and do it’s magic. They make the most juicy chicken bites and an easy flavorful meal. 

    You will be surprised at how with very few ingredients you are able to create the best Indian style chicken which is in fact perfect for entertaining too.

    Auto Draft

    Ingredients

      for the Turmeric & Cumin Yogurt Chicken:
    • 1 teaspoon Cairo nut & spice mix
    • 2 chicken breasts, large & skinless, cut into 1-2 inch cubes
    • ½ cup yogurt, full fat
    • 1 teaspoon cumin seeds, toasted, ground to powder
    • 2 teaspoons fresh turmeric, fresh, grated fine (you can substitute ? teaspoon turmeric powder)
    • ½ teaspoon white pepper
    • 1 teaspoon salt
    • 2 tablespoon oil
    • For the Cilantro Habanero Chicken:
    • 1 teaspoon Mumbai nut & spice mix
    • 2 chicken breasts, skinless, cut into 1-2 inch cubes
    • 1 cup cilantro, fresh (or 1 bunch)
    • 3 habanero peppers
    • 5-6 garlic cloves, whole
    • ginger, fresh, 2 inches of root
    • 1 teaspoon cumin seeds
    • 2 teaspoons lemon juice, fresh
    • 1 teaspoon salt, or to taste
    • 2 tablespoons oil

    Instructions

      Turmeric & Cumin Yogurt Chicken:
    1. Add the cut chicken cubes into a bowl with a tight fitting lid, or into a ziploc bag. Add all the ingredients for the marinade, seal tightly, and massage the chicken well. Let it sit overnight in the refrigerator.
    2. Skewer the chicken with alternating veggies or lay them on a baking tray and bake in a 450° oven for 25-30 minutes. You can grill this as well.
    3. Serve the Turmeric & Cumin Chicken with some rice or naan, yogurt raita and lemon wedges. Just before serving, sprinkle with additional Cairo nut & spice mix.
    4. Cilantro Habanero Chicken:
    5. Place all the ingredients, except chicken, into a food processor and grind everything into a coarse paste to make the marinade.
    6. Combine the marinade and chicken together into a bowl or a ziploc bag. Massage the chicken with the marinade and let it sit refrigerated for at least 6 hours to overnight.
    7. Skewer the chicken with alternating veggies or lay them on a baking tray and bake in a 450° oven for 25-30 minutes. Just before serving, sprinkle with additional Mumbai nut & spice mix
    8. Serve the Cilantro Habanero Chicken with some rice or naan, and lemon wedges.
    9. Both chicken dishes can be served with some green chutney which we make using the cilantro chicken marinade ingredients (fresh from another batch, not the one used to marinate the chicken) and mix together with some yogurt.

    Notes

    These Indian spiced chicken skewers, made two ways, are made using both the Glory Kitchen CAIRO nut blend and the MUMBAI nut blend. Enjoy!

    Indian Spiced Chicken Skewers - Glory Kitchen
    Indian Spiced Chicken Skewers - Glory Kitchen
    Indian Spiced Chicken Skewers - Glory Kitchen
  • RUBY ASIAN SLAW

    I absolutely love the deep, rich colors of this slaw. The purple cabbage, ruby red beets, deep orange carrots and bright green scallions make this salad quite a show stopper.  There’s a surprise ingredient too that makes it sweet and juicy – a shredded apple.

    It is perfect for a meal at home but I also like to serve a huge bowl of this slaw when entertaining a crowd.  Because of its vibrancy and bright colorations, a great big bowl of this salad looks great on a table setting.

    Another reason it is perfect for entertaining is, unlike other salads, the firm cabbage, beets and carrots remain crisp and crunchy, even when they’ve been sitting in dressing for a while.

    When mixed with the tangy dressing, the combination of flavors are amazing.  Crunchy raw veggies dressed in an Asian inspired vinaigrette and tossed with sunflower seeds and the flavors of Penang nut & spice mix, make it a salad so tasty you want to return for seconds and thirds.

    If I am having a salad as a meal (which I typically do at lunchtime), I like to add a protein to make it more of a complete meal.  Topping this slaw with grilled salmon, shrimp or any other type of fish is a great way to make it more filling and satisfying.  Here I’ve added smoked sardines, which may not be on everyone’s favorite list, but the salty smokiness added a wonderful flavor.

    And a hint to make this salad even easier… when prepping the veggies, I like to chop them the day before and store them in individual zip lock baggies.  I also prep the dressing and store it in a small glass jar in the refrigerator.  When it is time for serving you just toss all the slaw ingredients together and serve in a very large bowl.  Enjoy!

    Margie Bruner
    owner of Glory Kitchen

    instagram
    facebook

    Ruby Asian Slaw

    Yield: 4 or more

    Ingredients

      For the dressing:
    • 1 tablespoon Penang nut & spice mix
    • 2 tablespoons sesame oil
    • 1 tablespoon olive oil
    • 3 tablespoons rice wine vinegar
    • 1 tablespoon soy sauce
    • 1 tablespoon honey
    • 2 tablespoons mayonnaise
    • 1 teaspoon salt
    • For the slaw:
    • 3-4 cups red cabbage, shredded
    • 2-3 cups beets, raw, shredded
    • 2-3 cups carrots, shredded
    • 1 cup scallions, sliced thin
    • 1-2 cups red apple, shredded
    • ½ lime, fresh
    • ½ cup sunflower seeds
    • Penang nut & spice mix to top it off before serving

    Instructions

    1. Whisk together all the ingredients for the Asian dressing and set aside.
    2. Begin by shredding or slicing very thinly the red cabbage, beets & carrots. Do not shred the apple until the very end because it will turn brown. (When you are ready to serve, shred the apple and then squeeze the lime over it and toss. This helps to keep the apple from browning.) I bought pre-shredded carrots, which was a big help but sliced my cabbage & beets. For the beets, if you julienne them yourself, peel them then slice into thin rounds, then stack the rounds and slice into thin matchsticks. If you do not want to julienne them yourself you can place them into a food processor with the grating attachment. I personally don't like the way my food processor shreds the beets so I prefer to hand julienne them. If you have a spiralizer this would work as well. Really it is up to you - the flavors are wonderful either way. I like to prep all of the veggies (except the apples) and place them all into ziplock baggies the day before and then toss all together when ready to eat.
    3. When ready to serve, using a very large mixing bowl, toss together the cabbage, beets, carrots, scallions, shredded apple & sunflower seeds. Then add enough dressing to your liking. I always like to start with just a bit, taste and then adjust and add additional as needed. When dressing a salad or slaw it is important to remember you can always add more, but you can't take away if you overdo it.

    Ruby Asian Slaw - Glory Kitchen
    Ruby Asian Slaw - Glory Kitchen
    Ruby Asian Slaw - Glory Kitchen
    Ruby Asian Slaw - Glory Kitchen
    Ruby Asian Slaw - Glory Kitchen
    Ruby Asian Slaw - Glory Kitchen
  • CRISPY BRUSSELS SPROUTS WITH MUSTARD DIPPING SAUCE

    Brussels sprouts are one of my all time favorite veggies but as a child I had such an aversion to them.  In our household they were typically steamed and the smell it emitted was off-putting. Or maybe it was because I just wasn’t a fan of vegetables in general.

    Fast forward to adulthood, once I experienced the sweet, crispy, caramelization of roasted brussels I became a huge, huge fan.

    If they’re on the menu at a restaurant I usually order them as an appetizer to enjoy with a glass of wine.  I almost always serve them as part of our Thanksgiving meal, I often make them just for snacking, and I love to serve them to guests as an appetizer alongside a dipping sauce.

    Brussels sprouts are such a versatile vegetable and have become quite popular and trendy.  Their name is thought to have actually originated from Brussels, Belgium, where they have long been popular there.

    They are from the cabbage family and are cultivated for their small, edible buds which grow on long stalks.  Their harvest season ranges from September to March and they are traditionally known as a winter vegetable, which is why you often see them on a Thanksgiving or Christmas table.  If they are available, I’ll eat roasted brussels sprouts any time of year – they’re just that good.

    Margie Bruner
    owner of Glory Kitchen

    instagram
    facebook

    Crispy Brussels Sprouts with Mustard Dipping Sauce

    4 servings

    Ingredients

      For the brussels sprouts:
    • 2 teaspoons Mumbai nut & spice mix
    • 1½ lb brussels sprouts, trimmed & halved
    • olive oil
    • ¾ teaspoon salt
    • ½ black pepper
    • For the mustard sauce:
    • Mumbai nut & spice mix
    • 2/3 cup Greek yogurt
    • 1/3 cup whole grain mustard or dijon mustard
    • 2 tablespoons apple cider vinegar
    • 1 tablespoon honey
    • ¼ teaspoon salt
    • ½ teaspoon black pepper

    Instructions

    1. Preheat the oven to 450°. Snip the ends off each sprout then slice each in half, lengthwise. Keep all the loose leave which may fall off when trimming. These will crisp up in the oven like chips. Lay them loosely in a parchment or foil lined baking sheet being careful not to crowd. This keeps them from getting steamed when they are too crowded. Keeping space between them will allow the sprouts to brown and crisp up nicely. Drizzle with olive oil, salt, pepper and 2 teaspoons of Mumbai nut & spice mix. Place into the hot oven for 30-35 minutes, or until they crisp and brown nicely. At some point you will need to check the sprouts and remove any loose leaves which have browned (so they won't burn). Keep these chip-like leaves aside, you will want these as part of your dish when you are ready to serve. Place the sprouts back into the oven to continue to brown.
    2. In a small mixing bowl, mix together all the ingredients for the mustard sauce. Place into a small serving bowl and sprinkle the top with Mumbai nut & spice mix.
    3. Once the brussels sprouts are ready, remove from the oven, display on a serving tray along with the dipping sauce. Sprinkle them with the loose chips which were set aside and serve warm or right out of the oven.

    Notes

    To keep these crispy it is best to serve them soon after they come out of the oven. If you prepare ahead and then cover and refrigerate, although they are still delicious, they will loose some of their crispness when you reheat.

    Crispy Brussels Sprouts with Mustard Dipping Sauce - Glory Kitchen
    Crispy Brussels Sprouts with Mustard Dipping Sauce - Glory Kitchen
    Crispy Brussels Sprouts with Mustard Dipping Sauce - Glory Kitchen
    Crispy Brussels Sprouts with Mustard Dipping Sauce - Glory Kitchen
    Crispy Brussels Sprouts with Mustard Dipping Sauce - Glory Kitchen
    Crispy Brussels Sprouts with Mustard Dipping Sauce - Glory Kitchen
  • SICILIAN CHICKEN STEW

    Patti Conciatori is a wonderful cook and after marrying into an Italian family she came to master the art of Italian cooking.  As a mother of three college-aged girls, Patti often has a house full of family & friends.  She entertain crowds in a warm, welcoming, and relaxed style in both her Cape Cod and Darien, Connecticut homes. I asked Patti to share one of her favorite family dishes – a Sicilian chicken dish which doesn’t disappoint. -Margie

    Patti Conciatori
    wife, mother, and home cook

    I often tweak recipes based on personal tastes and what I have in my house, which is what I’ve done with this delicious and hearty Sicilian Chicken Stew recipe adapted from Mario Batali.  It is a perfect slow cooked meal on a cold night and it makes enough to feed a crowd.  The cook time may seem lengthy, but the longer it cooks the more flavor and richer the taste.  All you need to add is some crunchy Umbria mix on top, a side salad, and some good bread to scoop up every last bite.

    I love to cook simple delicious meals and am thrilled that my three college-aged daughters are finally asking for my recipes!

    Sicilian Chicken

    8 servings

    Ingredients

    • Umbria nut & spice mix
    • 16 pieces of chicken – mostly skinless boneless thighs and two skinless, boneless breasts cut in half
    • Coarse salt and freshly ground pepper
    • 8 tablespoons extra-virgin olive oil, plus extra for drizzling
    • 4 medium russet potatoes, unpeeled, cut in chunks
    • 1 large eggplant, cut in large cubes
    • 4 green bell peppers, cored, seeded and diced into very small pieces
    • 6 medium carrots, sliced into ½ inch rounds
    • 6 plum tomatoes, cut in chunks
    • 1 cup of Sicilian olives
    • 4 tablespoons of salt-packed capers, rinsed
    • 1 bottle of red wine
    • 6 tablespoons chopped fresh mint
    • 6 tablespoons chopped fresh flat-leaf parsley
    • Pinch of hot red pepper flakes

    Instructions

    1. Preheat oven to 350°.
    2. Season chicken pieces with salt and pepper. In a large Dutch oven, heat olive oil over medium-high heat until hot but not smoking. Add chicken pieces in batches and brown on both sides. Transfer to a plate and set aside.
    3. In same pan, combine potatoes, peppers, eggplant, carrots, tomatoes, olives and capers and cook until softened, but not browned, about 8 – 10 minutes. Season with salt and pepper. Add all the wine and return chicken to the pot and bring to a boil.
    4. Cover Dutch oven and put in oven at 350° for 2 ½ hours. Uncover and leave in warm oven for 2 hours. Turn oven up to 200° and reheat an hour before serving.
    5. Stir in half the mint and parsley. Transfer stew to large serving dish. Top with remaining mint and parsley, Umbria nut & spice mix and drizzle with olive oil. Serve!

    Notes

    from Margie: When I recently made this dish I reduced the size to half since it was just a meal for my husband and me. Even doing so, I found I needed to transfer my ingredients into a large stock pot because they would not fit into my cast iron dutch oven. So use a large pot, and if you are making the entire recipe, use the largest one you have. You'll be glad the recipe yields a lot because it is just SO good!

    Sicilian Chicken Stew - Glory Kitchen
    Sicilian Chicken Stew - Glory Kitchen
    Sicilian Chicken Stew - Glory Kitchen
    Sicilian Chicken Stew - Glory Kitchen
    Sicilian Chicken Stew - Glory Kitchen
    Sicilian Chicken Stew - Glory Kitchen
    Sicilian Chicken Stew - Glory Kitchen
    Sicilian Chicken Stew - Glory Kitchen
  • SPICY CHICKEN LEGS

    Spicy, sweet, tangy, and savory food small enough to eat with your hands – what could be better for watching the Super Bowl or sports on tv?  These Spicy Chicken Legs are bursting with all types of flavors.  Infused with Indian spices from our Mumbai nut & spice mix they definitely pop with flavor while staying true to the sticky sweetness of typical chicken finger food.

    These little bites can be made ahead and served at room temperature piled high on a platter.  Just before serving I like to sprinkle them with fresh chopped scallions and a squeeze of lime juice which cuts through the heavy flavors.

    Pair these chicken legs with cold beer or craft cocktails and you have a perfect party pleaser.  Cheers!

    Margie Bruner - Glory Kitchen

    owner of Glory Kitchen

    instagram
    facebook

    Spicy Chicken Legs

    Ingredients

    • 2 teaspoons Mumbai nut & spice mix
    • ¾ cup brown sugar
    • ¼ cup apple cider vinegar
    • ¼ cup water
    • 3 cloves garlic, minced
    • 1" piece fresh ginger, peeled & minced
    • 2 scallions, sliced thin
    • 2 teaspoons sambal chili paste or sriracha sauce
    • 1 teaspoon salt
    • 2 tablespoons lime juice, fresh
    • 6-8 chicken legs
    • 1 tablespoon olive oil
    • more sliced scallions for garnish
    • lime wedges for squeezing just before serving

    Instructions

    1. Heat the oven to 375°. In a small saucepan mix together Mumbai nut & spice mix, brown sugar, cider vinegar, water, minced garlic, minced ginger, 2 scallions, chili paste, salt & lime juice and cook over medium heat, stirring often, for about 8 minutes. When the flavors are melded and the mixture has thickened, remove from heat, set aside to cool. If the mixture thickens too much add a bit of water, a few teaspoons at a time being careful to not thin it too much - you want it saucy so it sticks to the chicken legs.
    2. On a foil lined sheet tray, drizzle the chicken legs with olive oil and toss around until they are all evenly coated with a bit of oil. Place in the 375° oven for about 30 minutes or until cooked through. Remove from oven and allow to cool.
    3. Once the legs are cooled, place them in a large bowl and pour the sauce over them, tossing until they are coated all around. Cover and place in the refrigerator for about 3 hours or overnight.
    4. When you are about ready to eat, turn the oven on broil, spread the chicken legs on a foil lined sheet tray and place them under the broiler to brown (do not place them directly under the broiler because they can burn easily. I place them in the middle of the oven and keep an eye on them while browning). Let them brown a bit and then turn them over and brown the other side. Remove and serve while hot or ideally at room temperature sprinkled with fresh sliced scallions and squeezed with a wedge of fresh lime.

    Spicy Chicken Legs - Glory Kitchen
    Spicy Chicken Legs - Glory Kitchen
    Spicy Chicken Legs - Glory Kitchen
    Spicy Chicken Legs - Glory Kitchen
    Spicy Chicken Legs - Glory Kitchen
  • CHILE CON QUESO

    This Chile con Queso recipe has been a family favorite for as long as I can remember.  My boys ask for it often – especially when they’re all gathered ’round watching a big sports event on TV.  Next weekend the Carolina Panthers play in the Super Bowl and Charlotte is heated with football fever, so I felt this was the perfect time to share this favorite family recipe.

    The basis for this queso is from a recipe we used when I was growing up, however, I tweaked it a bit using more veggies and a variety of real cheeses.

    I don’t use processed cheese in anything (just look at the ingredient list on that bright orange box and you’ll understand why).  I like to use Monterey Jack cheese because I love the creamy, stretchy cheese when it melts into the caramelized vegetables.  Sometimes I add half jack cheese and half gouda or white cheddar.  Feel free to experiment and combine various cheeses for more depth of flavor.

    When serving, it can be a bit messy, so I have found that placing it into individual sized ramekins makes it fun for each person to have their own little dish alongside a handful of crisp, firm tostada chips.  Right before serving, top it with a sprinkle of San Miguel nut & spice mix and fresh cilantro for a fresh and crunchy garnish.

    Margie Bruner - Glory Kitchen

    owner of Glory Kitchen

    instagram
    facebook

    Chile con Queso

    about 4 servings

    Ingredients

    • San Miguel nut & spice mix
    • olive oil
    • 1 red bell pepper, chopped
    • 1 medium yellow onion, chopped
    • 2 zucchini, chopped
    • 1 poblano pepper, chopped
    • ½ jalapeño pepper, minced
    • 1 cup cherry or grape tomatoes, sliced
    • 1 clove garlic, minced
    • sea salt
    • 2 tablespoons milk or cream
    • 2 cups monterey jack cheese, shredded

    Instructions

    1. Preheat the oven to 400º. Prepare all the veggies by washing & chopping, then set each aside into small bowls. Shred the cheese & set aside.
    2. In a deep pot (I use a 3 ½ qt. pot), heat 2 teaspoons or so of olive oil and when hot, add the onion, bell pepper, poblano pepper and a good pinch of salt. Let these veggies sweat and soften, but don't overcook, you want them to keep some firmness.
    3. Add in the garlic, minced jalapeño, zucchini & 1 teaspoon San Miguel nut & spice mix. Let these sauté just a bit.
    4. Add the chopped tomatoes, another pinch of salt and let these wilt just a bit.
    5. Remove the pot from the heat, stir in the milk/cream and shredded cheese, then spoon the mixture into individual ramekins, small cast iron pans, or a larger serving dish (make certain whatever you use is oven proof). Sprinkle with additional San Miguel nut & spice mix then place into the hot oven just to heat through and melt the cheese completely. Remove from the oven, sprinkle with fresh herbs (preferably cilantro) and serve with firm tostada chips or spoon onto warm tortillas to make cheesy burritos.

    Notes

    I have found it makes a tremendous difference to have all of the vegetables cut up before beginning to sauté them. The french call this "mise en place", which means, putting into place. Basically, it is having all of your ingredients prepped before you begin to cook. In this dish preparing first makes it easier and moves the process so much quicker - so chop away before you begin!

    Chile con Queso - Glory Kitchen
    Chile con Queso - Glory Kitchen
    Chile con Queso - Glory Kitchen
    Chile con Queso - Glory Kitchen
    Chile con Queso - Glory Kitchen
    Chile con Queso - Glory Kitchen
    Chile con Queso - Glory Kitchen
  • ROASTED CARROT SOUP

    The rich, orange color of this soup matches the delicious taste – deep, rich, roasted carrot flavor.  Carrots combined with caramelized onions and a touch of garlic and ginger, all roasted until they are intensely sweet and flavorful, makes for a smooth soothing meal on a cold winter day.

    Creamy soup always pairs beautifully with a side of toasted crostini for dipping and a bit of crunchy flavor, so we made some sourdough toasts topped with shredded white cheddar and hazelnut crunchy flavor from Cairo nut & spice mix.

    This recipe yields quite a bit of soup, so it is perfect for jarring the extra soup and gifting it to neighbors and friends or set some aside into the freezer to have on hand for a busy day.  If you’re sharing your soup as a gift, what better way to package it than wrapping it with our Glory Kitchen hand drawn carrot tag!

    Margie Bruner
    owner of Glory Kitchen

    instagram
    facebook

    Roasted Carrot Soup

    Yield: 8 or more servings

    Ingredients

    • Cairo nut & spice mix
    • 2 lb carrots
    • 2 yellow onions
    • 4 garlic cloves
    • ginger, fresh, about 1 inch of root
    • 6 cups vegetable stock
    • olive oil
    • sea salt
    • 1 lime, freshly juiced
    • ½ teaspoon coriander, ground
    • ½ teaspoon nutmeg, ground
    • 1 cup half & half
    • fresh parsley, for garnish
    • yogurt, sour cream, or créme fraîche for garnish

    Instructions

    1. Preheat the oven to 425º. Cut tops off the carrots (where stem grows), then roughly chop all carrots and lay them out onto a parchment or foil lined sheet tray. Roughly chop all onions & do the same. Throw 4 whole garlic cloves, no need to peel, onto sheet tray. Slice about 1 inch of fresh ginger into very small pieces, no need to peel, and also place on sheet tray but keeping it separated in a corner of the tray so it can be found & removed later. Drizzle all the veggies with olive oil and toss with sea salt and a generous amount of Cairo nut & spice mix. Place in the hot oven and roast for 15 minutes.
    2. Remove the garlic & ginger from the sheet tray and place the carrot/onion mix back into the oven to roast for an additional 30-40 minutes or until the veggies turn a golden brown. Set aside the garlic & ginger and allow to cool, then remove the skin from the garlic cloves.
    3. Once the veggies are out of the oven and are somewhat cool, place them into a food processor, or for a very smooth purée, a blender, with about 2 cups of vegetable stock and puree until they are nice and smooth without any chunks. If your food processor/blender can't hold it all, you may need to split the veggies and process them in two separate batches. Add more stock as needed and then pour pureed vegetables into a large stock pot.
    4. Turn the heat on med/low and add any remaining vegetable stock, juice of 1 lime, coriander, nutmeg and salt. Bring to a low simmer for about 10 minutes, continuing to stir the pot. Remove soup from heat, add in the half & half to finish the soup. If it is too thick, you can add more stock or water until the proper soup consistency is reached.
    5. Serve in bowls garnished with a drizzle of sour cream, creme fraîche or yogurt and top with fresh parsley and a sprinkle of Cairo nut & spice mix. Serve with cheesy crostini toasts topped with melted cheese and Cairo nut & spice mix.

    Notes

    This soup would also work well with Mumbai, Penang or San Miguel nut & spice mixes.

    Roasted Carrot Soup - Glory Kitchen
    Roasted Carrot Soup - Glory Kitchen
    Roasted Carrot Soup - Glory Kitchen
    Roasted Carrot Soup - Glory Kitchen
    Roasted Carrot Soup - Glory Kitchen
    Roasted Carrot Soup - Glory Kitchen
    Carrot Gift Tag - Glory Kitchen
  • BROWN BUTTER APPLES ON TOAST

    Caramelized apples take on a rich, intense flavor, especially when they are browned with a bit of butter and a sprinkle of sweetness.  These apples, infused with french herbs from our Provence nut & spice mix, are sweet, savory and full of herb flavor.

    Place the warm apples over a slice of crunchy sourdough toast spread with almond butter and you have a wonderful mix of fresh flavors.  Enjoy these brown butter apples alongside a glass of wine for a perfect appetizer or whip these up for a well deserved afternoon break or morning breakfast.

    owner of Glory Kitchen

    instagram
    facebook

    Brown Butter Apples on Toast

    Ingredients

    Instructions

    1. Slice apples into thin rounds, but not too thin so they fall apart. Heat a small sauté pan and add a slice or two of butter allowing it to melt. Add a teaspoon or more of coconut palm sugar, brown sugar, honey or even maple syrup into the melted butter. Add a teaspoon of Provence nut & spice mix and then place the apples down into the pan and allow them to sit without touching. Check to see if they are caramelized and when they are golden brown, sprinkle the top with a pinch of sea salt and flip the apple so the other side begins to brown.
    2. Toast your bread and once cooled, spread with a layer of almond butter or any other type of nut butter.
    3. Remove your golden apples from the pan and place over the almond butter toast. Sprinkle with additional Provence nut & spice mix and serve as an Hors D'oeuvres alongside a glass of wine or as an afternoon snack.

    Brown Butter Apples on Toast - Glory Kitchen
    Brown Butter Apples on Toast - Glory Kitchen
  • SHRIMP AND GRAPEFRUIT WINTER SALAD

    The tart refreshing flavors of fresh grapefruit adds so much tang and juiciness to a green winter salad.  This salad has lovely pink colorations which makes it pretty and refreshing to serve, especially during the cold and grey winter months.  There is plenty of fresh variety in this bowl with the simply sauteed shrimp, salty feta cheese, tart grapefruit, crunchy peanuts and the Asian flavors of Penang nut & spice mix. I love to serve this when citrus is plentiful and at its peak season.

    Sectioning a fresh grapefruit can seem intimidating to accomplish, however, once you’ve mastered the knife technique, you’ll see it is quite simple.  It is worth the extra effort to prepare because the grapefruit sections come out juicy, delicate and free of the outside membranes. You will need to work with a very sharp knife, moving very slowly and deliberately.

    owner of Glory Kitchen

    instagram
    facebook

    Shrimp & Grapefruit Salad

    2-3 large salads

    Ingredients

      For the asian vinaigrette dressing:
    • 1 teaspoon Penang nut & spice mix
    • 1 tablespoon olive oil
    • 1 tablespoon sesame oil
    • 1 tablespoon soy sauce
    • 1 teaspoon rice wine vinegar
    • grapefruit juice from grapefruits
    • 1 ½ teaspoons honey
    • 1 teaspoon sambal chili paste (or sriracha)
    • For the salad:
    • Penang nut & spice mix
    • 2 grapefruits, sectioned, juice reserved
    • 1 bag arugula
    • ½ leek, cut thin, on bias
    • ¾ lb shrimp, (I like small, 31/40 count)
    • sesame oil
    • ½ cup peanuts
    • 1 avocado
    • ½ block feta cheese
    • asian vinaigrette dressing (from above)

    Instructions

    1. With a sharp knife, carefully section the 2 fresh grapefruits (as shown in photograph). To section a piece of citrus, slice each end off fruit. Then run your sharp knife down the side of the fruit, removing the peel with each slice. Go around the entire fruit until the white pith is removed. Move slowly & deliberately, trying to leave as much fruit intact but still removing the white part of the skin. Once it is completely free of peel, place the grapefruit in one hand and the knife in the other. Begin by slicing down the side of one of the membranes, removing it carefully from the flesh (see photo). Then run it down the other side until the segment comes out clean. Place it in bowl and continue all around until each segment is removed. When complete, squeeze the membranes over a bowl to release all the extra juice and reserve for the dressing.
    2. Toast the peanuts in a dry pan and once they are lightly browned, remove into a bowl to cool.
    3. Sauté the shrimp in about 2 teaspoons of sesame oil just until they turn pink and remove into a separate bowl to cool. Do not overcook or they will turn rubbery.
    4. Slice the leek in half, lengthwise and rinse well under running water. Open the leaves and let the water wash the interior membranes where small amounts of dirt often stay behind. Dry and slice the leek thinly, on the bias. Set aside.
    5. Arrange the salad in each individual serving bowl beginning with a bed of arugula. Then layer shrimp, grapefruit, leeks, peanuts, feta cheese and finally, the sliced avocado (wait until last minute to cut the avocado so it stays nice and bright green and does not turn brown). Top the salad with plenty of Penang nut & spice mix. Serve with the dressing on the side.

    Notes

    This salad has several ingredients such as Sambal chili paste, sesame oil and rice wine vinegar. As with all recipes, always feel free to substitute oils & chilis and experiment with your own home ingredients. I never feel as though I should go out & buy a bottle of an ingredient only to use 1 or 2 tablespoons. So always try substituting with like ingredients. Of course, if you decide to buy Sambal chili paste you won't regret it - it has wonderful flavor & I use it often on so many recipes that are not Asian. Enjoy!

    Shrimp & Grapefruit Salad - Glory Kitchen
    Shrimp & Grapefruit Salad - Glory Kitchen
    Shrimp & Grapefruit Salad - Glory Kitchen
    Shrimp & Grapefruit Salad - Glory Kitchen
    Shrimp & Grapefruit Salad - Glory Kitchen
    Shrimp & Grapefruit Salad - Glory Kitchen
    Shrimp & Grapefruit Salad - Glory Kitchen
    Shrimp & Grapefruit Salad - Glory Kitchen
    Shrimp & Grapefruit Salad - Glory Kitchen
Updating…
  • No products in the cart.

JOIN US !
JOIN
close-link