• CRISPY MAPLE BACON

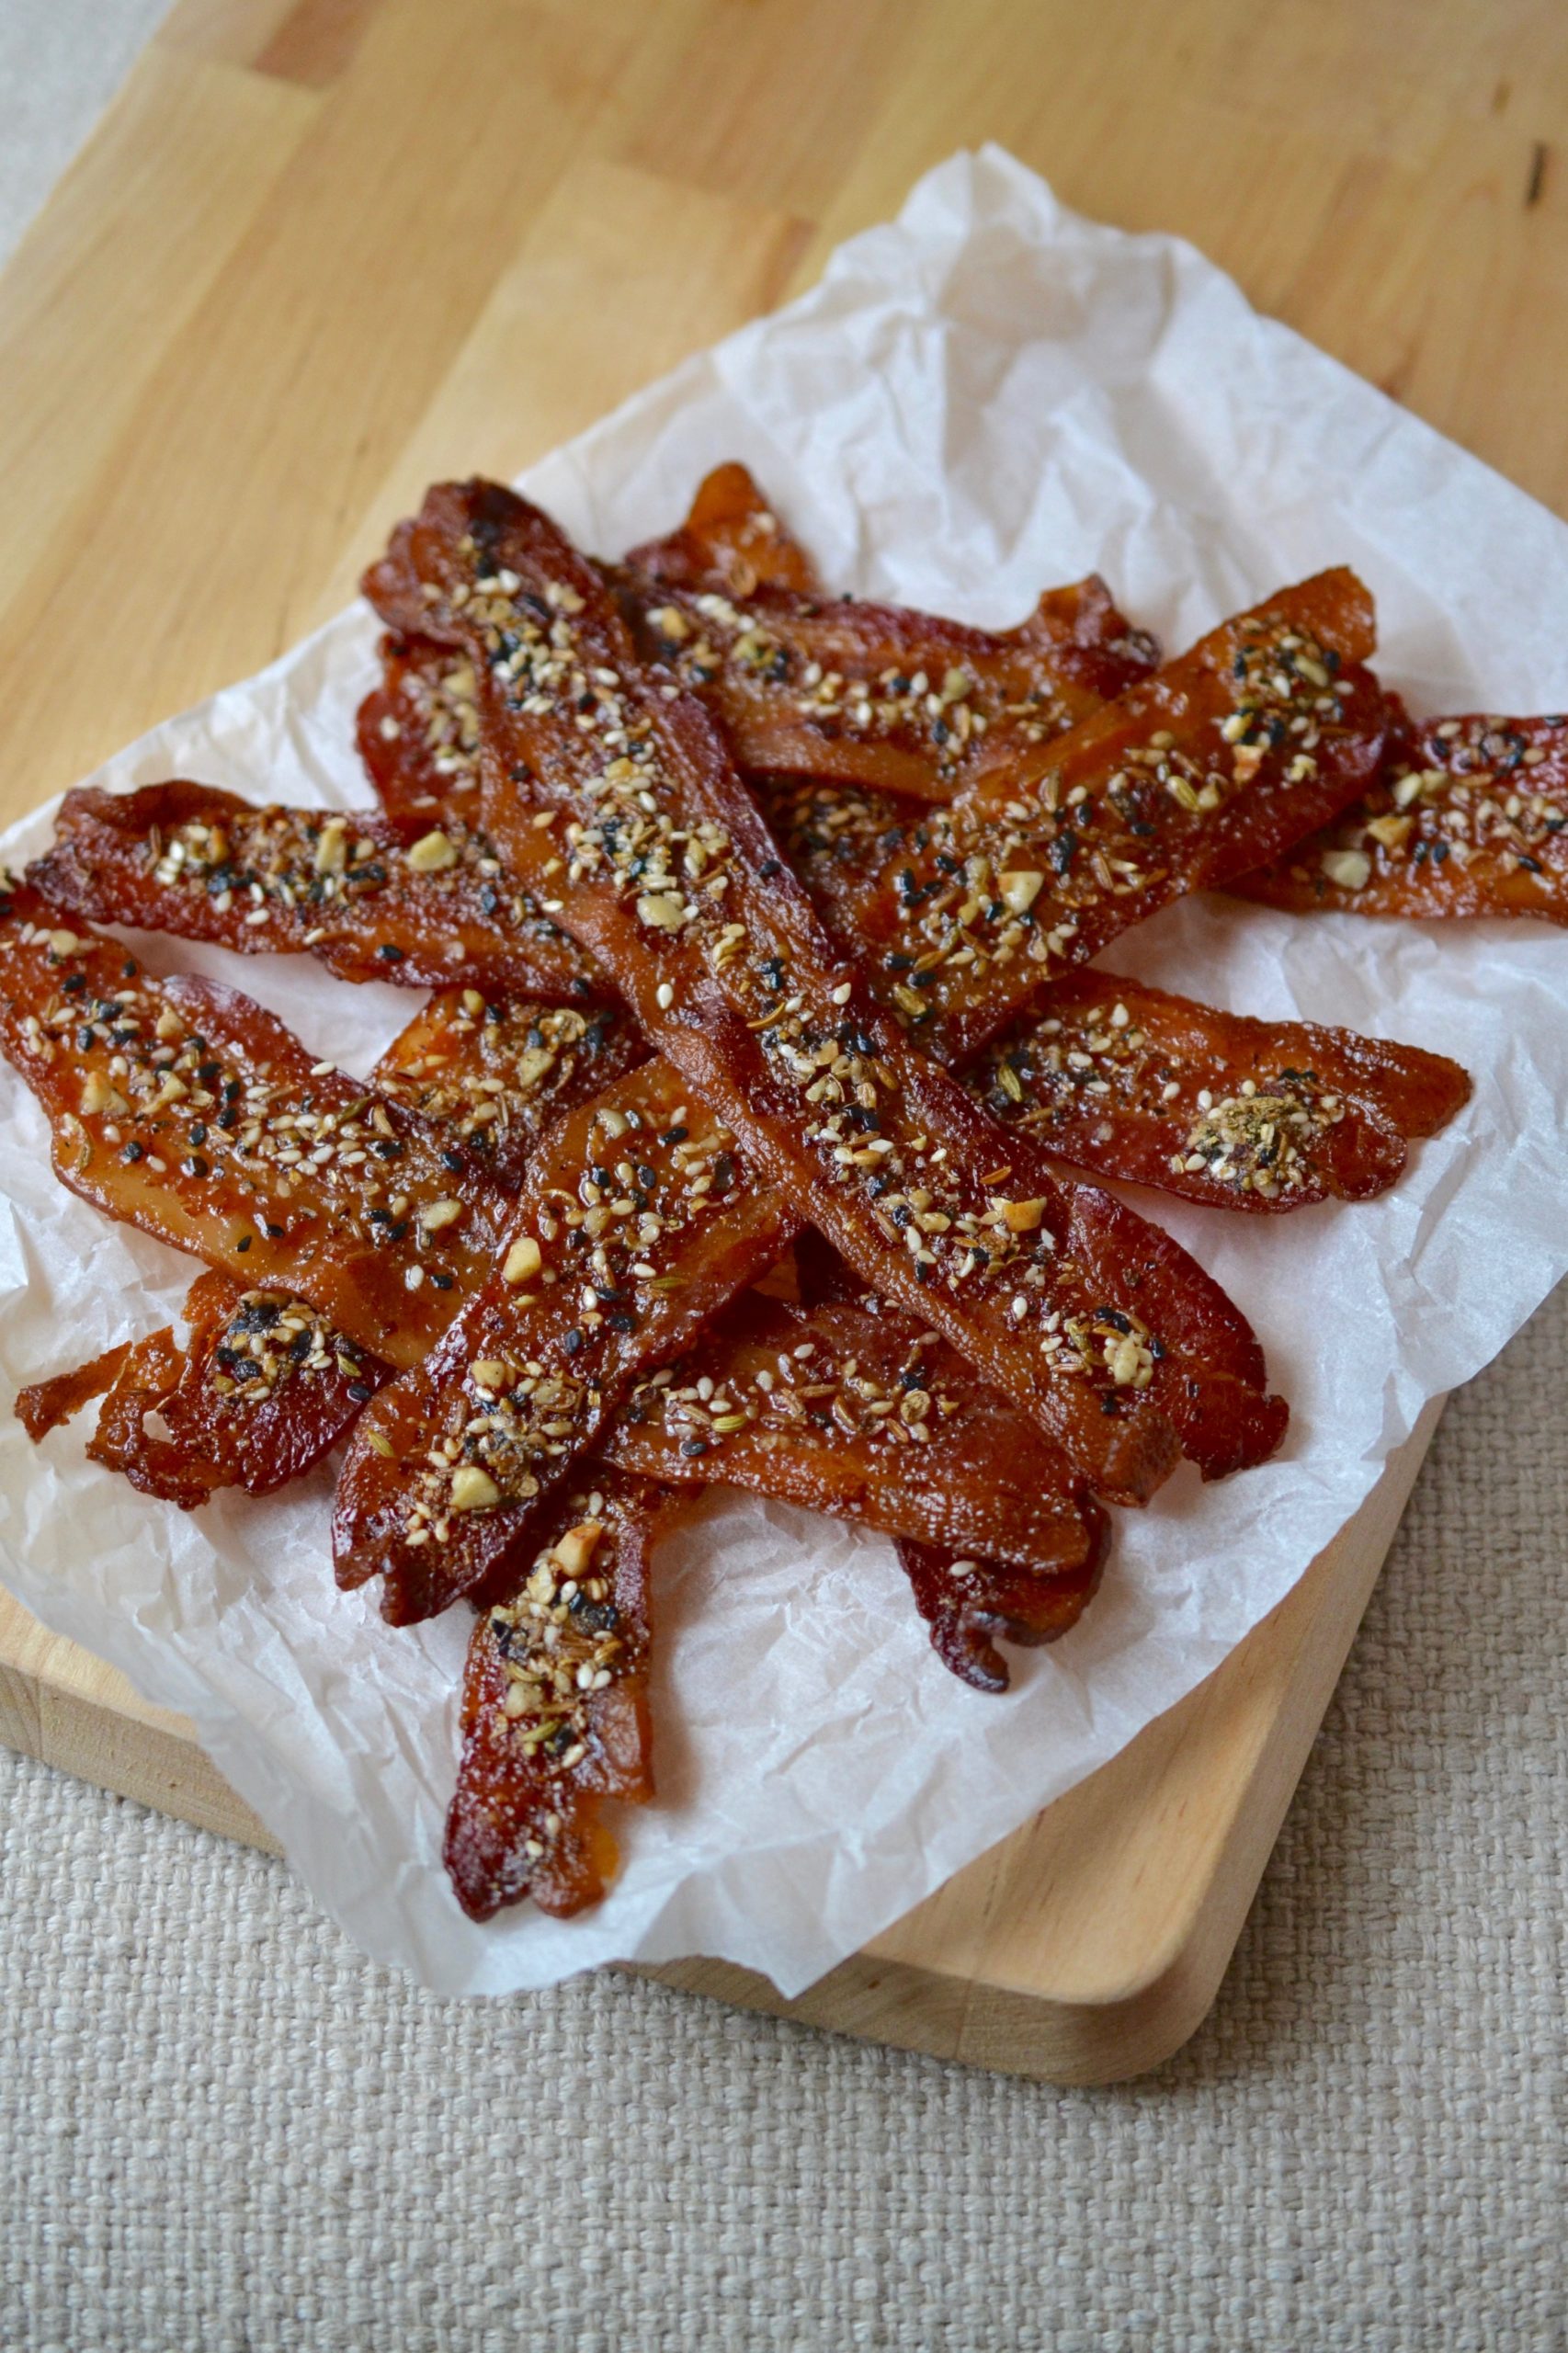
    This is a sweet and spicy twist on plain bacon, and who doesn’t love crispy bacon?  With only 3 ingredients, this Crispy Maple Bacon is quick, easy and will wow your guests when they taste the surprising touch of maple syrup sweetness paired with the spiciness and crunch of our Cairo nut & spice blend.

    The first time I tried a bit of sweetness on my traditional bacon I was a bit skeptical, but once I tasted the sweet, smoky, spicy combination I could not get enough.

    I like to serve this sweet and spicy bacon to guests as a fun appetizer.  Stack the bacon sticks into a pretty silver cup or glass and pass it around for guests to enjoy with their favorite cocktail, beer or glass of wine.

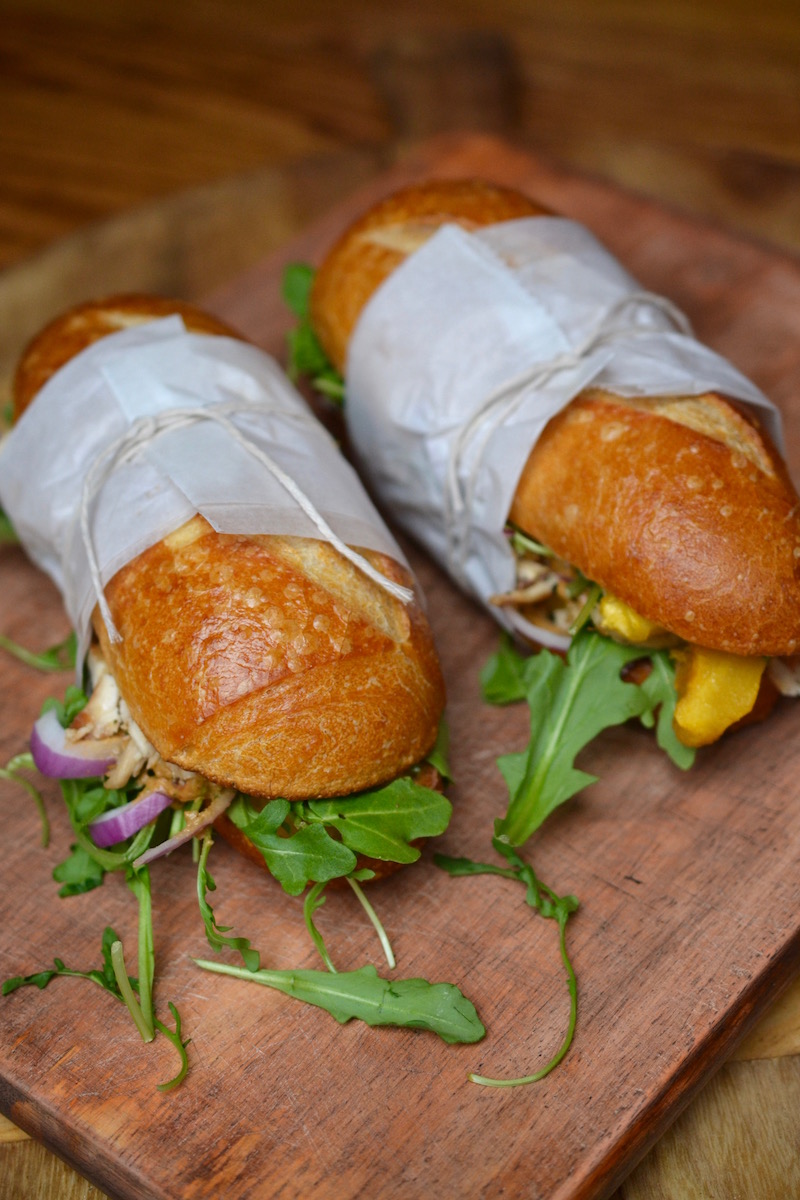
    This sweet and spicy bacon is perfect with your traditional favorite breakfast eggs and toast or piled and layered into a BLT sandwich.  By adding the sprinkle of Glory Kitchen nut & spice mix and the brush of sweetness from the maple syrup, you’ll find you’ve discovered a delicious new way to elevate your favorite breakfast food.

    Margie Bruner
    owner of Glory Kitchen

    instagram
    facebook

    Crispy Maple Bacon

    Ingredients

    Instructions

    1. Preheat oven to 400°.
    2. Take the thick cut bacon and lay it out on a wire rack placed over a baking tray lined with parchment paper or aluminum foil. Elevating the bacon on a rack allows the air to circulate around and creates crispier bacon. Lining the tray with foil allows for a quicker cleanup.
    3. Place in the lower third of the oven and cook for 10-15 minutes, or until lightly browned.
    4. Remove from the oven and pat the oil off the bacon strips with a dry paper towel. Using a pastry brush, brush each slice, on the side facing up, with a good amount of maple syrup. Carefully sprinkle each slice with Cairo nut & spice mix then place the baking sheet back into the oven and continue to bake until the slices are nicely browned and crispy. Remove from the oven, allow to cool and serve.

    Crispy Maple Bacon - Glory Kitchen
    Crispy Maple Bacon - Glory Kitchen
    Crispy Maple Bacon - Glory Kitchen
    Crispy Maple Bacon - Glory Kitchen
    Crispy Maple Bacon - Glory Kitchen
    Crispy Maple Bacon - Glory Kitchen
    Crispy Maple Bacon - Glory Kitchen
  • BEET AND AVOCADO SALAD

    Oh the fresh flavors of this Beet and Avocado Salad spiced up with our Middle Eastern blend of nut & spices.  Beets usually rank into two various camps.  Some people love them, and others have a strong aversion to them.  I have often heard those in the latter group say “they taste like dirt”.

    Obviously that sounds quite unappealling, and I am ashamed to say for a long time I fell into that “dirt” category – I had a true disliking for all things beet related.

    When beets became trendy in the chef  and culinary worlds, I thought there must be something more to these messy, red, root vegetables and I had a hunch I was missing out on something special.

    Once I learned the process of roasting with a bit of olive oil and sea salt, then marinating the beets in a tangy vinaigrette, I discovered the secret joys of this very popular veggie. The hot oven adds a wonderful roasted flavor and the marinade a sweet tanginess.

    I have also found them to be delicious eaten raw, much like a carrot stick, and dipping them into spinach dip, hummus, or a creamy tzatziki sauce .  Beets are often used to color food in a reddish/fuchsia pink hue, and with that dramatic presentation in mind, I often make beet hummus, beet vinaigrette dressing, and even beet muffins.

    I don’t believe there is another natural, plant-based food out there that can create such magic in tinting foods.  As an important side note, when working with beets, you’ll quickly find your hands will also get the red color treatment.  Not to worry, it washes out, and you can always wear plastic gloves.

    Beetroots are the bulbous portion (taproot) of the beet plant and can be either red or golden.  Both are beautiful, rich colors and I often mix them together in salads, or sometimes use just one color to add pizzazz to foods.  Every part of the beet plant is edible.  The leaves and stems can be chopped up and added into salads, whipped up into a pesto, or sauteed in a bit of fresh garlic and olive oil then served as a side dish.

    If you’ve not previously been a fan of beets, I urge you to try them again.  With a little finesse in the preparation, they’ll quickly become one of your very favorites.

    Margie Bruner - Glory Kitchen

    Margie Bruner
    owner of Glory Kitchen

    instagram
    facebook

    Beet and Avocado Salad

    4 large servings

    Ingredients

    • Cairo nut & spice mix
    • 4 beets, large (8 if small)
    • 6-8 cups fresh spinach
    • 2 ripe avocados
    • 4-6 sprigs baby broccoli
    • 2 tablespoons olive oil
    • 2 tablespoons balsamic vinegar
    • 1 generous pinch sea salt
    • candied pecans

    Instructions

    1. Wrap beets in foil and bake in a 350° oven for about 30 minutes. After 30 minutes, pierce the beets with a fork and if they are tender, they are ready. If still firm, continue to cook until they are fork tender. Remove from the oven, open up the foil, and allow to cool completely.
    2. With a paring knife, gently remove the skin of the beets. Once cleaned, slice them in half (lengthwise), then slice each half again, forming pretty wedges. Place all the sliced beets into a large mixing bowl, add the olive oil, balsamic vinegar and sea salt. Toss these together gently then set aside to marinate and allow the juices to create a lovely vinaigrette dressing.
    3. Take the spinach and chop ever so slightly just to break it down and make a bit smaller - do not over chop. Arrange the spinach at the base of each individual salad bowl or plate. On top of the spinach, layer the marinaded beets (reserving the vinaigrette left behind), the sliced avocado, the full sprigs of baby broccoli, and the candied pecans. Sprinkle the beets and avocado with generous amounts of Cairo nut & spice mix, take the remaining vinaigrette left behind from the beets, and drizzle over each individual salad.

    Notes

    If you wish to have a greater amount of beet vinaigrette dressing, double the amounts of olive oil and balsamic vinegar when marinating the beets. This salad would also be wonderful using our Glory Kitchen Mumbai, Penang or Provence blends.

    Beet and Avocado Salad - Glory Kitchen
    Beet and Avocado Salad - Glory Kitchen
    Beet and Avocado Salad - Glory Kitchen
    Beet and Avocado Salad - Glory Kitchen
    Beet and Avocado Salad - Glory Kitchen
  • BRIE CHEESE AND GRAPE BAGUETTE

    Talk about a delicious twist on a cheese sandwich… it’s a little sweet, a little tangy, a lot of herb flavor, and gooey melted french cheese on a crisp and toasted french roll.  Brie cheese is a soft, creamy cow’s milk cheese named after the Brie region in France.  The creaminess is sandwiched inside a rind of mold which is typically eaten.  The flavor of the mold is often dependent upon the quality of ingredients used and the period of time it is aged, typically four to five weeks.

    Brie pairs well with french herbs, and in this case, a bit of sweetness from the currants found in our Provence nut blend and the crunchiness from the cashew nuts.

    If you like soft, stretchy cheese, you will love this sweet tasting brie cheese and grape baguette filled with fresh greens, peppery red onion, and juicy red grapes.  These are not your typical sandwich fixings – they go beyond what you would expect in a french baguette and the sweet, tangy flavors are a perfect match.

    The next time you find yourself in a rut for lunch ideas, slice up some fresh, delicious grapes and fill up a wonderful loaf of bread with herbaceous french flavors.

    Margie Bruner - Glory Kitchen

    Margie Bruner
    owner of Glory Kitchen

    instagram
    facebook

    Brie Cheese and Grape Baguette

    Yield: 4 servings

    Ingredients

    • Provence nut & spice mix
    • 1 bunch of red seedless grapes
    • 1 wheel brie cheese
    • fresh arugula
    • red onion, sliced thin
    • balsamic vinegar
    • olive oil
    • sea salt
    • pinch of sugar
    • french baguette

    Instructions

    1. Slice the french baguette into 4 pieces. If it is rather small, you may need two baguettes and slice each one in half. Take each individual piece and slice them open. Brush the inside (both sides) with olive oil, sprinkle with sea salt and toast under the broiler until they are lightly browned. Remove and allow to cool.
    2. Slice the grapes in half and set aside in a bowl.
    3. Into a mixing bowl, add 1 ½ tablespoons olive oil, 1 ½ tablespoons balsamic vinegar, 2 teaspoons Provence nut & spice mix, a pinch of sea salt, and a pinch of sugar. Whisk together until the dressing is incorporated. Take a couple of large handfuls of arugula, the sliced grapes, and about ¼ of the red onion (sliced thinly) and add into the mixing bowl with the dressing. Toss to coat all the lettuce, grapes and onion.
    4. Take thick slices of the brie cheese and layer them onto the inside of the toasted baguette loaves. Place these under the broiler just until the cheese is soft and melted. Remove from oven, stuff each baguette with the grape and arugula mixture and serve hot. Enjoy!

    Brie Cheese and  Grape Baguette
    Brie Cheese  and Grape Baguette
    Brie and Roasted Grape Baguette
    Brie Cheese and Grape Baguette
    Brie Cheese and Grape Baguette
  • LEMON AND ASPARAGUS PASTA

    This Lemon and Asparagus Pasta recipe yields a bright, fresh bowl of springtime goodness.  Asparagus, white wine, and fresh lemons always say spring to me and they’re welcomed flavors after the heavy winter dishes that helped keep us warm and cozy in the cold weather.  

    The bright flavors of lemon juice and freshly grated lemon rind add a crispness   while the presentation is pretty and inviting.  With only a few ingredients, some patience to shred the asparagus and a quick sauté in a hot pan, this dish can be made quickly and inexpensively.   The flavors are refreshing and delicious; a perfect meal to welcome warmer weather, springtime blossoms, and new beginnings.

    I often create recipes according to my mood or by what looks fresh and seasonal at the market.  As a result, the process often involves a little of this and that, so as you are tossing in all the fresh goodness, don’t be shy about adding a bit more wine or chicken stock for moisture, more Umbria blend for crunch, or more seasoning to your own personal liking.

    In addition, although I usually try to cook with a “healthy” type of pasta such as 100% whole wheat, brown rice flour or a 100% quinoa pasta, for purposes of this recipe post I used a semolina spaghetti pasta because it makes for a prettier photograph!  Happy spring.

    Margie Bruner
    owner of Glory Kitchen

    instagram
    facebook

    Lemon and Asparagus Pasta

    Yield: serves 4

    Ingredients

    • 1 tablespoon Umbria nut & spice mix
    • 1 bunch fresh asparagus
    • 8-10 ounces spaghetti pasta
    • ½ - ¾ cup white wine
    • 2 tablespoons unsalted butter
    • 3 tablespoons olive oil
    • 2 teaspoons finely grated lemon zest
    • 3 tablespoons fresh lemon juice
    • sea salt
    • fresh parmesan cheese

    Instructions

    1. After washing and drying asparagus, cut the tip off each stalk (about 2 inches) and set aside in a bowl. Take the remaining stalk and using a vegetable peeler, make long shreds of the entire stalk until you cannot peel any more. If there is a thick strand leftover, slice it lengthwise to make it thinner, much like the other strands. This takes a bit of patience. 🙂 After shredding all the stalks, set these aside in a large bowl.
    2. Cook the spaghetti noodles in a large stock pot of very salted, boiling water until it is al dente and not overly cooked. Drain the noodles and set these aside in a large bowl with a slight drizzle of olive oil tossed in so they do not stick to one another as they cool.
    3. Using the same stock pot from the noodles, heat 1 tablespoon of olive oil and toss in the asparagus tips which were set aside earlier. Add a pinch of salt and toss gently just until they are bright green but still crisp (less than one minute if the oil is hot). Remove from heat and set aside in a bowl.
    4. To the same pot, add the 2 tablespoons butter, 2 tablespoons olive oil and a generous pinch of salt. Add in the shredded asparagus and toss gently as they begin to wilt and soften. Don't over cook them, it goes quickly. Add in the wine, the Umbria nut & spice mix, and the fresh lemon juice. Add the spaghetti noodles. Toss gently until the asparagus and noodles are incorporated then serve the pasta in individual serving bowls. Top and garnish each serving with asparagus tips, grated lemon rind, more Umbria blend, and large shreds of fresh parmesan cheese. Use a vegetable peeler on a block of cheese to yield large shaved slices. Serve immediately.

    Lemon and Asparagus Pasta - Glory Kitchen
    Lemon and Asparagus Pasta - Glory Kitchen
    Lemon and Asparagus Pasta - Glory Kitchen
    Lemon and Asparagus Pasta - Glory Kitchen
    Lemon and Asparagus Pasta - Glory Kitchen
    Lemon and Asparagus Pasta - Glory Kitchen
    Lemon and Asparagus Pasta - Glory Kitchen
  • PARTY SALAD

    The next time you offer to bring the salad for a gathering of friends and family, surprise everyone with this bright and colorful bowl.  All of the veggie variety and the combination of flavors make this an eye catching platter when it is sitting on a buffet table.

    This Mexican inspired salad is one that typically pleases everyone, even non-veggie loving guests because the tostada chips add a bit of sinfulness to the dish.  The key is to add in the tostada chips and dressing just before it is ready to serve so the chips and veggies stay fresh and crisp.  Your guests will request a repeat of this salad time and time again.

    I haven’t included any ingredient measurements because this is a salad that is meant to be large or small.  Obviously, it works perfectly for a large crowd, however, if your group is smaller, chop only the ingredients according to your needs and save the rest for another day.

    The dressing recipe will yield enough for a very large salad and more, so only use what you need and refrigerate the rest.  It can be used again later as a dipping sauce for raw veggies, to coat a chicken for roasting or drizzled into a wrap sandwich.

    Basically, this salad involves a little bit of this, and a little bit of that so get creative and add in other veggies you love.  Hope this big bright bowl adds some pizazz to your next party!

    Margie Bruner
    owner of Glory Kitchen

    instagram
    facebook

    Mexican Party Salad

    serves as few or as many as you wish

    Ingredients

      For the salad:
    • San Miguel nut & spice mix
    • iceberg lettuce, sliced very thin
    • brussels sprouts, sliced very thin
    • purple cabbage, sliced very thin
    • corn on the cob
    • carrots, julienned
    • red onion
    • fresh jalapeño pepper
    • canned black beans, rinsed
    • monterrey jack cheese, shredded
    • corn tostada chips
    • For the avocado dressing:
    • 2 teaspoons San Miguel nut & spice mix
    • ¼ cup olive oil
    • 2 limes, juiced
    • ½ avocado, ripe
    • 1 garlic clove
    • 2 slices pickled jalapeños
    • ¼ cup Greek yogurt
    • 4 tablespoons water, or more
    • 1 teaspoon salt
    • 1 tablespoon honey

    Instructions

    1. Using a blender, combine all the ingredients for the dressing and blend together until it is smooth and creamy. Add more water (1 tablespoon at a time) if you prefer your dressing thinner, until you reach the right consistency. Pour the dressing into a glass jar with a lid and refrigerate. When you're ready to toss into the salad, make certain it has reached room temperature and shake well before pouring.
    2. Clean each ear of corn by removing the skin and the silks. Drizzle each cob with a bit of olive oil and using your hands, rub the cobs up and down to coat the corn all over lightly. Place on a sheet tray and sprinkle each cob with a pinch of salt. Place the cobs under the broiler and stand by to turn them as the tops begin to brown. Do not step away because they can burn very quickly under an oven broiler. Using tongs, rotate the corn a bit until the entire ear is slightly browned all around. Remove from the oven and let the corn cool completely. Once they have cooled, slice the kernels from the cob and place the corn kernels into a bowl.
    3. Depending upon how large you wish for your salad to be, slice the iceberg lettuce, slice the purple cabbage, slice the small brussels sprouts, julienne the carrots, chop the jalapeño into very small pieces, slice the red onion very thin and set all these veggies aside into their own bowls.
    4. Shred the monterrey jack cheese and set aside. You can do all of this prep work well before the party begins - just place each ingredient into a bowl or a ziplock baggie and store in the refrigerator until just before you need to serve your salad.
    5. Just before the guests arrive, assemble all of your ingredients into a very large serving bowl, sectioning out each ingredient so it displays nicely. If you are taking this to a party, cover it with plastic wrap and take with you pre-assembled (just like the photo) Don't forget to take the bag of chips and the pre-made dressing to toss in just before you are ready to serve!
    6. When you're guests are ready to eat, take a handful of tostada chips and crush them in between both hands to sprinkle over the top of the salad. Add dressing and toss everything together. Serve immediately so the chips and the lettuces stay crunchy.

    Mexican Party Salad - Glory Kitchen
    Mexican Party Salad - Glory Kitchen
    Mexican Party Salad - Glory Kitchen
    Mexican Party Salad - Glory Kitchen
    Mexican Party Salad - Glory Kitchen
  • RICE AND BEANS AND GREENS

    This is a flavorful salad of brown rice, white beans, shaved brussels sprouts, chopped kale and any other greens that move you.  A big bowl of this salad can become a filling and satisfying vegetarian meal that even ferocious meat eaters can stand behind. It also works beautifully as a side dish or even better, as a base for grilled salmon, white fish or roasted chicken.

    The combination of part raw and part roasted greens gives the flavor a more interesting dimension. Tossing in one of our Glory Kitchen nut blends along with raw almonds adds wonderful crunch too.  Use whatever greens are in season, kale, spinach, mustard greens, etc. and season this salad with dressing per your preferences.

    I dressed this salad lightly, however, you can easily double or triple the amounts added if you like more tang and seasoning.  It’s important that you taste as you progress along and add more dressing or seasoning until you reach the perfect flavor.  Enjoy!

    Margie Bruner
    owner of Glory Kitchen

    instagram
    facebook

    Rice and Beans and Greens

    4 servings

    Ingredients

      For the salad:
    • 2 teaspoons Mumbai nut & spice mix
    • 1 cup uncooked brown rice
    • 2 cups vegetable broth
    • 1 can white beans (I used Cannellini beans), rinsed and drained
    • 1 small bag brussels sprouts (about 10-15 cabbages)
    • 2 large handfuls baby kale
    • 2 large handfuls fresh spinach or other greens
    • olive oil
    • ½ cup raw almonds, whole
    • For the dressing:
    • 1 ½ tablespoons olive oil
    • 1 tablespoon balsamic vinegar
    • ½ lime, fresh squeezed
    • 1 tablespoon greek yogurt
    • 1 pinch salt
    • 1 generous pinch Mumbai nut & spice mix

    Instructions

    1. Measure 1 cup of uncooked brown rice and place into a small covered casserole dish. Add 2 cups of vegetable broth and 2 teaspoons of Mumbai blend. Cover and place into a 350° oven for 45 minutes. When tender and cooked through, remove rice from the oven, remove the lid, fluff the rice and let it cool completely.
    2. Using a mandolin or a sharp knife, slice the brussels sprout cabbages into very thinly shaved slices. Set aside ½ to keep raw, the other half, spread onto a parchment lined baking sheet, drizzle with olive oil, a pinch of sea salt and Mumbai blend. Chop the baby kale, spinach or whatever greens you are using into small pieces, reserve ½ of each to keep raw, place the other half onto a baking tray and drizzle with oil, sprinkle with sea salt & Mumbai blend. Place both greens into a 400° oven until they are somewhat crisp (about 10-15 minutes). Remove from oven and cool completely.
    3. Mix together the ingredients for the dressing and set aside.
    4. In a large bowl, mix together the cooked brown rice, roasted & raw brussels, kale & spinach, chopped almonds, white beans, Mumbai blend and dressing. Serve a large bowl as a vegetarian entree or use the bean salad as a bed to top with roasted chicken, salmon or white fish. Enjoy!

    Notes

    Although I have used Mumbai nut blend for this dish, it would also work well with any of the other Glory Kitchen nut & spice mixes.

    Rice and Beans and Greens - Glory Kitchen
    Rice and Beans and Greens - Glory Kitchen
    Rice and Beans and Greens - Glory Kitchen
    Rice and Beans and Greens - Glory Kitchen
    Rice and Beans and Greens - Glory Kitchen
    Rice and Beans and Greens - Glory Kitchen
  • PICKLED JALAPEÑO PEPPERS

    Every refrigerator needs to be stocked with a jar of pickled jalapeño peppers.  I always have one and reach for it often to add a bit of heat and flavor to dishes – and not just Mexican meals.  I add chopped jalapeños to the obvious foods like nachos, enchiladas, quesadillas and beans of all types.

    I also, however, use them to spice up rice, salads, dressings, baked potatoes, soup bases, and the list goes on.  You never know when something needs an added note of heat and if you have a jar of jalapeño peppers handy, you’ll always be prepared.

    My home refrigerator always has a jar, however, it wasn’t until I reached for them recently that I realized I was out and needed to run by the store to purchase another.  That was when it hit me that I needed to make my own homemade jalapeños, and of course, I wanted to add some interesting notes by flavoring the brine with our Cairo nut & spice mix.

    It had never crossed my mind to make my own pickled jalapeño peppers, but let me tell you, it is so, so easy.  I already had the few ingredients needed sitting in my pantry, it was quick, and the result was delicious.  So much fresher and so much more flavorful than anything I could buy at the local store.

    As a bonus, I’ve also found myself using the seasoned brine to add acid and flavor to salad dressings and all types of sauces.  When a recipe calls for vinegar, add a spoonful from this jar of jalapeños.  From here on out, homemade jalapeños will be a staple in my refrigerator and they should be in yours too!

    And by the way, these jalapeños would make a perfect gift, especially if they are dressed up with our very own Glory Kitchen pepper gift tags!  You can order these chili pepper gift tags from our website here. 🙂

    Margie Bruner
    owner of Glory Kitchen

    instagram
    facebook

    Pickled Jalapeño Peppers

    one 16 oz jar of peppers

    Ingredients

    • 4-8 jalapeño peppers, fresh
    • 1 cup white wine vinegar
    • 1/8 cup olive oil
    • 1 tablespoon CAIRO nut & spice mix
    • 1 tablespoon sea salt, kosher style
    • ½ tablespoon sugar

    Instructions

    1. In a medium saucepan, bring to a boil vinegar, oil, CAIRO nut & spice mix, salt, and sugar. Boil for about 3-4 minutes, making certain the salt and sugar are completely dissolved. Remove pan from heat and set aside to slightly cool.
    2. Slice the fresh jalapeños (I like to slice them lengthwise - it makes a larger cut and also look prettier in the pickling jar) and layer them carefully into a 16 oz mason jar, arranging them so their sides are displayed nicely. If you are making these pepper jars as gifts, take extra time to stack them so they look visually appealing through the glass.
    3. Pour the liquid over the jalapeños until they are completely submerged and close with lid. You may do this even if the liquid is still a bit warm. Allow the jar to come to room temperature before refrigerating.
    4. If you are making these to use right away, you can place them in the refrigerator, allow to marinate for 3 or more days, and then use as needed. They should last in your fridge for up to a month or more.
    5. You can also use the same recipe if you are canning, using typically canning procedures. Doing it this way, they'll last up to a year!

    Notes

    I used the Glory Kitchen Cairo nut blend but these peppers would also work well with the Mumbai, Penang or San Miguel nut blends.

    Pickled Jalapenos - Glory Kitchen
    Pickled Jalapenos - Glory Kitchen
    Pickled Jalapenos - Glory Kitchen
    Pickled Jalapenos - Glory Kitchen
    Pickled Jalapenos - Glory Kitchen
    Pickled Jalapenos - Glory Kitchen
    Pickled Jalapenos - Glory Kitchen
  • DUTCH BABY PANCAKES

    Dutch Baby Pancakes are such a fun dish – they are airy, pretty and taste delicious.  Who wouldn’t love their own cute little cast iron pan filled with a puffy pancake and topped with caramelized apples and then sprinkled with a dusting of powdered sugar?  Dutch baby pancakes remind me a bit of souffles because they are light, airy, and need to be served immediately out of the oven so they don’t deflate.

    At first glance, they may look intimidating to make, but read on through the recipe… you’ll find out they are quite easy with few ingredients and just a few simple steps.  Using a blender, you whip up the pancake batter then pour it into a hot skillet and let the oven do its magic.

    Your guests will be wowed as you present them with a puffy pancake topped with fresh fruit and a squeeze of tangy lemon.  Let the season dictate your choice of topping and then make a simple compote of lemon juice, brown sugar and fresh fruit… think apples, strawberries, blueberries, cherries, plums, and the list goes on.  Enjoy!

    Margie Bruner - Glory Kitchen

    Margie Bruner
    owner of Glory Kitchen

    instagram
    facebook

    Dutch Baby Pancakes

    serves 4

    Ingredients

    • 2-3 teaspoons Provence nut & spice mix
    • 3-5 tablespoons unsalted butter, room temperature
    • 3 large eggs
    • 3/4 cup whole milk
    • 1/2 cup all-purpose flour, (spooned and leveled)
    • 1/4 teaspoon salt
    • 1/2 teaspoon pure vanilla extract
    • 1/4 cup plus 1 tablespoon sugar
    • 1 tablespoon fresh lemon juice
    • For topping:
    • 2 apples
    • butter
    • brown sugar

    Instructions

    1. Slice apples thinly. Heat a cast iron skillet, add a pat of butter and brown sugar and let melt until sugar caramelizes then add the apples, laying them flat and not overlapping. Allow the apples to sit without touching them, at medium heat, until they are caramelized and then flip and do the same on the other side. Remove the apples from the pan and set aside as the topping to your dutch baby.
    2. Preheat oven to 425 degrees. Using 4 small individual cast-iron pans or 1 medium cast-iron pan, melt about 1 tablespoon butter in each individual pan or 2 tablespoons if using a single cast iron pan. (When the batter is ready and blended, I place the pans in the hot oven and allow the butter to melt and the pan to heat up.)
    3. In a blender, combine eggs, milk, flour, Provence nut & spice mix, salt, vanilla, and 1/4 cup sugar. Blend the mixture until foamy, about 1 minute. Pour the batter into the hot skillet (s), bake until pancake is puffy and lightly browned, about 20 minutes. (the edges of the pancake will crisp up a bit)
    4. Working quickly, remove the pancakes from the oven, arrange the caramelized apples or other fresh fruit on top, sprinkle all over with powdered sugar and serve with lemon wedges to squeeze over the hot pancakes. Serve immediately.

    Notes

    adapted from a Martha Stewart recipe

    Dutch Baby Pancakes - Glory Kitchen
    Dutch Baby Pancakes - Glory Kitchen
    Dutch Baby Pancakes - Glory Kitchen
  • BUTTERNUT SQUASH AND CHICKEN SANDWICH

    This sandwich layered with thick slices of roasted butternut squash and other veggies is filling and delicious .  Big slices of squash, rubbed with olive oil and roasted in the oven until they are tender and golden brown, then added into a hollowed out sourdough roll… well, it is just so good.

    It also has a bit of added heat from sriracha mayo, which is simple to mix together but oh so much better than just plain mayo.  I have added roasted and shredded chicken as well because I typically like a protein in my sandwiches but it would be just as wonderful with the butternut alone, or with other roasted veggies.  Think thick slices of zucchini, eggplant or large portobello mushrooms.  You could even add caramelized onions for a touch of sweetness.

    Finding fresh, good bread is the essential first step in making an amazing sandwich.  I’ve always felt it was the starting point for something really tasty and I am willing to make a special trip to the local bread bakery to find just the right loaf or roll.  I often will buy a few extra, wrap them well, and put them in the freezer to have ready when the sandwich mood hits.  Just remember, bread does not last too long in the freezer, so date the outer wrapping and use it within 3 months or so.

    Three reasons I hollow out the sourdough loaf: one, it allows you to really fill it with lots of veggies and flavor, two, it reduces the extra bread calories, and three, it helps meld the sandwich together so things stay put when you are biting into that toasted, veggie filled goodness.

    The Penang nut & spice mix sprinkled into the roll adds a bit of crunch and nutty flavor.  Use this recipe as a starting point, then get creative and make your own combination of roasted veggie flavors!

    Any of the Glory Kitchen nut & spice mixes would work well in this type of sandwich.

    Margie Bruner
    owner of Glory Kitchen

    instagram
    facebook

    Butternut Squash and Chicken Sandwich

    Ingredients

      For the sriracha mayo:
    • 1 tablespoon sriracha sauce, gochujang sauce or other hot sauce
    • ½ cup mayonnaise
    • 2 teaspoons lime juice, fresh
    • pinch of sea salt
    • For the sandwiches:
    • Penang nut & spice mix
    • 4 sourdough rolls or baguette
    • 1 butternut squash, sliced and roasted
    • 1 bag arugula
    • red onion, sliced thin
    • roast chicken, shredded
    • olive oil
    • sea salt

    Instructions

      Sriracha mayo:
    1. Mix all the ingredients for the sriracha mayo using a small amount of hot sauce, then adjust the heat level as desired by adding more in small increments. Set aside.
    2. Sandwiches:
    3. Peel the butternut squash, clean out the inside cavity, and slice into about ½ inch thickness. I like to cut them lengthwise and get a nice thick slice. Drizzle them with olive oil, rub all over with your fingers, sprinkle with sea salt, and place them into a 450° oven for about 30 minutes or until the squash is golden and tender. Remove from the oven and let them cool completely.
    4. Slice the sourdough rolls in half lengthwise, and with your hands, scoop out the tender inside cavity of bread. Next, drizzle the inside with olive oil, rub it all around with your hands, sprinkle the inside with sea salt and then with a generous sprinkle of Penang nut & spice mix. Place the rolls into the oven with the temperature set to broil. Stand by and keep an eye on these because they can burn all too quickly. Remove rolls from the oven when they are toasted and golden.
    5. Take the rolls and fill each side with roasted squash, then add a layer of sriracha mayo, then a layer of shredded chicken, sliced red onions, and top with lots of arugula. Drizzle the arugula with a tad of olive oil then sprinkle with sea salt. Top with the other half of the loaf. I like to tie each sandwich tightly with parchment paper and twine then leave in the refrigerator for about an hour to allow it to meld and bind together. Slice in half and serve sandwiches at room temp. with a side of chips, slaw or potato salad. Enjoy!

    Butternut Squash and Chicken Sandwich - Glory Kitchen
    Butternut Squash & Chicken Sandwich_square2
    Butternut Squash and Chicken Sandwich - Glory Kitchen
    Butternut Squash and Chicken Sandwich - Glory Kitchen
    Butternut Squash and Chicken Sandwich - Glory Kitchen
Updating…
  • No products in the cart.

JOIN US !
JOIN
close-link