Author Archives: Margie

  • Mushroom Soup - Glory Kitchen

    MUSHROOM SOUP

    I’ve been making this Mushroom Soup for over 35 years and I love it every time I make it.  Because it is a hearty, creamy soup I typically make this recipe in the winter – but it always satisfies.  With so many mushrooms it has an intensely deep, rich, umami flavor and has become a favorite of friends every time I share the recipe.  It’s a wonderful dish to make for a dinner party too – tastes so fancy but really quite easy to make.

    Many years ago, back in my college days, we used to frequent a restaurant called The Grape, located on Greenville Avenue, in Dallas, Texas.  The very reason we went was to order this wonderful and flavorful Mushroom Soup.  Thirty five years later, The Grape Restaurant is still going strong, it is still in the same location, and it still serves this favorite and now infamous, Mushroom Soup. (Update: sadly, The Grape closed its doors in October, 2019)

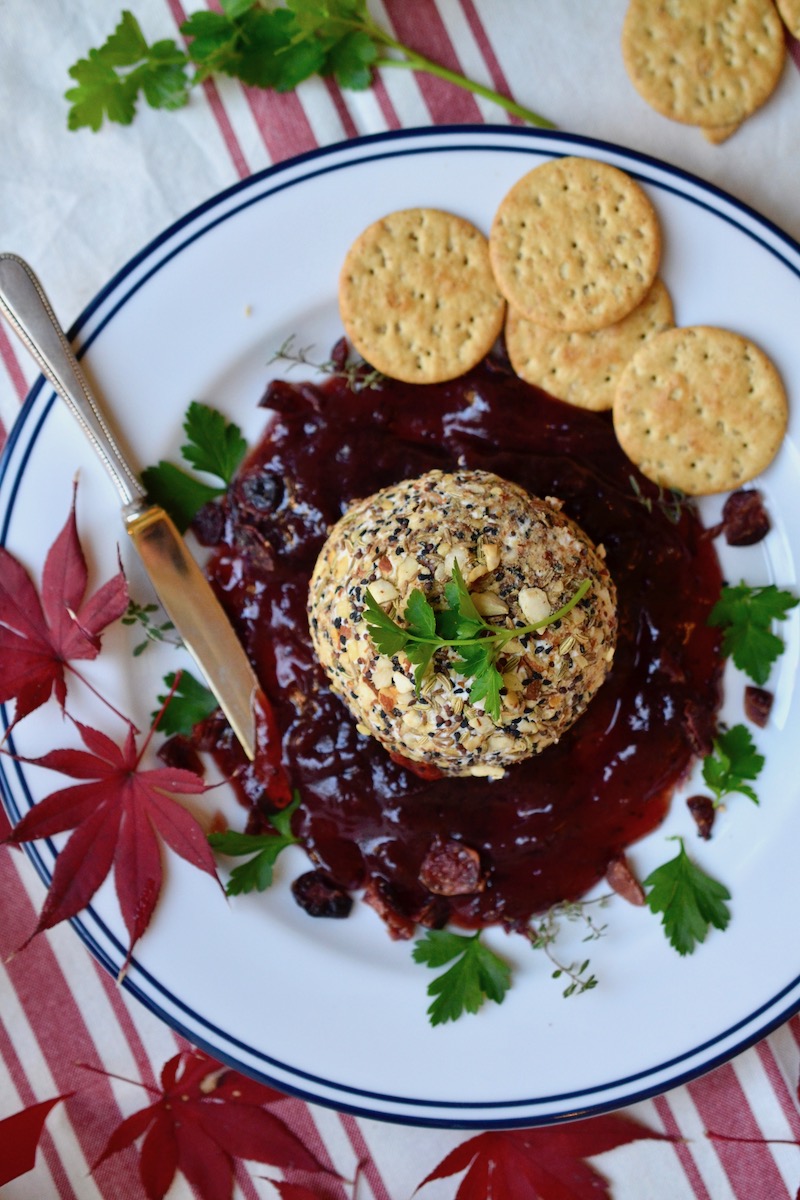
    Over the years, I’ve adapted The Grape’s recipe in an effort to lighten it up a bit and I infused in some of our Glory Kitchen Provence nut & spice mix to add a bit of French flair to the Mushroom flavors.  The Provence blend adds just the right amount of herbs with the thyme, marjoram, savory, and basil and the little currants give it a touch of sweetness – a nice flavor burst.

    Concerning the type of mushrooms to use in this soup, I don’t really fret with an exact variety.  When available, I do like to mix them up and try to include cremini, shiitake, oyster, and enoki mushrooms, but if all you can find is the typical button mushroom, don’t be afraid to go with that too.  Mushrooms of all varieties will work in this soup.  When they are sauteed and browned with the butter, the flavor becomes wonderfully intensified and makes a terrific soup no matter which variety mushroom you end up using.

    I am a true soup lover and this Mushroom Soup recipe is made at least once a year – I hope you enjoy it as much as we do and make it on repeat year after year.

    Margie Bruner - Glory Kitchen

    Margie Bruner
    owner of Glory Kitchen

    instagram
    facebook

    MUSHROOM SOUP

    Ingredients

    • 1 tablespoon Provence nut & spice mix
    • 5 tablespoons butter
    • 2 medium onions, chopped
    • 3 celery stalks, chopped
    • ¾ lb fresh mushrooms, coarsely chopped
    • 4 tablespoons flour
    • 3 cups beef stock
    • ½ cup white wine
    • ¼ tsp. white pepper (or black if you don't have)
    • ¼ tsp nutmeg (freshly grated is preferred)
    • ½ cup heavy cream (or half & half)

    Instructions

    1. Melt butter in heavy stock pot. Add chopped onions, celery, and Provence nut & spice mix and cook over medium heat until the veggies are translucent. Add all the mushrooms and cook for 10-12 minutes, or until liquid has cooked out of mushrooms and they are soft. Lightly sprinkle in the flour and blend, cooking for a few minutes to remove the raw flour taste.
    2. Add the beef stock, and the white wine, just a bit at a time, whisking well to make certain there are no lumps. Once all the stock and wine have been added, add white pepper and fresh nutmeg and slowly bring the mixture to a boil. Immediately reduce the heat & simmer for 10 minutes, stirring occasionally. Remove the pot from the heat source, slowly add cream and serve warm.

    Mushroom Soup - Glory Kitchen
    Mushroom Soup - Glory Kitchen
    Mushroom Soup - Glory Kitchen
    Mushroom Soup - Glory Kitchen
    Mushroom Soup - Glory Kitchen
  • Holiday Cheese Ball - Glory Kitchen

    HOLIDAY CHEESE BALL

    This Holiday Cheese Ball is the perfect appetizer for upcoming parties and gatherings.  It is always a hit because really, who doesn’t love creamy cheese loaded with crunchy flavor?  The best part about this appetizer is threefold: first, it is made with only three ingredients; second, it takes no time at all to put together, and finally, you can make it ahead and serve at room temperature when guests arrive.  That is what I call perfect party fare.

    I call this a Holiday Cheese Ball because it seems so appropriate for winter party gatherings but don’t be fooled by the name, it is just as good served at all times of the year.  For spring or summer seasons I would pair it with sweet strawberry, peach, or blackberry jam but during the Christmas season I love serving this spicy and flavorful Holiday Cheese Ball alongside a cranberry compote or fig jam.  The sweet, fruity jam, the creaminess of the cheese, and the pungent notes of seeds and herbs from the Indian flavors of our Mumbai nut & spice mix make for a tasty combination.

    This Holiday Cheese Ball is made by mixing cream cheese and Monterrey Jack cheese, then crusted with our spicy Indian nut mix, but all flavors of our Glory Kitchen nut & spice mixes work beautifully crusted on a cheese ball.

    For a different twist you could try a mix of cream cheese and Manchego or Queso Fresco and then crust it with our Mexican flavors of San Miguel nut & spice mix.  Or take it in a Mediterranean direction with a cream cheese and feta combination crusted with our Cairo nut & spice mix.  Another fabulous cheese combination (and one I make often) is cream cheese and goat cheese crusted with our Provence nut & spice mix.  There are so many combinations; each one has its own delicious flavor twist and they make a lovely presentation crusted in colorful seeds, nuts, herbs and spices.

    I like to make the cheese ball ahead, refrigerate wrapped in plastic wrap, then serve at room temperature when the guests arrive so the cheese is soft and creamy for spreading.  My favorite pairing is with fresh baguette slices but any type of cracker works perfectly as well.

    With our Glory Kitchen spice blends on hand, you’ll always be ready to throw together a true crowd-pleasing appetizer.  You don’t even need a recipe.  It’s just that simple.

    Margie Bruner - Glory Kitchen

    Margie Bruner
    owner of Glory Kitchen

    instagram
    facebook

    Holiday Cheese Ball

    Yield: about 6-8 persons

    Ingredients

    • about 1/4 cup Mumbai nut & spice mix
    • 1 block (8 ounce) cream cheese
    • 1 block Monterrey Jack cheese, shredded
    • fresh parsley, for garnish
    • 1 jar cranberry jam or preserves (also would be great with fig jam, strawberry jam, or blackberry jam)
    • crackers or slices of fresh baguette

    Instructions

    1. In a large mixing bowl, combine the cream cheese and Monterrey Jack cheese until they are incorporated well. I like to use my hands to get it well mixed together. Form into a ball.
    2. Take the Mumbai nut & spice mix and sprinkle it out onto a flat countertop, cutting board, or flat surface. Take the cheese ball and press it down firmly into the Mumbai nut & spice mix to crust the exterior of the ball. Move it around and continue pressing the cheese into the nut mix until the entire ball is completely covered in the blend. Wrap the cheese ball with plastic wrap and store in the refrigerator until ready to serve.
    3. I like to bring the cheese to room temperature before serving so it is creamy and easy to spread. Place the ball into the center of a serving dish and spoon a seasonal jam (I love cranberry at Christmas time but fig is delicious as well) all around the base of the cheese ball. Serve with slices of fresh baguette or with your favorite crackers.

    Holiday Cheese Ball - Glory Kitchen
    Holiday Cheese Ball - Glory Kitchen
    Holiday Cheese Ball - Glory Kitchen
    Holiday Cheese Ball - Glory Kitchen
    Holiday Cheese Ball - Glory Kitchen
  • Sriracha Spiced Cashews - Glory Kitchen

    SRIRACHA SPICED CASHEWS

    This recipe for Sriracha Spiced Cashews is a special request from many of you I met at last week’s Christmas Bazaar.  We had great fun spreading Glory Kitchen Christmas cheer and I loved meeting so many new people and introducing you to our crunchy nut & spice mixes.  During the market I served a bowl of these cashew nuts seasoned with our Penang nut & spice mix, a blend of chopped peanuts and Asian seeds & spices. Paired with a touch of honey and sriracha chili, they make a great combination of sweet and spicy.

    Sriracha chili is a Thai or sometimes considered a Vietnamese chili sauce.  It has a garlic base and is widely available at most grocery stores.  If you don’t have Sriracha, don’t be afraid to substitute other chili pastes or sauces such as Gochujang (a Korean sweet & spicy chili paste), Adobo (a Mexican smoky jalapeno sauce), or Harissa (a North African chili paste). If you use Adobo, I would pair it with our Glory Kitchen San Miguel nut & spice mix. 🙂

    These yummy Sriracha Spiced Cashews are made with honey, chili, and a squeeze of lime – that’s it.  I love to have these stored away in a zip-lock baggie in the freezer, so if you make them, consider doubling the recipe so you can have some stashed away and ready for an impromptu cheese board, to sprinkle in a salad, or just to snack on alongside a glass of wine.  Let the parties begin!

    Margie Bruner - Glory Kitchen

    Margie Bruner
    owner of Glory Kitchen

    instagram
    facebook

    Sriracha Spiced Cashews

    Yield: makes 3 cups of cashews

    Ingredients

    • 2 tablespoons Penang nut & spice mix
    • 1 egg white
    • 3 tablespoons honey
    • 2 tablespoons Sriracha or Gochujang sauce
    • 1/2 lime (juice and zest)
    • 1 teaspoon sea salt
    • 3 cups raw cashews

    Instructions

    1. Preheat the oven to 300°. Line a baking sheet with parchment paper and either spray the paper with a light cooking spray coating or drizzle a bit of oil (I like to use olive oil) on the parchment and rub it all over with your hands to give it a light coat. You can also use a silpat liner on your baking tray.
    2. Mix together the Penang nut & spice mix, egg white, honey, Sriracha, lime juice & zest, and sea salt.
    3. Using a large mixing bowl, combine the cashews and Sriracha mixture and toss well to coat the cashews. I like to use my hands to get it well mixed.
    4. Spread the cashews in an even layer on a large baking sheet. Reserve any extra sauce at the bottom of the bowl to coat the cashews again after they are half-way toasted. Place into the oven for 15 minutes.
    5. Remove the cashews from the oven, pour any remaining sauce over them, and gently move them around so they are turned and so they do not stick to the tray. Place back into the oven for another 15 minutes.
    6. Turn off the oven and leave the tray in the oven for an additional 30 minutes with the door shut to allow the warm heat to dry out the nuts. Remove from the oven, allow to cool completely and store in an airtight container until ready to use.

    Sriracha Spiced Cashews - Glory Kitchen
    Sriracha Spiced Cashews - Glory Kitchen
    Sriracha Spiced Cashews - Glory Kitchen
    Sriracha Spiced Cashews - Glory Kitchen
    Sriracha Spiced Cashews - Glory Kitchen
    Sriracha Spiced Cashews - Glory Kitchen
    Sriracha Spiced Cashews - Glory Kitchen
  • Bistro Braised Chicken Thighs - Glory Kitchen

    BISTRO BRAISED CHICKEN THIGHS

    I’m excited for this week’s recipe of Bistro Braised Chicken Thighs coming from a friend who is passionate about her food.  She loves checking out new restaurants, experiencing new food trends, and is an avid home cook – a true foodie in every sense of the word.  Julie Wojciechowski is an East coast girl who hails from Connecticut and with whom I bonded immediately when she first moved to Charlotte.  She is a lover of all things outdoors, is a serious yogi, and is my morning walking buddy.

    During a recent walk we chatted about our excitement for the onset of cool weather foods when Julie mentioned how much she loves to use her le Creuset braiser for her favorite slow cooked food recipes.  The term “braising” comes from the french word “braiser”, which is a combination cooking method using both wet and dry heats.  Typically, a protein is first seared at a high temperature to brown and bring caramelization to the exterior (this gives flavor), and then it is finished in a heavy iron pot with a lid and allowed to cook at a very low temperature alongside a braising liquid.  The result is a flavorful & tender, fall-off-the-bone dish.

    Julie’s recipe is a light chicken dish which uses thighs, one of the tastiest parts of a chicken.  It is braised with carrots, celery, and a secret sweet ingredient (dried plums), then seasoned with our Glory Kitchen Provence nut & spice mix, a mix of french herbs, chopped cashews, and dried currants.

    And although this recipe will tell you to serve this tender chicken over cooked egg noodles, Julie actually made homemade spaetzle as the base for her braised chicken.

    When she first told me we were going to make homemade spaetzle, I thought it sounded interesting but complicated.  To my great surprise, however, the recipe included 4 simple ingredients: 2 1/2 cups flour,  1 cup of milk, 2 eggs, and a pinch of salt.

    It literally took about 3 minutes to mix together with a fork, place the wet dough into her spaetzle maker, and boil the little pearl dumplings in a pot of hot water until they rose to the top, which meant the noodles were ready.  Total time?  No more than 3 minutes – and we had homemade spaetzle!

    The tiny dumplings were delicious little puffs and took the dish from tasty to spectacular.  I can hardly wait to get my spaetzle maker and do it all again on my very own.  If you aren’t ambitious enough to attempt homemade spaetzle noodles, don’t let this hold you back – a dried egg noodle will work magic as well.

    I hope you enjoy Julie’s delicious braised chicken dish.

    recipe by:
    Julie Wojciechowski

    Bistro Braised Chicken Thighs

    Ingredients

    • 3 teaspoons Provence Nut & Spice mix
    • 2 tablespoon butter, divided
    • 8 (4-ounce) bone-in chicken thighs, skinned
    • 4 thinly sliced carrots
    • 2 onions, chopped
    • 1/2 cup thinly sliced celery (2-3 stalks)
    • 8 pitted dried plums, chopped
    • 2 teaspoons Dijon mustard
    • 2 cups chicken broth
    • 3/4 cup water
    • 1/2 teaspoon salt
    • 1/2 teaspoon black pepper
    • 4 cups hot cooked egg noodles

    Instructions

    1. Melt 1 tablespoon butter in a large skillet over medium heat. Add chicken to pan; cook 6 minutes, browning on both sides. Remove chicken from pan; keep warm.
    2. Add remaining tablespoon butter to pan; swirl until butter melts. Add carrot, onion, celery, and dried plums; cook 4 minutes or until vegetables begin to soften, stirring frequently. Stir in Provence Nut & Spice mix; cook 30 seconds. Stir in mustard. Add broth and 3/4 cup water, scraping pan to loosen browned bits; bring to a simmer.
    3. Return chicken to pan. Cover, reduce heat, and simmer for 35 minutes. Uncover, increase heat to medium-high, and simmer until sauce is reduced by half (about 10 minutes). Stir in salt and pepper. Serve over cooked noodles.

    Bistro Braised Chicken Thighs - Glory Kitchen
    Bistro Braised Chicken Thighs - Glory Kitchen
    Bistro Braised Chicken Thighs - Glory Kitchen
    Bistro Braised Chicken Thighs - Glory Kitchen
    Bistro Braised Chicken Thighs - Glory Kitchen
    Bistro Braised Chicken Thighs - Glory Kitchen
    Bistro Braised Chicken Thighs - Glory Kitchen
  • Butternut, Brussels, and Walnut Salad with Tangerine Dressing -Glory Kitchen

    BUTTERNUT, BRUSSELS, & WALNUT SALAD

    This Butternut, Brussels, and Walnut Salad with a Tangerine Vinaigrette is a delicious way to ring in the fall season.  It’s everything tasty about fall tossed together into one big bowl and it has all types of flavor –  roasted squash, crunchy brussels sprouts, tart cranberries, nutty walnuts, and creamy goat cheese.  This combination of ingredients makes a mighty flavorful salad that you’ll want to repeat over and over.  I’ve already made this salad twice and I’m serving it again for a gathering this week.

    This is a simple recipe but to make it quickly I recommend roasting both the butternut squash and the brussels sprouts the day before and store them in the refrigerator until you are ready to assemble your salad.  The tangerine dressing could also be made ahead and stored in a mason jar in your fridge until you are just about to serve.  My best advice is to roast plenty of butternut squash and brussels sprouts because it is difficult to resist the temptation of snacking on them as they come out of the hot oven… better than candy!

    The dressing has a surprise ingredient of fresh tangerine juice which gives it a bright and citrusy flavor.  A drizzle of honey adds more sweetness but the best part is the surprise pinch of cinnamon and the Indian flavors from our Glory Kitchen Mumbai nut & spice mix.   This recipe will make plenty of dressing  so you may have some leftover for drizzling on raw veggies later or even to use as a marinade for salmon.  Hope you enjoy this Butternut, Brussels, and Walnut Salad with a Tangerine Vinaigrette as much as I have.

    Margie Bruner - Glory Kitchen

    Margie Bruner
    owner of Glory Kitchen

    instagram
    facebook

    Butternut, Brussels, & Walnut Salad with a Tangerine Vinaigrette

    serves about 6 salads

    Ingredients

      For the dressing:
    • 1 teaspoon Mumbai nut & spice mix
    • 1/2 cup olive oil
    • 1/4 cup white wine vinegar
    • 1/4 cup tangerine juice, fresh squeezed
    • 1/2 cup greek yogurt
    • 1/4 cup organic mayonnaise
    • 1 teaspoon honey
    • good pinch of salt
    • good pinch of cracked pepper
    • good pinch of cinnamon
    • For the salad:
    • 1 butternut squash, cubed & roasted
    • 3-4 cups brussels sprouts, quartered & roasted
    • romaine lettuce, chopped
    • arugula lettuce
    • 1/2 cup (or less) dried cranberries
    • 1/2 cup goat cheese crumbles
    • 1 cup walnuts, toasted & coarsely chopped
    • extra Mumbai nut & spice mix
    • for topping

    Instructions

      dressing:
    1. Place all of the dressing ingredients into a small mason jar and shake very well until it is completely emulsified together. Taste the dressing and adjust the seasonings. You may want to add a bit more honey if you prefer it a bit sweeter.
    2. salad:
    3. Peel and cube the butternut squash and place onto a baking sheet lined with parchment paper. To allow for easier peeling & slicing I like to place the entire butternut squash into the microwave and run it for 5 minutes or so, on high. Remove and allow to cool a bit. Cut in half, cut the ends off, then peel. Slice each piece in half, clean out the cavity with a spoon (I like to use a grapefruit spoon which has serrated edges). Then slice the butternut and cut into cubes. Drizzle the cubed squash with olive oil & sprinkle with sea salt. Place into a hot 450° oven for about 30 minutes or until the squash is a bit browned on the edges. Remove and cool completely. This can be done the day before and stored in the refrigerator.
    4. Take the brussels sprouts and cut off the ends, slice them into quarters then place on a parchment lined baking sheet and do the same as you did the squash; drizzle with olive oil, sprinkle with a pinch of sea salt, and throw into a hot oven, 450°, for a bit less time than the squash. You don't want to burn them so keep a close eye on your oven. I like to bake both sheets of vegetables at the same time. I also like to do this step well before I plan on assembling the salads.
    5. Slice up your romaine lettuce & toss together with the arugula (about equal parts of each). I typically like to toss them together with just a bit of dressing to lightly dress the lettuces but only use a bit so they don't wilt.
    6. Add the lettuces to each individual bowl or plate, top with butter nut squash, brussels sprouts, & dried cranberries. Top with toasted walnuts & goat cheese crumbles. You can finish with an additional sprinkle of Mumbai nut & spice mix.
    7. Serve the salads with the dressing on the side.

    Notes

    This dressing would also be wonderful with our Cairo, San Miguel, or Provence nut & spice mix.

    Butternut, Brussels, and Walnut Salad with Tangerine Dressing -Glory Kitchen
    Butternut, Brussels, and Walnut Salad with Tangerine Dressing -Glory Kitchen
    Butternut, Brussels, and Walnut Salad with Tangerine Dressing -Glory Kitchen
    Butternut, Brussels, and Walnut Salad with Tangerine Dressing -Glory Kitchen
    Butternut, Brussels, and Walnut Salad with Tangerine Dressing -Glory Kitchen
    Butternut, Brussels, and Walnut Salad with Tangerine Dressing -Glory Kitchen
  • Alaskan Cod en Papillote - Glory Kitchen

    ALASKAN COD EN PAPILLOTE (in parchment paper)

    An amazing way to bake fish is using this recipe for Alaskan Cod en Papillote, which means fish wrapped in a parchment paper packet or envelope.  Let’s face it, a fresh filet of wild-caught fish can be a pricey purchase and how many times have you tried to place it on the grill only to lose half the filet when it sticks to the grill or falls through the grates.  This is hands down my favorite way to work with a delicate piece of fish. The result is a tender, juicy and oh so flavorful dish.

    This method treats the fish delicately and the veggies alongside steam in their own juices and cook to tender perfection.  When the envelope emerges from the oven, a little snip of the parchment paper releases the most beautiful aroma.  I like to serve the packet on the plate with just a bit of a nip in the paper and then allow each person to gently rip open the packet to reveal fish filet perfection.  This is a complete meal in one packet – how easy is that?

    Don’t be afraid to use this baking method with all types of fish from salmon, to sea bass, to fresh-caught stream trout.  The choice of vegetables tucked inside your packet can vary with the seasons, zucchini, thinly sliced carrots, fennel, sliced cherry tomatoes, peppers, and the list goes on.  Our Provence nut & spice mix is the perfect seasoning for tender fish and fresh vegetables with aromatic french herbs and a touch of sweetness from dried currants.  The possibilities for this Alaskan Cod en Papillote dish are endless and the results – well, let’s just say I feel certain you’ll be wanting to make it again and again.  It is so, so simple and absolutely divine.  Enjoy!

    Margie Bruner
    owner of Glory Kitchen

    instagram
    facebook

    Alaskan Cod en Papillote (in parchment paper)

    Yield: 4 servings

    Ingredients

      For the marinade:
    • 2 tablespoons olive oil
    • 1 tablespoon fresh lemon juice
    • zest from lemon
    • 1 teaspoon Provence nut & spice mix
    • 1 1/2 teaspoon whole grain mustard
    • good pinch of salt
    • squeeze of honey
    • For the fish packet:
    • 1 1/2 - 2 pounds Alaskan Cod or other white fish, sliced into 4 filets
    • 1/2 red bell pepper
    • 7-8 fresh mushrooms
    • 1 cup haricot verts (french green beans)
    • 4 fresh lemon slices
    • 4 fresh sprigs of thyme

    Instructions

    1. Preheat the oven to 375°
    2. In a small bowl, mix together all the ingredients for the marinade and set aside.
    3. Cut the fish into 4 individual portions. Take an 18" piece of parchment paper and fold in half to create a crease in the center. Place a piece of fish near the crease, in the center of the parchment. Place a slice of lemon on top of the fish. Arrange the veggies around the fish and season the fish & veggies with a bit of sea salt. Drizzle the top of each fish filet and vegetables with some of the marinade.
    4. Fold the parchment paper over the fish and begin to crease the edges in an overlapping fashion beginning on one end and repeating all around until you have created a sealed packet around the fish and veggies (see photo).
    5. Repeat with remaining parchment and filets. Place the 4 packets on a baking sheet and bake for about 20-25 minutes, depending upon thickness of filet.
    6. Transfer the packet to a plate and carefully slice open with a knife or scissors. I like to cut an "X" right in the center then fold the paper back to reveal the delicious steam and aroma. You can choose to serve on a plate with the paper (my preference) or remove the contents onto a serving plate. Enjoy!

    Alaskan Cod en Papillote - Glory Kitchen
    Alaskan Cod en Papillote - Glory Kitchen
    Alaskan Cod en Papillote - Glory Kitchen
    Alaskan Cod en Papillote - Glory Kitchen
    Alaskan Cod en Papillote - Glory Kitchen
    Alaskan Cod en Papillote - Glory Kitchen
  • Roasted Corn and Avocado Dip - Glory Kitchen

    ROASTED CORN AND AVOCADO DIP

    My Roasted Corn and Avocado Dip is a crowd favorite that I have been making for over 20 years and it gets requested for a party time and time again.  It’s fresh, crisp, and oh-so-tasty!  Of course the best time of year to make Roasted Corn and Avocado Dip is summertime, when fresh corn is abundant in the markets, but don’t let that hold you back from making this dish during the off-season.  I have been known to grab a bag of frozen corn, toss it with a touch of olive oil, and roast it in the oven when you just can’t get your hands on a fresh ear of corn – not quite as crispy but still delicious. The added crunch from our Glory Kitchen San Miguel nut & spice mix gives it an extra kick of flavor and crunchy goodness.

    This is a perfect dip to serve to a crowd paired with tostada chips but it is also wonderful spooned over lettuce greens to make a fresh salad or tucked into tacos as a fresh topping.

    Once you know the main ingredients, it is easy to throw together from memory, but don’t skip the roasting of the corn because although it’s an extra step that takes a bit of time, it adds such an intense and smoky flavor to the dish.

    You can make this dip and serve it immediately or make it a few hours before your guests arrive, the flavors only intensify as it melds together.  I hope you make this Roasted Corn and Avocado Dip before the summer gets away from you.

    Margie Bruner
    owner of Glory Kitchen

    instagram
    facebook

    Corn and Avocado Dip

    Ingredients

    • 2 teaspoons San Miguel nut & spice mix
    • 3 ears of corn
    • 2 tablespoons olive oil
    • 3-4 roma tomatoes, diced
    • 3 avocados, diced
    • ½ cup red onion, chopped
    • ¼ cup fresh cilantro, chopped
    • 2-3 cloves fresh garlic, minced
    • 1 fresh jalapeño pepper, minced
    • 1 small lime, juiced (about 1 1/2 tablespoons)
    • 1 tsp cider vinegar
    • 1 tsp. sea salt

    Instructions

    1. Peel and clean the ears of corn, drizzle with a bit of olive oil, and using your hands, rub the olive oil over all the corn, distributing it evenly. Place them on a baking sheet, sprinkle with sea salt and place in the oven under the broil. Keep a close watch on the corn and using tongs, turn the ears as they begin to lightly brown on the top. Once they are lightly toasted, remove from the oven and allow them to cool. Slice the kernels off the cob and place the corn into a large mixing bowl.
    2. Add all of the remaining ingredients into the bowl of corn and mix well. You can either serve immediately or refrigerate for up to 3 - 6 hours. Just before serving, sprinkle the top with more San Miguel nut & spice mix and serve with tostada chips as a dip. You can also spoon the corn dip over fresh lettuce greens, top with crushed tostada chips and enjoy a Mexican corn & avocado salad.

    Roasted Corn and Avocado Dip - Glory Kitchen
    Roasted Corn and Avocado Dip - Glory Kitchen
    Roasted Corn and Avocado Dip - Glory Kitchen
    Roasted Corn and Avocado Dip - Glory Kitchen
    Roasted Corn and Avocado Dip - Glory Kitchen
  • Watermelon and Tomato Salad -Glory Kitchen

    WATERMELON AND TOMATO SALAD

    Watermelon is the epitome of summer to me and it is one fruit I just can’t seem to get enough of.  Until I tasted this refreshing Watermelon and Tomato Salad I never would have thought to combine such a sweet fruit with fresh tomatoes.  The combination is quite a delicious surprise and hits many notes of flavor.

    Let’s begin with the sweet juiciness of watermelon, then add tomatoes, which I typically think of as a savory vegetable (even though it is botanically considered a fruit), add the saltiness of feta cheese crumbles, then toss it all together with fresh herbs and a light vinaigrette seasoned with our Mediterranean inspired nut & spice mix, called Cairo.

    I grow lots of herbs in my garden and chose to use fresh oregano in this salad to give it a peppery herb flavor but other herbs which would also work beautifully in this salad are fresh basil, cilantro, mint, or flat leaf parsley.  When mixing together the ingredients for the vinaigrette, it is important to taste as you go and adjust the seasonings to your own preferences.  I would be careful with the salt because of the existing saltiness of the feta cheese and you can certainly omit the honey if your watermelon is already super sweet.  The crunch and spiciness of the Cairo nut & spice mix is a wonderful surprise note of flavors; just a touch of fennel & cumin flavor gives it real interest.

    This is a refreshing salad combining two summer favorites – watermelon and tomato.  If you never thought these two would pair well, it’s time to give it a try.

    Margie Bruner
    owner of Glory Kitchen

    instagram
    facebook

    Watermelon and Tomato Salad

    Yield: serves 3-6

    Ingredients

    • Cairo nut & spice mix
    • 3 cups cherry tomatoes, preferably in season & locally grown
    • 3 cups watermelon, cubed & seedless
    • 1/3 cup feta cheese, crumbled
    • 1 tablespoon olive oil
    • 3/4 tablespoon lemon juice, fresh
    • 1 teaspoon honey
    • pinch of salt
    • 1/4 cup oregano, fresh & chopped

    Instructions

    1. Slice the cherry tomatoes in half and place into a large bowl along with the cubed watermelon.
    2. Whisk together the Cairo nut & spice mix, olive oil, lemon juice, pinch of salt, & honey.
    3. Add to the tomato & watermelon mixture, as well as the fresh oregano and feta cheese crumbles. Toss gently, taste and adjust seasonings, and serve.

    Notes

    The Mumbai nut & spice mix would also work well with this salad.

    Watermelon and Tomato Salad -Glory Kitchen
    Watermelon and Tomato Salad -Glory Kitchen
    Watermelon and Tomato Salad -Glory Kitchen
  • Cauliflower, Coconut and Basil Rice - Glory Kitchen

    CAULIFLOWER, COCONUT AND BASIL RICE

    This aromatic Cauliflower, Coconut, and Basil Rice is a new favorite.  The presentation is crisp and bright and my big secret  – it is made with half rice and half cauliflower. You really can’t tell there is a secret vegetable tucked inside.  The flavor is light and airy and I love the white color laced with bright green slivers of basil and then finished with the crunchy flavors from our Glory Kitchen Penang nut & spice blend.  The little bits of chopped peanuts, sesame seeds, and nori seaweed flakes give it such an interesting Asian and nutty flavor, not to mention, the color of those little sprinkles just pop against the pure white rice.

    Organic coconut milk is added as part of the liquid which gives this Cauliflower, Coconut and Basil Rice a wonderful rich and tropical flavor.  Coconut milk, as opposed to coconut water, comes from the inside flesh of the coconut (some call this the “meat”) combined with water.  This “milk” is thicker and more flavorful than the water found inside the coconut.  Because it has a higher fat content, there is no need to add oil or butter to the rice.  When you lift the lid after steaming your rice, it emits the most amazing floral aroma – that is the magic of the coconut.

    The reason it is hard to tell this rice is made up of half cauliflower is because it is steamed along with Jasmine rice, a long-grain type primarily grown in Thailand.  There is such a thing as a brown Jasmine rice, and yes, it does have a higher nutritional value than the white rice.  However, I prefer to use the white because of its clean color – especially when pairing it with cauliflower.  It is hard to differentiate between the actual rice and the cauliflower.

    I make this rice often to accompany a stir fry of vegetables like bok choy, mushrooms, peppers and snap peas .  It also makes a tasty bed for any type of white fish, salmon or shrimp.  The pure white color makes a beautiful backdrop for a perfectly baked fish or protein.  And if you’re lucky enough to have a bit left over, you can use it in your summer rolls or spread it on nori sheets topped with fresh vegetables and roll them up to make sushi rolls.  I hope you’ll try this lightened-up spin on rice.  It makes basic rice so much more interesting.

    Margie Bruner - Glory Kitchen

    Margie Bruner
    owner of Glory Kitchen

    instagram
    facebook

    Cauliflower, Coconut & Basil Rice

    Yield: 4-6 servings

    You can add the Penang nut & spice mix when you are steaming the rice, however, I like the nuts to stay crunchy so I add it in with the basil just before serving.

    Ingredients

    • 2 teaspoons or more Penang nut & spice mix
    • 2 cups jasmine rice
    • 2 cups cauliflower rice
    • 2 cups organic coconut milk (13.5 oz can)
    • 2 cups water
    • 2 teaspoons lime juice, fresh
    • 1/2 teaspoon salt
    • fresh basil, 1 bunch (about 3/4 - 1 cup)

    Instructions

    1. Either buy pre-"riced" cauliflower, or you can make your own by buying a full head of cauliflower, removing the stem, and break into small florets. Place the raw cauliflower florets into a food processor and pulse to break down until they are about the size of rice. I do not like to break it down too small, so after pulsing, I separate out the large pieces, pour the riced portion into a bowl and then re-pulse the larger pieces until they are all a similar consistency. Take your time in pulsing, otherwise, you risk making mushy cauliflower purée instead of creating a "riced" consistency.
    2. In a large pot, mix together the cauliflower rice, uncooked jasmine rice, coconut milk, water, lime juice, and 1/2 teaspoon salt. Place the pot on a burner at med/high heat and bring to a boil with lid on.
    3. Once it is at boil, turn down the heat to low and allow to simmer for 3-5 minutes (no more or the bottom will burn), remove pot from the heat, and let it sit completely covered for 20 minutes. Do not lift the lid; you want to allow the heat to steam cook the cauliflower rice. After 20 minutes, remove the lid & fluff the rice gently with a fork. Let the rice sit and cool for about 10 minutes or more.
    4. When the rice has cooled, add in the chopped basil and stir. It is important to add the basil only after it has cooled or the heat will wilt it and turn it dark. Mixing it in after cooling keeps the basil bright green and fresh. Just before serving, sprinkle generously with Penang nut & spice mix.

    Cauliflower, Coconut and Basil Rice - Glory Kitchen
    Cauliflower, Coconut and Basil Rice - Glory Kitchen
    Cauliflower, Coconut and Basil Rice - Glory Kitchen
    Cauliflower, Coconut and Basil Rice - Glory Kitchen
Updating…
  • No products in the cart.

JOIN US !
JOIN
close-link