• Herbed Ricotta Crostini - Glory Kitchen

    HERBED RICOTTA CROSTINI

    I love a good crostini so much – I think it should be included as one of the main food groups. 🙂  Herbed Ricotta Cheese Crostinis topped with anything fresh and seasonal, then drizzled with sweet honey, and finally topped with crunchy flavors from our Glory Kitchen nut & spice mixes can be a full meal in my book.

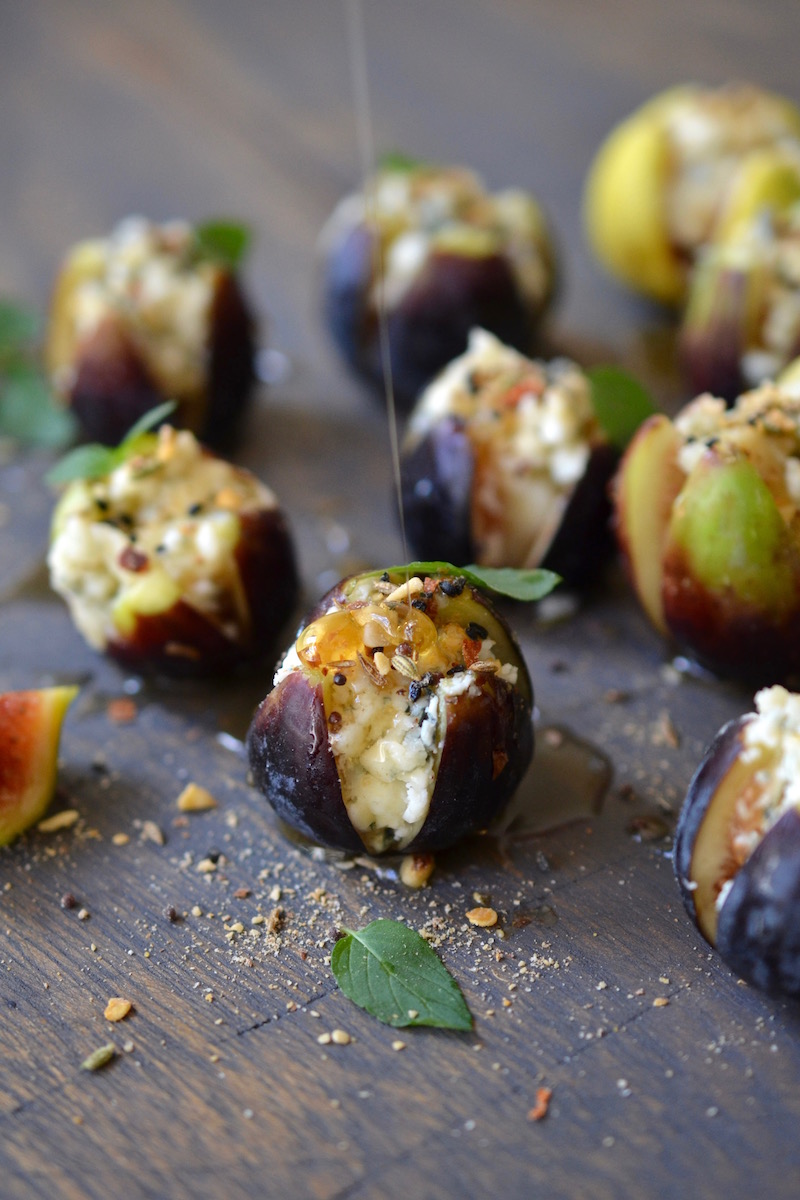
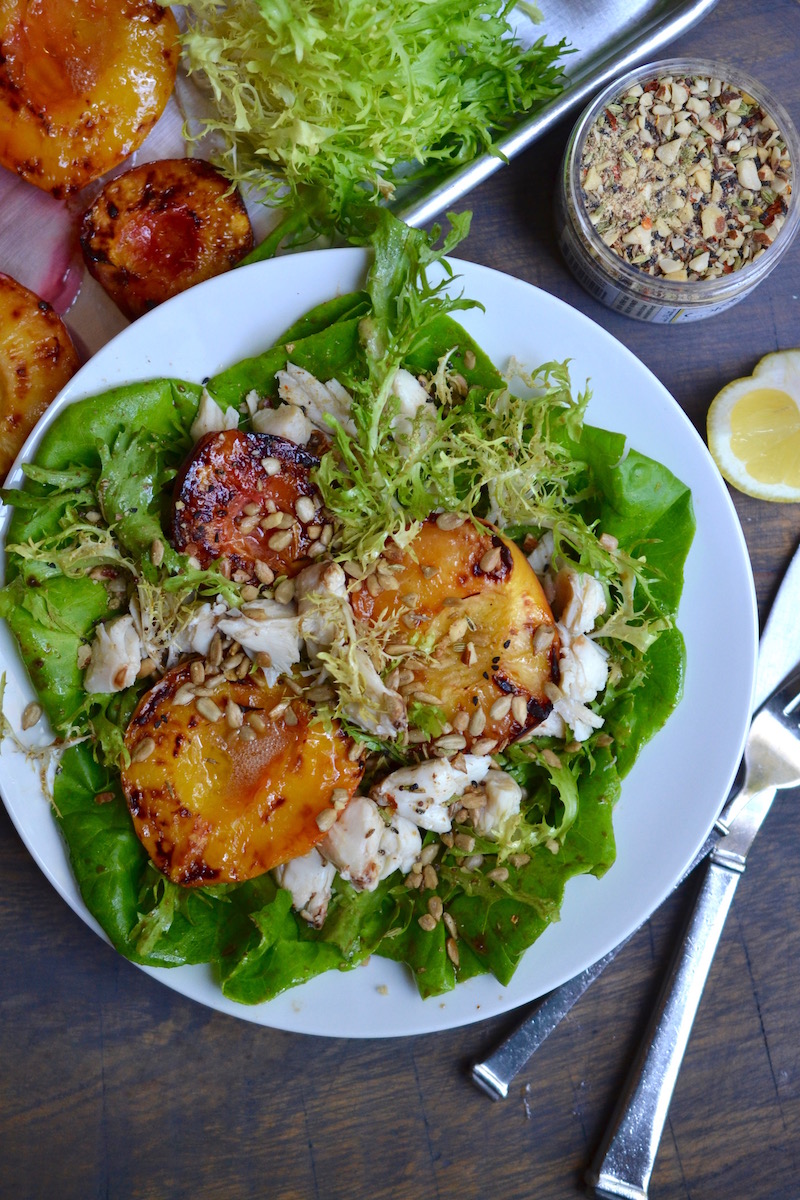
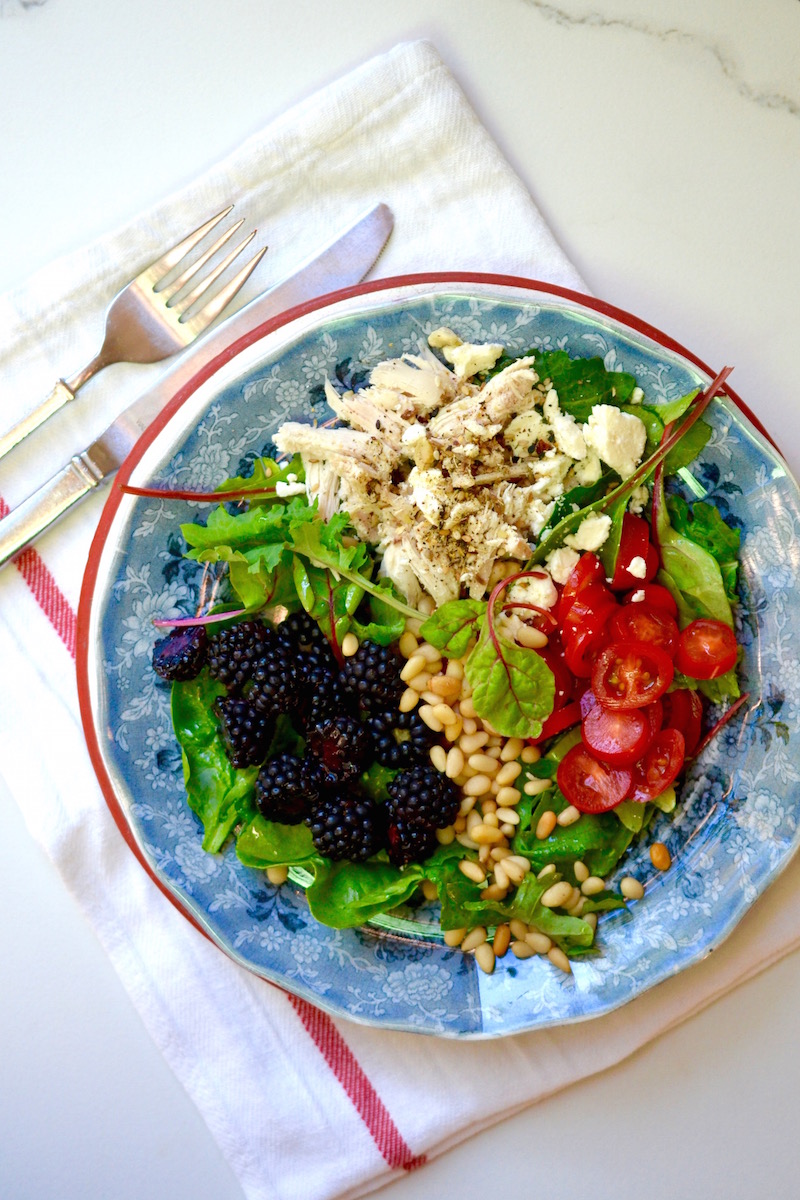
    Little olive oil crisped toasts with a creamy base and a flavorful topping are a quick and easy way to enjoy berries, stone fruits, tomatoes, grilled zucchini, even eggs of all types.

    I begin with a canvas of toast, slather on herbed ricotta cheese, then add whatever seasonal food I have on hand.  A final sprinkle of a crunchy nut blend, and in this case, our french flavors from Provence nut & spice mix makes for a delicious snack, breakfast, appetizer, or as is often in my case, dinner.  This is such a great way to get creative and top those crostinis with whatever freshness the season brings.

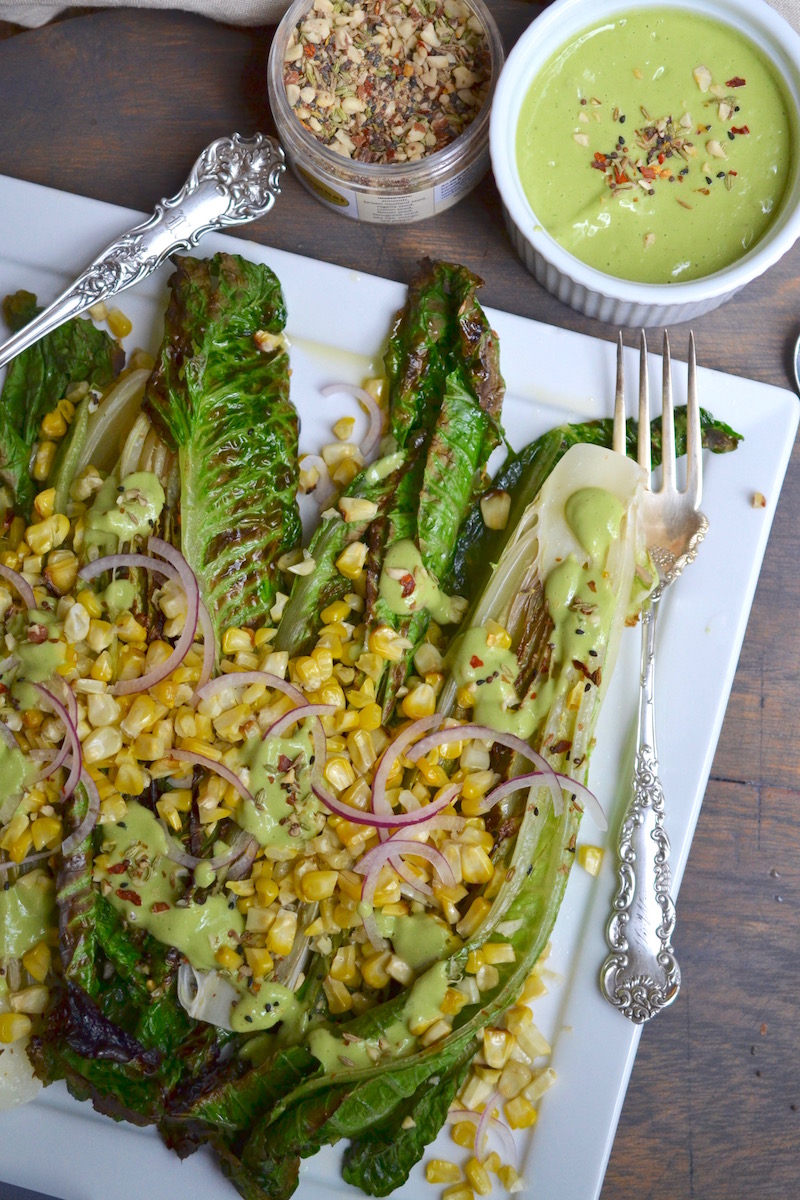
    As you can see from the following photographs, crostinis and toasts are the perfect match for our Glory Kitchen nut & spice mixes.  

    In the first few photos, I’ve used our Provence nut & spice mix as inspiration – mixed ricotta cheese with all types of fresh herbs, infused honey with lemon and french herbs,  and created a simple but perfectly creamy bite.  I’ve also included other crostinis using our Mumbai Indian blend, our San Miguel Mexican blend, our Umbria Italian blend, and our Cairo Middle Eastern blend.  They all add a nice crunchy flavor to crostini.  

    Hope you’ll get creative and top your next crostini toasts with any of our Glory Kitchen nut & spice mixes.

    Margie Bruner
    owner of Glory Kitchen

    instagram
    facebook

    Herbed Ricotta Crostinis

    Yield: serves about 6-8 persons

    Ingredients

      For the herbed ricotta spread:
    • 2 cups ricotta cheese
    • 1/2 cup (or more) fresh herb mixture; basil, thyme, parsley, chives, mint, tarragon
    • pinch of sea salt
    • For the honey drizzle:
    • 1/2 cup honey
    • 2 teaspoons Provence nut & spice mix
    • fresh lemon, juice and zest
    • For the crostini toasts:
    • 1 french baguette
    • olive oil
    • pinch of sea salt
    • For the toppings:
    • anything in season - fresh fruit, veggies, even eggs

    Instructions

    1. Using a strainer placed over a bowl (to catch the liquid), line the strainer with either a cheese cloth or double layered paper towel. Spoon the ricotta cheese into the strainer placed over the bowl and allow it to sit for about an hour, or overnight in the refrigerator. When the ricotta is well drained of its liquid, place it in a bowl.
    2. Add the mixture of chopped fresh herbs and a pinch of salt. Stir gently to incorporate and your ricotta is ready to be the base on all types of crostini.
    3. Slice a french baguette on the bias and place on a baking sheet. Drizzle the baguette slices lightly with olive oil, sprinkle them with a bit of sea salt, and place into a 375° until the edges are brown and crisp.
    4. Add 2 teaspoons Provence nut & spice mix to the honey. Add a good squeeze of fresh lemon juice and the zest of about 1/2 of a lemon. Mix together and allow the honey to sit about 10-15 minutes so the dried herbs have a chance to re-constitute.
    5. Top the toasted crostini with a slather of herbed ricotta then drizzle with honey. You can garnish the tops with a fresh sprig of herbs. Enjoy!

    Notes

    Depending upon the topping you add to your cheese crostini base, any of the Glory Kitchen nut & spice mixes are the perfect crunchy addition with lots of flavor and a pretty finishing touch!

    Herbed Ricotta Crostini - Glory Kitchen
    Herbed Ricotta Crostini - Glory Kitchen
    Herbed Ricotta Crostini - Glory Kitchen
    Herbed Ricotta Crostini - Glory Kitchen
    Herbed Ricotta Crostini - Glory Kitchen
    Tomato Crostini - Glory Kitchen
    Persimmon Crostini - Glory Kitchen
    Hard Boiled Egg Crostini - Glory Kitchen
    Provence nut & spice mix
    Strawberry Crostini - Glory Kitchen
    Strawberry & Blueberry Crostini - Glory Kitchen
  • Charred Romaine with Green Goddess Dressing - Glory Kitchen

    CHARRED ROMAINE WITH GREEN GODDESS DRESSING

    If you love a good salad but want something new and different, try serving this Charred Romaine with Green Goddess Dressing.  The slight wilting of the romaine lettuce and charred leaves give it a nice, smoky, and intense flavor.

    This salad is garnished with fresh toasted corn and a creamy, herb flavored Green Goddess dressing with hints of Indian spices from our Glory Kitchen Mumbai nut & spice mix.  Sprinkled on the lettuce before it goes under the broiler, the nuts & spices intensify in flavor and they add a nice crunch to the salad.

    Trendy restaurants have recently popularized grilled romaine lettuce salads, however, here I’ve bypassed the grill and placed it under a hot broiler for just a few minutes to char the delicate edges and give the firm romaine just a bit of a wilt.  Once it is browned, I quickly remove it from the oven, allow it to slightly cool, and serve the salad right away topped with corn and some crunchy nut flavor from our nut blends.

    If you happen to have any leftover Green Goddess dressing it is also great for raw veggie dipping, a sauce drizzled over fish, or a spread on a sandwich.  I love the bright green color from the avocado and fresh herbs and the flavor is fresh and creamy.

    Experiment with this recipe and toss it with any of our other Glory Kitchen nut blends if you wish to move it in another flavor direction.  Enjoy!

    Margie Bruner - Glory Kitchen

    Margie Bruner
    owner of Glory Kitchen

    instagram
    facebook

    Charred Romaine with Green Goddess Dressing

    Yield: serves 4

    Ingredients

      For the dressing:
    • 1/2 avocado, ripe
    • 1/2 clove garlic
    • 1 1/2 tablespoons apple cider or white wine vinegar
    • 1/2 lemon
    • 2 teaspoons honey
    • 1 anchovy (or not if you dislike)
    • 1 cup fresh herbs (any combination) parsley, thyme, tarragon, cilantro, basil, chives, oregano
    • 1 teaspoon sea salt
    • 1/2 teaspoon pepper
    • water (1/4 -1/2 cup)
    • 1/2 cup olive oil
    • 1 tablespoon red onion, chopped very small
    • For the charred salad:
    • Mumbai nut & spice mix
    • 2 heads of romaine lettuce
    • 2 ears of corn
    • red onion, sliced very thin (for garnish)
    • olive oil
    • sea salt

    Instructions

      for the dressing:
    1. In a blender, mix together avocado, garlic, vinegar, lemon juice, honey, anchovy, herbs, water, salt & pepper until smooth. If you are not a fan of anchovies, you can certainly leave these out but I think they add a great salty flavor to the dressing. Slowly add in the olive oil until it is smooth. If it is too thick, add a bit more water (1 tablespoon at a time) until the right consistency is achieved for a creamy dressing. Taste and season with more salt and pepper if needed. Toss the chopped red onion into the blended dressing and stir in with a spoon. Set the dressing aside and allow to sit at room temperature while the salad is being prepared.
    2. for the charred salad:
    3. Set the oven to broil and place the oven rack on the upper third of the oven. Not the very top, but close.
    4. Clean the ears of corn and place them on a foil lined baking sheet. Drizzle with a bit of olive oil and a sprinkle them with a bit of sea salt. Place them in the oven, under the broiler, and allow them to brown a bit (but not burn). Using tongs, turn them a bit so all sides get a bit toasted. If they are put into a hot oven, this process should only take a few minutes so stay close to the oven. Remove from the oven and allow to cool completely. Using a large knife, cut the kernels off each ear. Place the toasted corn in a bowl.
    5. Leaving the cores intact, and using a large chef's knife, slice each head of romaine lettuce in half lengthwise. Place them cut side up on a foil lined baking sheet and drizzle each one with olive oil. Sprinkle with a bit of sea salt and some Mumbai nut & spice mix. Place in the oven, under the broiler and keep a close eye to make certain they do not burn. When the edges are charred and just a bit wilted, remove from the oven and let them cool.
    6. Arrange the charred romaine on a serving platter or on individual serving plates. Sprinkle the toasted corn across the lettuce heads. Top with very thin slices of red onion and then drizzle with the Green Goddess dressing. Top them with a sprinkle of Mumbai nut & spice mix and enjoy!

    Notes

    These charred romaine leaves would be wonderful with any of the other Glory Kitchen blends. If you choose to try the Provence blend, I would add a few sprinkles of currants or raisins over the whole dish which would add a nice sweetness to the salad.

    Charred Romaine with Green Goddess Dressing - Glory Kitchen
    Charred Romaine with Green Goddess Dressing
    Charred Romaine with Green Goddess Dressing - Glory Kitchen
    Charred Romaine with Green Goddess Dressing - Glory Kitchen
    Charred Romaine with Green Goddess Dressing - Glory Kitchen
  • Roasted Garlic - Glory Kitchen

    ROASTED GARLIC

    Roasted Garlic is a great ingredient to use in dips, dressings, soups, hummus, cheese trays, bread, pizzas, or just topped on tasty crackers.

    Garlic in its raw state can be pungent and leave a strong after taste, however, once it is roasted, it becomes sweet, creamy, and deliciously caramelized.

    Sister to onions, shallots and leeks, garlic has many proven health benefits and medicinal properties.  It’s often touted as one of “the world’s healthiest foods”, so roasting it in large batches and keeping it on hand to be ready to throw into recipes is a great routine to have.

    I’ve seasoned this batch of garlic with the Asian nutty flavors of our Glory Kitchen Penang nut & spice mix which adds a bit of red pepper heat and a hint of ginger.  I think any of our Glory Kitchen nut blend flavors would make a great seasoning enhancer to Roasted Garlic – it just depends upon the flavor that moves you, Mexican, Asian, Indian, Italian, French or Middle Eastern.  The process is easy and the rewards are delicious. 

    Margie Bruner
    owner of Glory Kitchen

    instagram
    facebook

    Roasted Garlic

    Ingredients

    Instructions

    1. Heat the oven to 450°.
    2. Take the bulb (full head) of garlic and slice off the entire top to expose a flat layer of each clove. (see photo). Arrange the full bulbs with skins on, face up in a baking dish & drizzle the tops with olive oil. Sprinkle all the bulbs with sea salt and a generous amount of Penang nut & spice mix.
    3. Cover the baking dish tightly with aluminum foil and place in the hot oven for 30 minutes. Remove from the oven, uncover, and allow them to cool completely.
    4. Take each head of garlic, and with your hands, squeeze out each individual garlic clove into a bowl (see photo). Some cloves might be a bit soft and will squish out. Divide these up into what you will use now and place the leftovers into small freezer-safe bags to have ready for future recipes. I usually package each baggie with 10-15 cloves each.
    5. Use the Roasted Garlic cloves when making dips, pizza, sauces, soups, casseroles, or hummus... the sky's the limit.

    Notes

    Any of the Glory Kitchen nut & spice blends would be a great seasoning to Roasted Garlic.

    Roasted Garlic - Glory Kitchen
    Roasted Garlic - Glory Kitchen
    Roasted Garlic - Glory Kitchen
    Roasted Garlic - Glory Kitchen
    Roasted Garlic - Glory Kitchen
    Roasted Garlic - Glory Kitchen
  • Blue Cheese Stuffed Figs - Glory Kitchen

    BLUE CHEESE STUFFED FIGS

    Fresh figs are very seasonal, and sometimes hard to come by so when local figs become available in late summer I like to take advantage of them as much as possible.  These Blue Cheese Stuffed Figs are a showstopper appetizer and make a nice sweet and tangy cheese combination.  By keeping it simple the organic shape and deep colorations of the fig can be highlighted and the many contrasting flavors taste amazing.

    The sharp and salty flavor of blue cheese paired with the sweet and tender flesh of a ripe fig are a perfect match.  With the added sweetness of fragrant honey and the crunchy almonds and spices from our Glory Kitchen Mumbai nut and spice mix, you get a full flavor bite.  The Indian flavors from the Mumbai mix add an interesting note of heat and spice to the otherwise sweet and creamy fig.

    Blue cheese is a blanket term for a creamy but pungent cheese which has blue or grey cultured mold veined throughout.  Blue Cheese can go by many names and some, such as Roquefort, Gorgonzola, and Stilton carry a protected designation of origin label, which means to be called such, they must originate from that particular European region.  Blue Cheeses without a protected origin name are simply called “blue cheese”.  Regardless of they type of blue cheese used, the unique sharp flavor is a perfect contrast to the sweet fig.

    Other Glory Kitchen nut blends which work well with this appetizer are the Cairo Middle Eastern blend or the Provence French blend.  If using the Provence blend, I would allow it to saturate in the honey for a few minutes before adding the drizzle to help reconstitute the dried herb flavors.

    If it’s summer, find some figs and pair these little flavor bites with a nice, cool, glass of wine.

    Margie Bruner
    owner of Glory Kitchen

    instagram
    facebook

    Blue Cheese Stuffed Figs

    Yield: Serves 8-10

    Ingredients

    Instructions

    1. Allow the block of blue cheese to come to room temperature.
    2. After washing and drying figs, snip the stems off and cut an X in the top until the knife reaches about half way down the fig. Do not cut all the way through.
    3. Take a spoonful of cheese and with the fig in one hand and the cheese in the other, carefully open the fig and stuff the cheese into the center cavity. Work gently so the fig stays intact and does not bruise or disfigure.
    4. Arrange the stuffed figs on a serving platter, drizzle generously with honey. Sprinkle the tops generously with Mumbai nut & spice mix.
    5. Garnish with thinly sliced fresh mint or tiny little mint leaves. Serve at room temperature as an appetizer with a crisp glass of wine.

    Notes

    These Blue Cheese Stuffed Figs would also be wonderful using the Glory Kitchen Cairo or Provence blends.

    Blue Cheese Stuffed Figs - Glory Kitchen
    Blue Cheese Stuffed Figs - Glory Kitchen
    Blue Cheese Stuffed Figs - Glory Kitchen
    Blue Cheese Stuffed Figs - Glory Kitchen
  • GRILLED PEACH AND CRAB MEAT SALAD

    When it is peach season, summer peaches are one of the most flavorful and delicious fruits – BUT, only if they are in season and picked at the perfect time.

    There is nothing worse than a mealy and tasteless peach.  On the other hand, there is nothing more utterly delicious than a sweet & juicy peach.  This recipe for Grilled Peach and Crab Meat salad calls for grilling, however, a freshly cut peach sans the cooking would be just as tasty.  Skipping the grill would retain the firmness of the fruit.  In this salad version, however, I chose to grill, which brings out an intense and caramelized flavor and a melt-in-your mouth tender bite.

    The soft butter lettuce paired with lacey and somewhat bitter frisée lettuce makes a nice bed of greens for the tender peaches and delicate crab meat.

    I’ve added our Glory Kitchen Mumbai nut & spice blend to the dressing to add some spunky flavor and a touch of heat.  Other seasonings which would also work well with this salad are the Glory Kitchen Cairo, Provence or Penang nut & spice mixes.  Toasted sunflower seeds and a bit more Mumbai nut & spice mix sprinkled on top adds an element of crunch.

    If peaches are not available in your area, try this same recipe using plums, apricots, nectarines, or cherries – stone fruits are abundant all summer long.

    Margie Bruner
    owner of Glory Kitchen

    instagram
    facebook

    Grilled Peach and Crab Meat Salad

    Yield: makes 4 large salads or 6 small, side salads

    Ingredients

      For the dressing:
    • 2 teaspoons Mumbai nut & spice mix
    • 4 tablespoons olive oil
    • 1 small lemon, juice & zest
    • 2 tablespoons balsamic vinegar
    • 2 teaspoons dijon mustard
    • 2 teaspoons honey
    • 2 pinches sea salt
    • For the salad:
    • Mumbai nut & spice mix, for a final sprinkle
    • 1 head butter lettuce (also called bibb or boston lettuce)
    • 1 head frisée lettuce (also called curly endive or chicory)
    • 6 ripe peaches
    • 1/4 cup sunflower seeds, toasted
    • 8 oz. lump crab meat
    • dressing (recipe listed above)
    • olive oil
    • pinch of sugar
    • pinch of salt
    • squeeze of lemon

    Instructions

    1. In a bowl, whisk together all the ingredients for the dressing and set aside.
    2. Heat a small pan on the stove top and add the sunflower seeds. Gently toast them until they are just a tad brown. Stay close by because the seeds are small and can burn very quickly. Remove sunflower seeds from the pan and allow the seeds to cool completely.
    3. Slice each peach in half and gently remove each pit. Drizzle each peach with a bit of olive oil, rub the open flesh side with your hands to coat it with a bit of oil. Place the peaches flesh face side up on a baking tray. Sprinkle each with a pinch of salt and a generous pinch of sugar. Place each peach, face down, on to a hot grill and grill just until they are a bit caramelized and have grill marks. Remove from heat and allow to cool completely. As an alternative to grilling, you can lay the peaches face up on a baking sheet and place under a hot broiler in the oven. Broil just until the tops caramelize just a bit. Remove from oven and allow them to cool completely.
    4. Separate each leaf of the butter lettuce and place into a large mixing bowl. Drizzle with some of the pre-made dressing and with your hands, gently coat the lettuce leaves with a bit of dressing. Arrange the leaves in a circle onto each individual serving plate. Next, do the same with the frisée lettuce; remove the stems and break into bite sized pieces. Using the same dressing bowl, drizzle them with a bit of dressing and coat the leaves gently. Layer the frisée on top of the already arranged butter lettuce. Now take 3 half peaches and arrange them on top of the frisée lettuce. (If you are making small, side salads, I would use two half peaches per serving)
    5. Gently top each salad with a serving of lump crab meat, taking care not to break up the pieces and trying to keep the crab chunks intact. Top each salad with a generous amount of toasted sunflower seeds.
    6. Just before serving, drizzle each salad with additional dressing, give it a light squeeze of fresh lemon juice and finally, a sprinkle of additional Mumbai nut & spice mix. Serve immediately.

    Grilled Peach and Crab Meat Salad - Glory Kitchen
    Grilled Peach and Crab Meat Salad - Glory Kitchen
    Grilled Peach and Crab Meat Salad - Glory Kitchen
    Grilled Peach and Crab Meat Salad - Glory Kitchen
    Grilled Peach and Crab Meat Salad - Glory Kitchen
  • BLUEBERRY SCONES WITH LEMON GLAZE

    These easy-to-make Blueberry Scones with Lemon Glaze include the French herbs of marjoram, savory, basil and thyme from our Provence nut & spice mix.   The herbs, added into both the dough and in the lemon glaze, gives them a subtle hint of herb flavor and looks pretty on the glaze as well.

    When blueberries are in season, it’s a sure sign that summer has arrived and there’s hardly anything prettier than these little, sweet berries.  This recipe from Tyler Florence was adapted slightly to include our French herb & nut blend.  The process is quite easy and the result is delicious.

    I hope you make these soon – they’re the perfect pairing with your morning coffee.  I made a double batch… wrapped up the extras individually, and froze them in the freezer.  Each evening I pull one out and place it on the counter to defrost and welcome me in the morning.

    Margie Bruner
    owner of Glory Kitchen

    instagram
    facebook

    Blueberry Scones with Lemon Glaze

    Yield: makes approximately 8 large scones

    Ingredients

      For the blueberry scones:
    • 2 teaspoons Provence nut & spice mix
    • 2 cups all-purpose flour
    • 1 tablespoon baking powder
    • 1/2 teaspoon salt
    • 2 tablespoons sugar
    • 5 tablespoons unsalted butter, cold, cut in chunks
    • 1 cup fresh blueberries
    • 1 cup heavy cream, plus more for brushing the scones
    • For the lemon glaze:
    • 1 teaspoon Provence nut & spice mix
    • ¼ - ½ cup freshly squeezed lemon juice
    • 1-2 cups confectioners' sugar, sifted
    • lemon zest, finely grated (from 1 lemon)

    Instructions

    1. Preheat the oven to 400 degrees F.
    2. Sift together the dry ingredients; the flour, baking powder, salt, and sugar. Using a pastry blender, cut in the cold butter to coat the pieces with the flour. Break up until the mixture looks like coarse crumbs. Gently fold the blueberries into the batter. Take care not to mash or bruise the blueberries because their strong color will bleed into the dough. Make a well in the center of the bowl and pour in the heavy cream. With a wooden spoon, fold everything together just to incorporate; do not overwork the dough.
    3. Press the dough out on a lightly floured surface. Using your hands and a rolling pin, form into a rectangle about 12 by 3 by 1 ¼ inches. This does not need to be exact, however, the shape will be a long rectangle (see example). With a floured knife, cut the rectangle in 1/2, then cut the pieces in 1/2 again, giving you 4 (3") squares. Cut the squares in 1/2 on the diagonal to give you the classic triangle shape for scones. Gently place the scones on an ungreased cookie sheet. Brush the tops with a bit of heavy cream. Bake for 20 to 25 minutes or until the sides and tops begin to lightly brown. Remove from the oven and allow the scones to cool completely.
    4. While the scones are cooling, make the lemon glaze. Take 1 cup of the sifted powdered sugar and add about ¼ cup fresh lemon juice, the lemon zest, and the teaspoon of Provence nut & spice mix. Using a small whisk or a fork, whisk well until it is nice and smooth. Try to whisk the glaze enough to remove any sugar lumps. Add more lemon juice, a teaspoon at a time, until you reach the right consistency. If you wish to have lots of glaze, begin with more confectioners sugar. I like it a bit thick so you get a nice layer of glaze on each scone.
    5. Once the scones are completely cooled, using a spoon, drizzle each one with plenty of glaze. Sprinkle the glaze with fresh lemon zest. Allow the glaze to cool and set a bit before serving.

    Blueberry Scones with Lemon Glaze - Glory Kitchen
    Blueberry Scones with Lemon Glaze - Glory Kitchen
    Blueberry Scones with Lemon Glaze - Glory Kitchen
    Blueberry Scones with Lemon Glaze - Glory Kitchen
    Blueberry Scones with Lemon Glaze - Glory Kitchen
    Blueberry Scones with Lemon Glaze - Glory Kitchen
    Blueberry Scones with Lemon Glaze - Glory Kitchen
    Blueberry Scones with Lemon Glaze - Glory Kitchen, Provence nut & spice mix
    Blueberry Scones with Lemon Glaze - Glory Kitchen
    Blueberry Scones with Lemon Glaze - Glory Kitchen
    Blueberry Scones with Lemon Glaze - Glory Kitchen
  • RED, WHITE, AND BLUE SALAD

    This Red, White and Blue Salad recipe is a simple dish for celebrating anything patriotic in the USA.  Monday is Memorial Day and it doesn’t take much to whip up a bright and colorful salad.  Serve it on solid white, blue & white, or red accented dinnerware, and make the holiday feel just a bit more festive.  Even if you don’t have grand plans for the Memorial Day holiday, a touch of patriotism can brighten the day.

    To add a peppery bite to this salad I’ve used our Middle Eastern blend, Cairo nut & spice mix , however, the French blend, Provence, would add a nice herbaceous flavor, or the Indian blend, Mumbai, would add real spunk.  I’ve used blackberries in this salad because I love the shape and flavor of these berries, however, blueberries are also a great color choice and they too bring a touch of sweetness to the mix.

    A tip for presentation is to section each ingredient when arranging them onto the tossed greens to make the distinctive colors stand out.

    Memorial Day typically marks the beginning of summer and is always celebrated on the last Monday of May.  It originated at the end of the American Civil war, in 1868, when Union veterans would decorate the graves of those who died in service to our country during that war.  It was first called “Decoration Day” but later changed to “Memorial Day” and is now intended to honor all United States deceased veterans who have served our country.

    Thank you to all who have served and wishing you and your family a joyful holiday.

    Margie Bruner - Glory Kitchen

    by: Margie Bruner, owner of Glory Kitchen
    instagram
    facebook

    Red, White & Blue Salad

    Ingredients

      For the salad:
    • Cairo nut & spice mix
    • mixed dark baby greens or mesclun mix
    • pine nuts, lightly toasted
    • grape tomatoes, sliced
    • blackberries, fresh
    • roasted chicken, shredded
    • feta cheese, crumbled
    • balsamic vinaigrette
    • For the balsamic vinaigrette
    • 2 teaspoons Cairo nut & spice mix
    • 3 tablespoons olive oil
    • 2 ½ tablespoons balsamic vinegar
    • 2 teaspoons dijon mustard
    • 1-2 teaspoon honey
    • pinch of salt

    Instructions

      for the balsamic vinaigrette:
    1. Whisk together the ingredients for the dressing and set aside.
    2. for the salad:
    3. Shred the roasted chicken into small pieces and set aside. True confessions - I often buy an already roasted chicken at the grocery store and shred it for salads, pot pies, and other recipes which call for shredded chicken. It makes the process sooo much quicker and who doesn't want a shortcut that makes life a bit easier, right?
    4. Toast the pine nuts in a small pan over medium heat until lightly browned and set aside to cool. Work quickly and be ready to remove them from the heat onto a plate because they can burn in no time. (they taste delicious raw as well if you prefer not to toast)
    5. Slice the grape tomatoes into small rounds and set aside.
    6. When you are ready to serve, toss the greens with a bit of balsamic vinaigrette and arrange them on a serving plate. Arrange each ingredient over the dressed greens in sections to highlight the individual bright colors; pine nuts, tomatoes, blackberries, chicken, and crumbles of feta cheese.
    7. Drizzle the top with a bit more vinaigrette and top the chicken section with Cairo nut & spice mix. Serve immediately.

    Notes

    Other Glory Kitchen nut and spice mixes which I think would work well with this salad are the Provence and Mumbai blends. If using the Provence mix, I would trade out the pine nuts for toasted whole cashews.

    Red, White, and Blue Salad - Glory Kitchen
    Red, White, and Blue Salad - Glory Kitchen
    Red, White, and Blue Salad - Glory Kitchen
  • BEET AND AVOCADO SALAD

    Oh the fresh flavors of this Beet and Avocado Salad spiced up with our Middle Eastern blend of nut & spices.  Beets usually rank into two various camps.  Some people love them, and others have a strong aversion to them.  I have often heard those in the latter group say “they taste like dirt”.

    Obviously that sounds quite unappealling, and I am ashamed to say for a long time I fell into that “dirt” category – I had a true disliking for all things beet related.

    When beets became trendy in the chef  and culinary worlds, I thought there must be something more to these messy, red, root vegetables and I had a hunch I was missing out on something special.

    Once I learned the process of roasting with a bit of olive oil and sea salt, then marinating the beets in a tangy vinaigrette, I discovered the secret joys of this very popular veggie. The hot oven adds a wonderful roasted flavor and the marinade a sweet tanginess.

    I have also found them to be delicious eaten raw, much like a carrot stick, and dipping them into spinach dip, hummus, or a creamy tzatziki sauce .  Beets are often used to color food in a reddish/fuchsia pink hue, and with that dramatic presentation in mind, I often make beet hummus, beet vinaigrette dressing, and even beet muffins.

    I don’t believe there is another natural, plant-based food out there that can create such magic in tinting foods.  As an important side note, when working with beets, you’ll quickly find your hands will also get the red color treatment.  Not to worry, it washes out, and you can always wear plastic gloves.

    Beetroots are the bulbous portion (taproot) of the beet plant and can be either red or golden.  Both are beautiful, rich colors and I often mix them together in salads, or sometimes use just one color to add pizzazz to foods.  Every part of the beet plant is edible.  The leaves and stems can be chopped up and added into salads, whipped up into a pesto, or sauteed in a bit of fresh garlic and olive oil then served as a side dish.

    If you’ve not previously been a fan of beets, I urge you to try them again.  With a little finesse in the preparation, they’ll quickly become one of your very favorites.

    Margie Bruner - Glory Kitchen

    Margie Bruner
    owner of Glory Kitchen

    instagram
    facebook

    Beet and Avocado Salad

    4 large servings

    Ingredients

    • Cairo nut & spice mix
    • 4 beets, large (8 if small)
    • 6-8 cups fresh spinach
    • 2 ripe avocados
    • 4-6 sprigs baby broccoli
    • 2 tablespoons olive oil
    • 2 tablespoons balsamic vinegar
    • 1 generous pinch sea salt
    • candied pecans

    Instructions

    1. Wrap beets in foil and bake in a 350° oven for about 30 minutes. After 30 minutes, pierce the beets with a fork and if they are tender, they are ready. If still firm, continue to cook until they are fork tender. Remove from the oven, open up the foil, and allow to cool completely.
    2. With a paring knife, gently remove the skin of the beets. Once cleaned, slice them in half (lengthwise), then slice each half again, forming pretty wedges. Place all the sliced beets into a large mixing bowl, add the olive oil, balsamic vinegar and sea salt. Toss these together gently then set aside to marinate and allow the juices to create a lovely vinaigrette dressing.
    3. Take the spinach and chop ever so slightly just to break it down and make a bit smaller - do not over chop. Arrange the spinach at the base of each individual salad bowl or plate. On top of the spinach, layer the marinaded beets (reserving the vinaigrette left behind), the sliced avocado, the full sprigs of baby broccoli, and the candied pecans. Sprinkle the beets and avocado with generous amounts of Cairo nut & spice mix, take the remaining vinaigrette left behind from the beets, and drizzle over each individual salad.

    Notes

    If you wish to have a greater amount of beet vinaigrette dressing, double the amounts of olive oil and balsamic vinegar when marinating the beets. This salad would also be wonderful using our Glory Kitchen Mumbai, Penang or Provence blends.

    Beet and Avocado Salad - Glory Kitchen
    Beet and Avocado Salad - Glory Kitchen
    Beet and Avocado Salad - Glory Kitchen
    Beet and Avocado Salad - Glory Kitchen
    Beet and Avocado Salad - Glory Kitchen
  • BRIE CHEESE AND GRAPE BAGUETTE

    Talk about a delicious twist on a cheese sandwich… it’s a little sweet, a little tangy, a lot of herb flavor, and gooey melted french cheese on a crisp and toasted french roll.  Brie cheese is a soft, creamy cow’s milk cheese named after the Brie region in France.  The creaminess is sandwiched inside a rind of mold which is typically eaten.  The flavor of the mold is often dependent upon the quality of ingredients used and the period of time it is aged, typically four to five weeks.

    Brie pairs well with french herbs, and in this case, a bit of sweetness from the currants found in our Provence nut blend and the crunchiness from the cashew nuts.

    If you like soft, stretchy cheese, you will love this sweet tasting brie cheese and grape baguette filled with fresh greens, peppery red onion, and juicy red grapes.  These are not your typical sandwich fixings – they go beyond what you would expect in a french baguette and the sweet, tangy flavors are a perfect match.

    The next time you find yourself in a rut for lunch ideas, slice up some fresh, delicious grapes and fill up a wonderful loaf of bread with herbaceous french flavors.

    Margie Bruner - Glory Kitchen

    Margie Bruner
    owner of Glory Kitchen

    instagram
    facebook

    Brie Cheese and Grape Baguette

    Yield: 4 servings

    Ingredients

    • Provence nut & spice mix
    • 1 bunch of red seedless grapes
    • 1 wheel brie cheese
    • fresh arugula
    • red onion, sliced thin
    • balsamic vinegar
    • olive oil
    • sea salt
    • pinch of sugar
    • french baguette

    Instructions

    1. Slice the french baguette into 4 pieces. If it is rather small, you may need two baguettes and slice each one in half. Take each individual piece and slice them open. Brush the inside (both sides) with olive oil, sprinkle with sea salt and toast under the broiler until they are lightly browned. Remove and allow to cool.
    2. Slice the grapes in half and set aside in a bowl.
    3. Into a mixing bowl, add 1 ½ tablespoons olive oil, 1 ½ tablespoons balsamic vinegar, 2 teaspoons Provence nut & spice mix, a pinch of sea salt, and a pinch of sugar. Whisk together until the dressing is incorporated. Take a couple of large handfuls of arugula, the sliced grapes, and about ¼ of the red onion (sliced thinly) and add into the mixing bowl with the dressing. Toss to coat all the lettuce, grapes and onion.
    4. Take thick slices of the brie cheese and layer them onto the inside of the toasted baguette loaves. Place these under the broiler just until the cheese is soft and melted. Remove from oven, stuff each baguette with the grape and arugula mixture and serve hot. Enjoy!

    Brie Cheese and  Grape Baguette
    Brie Cheese  and Grape Baguette
    Brie and Roasted Grape Baguette
    Brie Cheese and Grape Baguette
    Brie Cheese and Grape Baguette
Updating…
  • No products in the cart.

JOIN US !
JOIN
close-link