• Roasted Garlic - Glory Kitchen

    ROASTED GARLIC

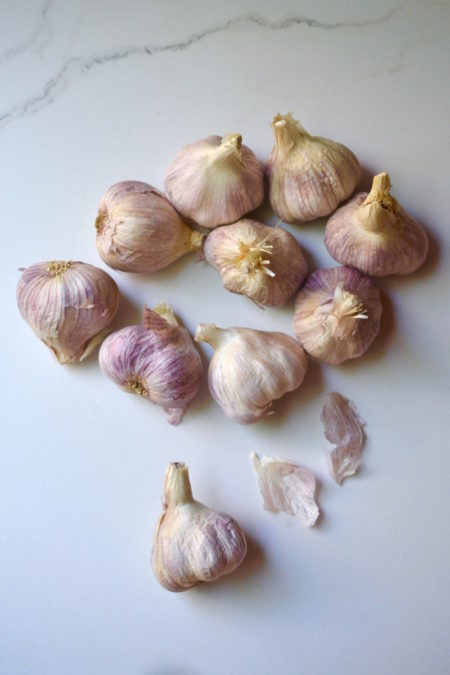
    Roasted Garlic is a great ingredient to use in dips, dressings, soups, hummus, cheese trays, bread, pizzas, or just topped on tasty crackers.

    Garlic in its raw state can be pungent and leave a strong after taste, however, once it is roasted, it becomes sweet, creamy, and deliciously caramelized.

    Sister to onions, shallots and leeks, garlic has many proven health benefits and medicinal properties.  It’s often touted as one of “the world’s healthiest foods”, so roasting it in large batches and keeping it on hand to be ready to throw into recipes is a great routine to have.

    I’ve seasoned this batch of garlic with the Asian nutty flavors of our Glory Kitchen Penang nut & spice mix which adds a bit of red pepper heat and a hint of ginger.  I think any of our Glory Kitchen nut blend flavors would make a great seasoning enhancer to Roasted Garlic – it just depends upon the flavor that moves you, Mexican, Asian, Indian, Italian, French or Middle Eastern.  The process is easy and the rewards are delicious. 

    Margie Bruner
    owner of Glory Kitchen

    instagram
    facebook

    Roasted Garlic

    Ingredients

    Instructions

    1. Heat the oven to 450°.
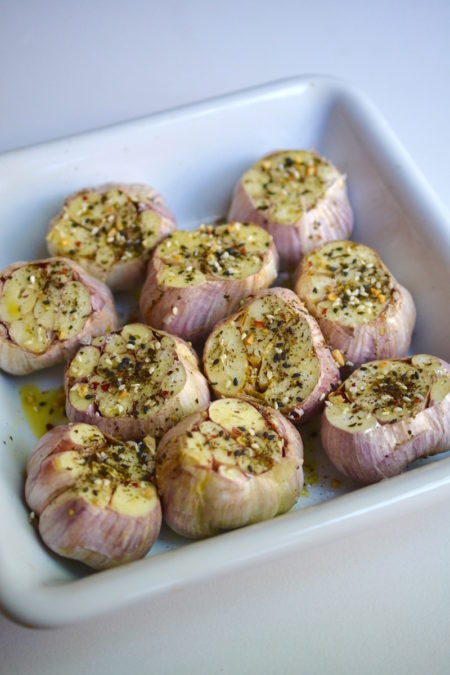
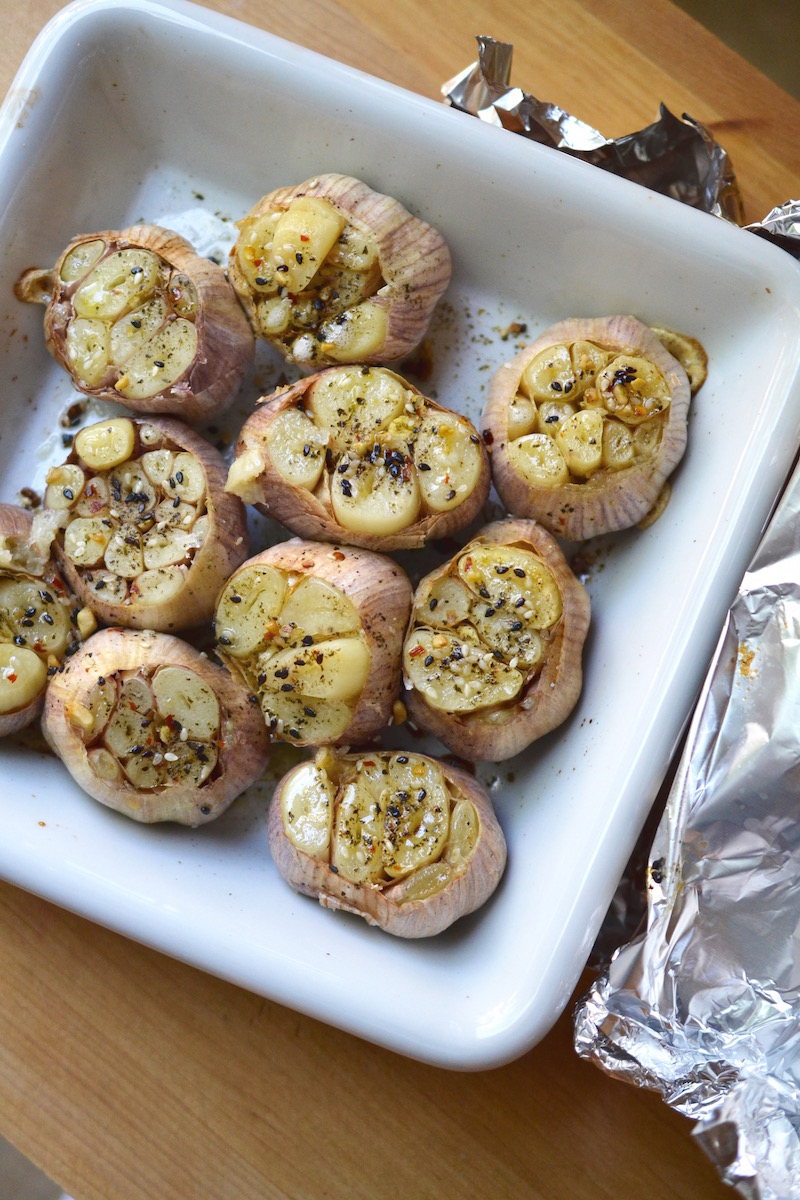
    2. Take the bulb (full head) of garlic and slice off the entire top to expose a flat layer of each clove. (see photo). Arrange the full bulbs with skins on, face up in a baking dish & drizzle the tops with olive oil. Sprinkle all the bulbs with sea salt and a generous amount of Penang nut & spice mix.
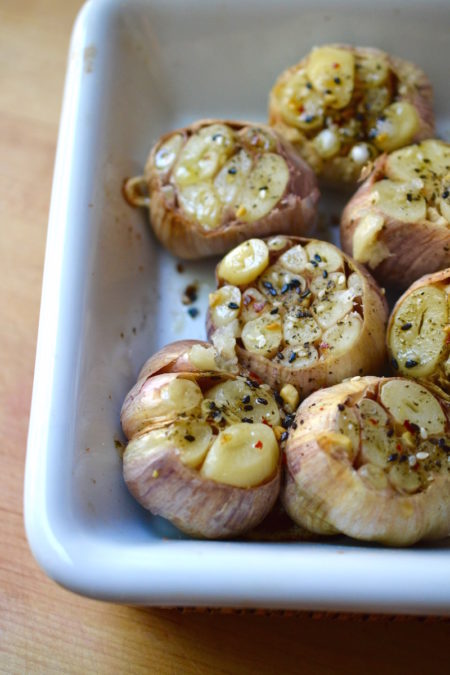
    3. Cover the baking dish tightly with aluminum foil and place in the hot oven for 30 minutes. Remove from the oven, uncover, and allow them to cool completely.
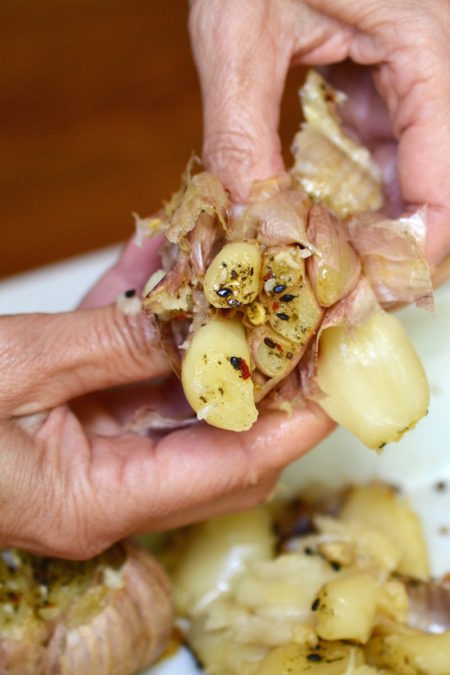
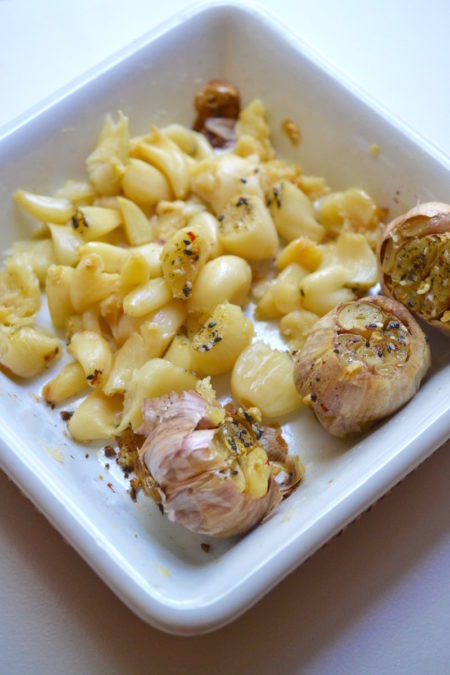
    4. Take each head of garlic, and with your hands, squeeze out each individual garlic clove into a bowl (see photo). Some cloves might be a bit soft and will squish out. Divide these up into what you will use now and place the leftovers into small freezer-safe bags to have ready for future recipes. I usually package each baggie with 10-15 cloves each.
    5. Use the Roasted Garlic cloves when making dips, pizza, sauces, soups, casseroles, or hummus... the sky's the limit.

    Notes

    Any of the Glory Kitchen nut & spice blends would be a great seasoning to Roasted Garlic.

    Roasted Garlic - Glory Kitchen
    Roasted Garlic - Glory Kitchen
    Roasted Garlic - Glory Kitchen
    Roasted Garlic - Glory Kitchen
    Roasted Garlic - Glory Kitchen
    Roasted Garlic - Glory Kitchen
  • Miso Chili Glazed Eggplant - Glory Kitchen

    MISO CHILI GLAZED EGGPLANT

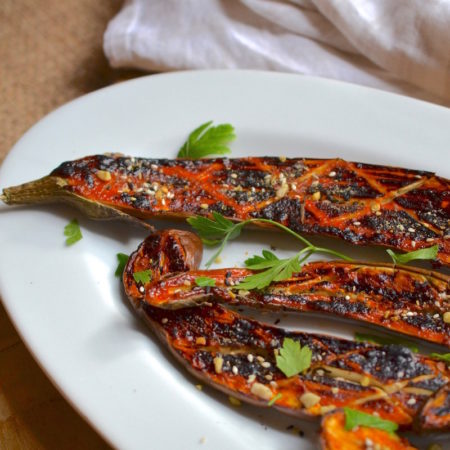
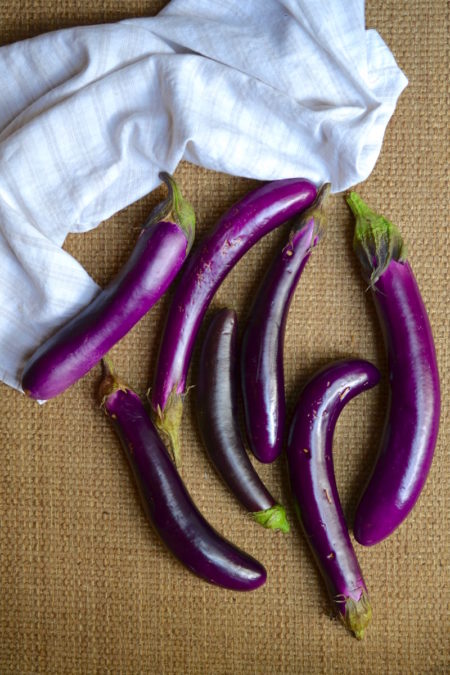
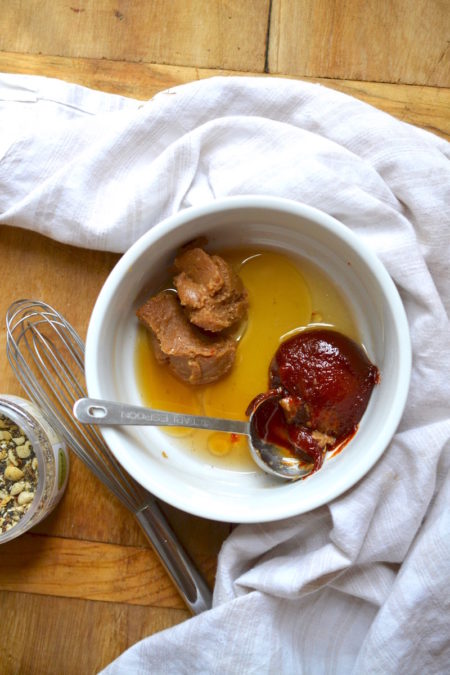
    These purple beauties were transformed into Miso Chili Glazed Eggplant slathered with a delicious sauce and made with the combination of miso  paste and gochujang sauce.

    Miso paste is a fermented soybean which is often aged anywhere between 6 – 36 months.  It adds a rich and deep flavor to sauces, soups and marinades.

    Gochugang, is a sweet yet fiery red pepper paste made with Korean chilis and it is quickly becoming a very popular and trendy kitchen ingredient.

    When I was at the Specialty Food Show in NYC recently, gochujang spiced food items were popping up everywhere.  If you haven’t yet tried gochujang, it is worth buying.   Although it might be difficult to pronounce, gochujang is is now available at typical grocery stores and found in the Asian food section.  Because both ingredients are fermented, miso paste and gochujang sauce will last in your refrigerator for quite a while, so keep them handy and start to add a bit on all types of dishes.

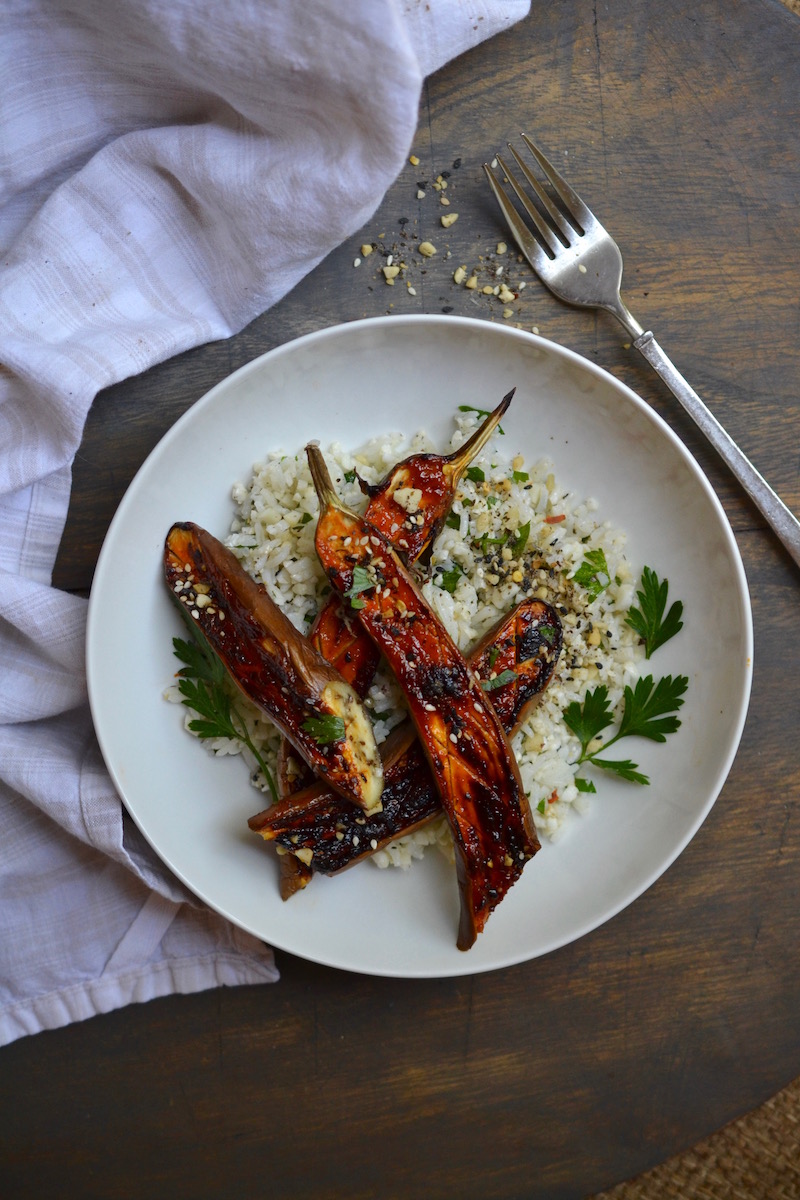
    These Chinese eggplants (also called Asian or Japanese eggplant) are slender and beautiful in color.  After a smear of this gochujang sauce, however, the bright purple coloration was transformed into a rich red, loaded with lots of spicy and sweet flavor.

    We topped this dish with our Glory Kitchen Asian flavors of Penang nut & spice mix  for color and added crunch.  This eggplant recipe is simple and wonderful served over a salad of jasmine rice and cauliflower rice. I also topped the dish with whole, toasted peanuts for a nice bite of crunch and served it as a vegetarian main dish.  I’ll be making this recipe again soon – hope you enjoy it as much as we did.

    Margie Bruner - Glory Kitchen

    Margie Bruner
    owner of Glory Kitchen

    instagram
    facebook

    Miso Chili Glazed Eggplant

    4-6 servings

    Ingredients

      For the miso glazed eggplant:
    • Penang nut & spice mix
    • 4-6 Japanese eggplant (also called Chinese or Asian eggplant)
    • 1 tablespoon sesame oil
    • 1 tablespoon mirin
    • 1 tablespoon rice wine vinegar
    • 2 tablespoons miso paste (yellow or white)
    • 2 tablespoons gochujang sauce
    • 1 squeeze honey
    • For the cauliflower jasmine rice:
    • 1 tablespoon Penang nut & spice mix
    • 3 cups cauliflower rice, raw
    • 2-3 cups jasmine rice, cooked
    • 1/4 cup flat leaf parsley, chopped
    • 1/8 cup mint, chopped
    • 3 tablespoons olive oil
    • 2 tablespoons rice wine vinegar
    • 1 teaspoon honey
    • 1/2 cup peanuts, coarsely chopped or whole

    Instructions

      For the miso glazed eggplant:
    1. Heat the oven to 425º.
    2. In a small bowl, whisk together the sesame oil, mirin, rice wine vinegar, miso paste, gochujang sauce, and honey. After it is smooth, set aside.
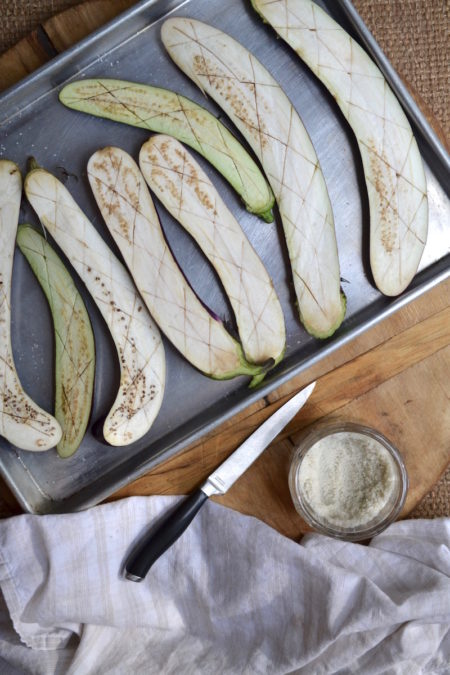
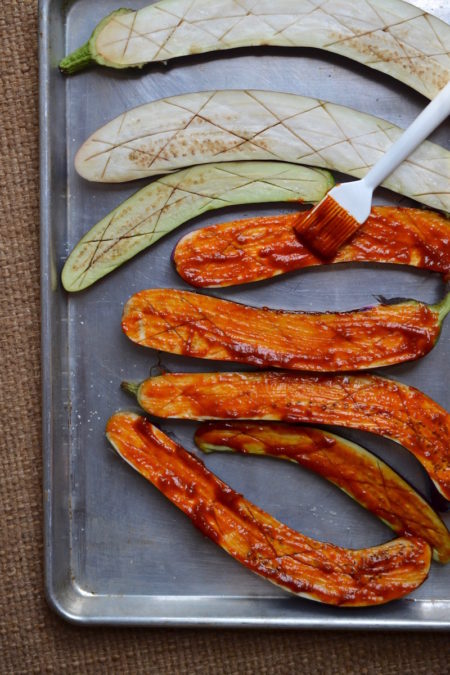
    3. Slice the eggplant in half, lengthwise, leaving the top stem on (I think it presents prettier this way). Sprinkle the cut surface of the eggplant with a bit of salt and let them sit for 10 minutes.
    4. Using a small paring knife, score the open cut side with a knife in a zig zag manner, taking care not to cut the eggplant all the way through. (see photo). The purpose of this is so the miso glaze can penetrate through the fruit - I know, most people consider eggplant a vegetable, however because of its seeds, it is actually a fruit.
    5. Brush the miso chili glaze over the surface of each eggplant half. Using a baking tray, place them into the oven for 7-10 minutes. Now set the oven to broil to gently brown the tops. Keep an eye on the oven so they don't burn. Once they have browned just a bit, remove from the oven. These can be served warm or at room temperature.
    6. For the cauliflower jasmine rice:
    7. In a small bowl, whisk together the olive oil, rice wine vinegar, honey, pinch of salt, and 1 tablespoon Penang nut & spice mix to make the dressing, then set aside.
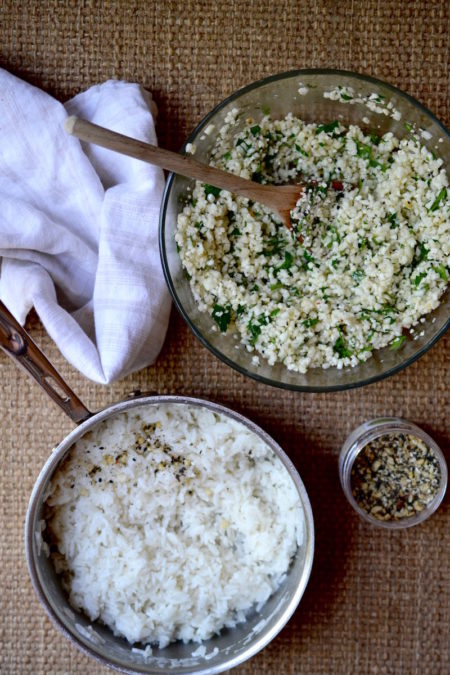
    8. In a large mixing bowl, toss together the cauliflower rice, fresh parsley, and fresh mint. I bought my cauli rice already pre-chopped and bagged from Trader Joe's, however, you can also buy a whole cauliflower, cut it into florets and pieces, then pulse it in a food processor until you achieve small, rice-like pieces. A full head of cauliflower will yield lots of extra rice so you can store it away and use it in other dishes. Pour the dressing over the cauliflower/herb combination and toss to incorporate well. Set aside to marinate while you are making the jasmine rice. You can cook the white rice with vegetable stock, coconut milk or just water. Follow directions on the package for rice and once it is cooked, lift the lid to cool completely. Toss 2-3 cups of rice in with the cauliflower mixture and set aside to meld with the flavors of the dressing.
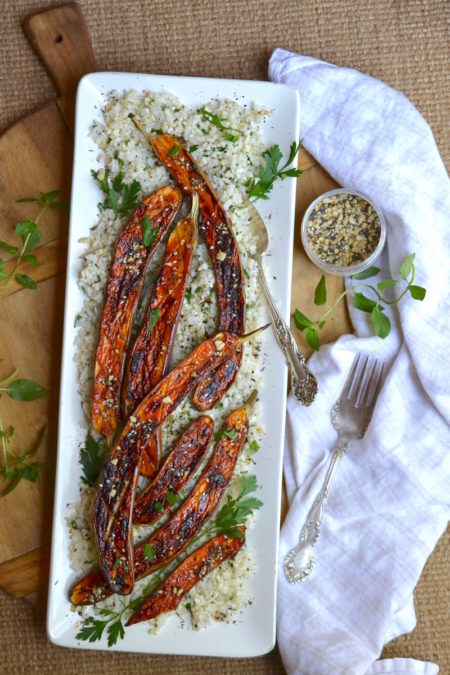
    9. To serve the eggplant dish, lay a bed of cauliflower jasmine rice onto a large serving platter. Arrange the miso glazed eggplant over the rice and sprinkle with Penang nut & spice mix. Top with fresh chopped herbs (mint and parsley) and coarsely chopped peanuts. This can be served warm or at room temperature.

    Miso Chili Glazed Eggplant - Glory Kitchen
    Miso Chili Glazed Eggplant - Glory Kitchen
    Miso Chili Glazed Eggplant - Glory Kitchen
    Miso Chili Glazed Eggplant - Glory Kitchen
    Miso Chili Glazed Eggplant - Glory Kitchen
    Miso Chili Glazed Eggplant - Glory Kitchen
    Miso Chili Glazed Eggplant - Glory Kitchen
    Miso Chili Glazed Eggplant - Glory Kitchen
  • GRILLED PEACH AND CRAB MEAT SALAD

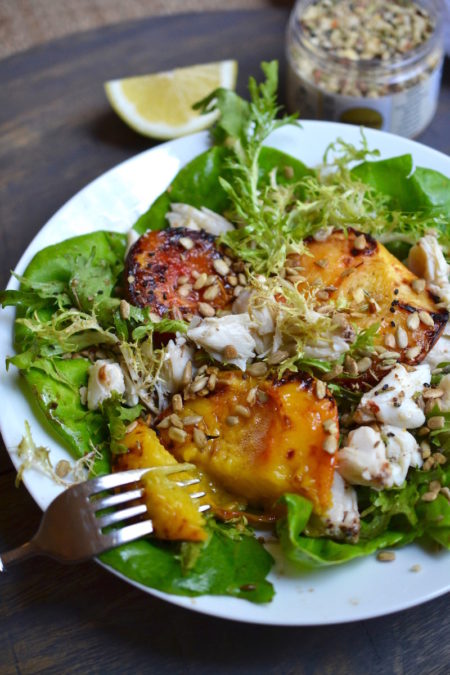
    When it is peach season, summer peaches are one of the most flavorful and delicious fruits – BUT, only if they are in season and picked at the perfect time.

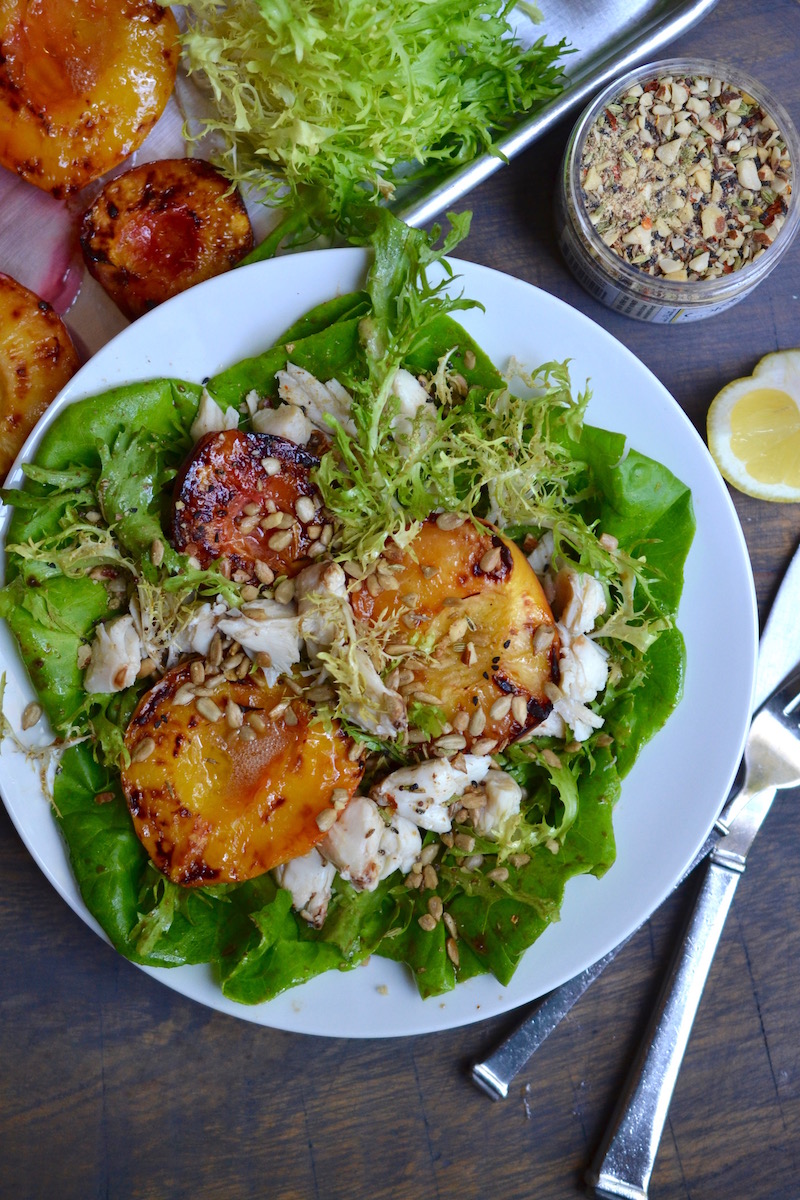
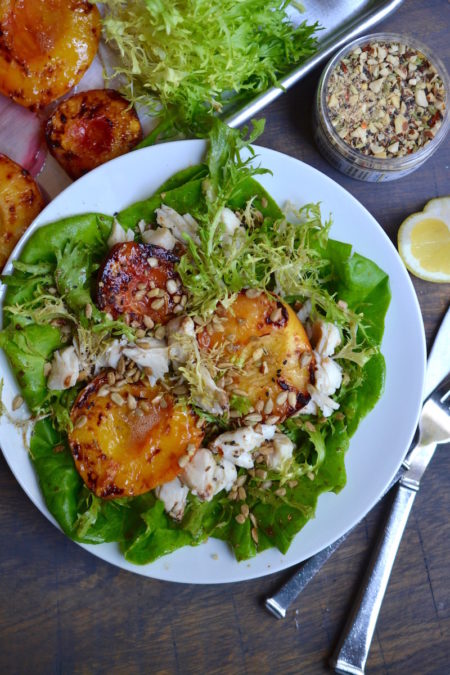
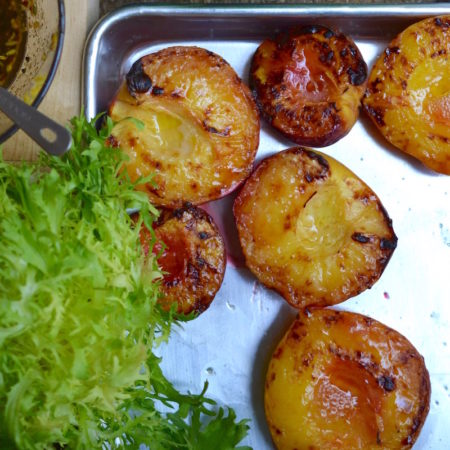
    There is nothing worse than a mealy and tasteless peach.  On the other hand, there is nothing more utterly delicious than a sweet & juicy peach.  This recipe for Grilled Peach and Crab Meat salad calls for grilling, however, a freshly cut peach sans the cooking would be just as tasty.  Skipping the grill would retain the firmness of the fruit.  In this salad version, however, I chose to grill, which brings out an intense and caramelized flavor and a melt-in-your mouth tender bite.

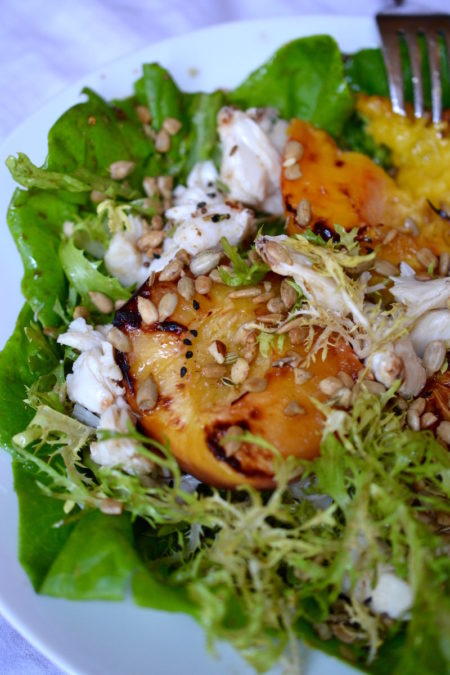
    The soft butter lettuce paired with lacey and somewhat bitter frisée lettuce makes a nice bed of greens for the tender peaches and delicate crab meat.

    I’ve added our Glory Kitchen Mumbai nut & spice blend to the dressing to add some spunky flavor and a touch of heat.  Other seasonings which would also work well with this salad are the Glory Kitchen Cairo, Provence or Penang nut & spice mixes.  Toasted sunflower seeds and a bit more Mumbai nut & spice mix sprinkled on top adds an element of crunch.

    If peaches are not available in your area, try this same recipe using plums, apricots, nectarines, or cherries – stone fruits are abundant all summer long.

    Margie Bruner
    owner of Glory Kitchen

    instagram
    facebook

    Grilled Peach and Crab Meat Salad

    Yield: makes 4 large salads or 6 small, side salads

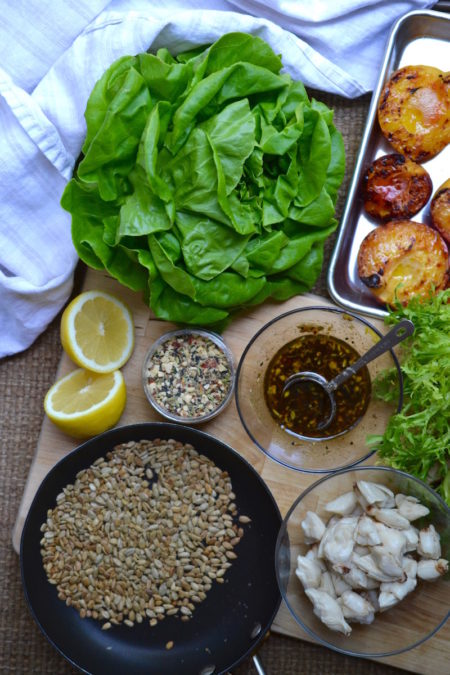
    Ingredients

      For the dressing:
    • 2 teaspoons Mumbai nut & spice mix
    • 4 tablespoons olive oil
    • 1 small lemon, juice & zest
    • 2 tablespoons balsamic vinegar
    • 2 teaspoons dijon mustard
    • 2 teaspoons honey
    • 2 pinches sea salt
    • For the salad:
    • Mumbai nut & spice mix, for a final sprinkle
    • 1 head butter lettuce (also called bibb or boston lettuce)
    • 1 head frisée lettuce (also called curly endive or chicory)
    • 6 ripe peaches
    • 1/4 cup sunflower seeds, toasted
    • 8 oz. lump crab meat
    • dressing (recipe listed above)
    • olive oil
    • pinch of sugar
    • pinch of salt
    • squeeze of lemon

    Instructions

    1. In a bowl, whisk together all the ingredients for the dressing and set aside.
    2. Heat a small pan on the stove top and add the sunflower seeds. Gently toast them until they are just a tad brown. Stay close by because the seeds are small and can burn very quickly. Remove sunflower seeds from the pan and allow the seeds to cool completely.
    3. Slice each peach in half and gently remove each pit. Drizzle each peach with a bit of olive oil, rub the open flesh side with your hands to coat it with a bit of oil. Place the peaches flesh face side up on a baking tray. Sprinkle each with a pinch of salt and a generous pinch of sugar. Place each peach, face down, on to a hot grill and grill just until they are a bit caramelized and have grill marks. Remove from heat and allow to cool completely. As an alternative to grilling, you can lay the peaches face up on a baking sheet and place under a hot broiler in the oven. Broil just until the tops caramelize just a bit. Remove from oven and allow them to cool completely.
    4. Separate each leaf of the butter lettuce and place into a large mixing bowl. Drizzle with some of the pre-made dressing and with your hands, gently coat the lettuce leaves with a bit of dressing. Arrange the leaves in a circle onto each individual serving plate. Next, do the same with the frisée lettuce; remove the stems and break into bite sized pieces. Using the same dressing bowl, drizzle them with a bit of dressing and coat the leaves gently. Layer the frisée on top of the already arranged butter lettuce. Now take 3 half peaches and arrange them on top of the frisée lettuce. (If you are making small, side salads, I would use two half peaches per serving)
    5. Gently top each salad with a serving of lump crab meat, taking care not to break up the pieces and trying to keep the crab chunks intact. Top each salad with a generous amount of toasted sunflower seeds.
    6. Just before serving, drizzle each salad with additional dressing, give it a light squeeze of fresh lemon juice and finally, a sprinkle of additional Mumbai nut & spice mix. Serve immediately.

    Grilled Peach and Crab Meat Salad - Glory Kitchen
    Grilled Peach and Crab Meat Salad - Glory Kitchen
    Grilled Peach and Crab Meat Salad - Glory Kitchen
    Grilled Peach and Crab Meat Salad - Glory Kitchen
    Grilled Peach and Crab Meat Salad - Glory Kitchen
  • HOMEMADE PEANUT BUTTER

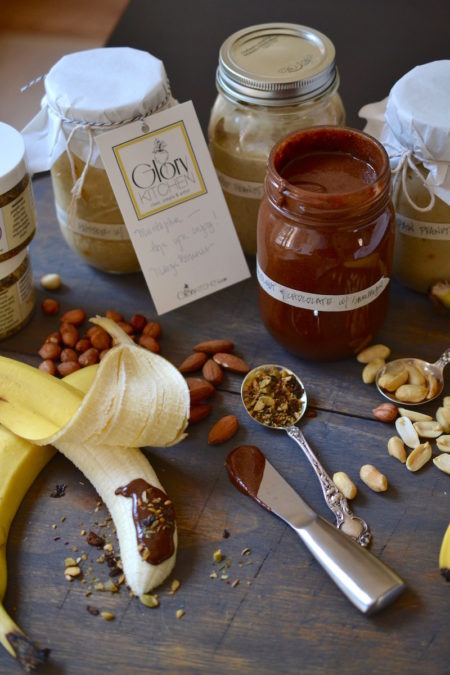
    Who knew making Homemade Peanut Butter could be so simple and so delicious? I never quite believed when I read or heard that you could take fresh, whole nuts and whirr them away in a food processor until creamy nut butter immerged, but it really is true.

    My husband has had a lifelong love and obsession for peanut butter.  After becoming more conscious about the foods we ate, we grew more diligent about reviewing ingredient lists on products, and discovered most commercial jars of peanut butter were loaded with chemicals.  We made the switch to buying pure almond and peanut butters at specialty grocery stores where the only ingredient coming out of these large nut crushing machines is pure almonds or peanuts.

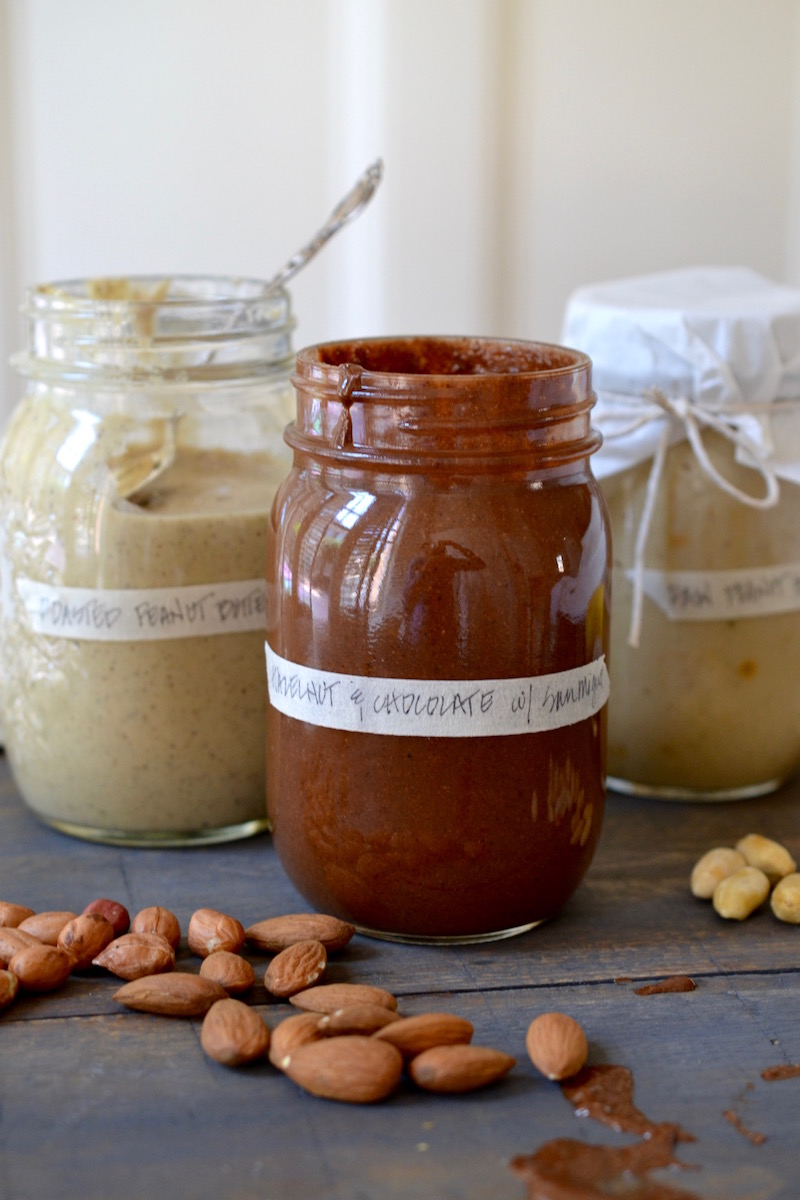
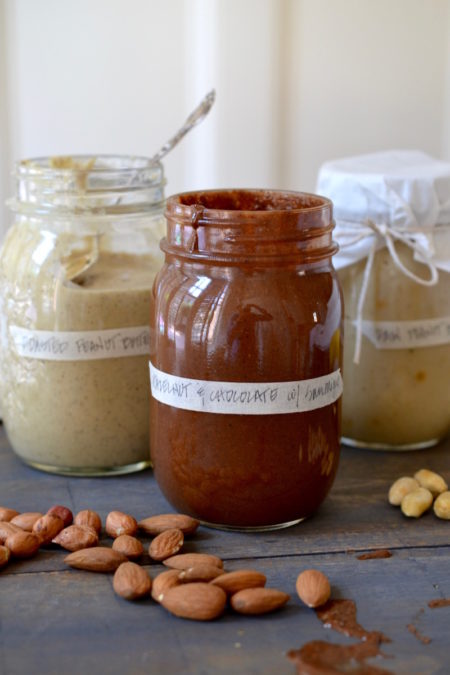
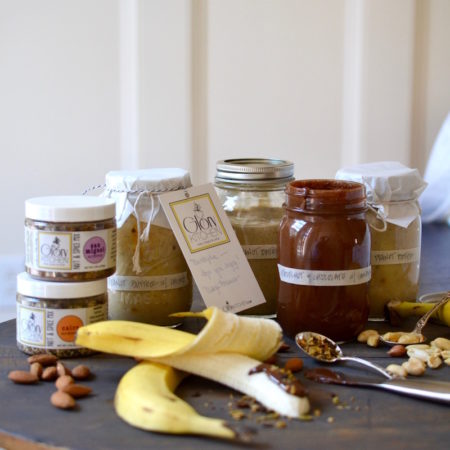
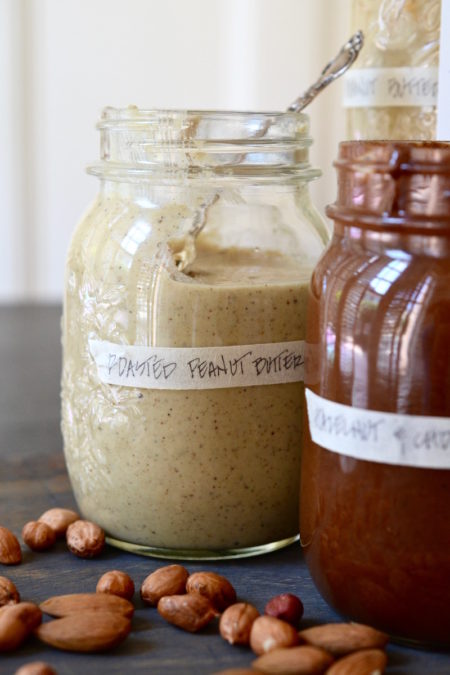
     This week I experimented with making my own nut butters using a variety of nuts and infusing them with spices, peppers and of course our Glory Kitchen nut and spice mixes.  My hazelnut & chocolate butter (does Nutella come to mind?) received a pop of heat from our San Miguel nut & spice mix.  The Asian peanut butter was blended with tahini and our Penang nut & spice mix, and the Middle Eastern flavored almond & peanut butter received an infusion of our Cairo nut & spice mix.

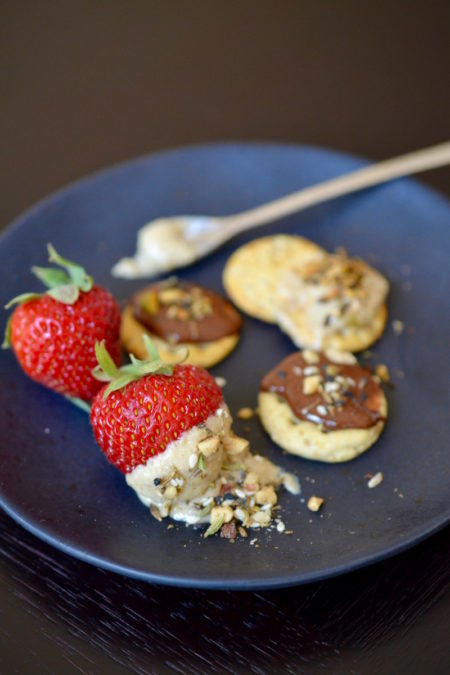
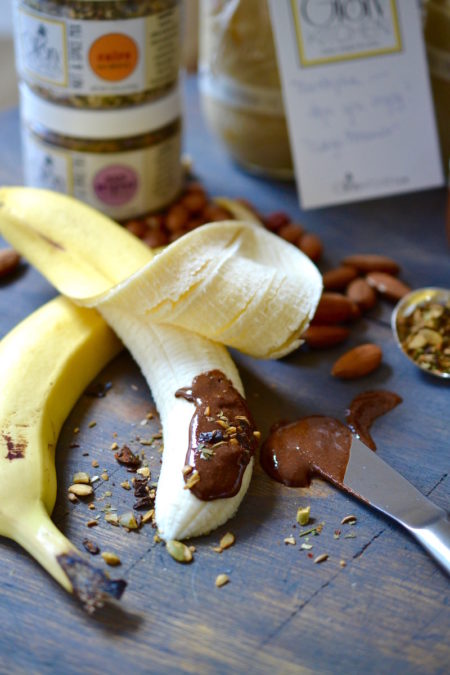
    All three nut butter varieties had their own unique flavor, but all were delicious and so much more interesting than a straight up version of peanut or almond butter.  We are loving the hazelnut & chocolate spread over bananas and strawberries.  The Asian peanut butter is great on crackers with a drizzle of honey and additional crunchy Penang nut & spice mix sprinkled on top.  The Middle Eastern nut butter is great in a peanut butter and jelly sandwich.

    If you have a food processor, you too can easily make your own homemade peanut butter.  The best part is you have delicious nut butters, made with real, plant-based ingredients and no chemicals, preservatives, or additives.

    I hope you’ll give it a try; it’s great fun to watch the transformation and you’ll be thrilled with the homemade result.

    Margie Bruner
    owner of Glory Kitchen

    instagram
    facebook

    Homemade Peanut Butter

    each blend makes 1-2 jars

    Ingredients

      Spicy Hazelnut & Chocolate Butter:
    • 1 tablespoon San Miguel nut & spice mix
    • 3 1/2 cups hazelnuts, roasted or raw
    • 1 cup dark chocolate chips, or less if you want it less sweet
    • 1/2 teaspoon cayenne pepper
    • 1/8 teaspoon sea salt
    • Middle Eastern Almond & Peanut Butter:
    • 1 tablespoon Cairo nut & spice mix
    • 2 cups peanuts, roasted or raw
    • 2 cups almonds, roasted or raw
    • 1 teaspoon sea salt
    • Asian Peanut Butter:
    • 1 tablespoon Penang nut & spice mix
    • 4 cups peanuts, roasted or raw
    • 1/2 cup tahini
    • 1 tablespoon soy sauce
    • 1/2 teaspoon sea salt

    Instructions

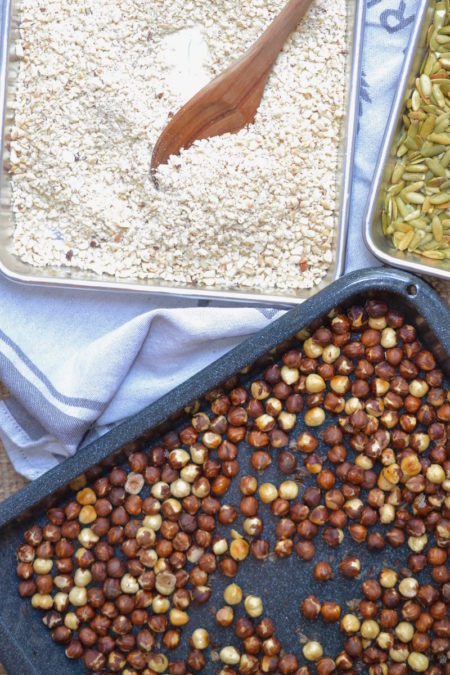
    1. If you prefer a more intense and roasted nut flavor, and you're working with raw nuts, spread your nuts onto a baking tray and place into a 375° oven. Toast the nuts just until they are lightly browned. Remove from the oven and allow to cool completely. If you prefer to keep your nuts raw, move forward with mixing them in a food processor.
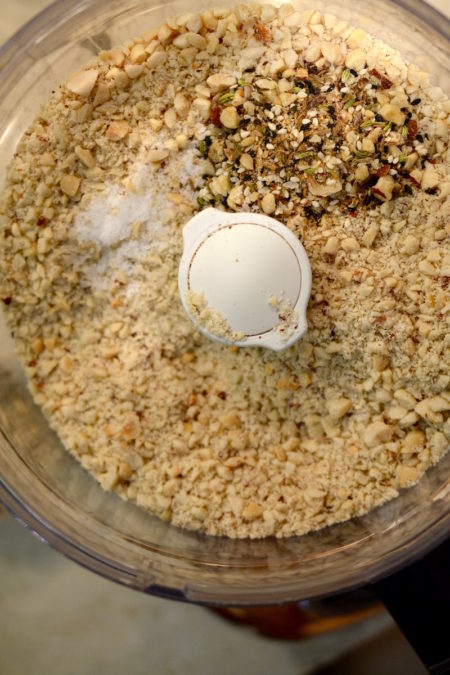
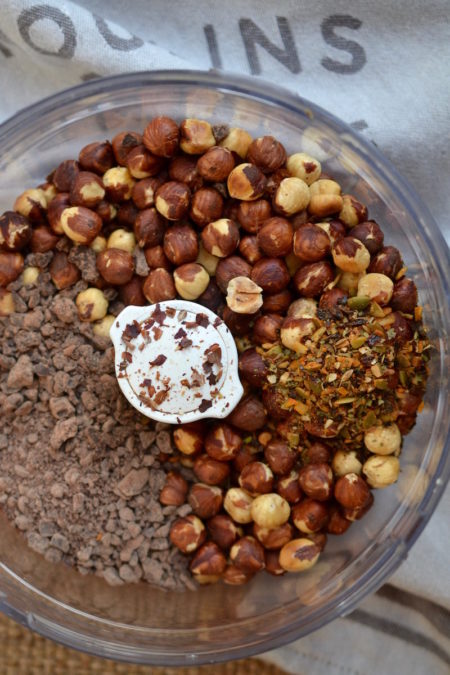
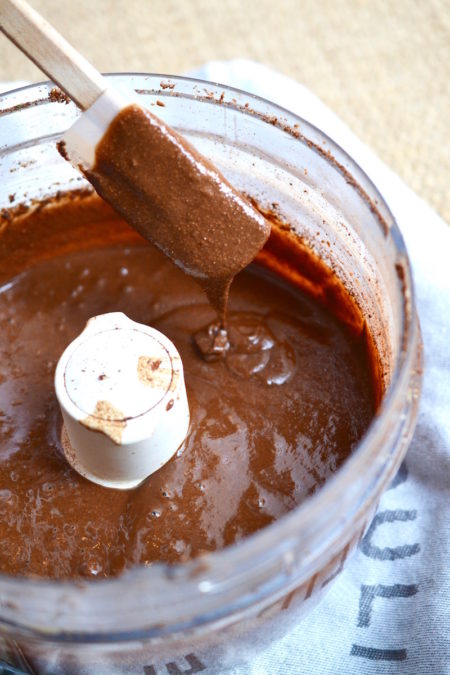
    2. If you are working with whole nuts, place all the nuts into a food processor and pulse until the nuts break down into small pieces. Add the remaining ingredients and whirl away until the mixture turns into a creamy butter. The more you process, the creamier the mixture will get, so if you prefer a crunchy or thick butter, do not process as long. As it mixes, stop and taste your flavors. If you like more heat on the Hazelnut Butter, add more cayenne. If you like it a bit saltier, add more salt. Just a little pinch at a time because salt and cayenne can overpower the butters very quickly, so add cautiously.
    3. Pour your finished butters into canning jars and enjoy! They stay fresh longer if they are stored in the refrigerator, however, these can be left out on the counter at room temperature for about 1 week.

    Notes

    You can really get creative on flavors for homemade nut butters. Don't be afraid to experiment! Our Glory Kitchen Mumbai nut blend would also work well in a nut butter.

    Homemade Peanut Butter - Glory Kitchen
    Homemade Peanut Butter
    Peanut Butter
    Homemade Peanut Butter - Glory Kitchen
    Homemade Peanut Butter - Glory Kitchen
    Homemade Peanut Butter - Glory Kitchen
    Homemade Peanut Butter - Glory Kitchen
    Homemade Peanut Butter - Glory Kitchen
    Homemade Peanut Butter - Glory Kitchen
    Homemade Peanut Butter - Glory Kitchen
  • ASIAN SHRIMP SKEWERS

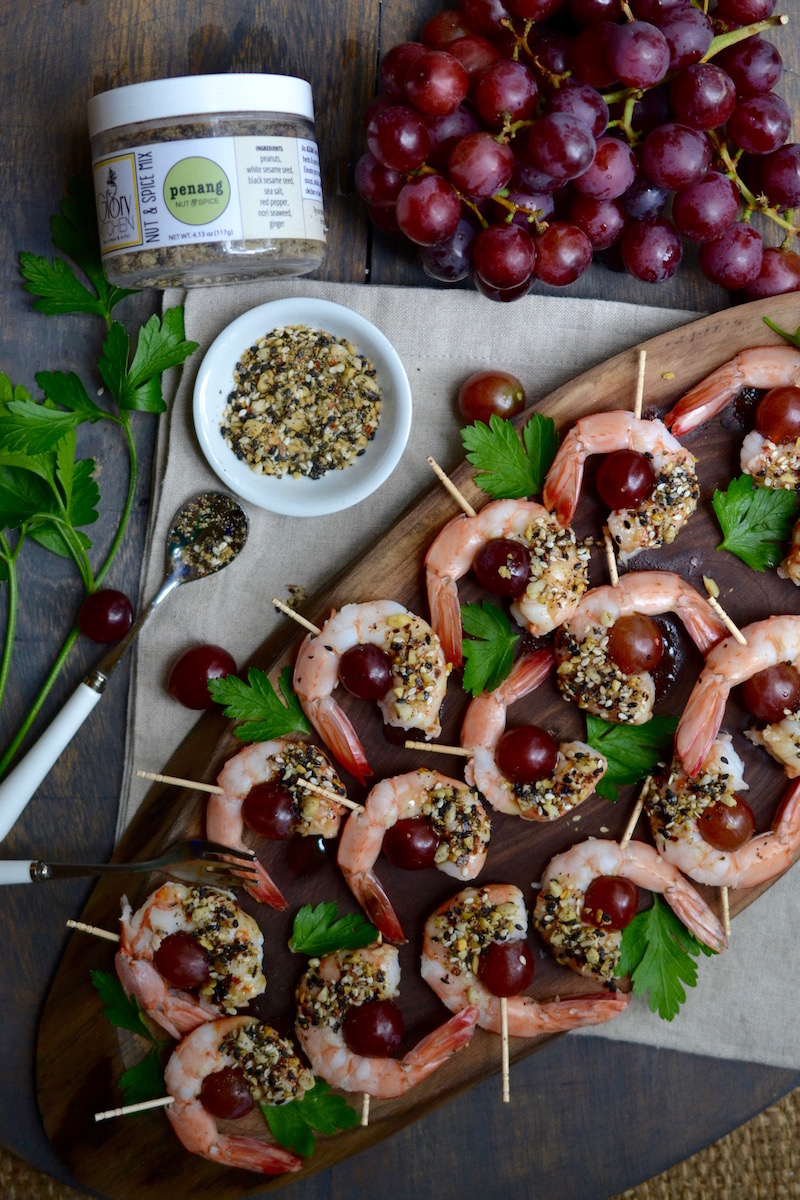
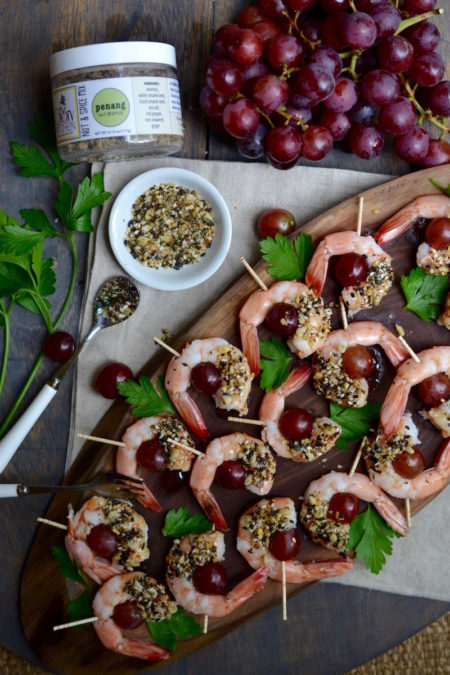
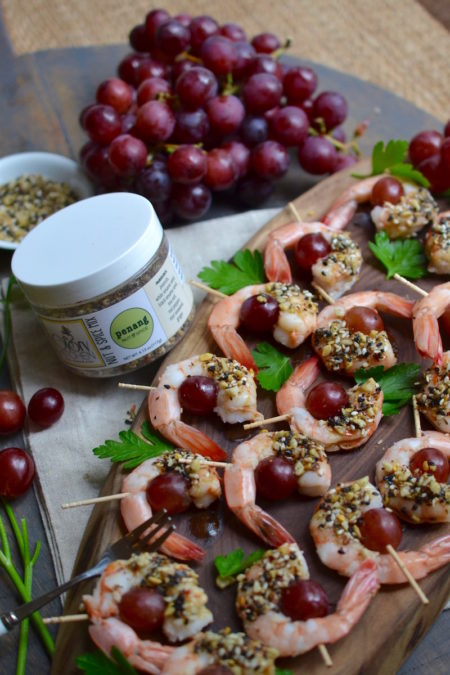
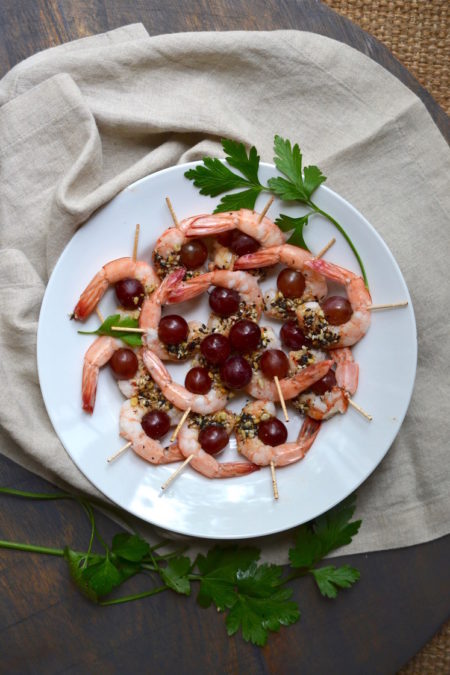
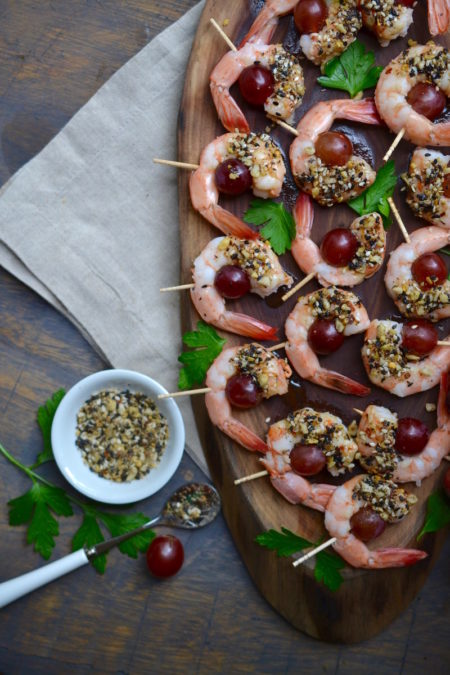
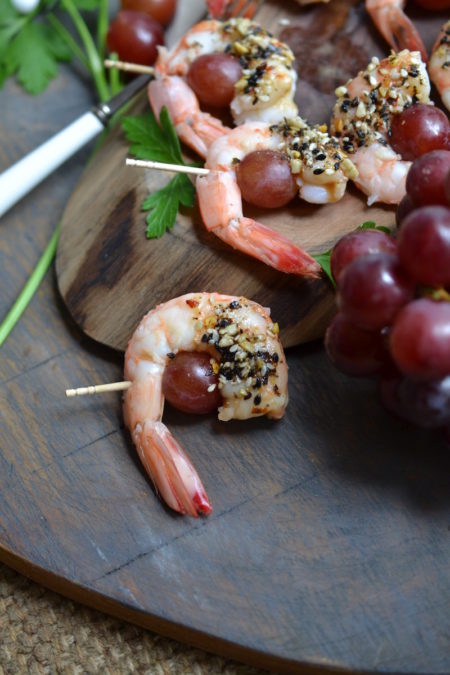
    This Asian Shrimp Skewer appetizer has a presentation ‘wow’ factor when serving to guests, but who knew this pretty platter could be put together quickly with only 6 simple ingredients?  Easy is the best way to describe the process for this shrimp appetizer but sweet and fresh describes the surprising taste.  In one biteful you get a burst of juicy grape and the soft, buttery taste of fresh shrimp.  Paired with that is an Asian flavor surprise from our Glory Kitchen Penang nut & spice mix – crunchy peanuts, sesame seeds, and a touch of red pepper heat.

    These little shrimps can be prepared ahead and stored in the fridge until the guests arrive.  We served these skewers with a crisp white wine but any fresh, fruity cocktail would pair perfectly with these juicy shrimp bites.

    For this dish I chose to use red grapes but using green grapes would add a pretty peach and green contrast, and of course using other Glory Kitchen nut blends would also work well.  Using the Cairo blend (Middle Eastern) or Mumbai blend (Indian) would take this shrimp appetizer in a whole new direction.

    Margie Bruner - Glory Kitchen

    Margie Bruner
    owner of Glory Kitchen

    instagram
    facebook

    Asian Shrimp Skewers

    Yield: 6-10 servings

    Ingredients

      For the shrimp skewers:
    • Penang nut & spice mix
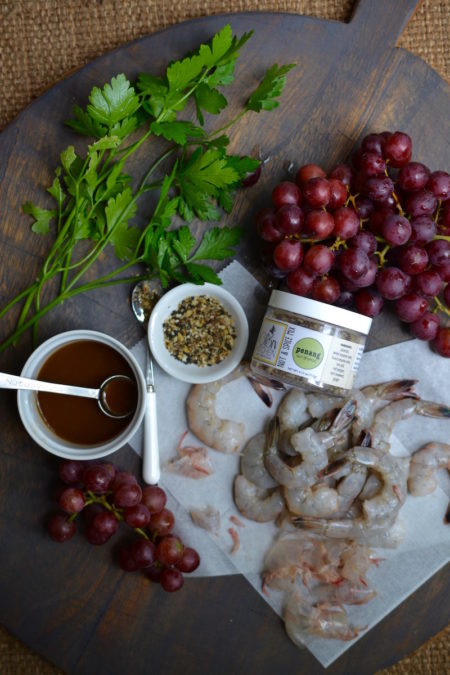
    • 1 lb. large to extra large shrimp, uncooked, with shells
    • 1 bunch red grapes
    • asian dressing (see recipe below)
    • toothpicks
    • cilantro, for garnish
    • sea salt (optional)
    • For the asian dressing:
    • 2 tablespoons sesame oil
    • 1 ½ teaspoon soy sauce
    • 1 teaspoon tahini

    Instructions

    1. Whisk together the ingredients for the Asian dressing and set aside.
    2. Peel each shrimp, leaving the tails intact. To devein each individual shrimp, run a small paring knife down the back of the shrimp (from the head to the tail). Using your fingers, remove the vein along the backside as you gently rinse it under running water. Set aside the cleaned shrimp.
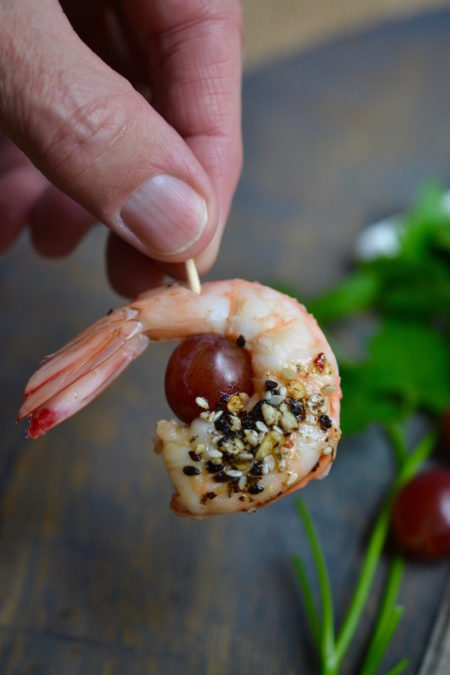
    3. Take a toothpick and, beginning directly under the tail, spear it through the shrimp and a single red grape, then through the base of the shrimp. The grape should sit securely in the "c" curve of the shrimp. Do this to each one of the shrimps.
    4. Using a small spoon, drizzle the Asian dressing over the lower part of your shrimp skewer, then sprinkle it with plenty of Penang nut & spice mix. Arrange it on a serving platter. Continue until the bottom half of each shrimp skewer is dressed with the Penang nut blend. Sprinkle the shrimps with a touch of sea salt. Cover the platter and place in the refrigerator until ready to serve. Just before serving to guests, garnish the shrimp skewers with sprigs and leaves of fresh cilantro.

    Asian Shrimp Skewers - Glory Kitchen
    Asian Shrimp Skewers - Glory Kitchen
    Asian Shrimp Skewers - Glory Kitchen
    Asian Shrimp Skewers - Glory Kitchen
    Asian Shrimp Skewers - Glory Kitchen
    Asian Shrimp Skewers - Glory Kitchen
    Asian Shrimp Skewers - Glory Kitchen
  • KIMCHI FRIED RICE WITH MUSHROOMS AND CHORIZO

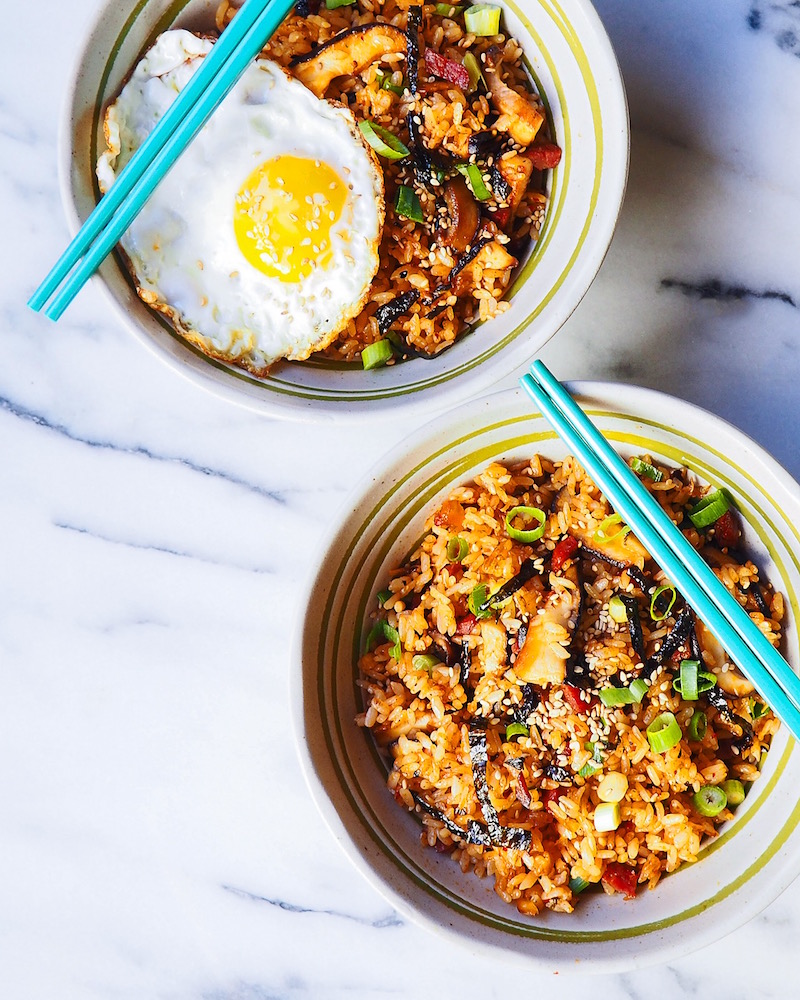
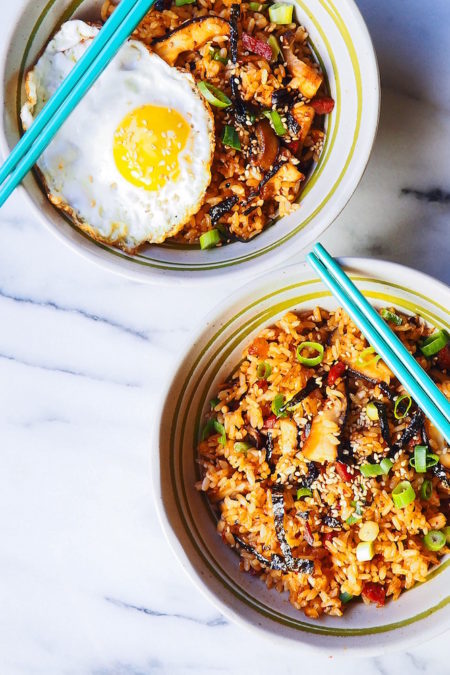
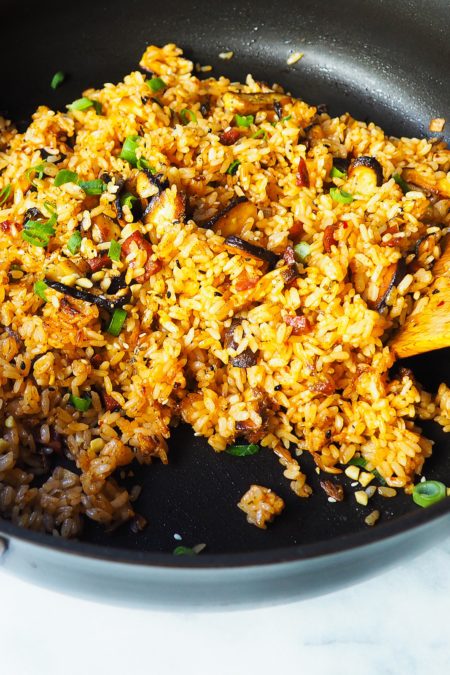
    My ultra talented friend, Lisa Rees, from Los Angeles, California, is sharing with us her mushroom and chorizo infused Kimchi Fried Rice seasoned with our Glory Kitchen Penang nut & spice mix.  Lisa is a true master behind the camera lens, capturing her beautiful food creations in such artful ways.

    Her photographs always seem to tell a story, arranged in such a way that draws you in for more.  To learn more about this very talented cook and photographer, visit her links listed below.      -Margie    (food and photos created by Lisa Rees)

    Lisa Rees
    artist, photographer, & cook

    Fried rice is such a popular dish universally nowadays, not limited to Asians.  The various versions of fried rice dishes are limitless, for example Indonesian Nasi Goreng, Chinese pork fried rice, Thai pineapple fried rice, Filipino garlic fried rice.  It is easy to make and the best part is with a little bit of imagination, you can use almost any ingredient on hand from the fridge/pantry to put into it.  I love its crunchy crispiness accompanied by the complex flavors from the different elements.  It’s quite sophisticated in its own simple and comforting way.  

    This recipe is inspired by the basic Korean style kimchi fried rice.  I incorporated fresh shiitake mushrooms, chorizo sausage along with the deliciously Asian influenced blend of Penang Nut & Spice to the mix.  The undeniable heat from the kimchi combined with the smokey flavor of the chorizo, further enhanced by the Penang Nut & Spice give this fried rice a vivacious personality and it is fiery in my opinion.

    Kimchi Fried Rice with Mushrooms and Chorizo

    2-3 portions

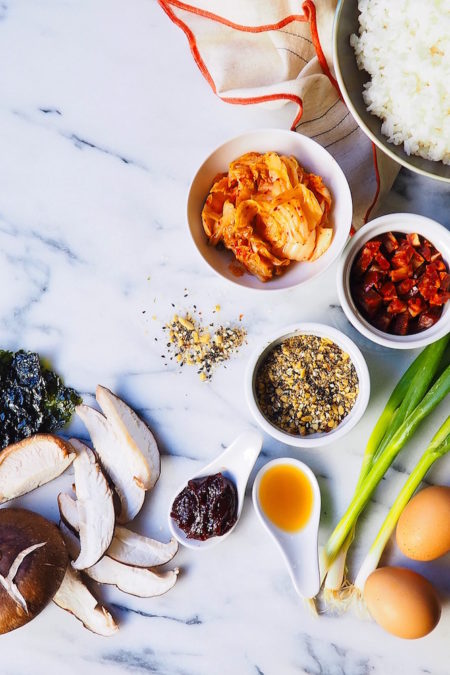
    Ingredients

    • Penang nut & spice mix
    • 1 cup of Kimchi (densely packed)
    • 1 tablespoon Gochujang (Korean chilli bean paste)
    • 1 tablespoon toasted sesame oil
    • 2 tablespoons vegetable oil
    • 3 oz. dried Spanish chorizo, cut into small dices
    • 6 oz. fresh shiitake mushrooms (about 2 large ones), cleaned, stem removed and cut into thin slices
    • 1 1/2 cups of short-grain rice, cooked to yield about 3 cups
    • 1 bunch of spring onions, finely sliced
    • 1 teaspoon salt
    • 1 tablespoon toasted sesame seeds
    • 2 small sheets of Korean nori (roasted seaweed), cut into thin slices
    • 3 large eggs, optional (if you like a sunny side up egg on top)

    Instructions

    1. Squeeze out as much juice as you can from the kimchi, into a small bowl and reserve the juice. Then finely chop the kimchi set aside.
    2. Whisk the reserved kimchi juice and Gochujang in a bowl until well blended.
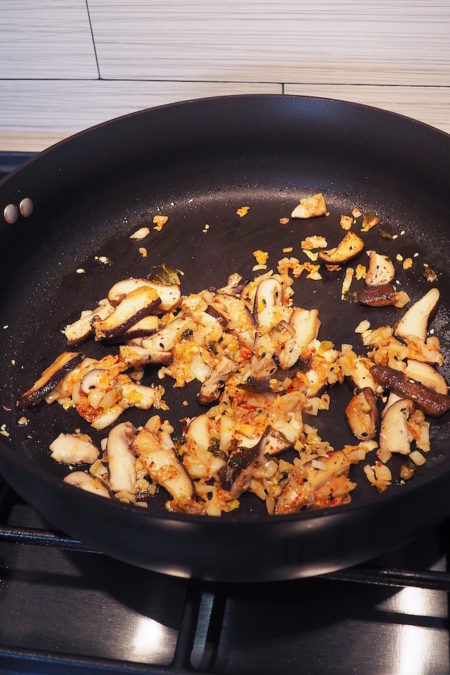
    3. Heat the vegetable oil over medium heat until hot in a non-stick deep frying pan or wok. Add shiitake mushroom slices, chopped kimchi and 2 teaspoons Penang nut & spice mix into the pan, stir frequently for about 3-4 minutes until the mushrooms become soft and the kimchi is browned and very fragrant.
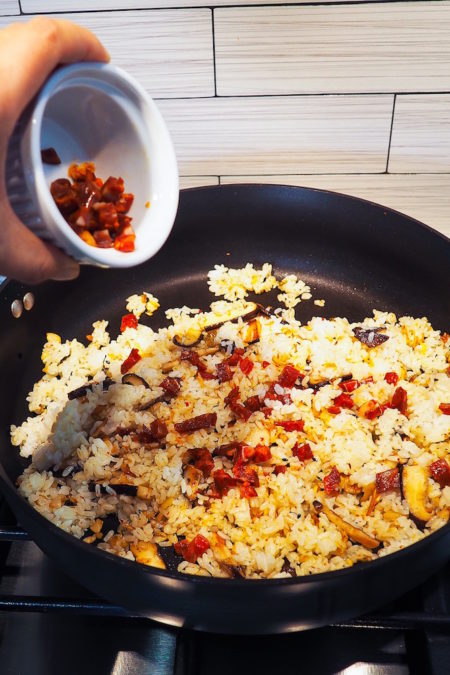
    4. Turn the heat to high, add the cooked rice to the pan, add toasted sesame oil to blend with the rice. Press the rice onto the sides of the pan if necessary to break up any large lumps, stir frequently for 2 minutes. Add chorizo dices and kimchi/Gochujang liquid evenly onto the rice, toss and stir fry everything for another 5 minutes until the rice is nicely browned and toasted, not sticking together as much. Add in the salt and 1 teaspoon of Penang nut & spice mix, mix well.
    5. Take the pan off the heat and toss in chopped spring onions. Meanwhile cook sunny side up eggs separately in another pan if you choose, and set them aside.
    6. To serve, divide the kimchi fried rice equally into 3 bowls. Sprinkle slices of nori and toasted sesame seeds and place a sunny side up egg into each bowl.

    Notes

    1. The cooked rice to be used should be at room temperature (not hot), and not mushy in consistency. If you have left over rice from the night before, it is even better.
    2. The key to a good fried rice is to heat the pan or wok until it is extremely hot - it helps to toast the rice and keeps the grain separate during cooking.
    3. By breaking up the runny yolk of a sunny side up egg and stirring it into the fried rice, this dish becomes super delectable and it gives the rice an almost melt-in-your-mouth, buttery taste.

    Kimchi Fried Rice - Glory Kitchen
    Kimchi Fried Rice - Glory Kitchen
    Kimchi Fried Rice - Glory Kitchen
    Kimchi Fried Rice - Glory Kitchen
    Kimchi Fried Rice - Glory Kitchen
  • BEET AND AVOCADO SALAD

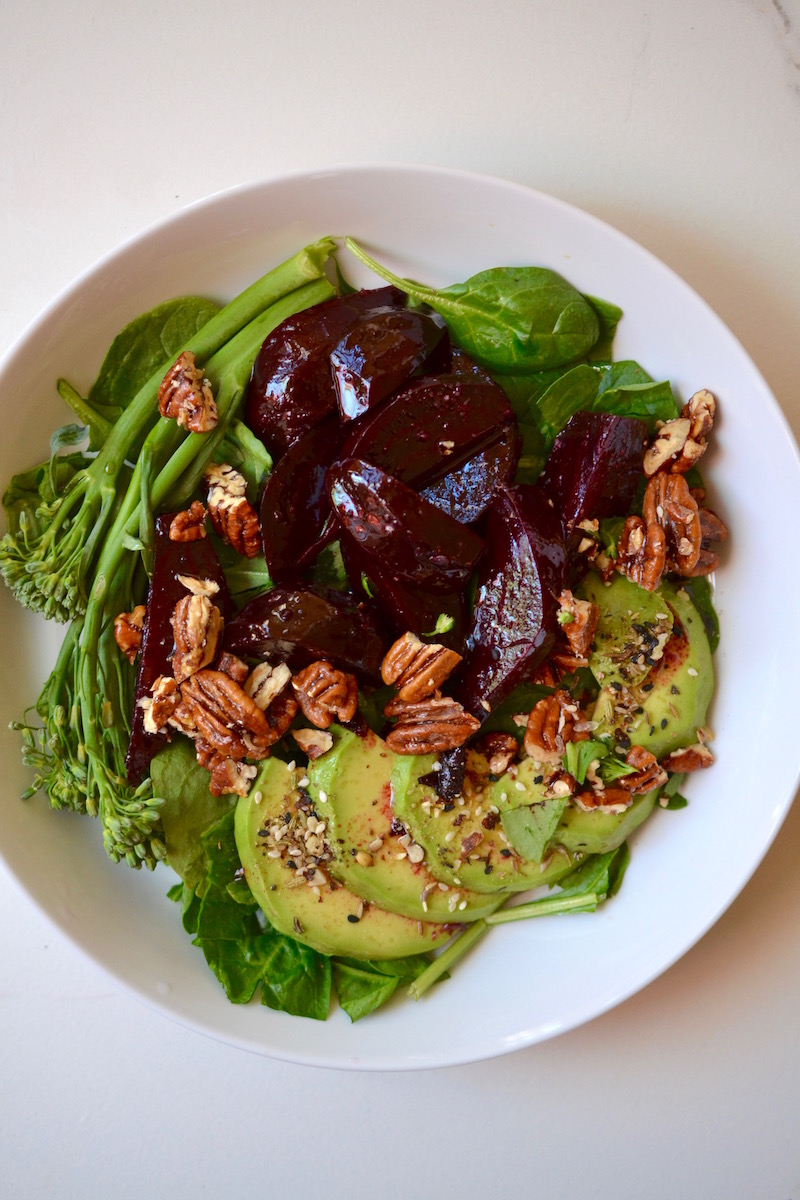
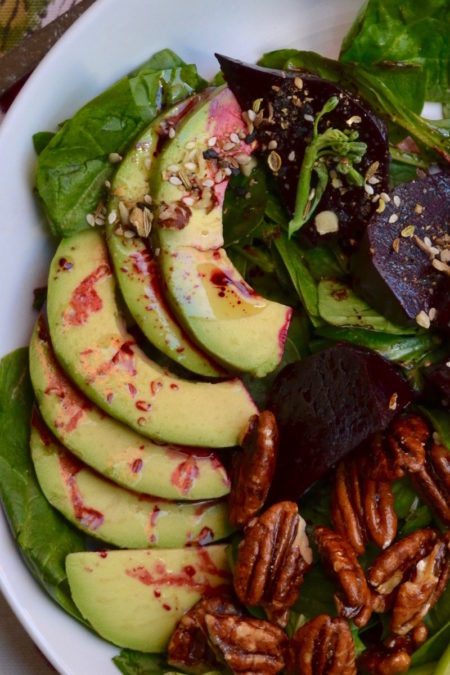
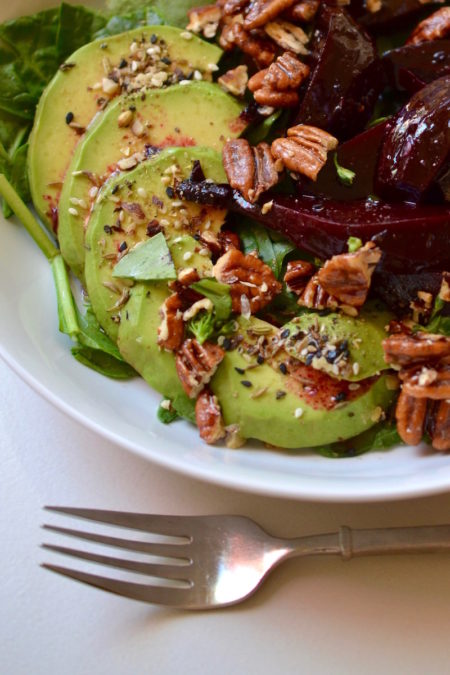
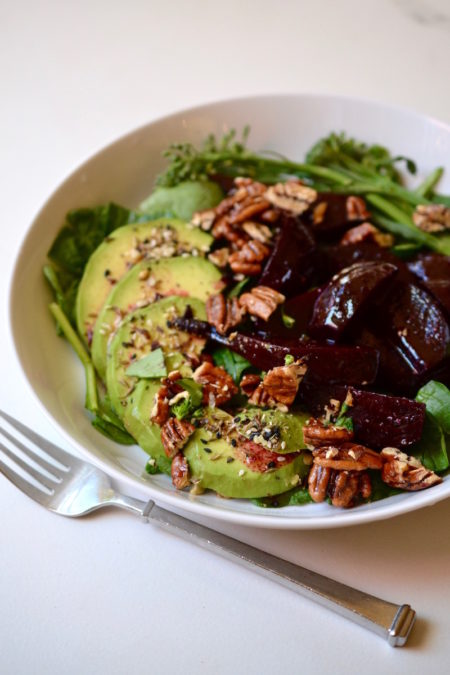
    Oh the fresh flavors of this Beet and Avocado Salad spiced up with our Middle Eastern blend of nut & spices.  Beets usually rank into two various camps.  Some people love them, and others have a strong aversion to them.  I have often heard those in the latter group say “they taste like dirt”.

    Obviously that sounds quite unappealling, and I am ashamed to say for a long time I fell into that “dirt” category – I had a true disliking for all things beet related.

    When beets became trendy in the chef  and culinary worlds, I thought there must be something more to these messy, red, root vegetables and I had a hunch I was missing out on something special.

    Once I learned the process of roasting with a bit of olive oil and sea salt, then marinating the beets in a tangy vinaigrette, I discovered the secret joys of this very popular veggie. The hot oven adds a wonderful roasted flavor and the marinade a sweet tanginess.

    I have also found them to be delicious eaten raw, much like a carrot stick, and dipping them into spinach dip, hummus, or a creamy tzatziki sauce .  Beets are often used to color food in a reddish/fuchsia pink hue, and with that dramatic presentation in mind, I often make beet hummus, beet vinaigrette dressing, and even beet muffins.

    I don’t believe there is another natural, plant-based food out there that can create such magic in tinting foods.  As an important side note, when working with beets, you’ll quickly find your hands will also get the red color treatment.  Not to worry, it washes out, and you can always wear plastic gloves.

    Beetroots are the bulbous portion (taproot) of the beet plant and can be either red or golden.  Both are beautiful, rich colors and I often mix them together in salads, or sometimes use just one color to add pizzazz to foods.  Every part of the beet plant is edible.  The leaves and stems can be chopped up and added into salads, whipped up into a pesto, or sauteed in a bit of fresh garlic and olive oil then served as a side dish.

    If you’ve not previously been a fan of beets, I urge you to try them again.  With a little finesse in the preparation, they’ll quickly become one of your very favorites.

    Margie Bruner - Glory Kitchen

    Margie Bruner
    owner of Glory Kitchen

    instagram
    facebook

    Beet and Avocado Salad

    4 large servings

    Ingredients

    • Cairo nut & spice mix
    • 4 beets, large (8 if small)
    • 6-8 cups fresh spinach
    • 2 ripe avocados
    • 4-6 sprigs baby broccoli
    • 2 tablespoons olive oil
    • 2 tablespoons balsamic vinegar
    • 1 generous pinch sea salt
    • candied pecans

    Instructions

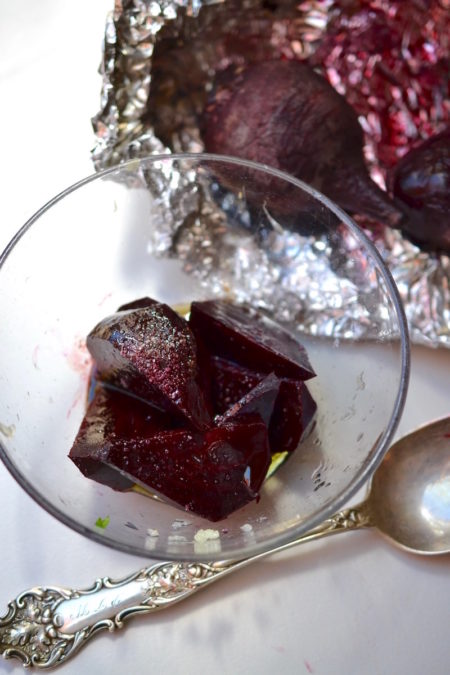
    1. Wrap beets in foil and bake in a 350° oven for about 30 minutes. After 30 minutes, pierce the beets with a fork and if they are tender, they are ready. If still firm, continue to cook until they are fork tender. Remove from the oven, open up the foil, and allow to cool completely.
    2. With a paring knife, gently remove the skin of the beets. Once cleaned, slice them in half (lengthwise), then slice each half again, forming pretty wedges. Place all the sliced beets into a large mixing bowl, add the olive oil, balsamic vinegar and sea salt. Toss these together gently then set aside to marinate and allow the juices to create a lovely vinaigrette dressing.
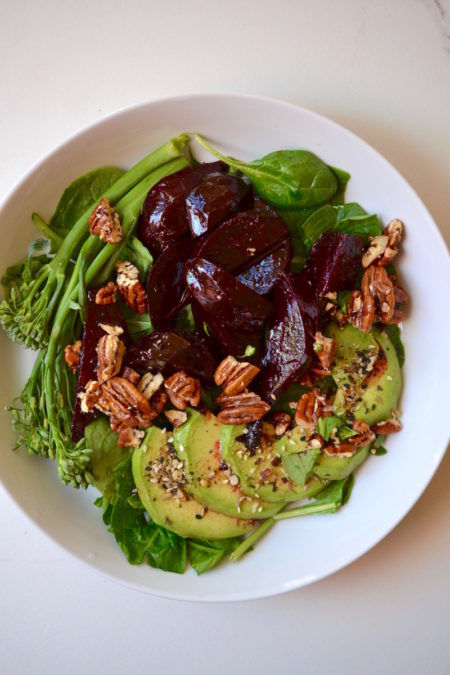
    3. Take the spinach and chop ever so slightly just to break it down and make a bit smaller - do not over chop. Arrange the spinach at the base of each individual salad bowl or plate. On top of the spinach, layer the marinaded beets (reserving the vinaigrette left behind), the sliced avocado, the full sprigs of baby broccoli, and the candied pecans. Sprinkle the beets and avocado with generous amounts of Cairo nut & spice mix, take the remaining vinaigrette left behind from the beets, and drizzle over each individual salad.

    Notes

    If you wish to have a greater amount of beet vinaigrette dressing, double the amounts of olive oil and balsamic vinegar when marinating the beets. This salad would also be wonderful using our Glory Kitchen Mumbai, Penang or Provence blends.

    Beet and Avocado Salad - Glory Kitchen
    Beet and Avocado Salad - Glory Kitchen
    Beet and Avocado Salad - Glory Kitchen
    Beet and Avocado Salad - Glory Kitchen
    Beet and Avocado Salad - Glory Kitchen
  • PICKLED JALAPEÑO PEPPERS

    Every refrigerator needs to be stocked with a jar of pickled jalapeño peppers.  I always have one and reach for it often to add a bit of heat and flavor to dishes – and not just Mexican meals.  I add chopped jalapeños to the obvious foods like nachos, enchiladas, quesadillas and beans of all types.

    I also, however, use them to spice up rice, salads, dressings, baked potatoes, soup bases, and the list goes on.  You never know when something needs an added note of heat and if you have a jar of jalapeño peppers handy, you’ll always be prepared.

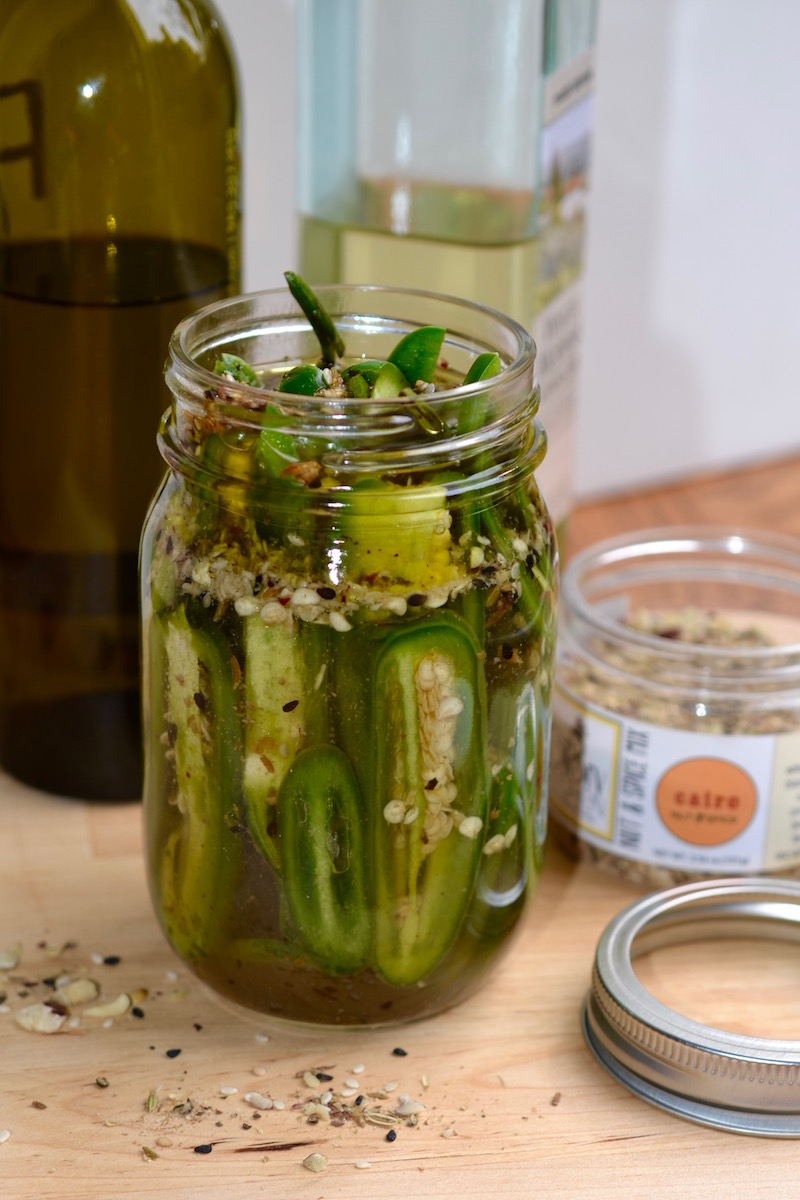
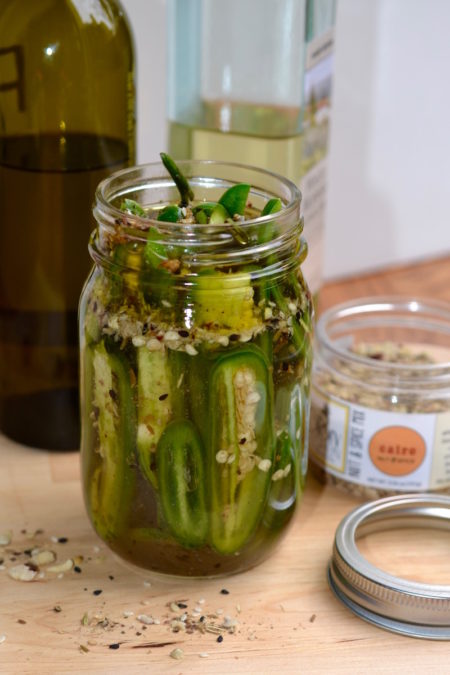
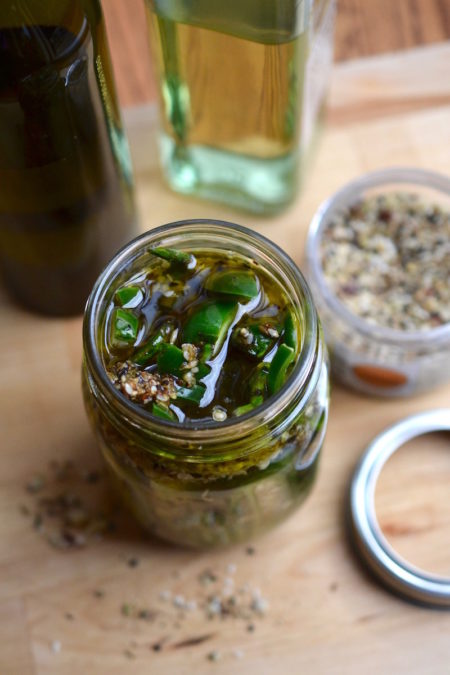
    My home refrigerator always has a jar, however, it wasn’t until I reached for them recently that I realized I was out and needed to run by the store to purchase another.  That was when it hit me that I needed to make my own homemade jalapeños, and of course, I wanted to add some interesting notes by flavoring the brine with our Cairo nut & spice mix.

    It had never crossed my mind to make my own pickled jalapeño peppers, but let me tell you, it is so, so easy.  I already had the few ingredients needed sitting in my pantry, it was quick, and the result was delicious.  So much fresher and so much more flavorful than anything I could buy at the local store.

    As a bonus, I’ve also found myself using the seasoned brine to add acid and flavor to salad dressings and all types of sauces.  When a recipe calls for vinegar, add a spoonful from this jar of jalapeños.  From here on out, homemade jalapeños will be a staple in my refrigerator and they should be in yours too!

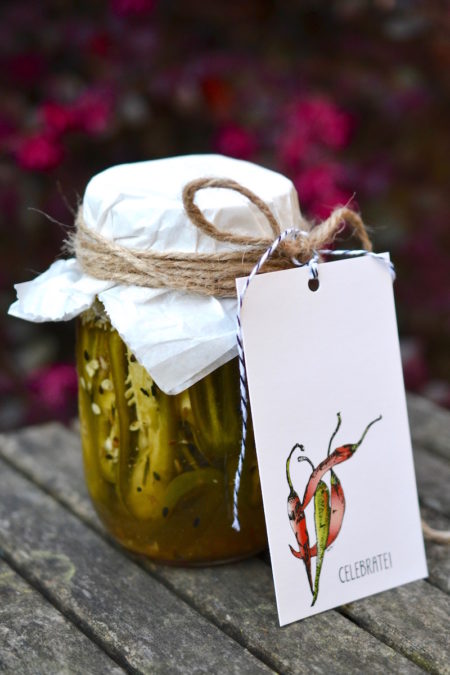
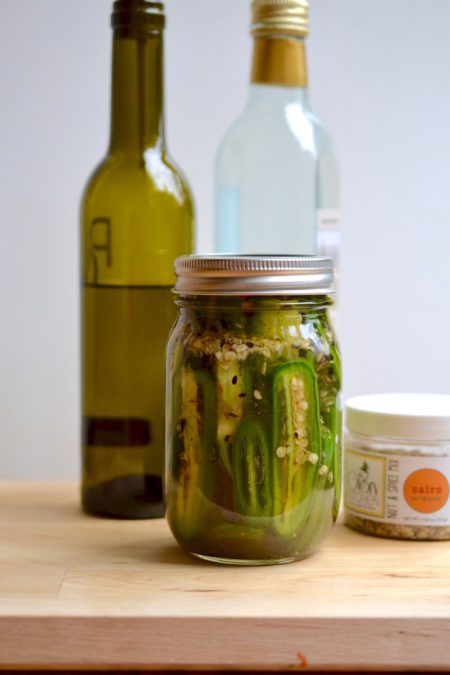
    And by the way, these jalapeños would make a perfect gift, especially if they are dressed up with our very own Glory Kitchen pepper gift tags!  You can order these chili pepper gift tags from our website here. 🙂

    Margie Bruner
    owner of Glory Kitchen

    instagram
    facebook

    Pickled Jalapeño Peppers

    one 16 oz jar of peppers

    Ingredients

    • 4-8 jalapeño peppers, fresh
    • 1 cup white wine vinegar
    • 1/8 cup olive oil
    • 1 tablespoon CAIRO nut & spice mix
    • 1 tablespoon sea salt, kosher style
    • ½ tablespoon sugar

    Instructions

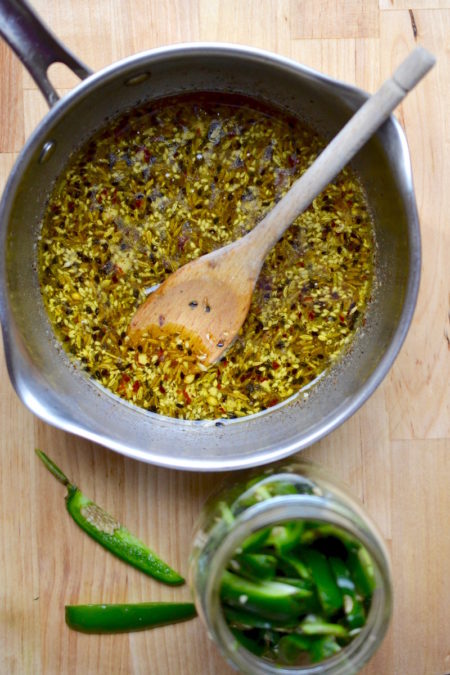
    1. In a medium saucepan, bring to a boil vinegar, oil, CAIRO nut & spice mix, salt, and sugar. Boil for about 3-4 minutes, making certain the salt and sugar are completely dissolved. Remove pan from heat and set aside to slightly cool.
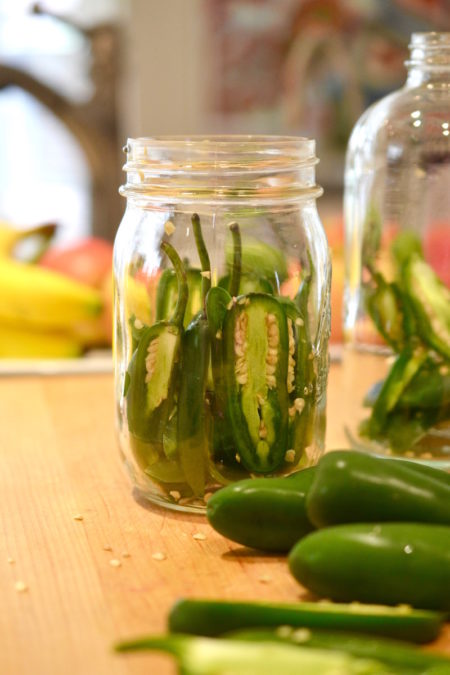
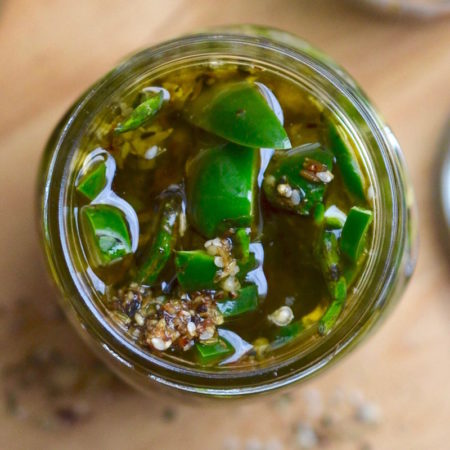
    2. Slice the fresh jalapeños (I like to slice them lengthwise - it makes a larger cut and also look prettier in the pickling jar) and layer them carefully into a 16 oz mason jar, arranging them so their sides are displayed nicely. If you are making these pepper jars as gifts, take extra time to stack them so they look visually appealing through the glass.
    3. Pour the liquid over the jalapeños until they are completely submerged and close with lid. You may do this even if the liquid is still a bit warm. Allow the jar to come to room temperature before refrigerating.
    4. If you are making these to use right away, you can place them in the refrigerator, allow to marinate for 3 or more days, and then use as needed. They should last in your fridge for up to a month or more.
    5. You can also use the same recipe if you are canning, using typically canning procedures. Doing it this way, they'll last up to a year!

    Notes

    I used the Glory Kitchen Cairo nut blend but these peppers would also work well with the Mumbai, Penang or San Miguel nut blends.

    Pickled Jalapenos - Glory Kitchen
    Pickled Jalapenos - Glory Kitchen
    Pickled Jalapenos - Glory Kitchen
    Pickled Jalapenos - Glory Kitchen
    Pickled Jalapenos - Glory Kitchen
    Pickled Jalapenos - Glory Kitchen
    Pickled Jalapenos - Glory Kitchen
  • BUTTERNUT SQUASH AND CHICKEN SANDWICH

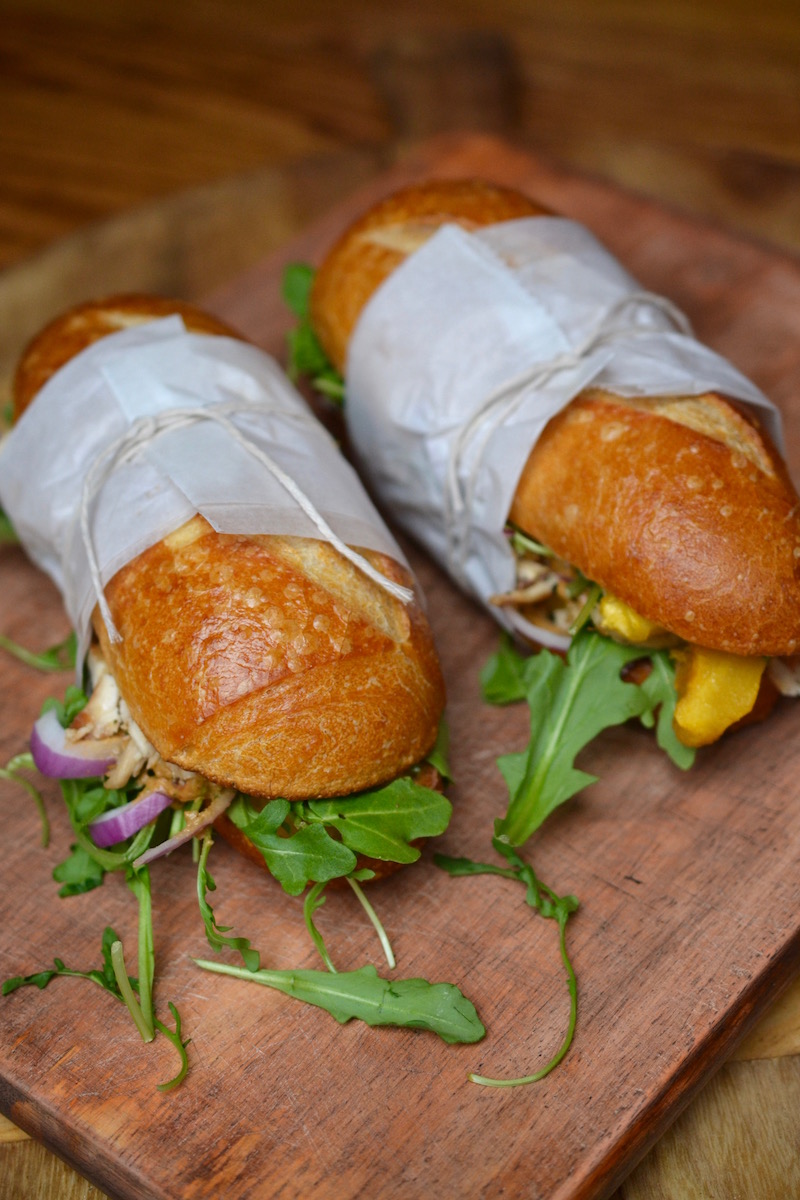
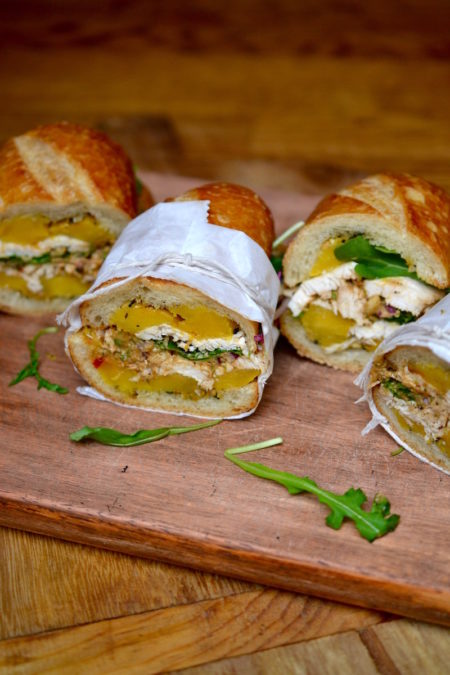
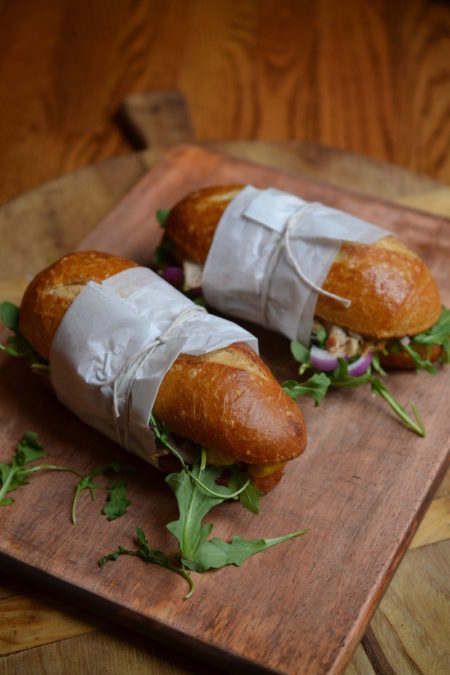
    This sandwich layered with thick slices of roasted butternut squash and other veggies is filling and delicious .  Big slices of squash, rubbed with olive oil and roasted in the oven until they are tender and golden brown, then added into a hollowed out sourdough roll… well, it is just so good.

    It also has a bit of added heat from sriracha mayo, which is simple to mix together but oh so much better than just plain mayo.  I have added roasted and shredded chicken as well because I typically like a protein in my sandwiches but it would be just as wonderful with the butternut alone, or with other roasted veggies.  Think thick slices of zucchini, eggplant or large portobello mushrooms.  You could even add caramelized onions for a touch of sweetness.

    Finding fresh, good bread is the essential first step in making an amazing sandwich.  I’ve always felt it was the starting point for something really tasty and I am willing to make a special trip to the local bread bakery to find just the right loaf or roll.  I often will buy a few extra, wrap them well, and put them in the freezer to have ready when the sandwich mood hits.  Just remember, bread does not last too long in the freezer, so date the outer wrapping and use it within 3 months or so.

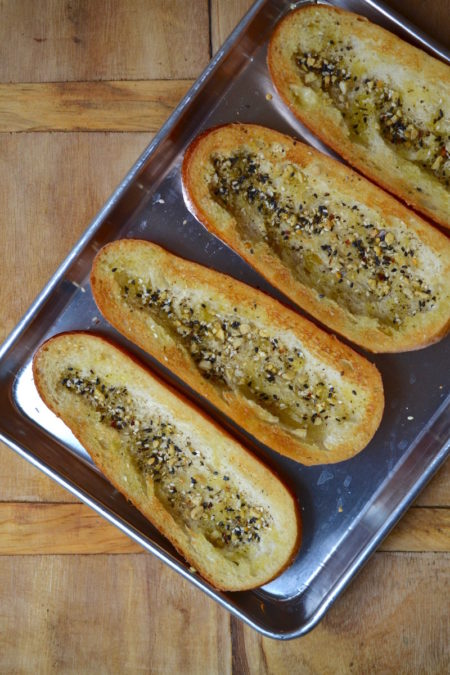
    Three reasons I hollow out the sourdough loaf: one, it allows you to really fill it with lots of veggies and flavor, two, it reduces the extra bread calories, and three, it helps meld the sandwich together so things stay put when you are biting into that toasted, veggie filled goodness.

    The Penang nut & spice mix sprinkled into the roll adds a bit of crunch and nutty flavor.  Use this recipe as a starting point, then get creative and make your own combination of roasted veggie flavors!

    Any of the Glory Kitchen nut & spice mixes would work well in this type of sandwich.

    Margie Bruner
    owner of Glory Kitchen

    instagram
    facebook

    Butternut Squash and Chicken Sandwich

    Ingredients

      For the sriracha mayo:
    • 1 tablespoon sriracha sauce, gochujang sauce or other hot sauce
    • ½ cup mayonnaise
    • 2 teaspoons lime juice, fresh
    • pinch of sea salt
    • For the sandwiches:
    • Penang nut & spice mix
    • 4 sourdough rolls or baguette
    • 1 butternut squash, sliced and roasted
    • 1 bag arugula
    • red onion, sliced thin
    • roast chicken, shredded
    • olive oil
    • sea salt

    Instructions

      Sriracha mayo:
    1. Mix all the ingredients for the sriracha mayo using a small amount of hot sauce, then adjust the heat level as desired by adding more in small increments. Set aside.
    2. Sandwiches:
    3. Peel the butternut squash, clean out the inside cavity, and slice into about ½ inch thickness. I like to cut them lengthwise and get a nice thick slice. Drizzle them with olive oil, rub all over with your fingers, sprinkle with sea salt, and place them into a 450° oven for about 30 minutes or until the squash is golden and tender. Remove from the oven and let them cool completely.
    4. Slice the sourdough rolls in half lengthwise, and with your hands, scoop out the tender inside cavity of bread. Next, drizzle the inside with olive oil, rub it all around with your hands, sprinkle the inside with sea salt and then with a generous sprinkle of Penang nut & spice mix. Place the rolls into the oven with the temperature set to broil. Stand by and keep an eye on these because they can burn all too quickly. Remove rolls from the oven when they are toasted and golden.
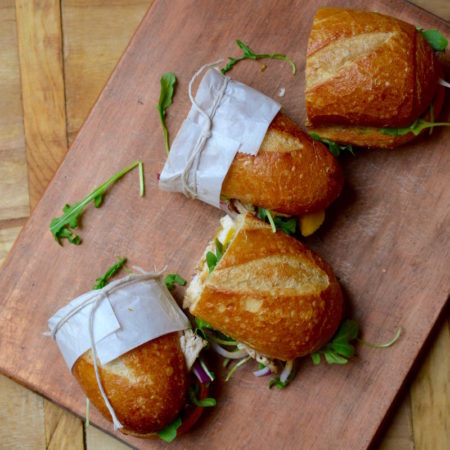
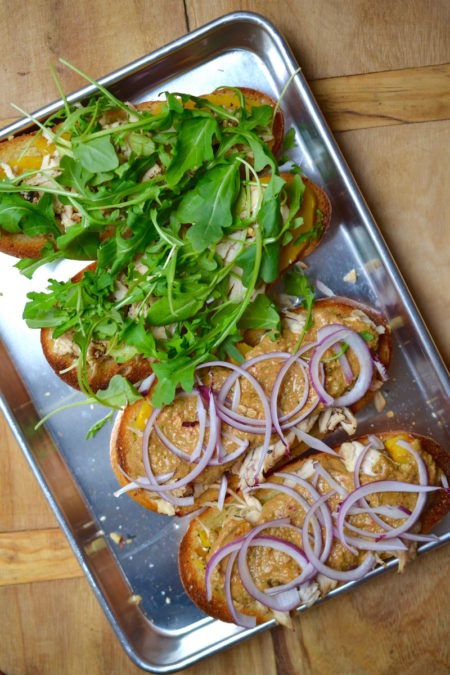
    5. Take the rolls and fill each side with roasted squash, then add a layer of sriracha mayo, then a layer of shredded chicken, sliced red onions, and top with lots of arugula. Drizzle the arugula with a tad of olive oil then sprinkle with sea salt. Top with the other half of the loaf. I like to tie each sandwich tightly with parchment paper and twine then leave in the refrigerator for about an hour to allow it to meld and bind together. Slice in half and serve sandwiches at room temp. with a side of chips, slaw or potato salad. Enjoy!

    Butternut Squash and Chicken Sandwich - Glory Kitchen
    Butternut Squash & Chicken Sandwich_square2
    Butternut Squash and Chicken Sandwich - Glory Kitchen
    Butternut Squash and Chicken Sandwich - Glory Kitchen
    Butternut Squash and Chicken Sandwich - Glory Kitchen
Updating…
  • No products in the cart.

JOIN US !
JOIN
close-link