Author Archives: Margie

  • Roasted Garlic - Glory Kitchen

    ROASTED GARLIC

    Roasted Garlic is a great ingredient to use in dips, dressings, soups, hummus, cheese trays, bread, pizzas, or just topped on tasty crackers.

    Garlic in its raw state can be pungent and leave a strong after taste, however, once it is roasted, it becomes sweet, creamy, and deliciously caramelized.

    Sister to onions, shallots and leeks, garlic has many proven health benefits and medicinal properties.  It’s often touted as one of “the world’s healthiest foods”, so roasting it in large batches and keeping it on hand to be ready to throw into recipes is a great routine to have.

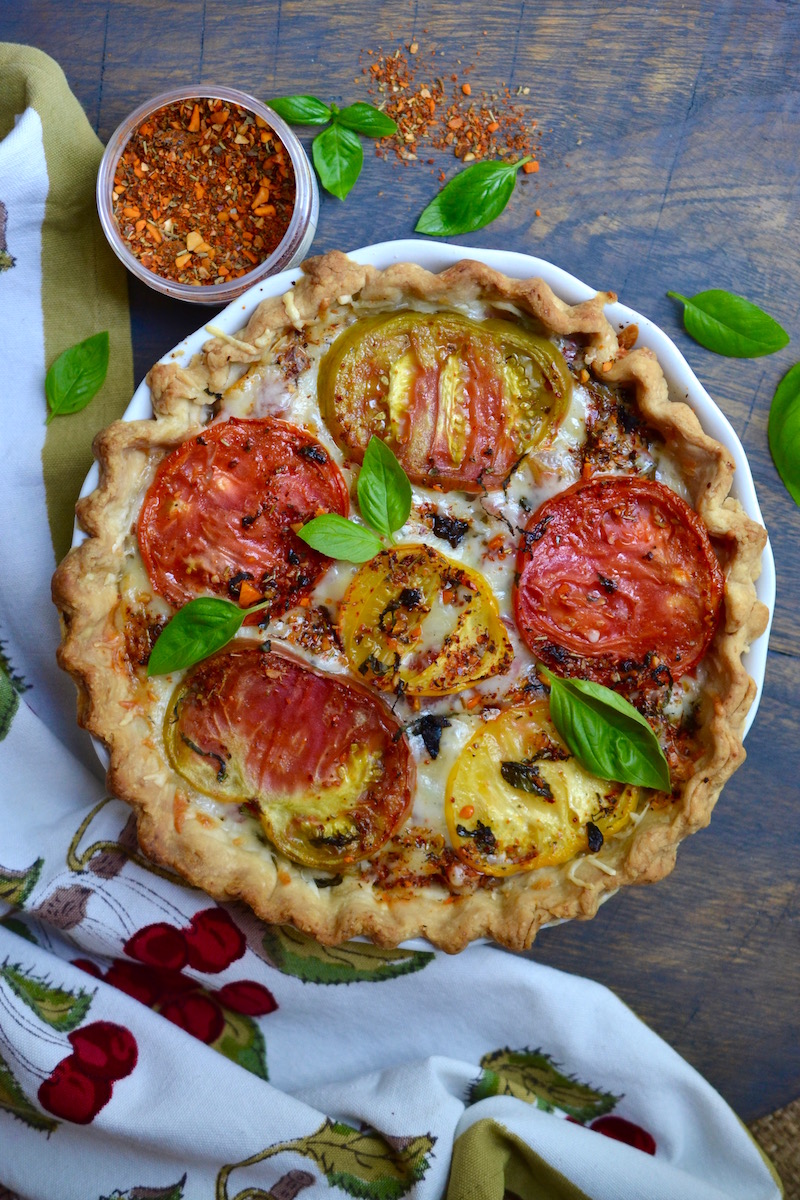
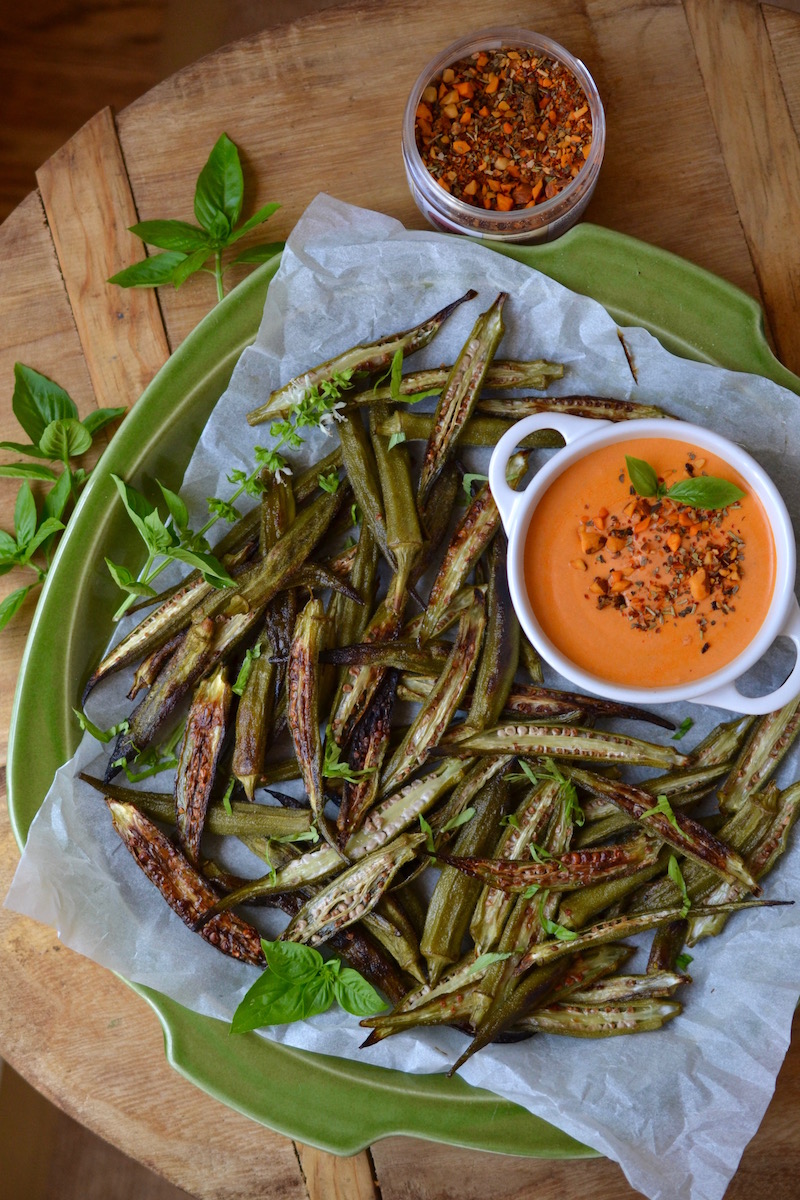
    I’ve seasoned this batch of garlic with the Asian nutty flavors of our Glory Kitchen Penang nut & spice mix which adds a bit of red pepper heat and a hint of ginger.  I think any of our Glory Kitchen nut blend flavors would make a great seasoning enhancer to Roasted Garlic – it just depends upon the flavor that moves you, Mexican, Asian, Indian, Italian, French or Middle Eastern.  The process is easy and the rewards are delicious. 

    Margie Bruner
    owner of Glory Kitchen

    instagram
    facebook

    Roasted Garlic

    Ingredients

    Instructions

    1. Heat the oven to 450°.
    2. Take the bulb (full head) of garlic and slice off the entire top to expose a flat layer of each clove. (see photo). Arrange the full bulbs with skins on, face up in a baking dish & drizzle the tops with olive oil. Sprinkle all the bulbs with sea salt and a generous amount of Penang nut & spice mix.
    3. Cover the baking dish tightly with aluminum foil and place in the hot oven for 30 minutes. Remove from the oven, uncover, and allow them to cool completely.
    4. Take each head of garlic, and with your hands, squeeze out each individual garlic clove into a bowl (see photo). Some cloves might be a bit soft and will squish out. Divide these up into what you will use now and place the leftovers into small freezer-safe bags to have ready for future recipes. I usually package each baggie with 10-15 cloves each.
    5. Use the Roasted Garlic cloves when making dips, pizza, sauces, soups, casseroles, or hummus... the sky's the limit.

    Notes

    Any of the Glory Kitchen nut & spice blends would be a great seasoning to Roasted Garlic.

    Roasted Garlic - Glory Kitchen
    Roasted Garlic - Glory Kitchen
    Roasted Garlic - Glory Kitchen
    Roasted Garlic - Glory Kitchen
    Roasted Garlic - Glory Kitchen
    Roasted Garlic - Glory Kitchen
  • Tomato Pie - Glory Kitchen

    TOMATO PIE

    When I first heard the term “Tomato Pie” it sounded unfamiliar and a bit strange.  I often think of sweet fruits like peach, blueberry, etc. for pie fillings but this savory pie is such a great dish to make utilizing fresh, homegrown tomatoes.  It’s a veggie pie that goes great with a side green salad but I also love that it yields leftovers for breakfast in the morning or lunch the next day.  A slice of warm tomato pie with a fried egg on top would make a delicious breakfast.

    I’ve been experimenting with homemade pie crusts, and to be honest, they can be tasty but time consuming.  After much trial and error, I feel as though I have finally perfected a great homemade pie crust (the recipe which I will share in a future post), however, I am certainly not opposed to using a store bought ready-made crust or a roll-out pie crust.

    I try to peruse the ingredient list and find one with straight-forward and clean ingredients.  I also prefer to use the roll-out type because after crimping and forming your edges, it looks a bit more rustic and homemade.

    If making your own pie crust sounds laborious and keeps you away from baking pies at home, then by all means, use a store bought one because there’s nothing better than homemade pies. I always buy two and keep one on hand in the freezer.

    The ingredients for this Tomato Pie are straightforward – tomatoes, onion, basil and our Glory Kitchen Umbria nut & spice mix for a bit of extra tomato flavor and a crunchy topping.  Once you have the pie crust pre-baked, the rest is quite simple.  I hope you’ll give this Tomato Pie recipe a try while homegrown tomatoes are still abundant.

    Margie Bruner - Glory Kitchen

    Margie Bruner
    owner of Glory Kitchen

    instagram
    facebook

    Tomato Pie

    Ingredients

    • Umbria nut & spice mix
    • 1 par-baked pie crust, homemade or store bought
    • 2 tablespoons dijon mustard
    • 1/2 cup white or yellow onion, chopped small
    • 3-4 tomatoes, rough chop
    • 1 egg, whisked
    • 1 tablespoons fresh basil, chiffonade
    • 1 cup gruyere cheese, shredded
    • 1 cup white cheddar cheese, shredded (can substitute with mozzarella or monterrey jack)
    • olive oil, just a drizzle
    • salt and pepper

    Instructions

    1. Slice a few tomatoes (about 5 slices), somewhat thin, and lay them on a paper towel to drain - these slices will be the decorative topping. Set these aside to allow them to dry out a bit. Chop the remaining tomatoes into a rough chop. Place them into a colander which has been placed into a large bowl to catch and drain the juices. Sprinkle the tomatoes with a bit of salt and set the colander aside to drain the tomatoes of their juices.
    2. Pre-bake the pie crust. Preheat your oven to 425°F. If you are making a homemade pie crust, make certain the crust is very cold (I put it in the freezer for about 15 minutes) lightly lay aluminum foil or parchment paper over the crust, fill it with weights (I use several cups of dry beans) and bake for 10-15 minutes or until the crust is lightly baked. Use the tines of a fork to prick to bottom of the crust so it does not bubble up. Do not let the edges turn brown. Remove and allow to cool a bit.
    3. Add the dijon mustard to the bottom of the cooled crust and spread it out evenly. Next, layer the chopped onions over the mustard.
    4. Take the tomatoes which were set aside in the colander, and with your hands, squeeze as much moisture as you can out of the tomatoes. You don't want a soggy pie crust so try and squeeze out as much as possible. I never throw out the tomato juice - it's delicious. I either drink it or save it to add into a soup or smoothie. Take the squeezed tomatoes and mix in the whisked egg. Layer these chopped tomato/egg mixture over the onions in the crust. Now add the basil chiffonade over the chopped tomatoes.
    5. Sprinkle the top of the tomato mixture with both types of shredded cheeses. Arrange the reserved and drained tomato slices (see photo) on top of the pie. Drizzle just a bit of olive oil over the tomatoes and rub the top with your fingers to distribute lightly over each tomato. Sprinkle the top with Umbria nut & spice mix.
    6. Bake the pie in a 425° oven until it is lightly browned and bubbly, anywhere from 25 to 45 minutes. Remove and allow to cool. Top with fresh basil and serve with a side salad.

    Tomato Pie - Glory Kitchen
    Tomato Pie - Glory Kitchen
    Tomato Pie - Glory Kitchen
    Tomato Pie - Glory Kitchen
    Tomato Pie - Glory Kitchen
    Tomato Pie - Glory Kitchen
    Tomato Pie - Glory Kitchen
  • Blue Cheese Stuffed Figs - Glory Kitchen

    BLUE CHEESE STUFFED FIGS

    Fresh figs are very seasonal, and sometimes hard to come by so when local figs become available in late summer I like to take advantage of them as much as possible.  These Blue Cheese Stuffed Figs are a showstopper appetizer and make a nice sweet and tangy cheese combination.  By keeping it simple the organic shape and deep colorations of the fig can be highlighted and the many contrasting flavors taste amazing.

    The sharp and salty flavor of blue cheese paired with the sweet and tender flesh of a ripe fig are a perfect match.  With the added sweetness of fragrant honey and the crunchy almonds and spices from our Glory Kitchen Mumbai nut and spice mix, you get a full flavor bite.  The Indian flavors from the Mumbai mix add an interesting note of heat and spice to the otherwise sweet and creamy fig.

    Blue cheese is a blanket term for a creamy but pungent cheese which has blue or grey cultured mold veined throughout.  Blue Cheese can go by many names and some, such as Roquefort, Gorgonzola, and Stilton carry a protected designation of origin label, which means to be called such, they must originate from that particular European region.  Blue Cheeses without a protected origin name are simply called “blue cheese”.  Regardless of they type of blue cheese used, the unique sharp flavor is a perfect contrast to the sweet fig.

    Other Glory Kitchen nut blends which work well with this appetizer are the Cairo Middle Eastern blend or the Provence French blend.  If using the Provence blend, I would allow it to saturate in the honey for a few minutes before adding the drizzle to help reconstitute the dried herb flavors.

    If it’s summer, find some figs and pair these little flavor bites with a nice, cool, glass of wine.

    Margie Bruner
    owner of Glory Kitchen

    instagram
    facebook

    Blue Cheese Stuffed Figs

    Yield: Serves 8-10

    Ingredients

    Instructions

    1. Allow the block of blue cheese to come to room temperature.
    2. After washing and drying figs, snip the stems off and cut an X in the top until the knife reaches about half way down the fig. Do not cut all the way through.
    3. Take a spoonful of cheese and with the fig in one hand and the cheese in the other, carefully open the fig and stuff the cheese into the center cavity. Work gently so the fig stays intact and does not bruise or disfigure.
    4. Arrange the stuffed figs on a serving platter, drizzle generously with honey. Sprinkle the tops generously with Mumbai nut & spice mix.
    5. Garnish with thinly sliced fresh mint or tiny little mint leaves. Serve at room temperature as an appetizer with a crisp glass of wine.

    Notes

    These Blue Cheese Stuffed Figs would also be wonderful using the Glory Kitchen Cairo or Provence blends.

    Blue Cheese Stuffed Figs - Glory Kitchen
    Blue Cheese Stuffed Figs - Glory Kitchen
    Blue Cheese Stuffed Figs - Glory Kitchen
    Blue Cheese Stuffed Figs - Glory Kitchen
  • Green Chili Corn Cakes - Glory Kitchen

    GREEN CHILI CORN CAKES

    Everything in this Green Chili Corn Cake recipe utilizes summer bounty: corn, tomatoes, peaches, and most importantly, green chili peppers.

    Late August and early September marks the peak of Hatch Chili Season, the annual harvest and celebration of a mild but flavorful chili pepper grown in the Hatch Valley around the area of Hatch, New Mexico.  These peppers remind me of my childhood growing up in west Texas, and are abundant all over the southwestern part of our country.

    The Hatch Chili cultivar was developed in the late 1800’s and the pepper is the state vegetable of New Mexico.  If you’ve ever been to colorful Santa Fe, you’ve probably seen the traditional ristra, a dried red pepper wreath adorning many of the entry doors.  This common decoration is made with Hatch chili pepper pods which have been dried, turned into a deep crimson red color, and strung for ornamentation.

    Green Hatch Chili Peppers have a subtle flavor often described as onion or garlic in taste.  The heat can vary but often they are quite mild.  The best way to use them is to char them in a very hot oven or over a fire, steam them in a covered bowl to blister the skins, remove the skin, seeds and stems, and then store them away in the freezer or jar them to use immediately.  The peppers are great additions to all types of foods, not just Mexican.

    I’ve made a Green Chili Corn Cake which is almost like a savory pancake with chili flavor and sweet corn.  It has a bit of crunch from our Glory Kitchen San Miguel nut & spice mix, added both to the batter for spicy flavor as well as a crunchy garnish.  And of course, if you can’t find authentic Hatch Chilis from New Mexico, you can always substitute canned green chilis. Enjoy!

    Margie Bruner - Glory Kitchen

    Margie Bruner
    owner of Glory Kitchen

    instagram
    facebook

    Green Chili Corn Cakes

    Yield: makes 3-4 servings

    Ingredients

      For the cakes:
    • 1 tablespoon San Miguel nut & spice mix
    • 2 1/2 cups corn kernels, divided in half (about 3-4 ears)
    • 4 oz. chopped green chili, canned or fresh
    • 2 tablespoons butter, room temperature
    • 3/4 cup buttermilk
    • 1/2 cup red onion, finely chopped
    • 1/2 cup basil chiffonade, plus more for garnish
    • 3/4 cup all-purpose flour
    • 1/2 cup cornmeal
    • 1 teaspoon baking powder
    • 1/2 teaspoon baking soda
    • Pinch of salt
    • For the salsa topping:
    • 1 teaspoon San Miguel nut & spice mix
    • 4 oz. green chili, chopped
    • 1/2 - 1 full jalapeno pepper, minced
    • 1 peach, chopped
    • 1 cup fresh corn kernels
    • 1/2 red onion, chopped
    • 1 avocado, chopped
    • 1 tomato, diced
    • 2 limes, juiced
    • 2 tablespoons avocado oil (or olive oil)
    • 1/2 teaspoon salt
    • Other:
    • sour cream (for optional garnish)
    • extra San Miguel nut & spice mix for garnish

    Instructions

    1. In a large bowl, mix together all ingredients except the avocado for the salsa. Cover, set aside in the refrigerator. Just before serving you will chop the avocado, mix into the salsa and serve on top the corn cakes. This salsa (sans the avocado) can be made a day ahead.
    2. In a blender, purée half the corn kernels, butter, and buttermilk until almost smooth. Transfer to a large mixing bowl and add in the remaining corn kernels, onion, and basil chiffonade.
    3. In a separate bowl, thoroughly combine all of the dry ingredients.
    4. Add the wet ingredients to the dry, and mix until just combined.
    5. Heat a griddle or a cast iron skillet and then add a few tablespoons of avocado oil. Spread so the surface for the corn cakes is oiled and hot. Measure about 2 heaping tablespoons of batter and place onto the griddle. Spread it gently with the top of the spoon to form a nice circle. The batter should resemble a pancake batter (but a bit thicker) If it looks too thick you can add a bit more buttermilk and stir in well. After about 2 minutes, check the cake to see if it is browned and then flip gently to brown the other side. Remove onto a cooling rack and immediately season with salt.
    6. Just before you begin cooking the corn cakes remove the salsa from the refrigerator and allow it to come to room temperature. Chop the avocado and mix it into the salsa. When the corn cakes are ready to serve, stack a few onto each serving plate, top with fresh salsa. You can also add a dollop of sour cream or greek yogurt. Garnish with a sprinkle of San Miguel nut & spice mix and more fresh basil. Can be served warm or room temperature.

    Notes

    Any leftover corn cakes would be wonderful served for breakfast and topped with a fried egg. Any leftover salsa would be great served as a dip with blue corn tortilla chips.

    Green Chili Corn Cakes - Glory Kitchen
    Green Chili Corn Cakes - Glory Kitchen
    Green Chili Corn Cakes -Glory Kitchen
    Green Chili Corn Cakes -Glory Kitchen
    Green Chili Corn Cakes -Glory Kitchen
    Green Chili Corn Cakes -Glory Kitchen
  • SUMMER TOMATO STRATA

    This Summer Tomato Strata recipe can feed a crowd and takes advantage of the abundance of beautiful tomatoes during this season.  It is perfect for those lazy summer mornings where you need only remove your strata from the fridge and pop it into the oven – most of the work is done the day or evening before.

    A “strata” is almost like a savory bread pudding, and it’s really a fancy name for the humble breakfast casserole.  The rich tomatoes paired with sourdough bread, cheese and an egg custard make this a perfect breakfast or dinner dish.  For breakfast, I like to pair it with a fresh fruit salad.  For dinner or lunch, I would add a crisp green salad on the side for a perfectly balanced meal.

    Taking advantage of so many beautiful local tomatoes, I used a variety of heirloom tomatoes, topped it with cheese, and finally our Glory Kitchen Italian nut & spice flavors from our Umbria blend.  This is a simple, make-ahead dish that can really satisfy.  Don’t hesitate to make the full dish or double the recipe – it makes great leftovers for a quick lunch or dinner.  A zap in the microwave and you’re ready to go!

    Margie Bruner
    owner of Glory Kitchen

    instagram
    facebook

    Summer Tomato Strata

    Ingredients

    • Umbria nut & spice mix
    • olive oil
    • 1 large red onion, cut in half then sliced thin
    • 3 garlic cloves, peeled & chopped
    • 5 cups sourdough bread, cut into cubes
    • 4 cups fresh tomatoes, cut into large pieces
    • pinch of salt
    • pinch of sugar
    • 10 eggs
    • 1 cup fresh parmigiano-reggiano cheese, grated
    • fresh basil, oregano or thyme leaves

    Instructions

    1. With your fingers, rub olive oil around all sides of a 9 x 13 baking dish. Spread the sourdough cubes evenly into the prepared and oiled baking dish and set aside.
    2. In a large saucepan, heat about 1 tablespoon olive oil and add the sliced red onions. Cook until lightly browned and wilted. Add the chopped garlic and sauté until lightly browned. Remove from the pan and set aside.
    3. Add a bit more olive oil into the same sauté pan and then add the chopped tomatoes. Add a pinch of salt and a pinch of sugar. Cook at medium heat until they are soft and saucy. Add in the onion & garlic mixture into the tomatoes and combine. Gently pour the tomato mixture over the cubed bread and spread until it is evenly dispersed in the baking dish.
    4. Break all 10 eggs into a large bowl and beat them until well mixed, the whites and yokes should be well incorporated. Pour the beaten eggs over the tomato and bread mixture. Cover the baking dish with aluminum foil and place into the refrigerator to sit overnight.
    5. When you are ready to bake, preheat the oven to 350°. Remove the prepared strata from the refrigerator and top with the grated parmigiano-reggiano cheese. Sprinkle generously with Umbria nut & spice mix. Place in the hot and bake for about 20 minutes or until the eggs have gently set - do not over bake. The eggs will continue to set as it cools outside the oven.
    6. Let the strata rest for at least 10 minutes before slicing and serving. If you wish, you may sprinkle with additional Umbria nut & spice mix just before serving. Top with fresh basil, thyme or oregano, either hand torn or chopped.

    Notes

    Begin preparing this onion & tomato strata the night before you plan on serving. Let it sit overnight to soak up the bread and meld the tomato and Italian flavors. Bake in the oven and serve the next day - perfect for a late morning brunch when you want to sleep in and pop something into the oven the next morning.

    Summer Tomato Strata - Glory Kitchen
    Tomato Strata
    Tomato Strata
    Summer Tomato Strata - Glory Kitchen
  • Okra Dippers - Glory Kitchen

    OKRA DIPPERS

    This is for all of the savory, salty, chip and dip lovers.  These Okra Dippers are as tasty and satisfying as any of your favorite snacks but they are good-for-you!  These little green dippers are addictive and oh so delicious.  Roasted and crisped-up okra paired with a creamy red pepper dipping sauce is the perfect appetizer to serve to guests at an outdoor garden party.  They taste sinful but actually healthy,

    The Italian style dip made with our Umbria nut & spice mix and served alongside the okra adds a great red color contrast to the beautiful green veggies.  Wait until you taste these little bites, they’re difficult to stop eating.

    With only 4 ingredients, the red pepper dipping sauce is quick and simple to make but has amazing tang and flavor.

    Although it is great paired with okra it could also be used on so many more foods.  It would make a great dip on a crudité platter alongside lots of colorful raw veggies.  It would be delicious on a wrap or as a sandwich spread, and it would work well as a creamy dressing on an iceberg lettuce wedge.  Of course a side bowl of crispy pita chips would also make this dip disappear in no time.

    In about 20 minutes (and most of that is cooking time) you can have a terrific snack or appetizer for guests.  Enjoy!

    Margie Bruner
    owner of Glory Kitchen

    instagram
    facebook

    Okra Dippers

    Ingredients

      For the dip:
    • 1 tablespoon Umbria nut & spice mix
    • 3/4 cup mascarpone cheese
    • 3/4 cup greek yogurt, plain
    • 1 1/2 -2 roasted red peppers, jarred
    • pinch of sea salt
    • For the okra:
    • 2 lbs fresh okra
    • 1 tablespoon olive oil
    • pinch of sea salt
    • fresh basil, julienned, for presentation

    Instructions

      for the dip:
    1. Mix together in a blender mascarpone cheese, greek yogurt, red pepper (depending upon how large they are in the jar, use 1 1/2 or 2 peppers), 1 tablespoon Umbria nut & spice mix and a pinch of salt. Blend until smooth, pour into a serving bowl and set aside.
    2. for the okra:
    3. Set the oven to 425°. Slice each okra lengthwise, place them all onto a baking tray and drizzle them with olive oil. Sprinkle with a pinch of salt and then using your hands, toss them gently so the oil is distributed on all the okra. Spread the veggies evenly so they have room to bake.
    4. Bake in the oven for about 20 minutes, or until they are nicely browned. The more you bake them, the crispier they get, but don't overcook them because they burn quickly. Remove from the heat and allow them to cool to room temperature.
    5. Arrange the okra onto a serving tray and place the red pepper dipping sauce beside it. Sprinkle the okra with a bit of fresh basil. Sprinkle the top of the dipping sauce with a bit of Umbria nut & spice mix. Enjoy!

    Okra Dippers - Glory Kitchen
    Okra Dippers - Glory Kitchen
    Okra Dippers - Glory Kitchen
    Okra Dippers - Glory Kitchen
    Okra Dippers - Glory Kitchen
  • Miso Chili Glazed Eggplant - Glory Kitchen

    MISO CHILI GLAZED EGGPLANT

    These purple beauties were transformed into Miso Chili Glazed Eggplant slathered with a delicious sauce and made with the combination of miso  paste and gochujang sauce.

    Miso paste is a fermented soybean which is often aged anywhere between 6 – 36 months.  It adds a rich and deep flavor to sauces, soups and marinades.

    Gochugang, is a sweet yet fiery red pepper paste made with Korean chilis and it is quickly becoming a very popular and trendy kitchen ingredient.

    When I was at the Specialty Food Show in NYC recently, gochujang spiced food items were popping up everywhere.  If you haven’t yet tried gochujang, it is worth buying.   Although it might be difficult to pronounce, gochujang is is now available at typical grocery stores and found in the Asian food section.  Because both ingredients are fermented, miso paste and gochujang sauce will last in your refrigerator for quite a while, so keep them handy and start to add a bit on all types of dishes.

    These Chinese eggplants (also called Asian or Japanese eggplant) are slender and beautiful in color.  After a smear of this gochujang sauce, however, the bright purple coloration was transformed into a rich red, loaded with lots of spicy and sweet flavor.

    We topped this dish with our Glory Kitchen Asian flavors of Penang nut & spice mix  for color and added crunch.  This eggplant recipe is simple and wonderful served over a salad of jasmine rice and cauliflower rice. I also topped the dish with whole, toasted peanuts for a nice bite of crunch and served it as a vegetarian main dish.  I’ll be making this recipe again soon – hope you enjoy it as much as we did.

    Margie Bruner - Glory Kitchen

    Margie Bruner
    owner of Glory Kitchen

    instagram
    facebook

    Miso Chili Glazed Eggplant

    4-6 servings

    Ingredients

      For the miso glazed eggplant:
    • Penang nut & spice mix
    • 4-6 Japanese eggplant (also called Chinese or Asian eggplant)
    • 1 tablespoon sesame oil
    • 1 tablespoon mirin
    • 1 tablespoon rice wine vinegar
    • 2 tablespoons miso paste (yellow or white)
    • 2 tablespoons gochujang sauce
    • 1 squeeze honey
    • For the cauliflower jasmine rice:
    • 1 tablespoon Penang nut & spice mix
    • 3 cups cauliflower rice, raw
    • 2-3 cups jasmine rice, cooked
    • 1/4 cup flat leaf parsley, chopped
    • 1/8 cup mint, chopped
    • 3 tablespoons olive oil
    • 2 tablespoons rice wine vinegar
    • 1 teaspoon honey
    • 1/2 cup peanuts, coarsely chopped or whole

    Instructions

      For the miso glazed eggplant:
    1. Heat the oven to 425º.
    2. In a small bowl, whisk together the sesame oil, mirin, rice wine vinegar, miso paste, gochujang sauce, and honey. After it is smooth, set aside.
    3. Slice the eggplant in half, lengthwise, leaving the top stem on (I think it presents prettier this way). Sprinkle the cut surface of the eggplant with a bit of salt and let them sit for 10 minutes.
    4. Using a small paring knife, score the open cut side with a knife in a zig zag manner, taking care not to cut the eggplant all the way through. (see photo). The purpose of this is so the miso glaze can penetrate through the fruit - I know, most people consider eggplant a vegetable, however because of its seeds, it is actually a fruit.
    5. Brush the miso chili glaze over the surface of each eggplant half. Using a baking tray, place them into the oven for 7-10 minutes. Now set the oven to broil to gently brown the tops. Keep an eye on the oven so they don't burn. Once they have browned just a bit, remove from the oven. These can be served warm or at room temperature.
    6. For the cauliflower jasmine rice:
    7. In a small bowl, whisk together the olive oil, rice wine vinegar, honey, pinch of salt, and 1 tablespoon Penang nut & spice mix to make the dressing, then set aside.
    8. In a large mixing bowl, toss together the cauliflower rice, fresh parsley, and fresh mint. I bought my cauli rice already pre-chopped and bagged from Trader Joe's, however, you can also buy a whole cauliflower, cut it into florets and pieces, then pulse it in a food processor until you achieve small, rice-like pieces. A full head of cauliflower will yield lots of extra rice so you can store it away and use it in other dishes. Pour the dressing over the cauliflower/herb combination and toss to incorporate well. Set aside to marinate while you are making the jasmine rice. You can cook the white rice with vegetable stock, coconut milk or just water. Follow directions on the package for rice and once it is cooked, lift the lid to cool completely. Toss 2-3 cups of rice in with the cauliflower mixture and set aside to meld with the flavors of the dressing.
    9. To serve the eggplant dish, lay a bed of cauliflower jasmine rice onto a large serving platter. Arrange the miso glazed eggplant over the rice and sprinkle with Penang nut & spice mix. Top with fresh chopped herbs (mint and parsley) and coarsely chopped peanuts. This can be served warm or at room temperature.

    Miso Chili Glazed Eggplant - Glory Kitchen
    Miso Chili Glazed Eggplant - Glory Kitchen
    Miso Chili Glazed Eggplant - Glory Kitchen
    Miso Chili Glazed Eggplant - Glory Kitchen
    Miso Chili Glazed Eggplant - Glory Kitchen
    Miso Chili Glazed Eggplant - Glory Kitchen
    Miso Chili Glazed Eggplant - Glory Kitchen
    Miso Chili Glazed Eggplant - Glory Kitchen
  • BLACKBERRY AND PARMESAN APPETIZER

    Here’s an easy way to enjoy fresh summer blackberries during their peak season.  This super simple Blackberry and Parmesan Appetizer always pleases and pairs beautifully with a glass of crisp white wine – perfect for outdoor cocktail parties, or a seated Al fresco dinner.

    The sweet and tangy blackberry fruit, salty chunks of cheese and peppery  flavors of our Glory Kitchen Cairo nut & spice mix create a lovely combination of flavor.  Parmegiano reggiano cheese is robust and nice on its own, however, when partnered with tangy blackberries you get a fresh burst of summer flavor.

    This same recipe would also pair well with our Glory Kitchen Mumbai nut & spice mix.  The pungent Indian flavors in the Mumbai blend adds a nice heat to the sweet honey and fruity berries.

    Feel free to swap out the berries to whatever is in season.  If you have access to fresh-picked blueberries, raspberries or strawberries, all would be a great match with salty parmesan slices.

    No slaving away at a hot oven for this appetizer.  With just a few ingredients and several minutes of slicing, this Blackberry and Parmesan Appetizer can be served to guests in no time.  Enjoy!

    Margie Bruner
    owner of Glory Kitchen

    instagram
    facebook

    Blackberry and Parmesan Appetizer

    Yield: approximately 6 servings

    Ingredients

    • Cairo nut & spice mix
    • 10-12 oz.fresh blackberries
    • 1/2 lb block parmigiano reggiano cheese
    • 2 tablespoons balsamic vinegar
    • 1 tablespoon honey + more for drizzling
    • 1/2 lime juice, fresh
    • 1 handful mint, fresh

    Instructions

    1. Slice about 1/3 of the blackberries in half lengthwise and place all the berries into a bowl. To this berry bowl, add balsamic vinegar, honey and fresh lime juice. Sprinkle in some of the mint which has been sliced (julienned) very thin. Using a spoon, carefully turn and mix the berries to incorporate the juices. Set the berries aside to macerate for about 30 minutes.
    2. Take the block of parmigiano reggiano cheese and carefully cut it into slices (see photo).
    3. If serving this appetizer on one large platter, arrange all the cheese slices on a serving plate. If serving individual portions, arrange the cheese, fanning it out on one side of the plate. For individual servings, I would place about 3-4 slices per person.
    4. Just before you are ready to serve, spoon the blackberries beside the parmesan cheese slices.
    5. Drizzle the parmegiano reggiano cheese with a bit of honey and then sprinkle it generously with Cairo nut & spice mix mix and torn fresh mint leaves. Serve immediately with a chilled glass of white wine.

    Blackberry and Parmesan Appetizer - Glory Kitchen
    Blackberry and Parmesan Appetizer - Glory Kitchen
    Blackberry and Parmesan Appetizer - Glory Kitchen
    Blackberry and Parmesan Appetizer - Glory Kitchen
  • GRILLED PEACH AND CRAB MEAT SALAD

    When it is peach season, summer peaches are one of the most flavorful and delicious fruits – BUT, only if they are in season and picked at the perfect time.

    There is nothing worse than a mealy and tasteless peach.  On the other hand, there is nothing more utterly delicious than a sweet & juicy peach.  This recipe for Grilled Peach and Crab Meat salad calls for grilling, however, a freshly cut peach sans the cooking would be just as tasty.  Skipping the grill would retain the firmness of the fruit.  In this salad version, however, I chose to grill, which brings out an intense and caramelized flavor and a melt-in-your mouth tender bite.

    The soft butter lettuce paired with lacey and somewhat bitter frisée lettuce makes a nice bed of greens for the tender peaches and delicate crab meat.

    I’ve added our Glory Kitchen Mumbai nut & spice blend to the dressing to add some spunky flavor and a touch of heat.  Other seasonings which would also work well with this salad are the Glory Kitchen Cairo, Provence or Penang nut & spice mixes.  Toasted sunflower seeds and a bit more Mumbai nut & spice mix sprinkled on top adds an element of crunch.

    If peaches are not available in your area, try this same recipe using plums, apricots, nectarines, or cherries – stone fruits are abundant all summer long.

    Margie Bruner
    owner of Glory Kitchen

    instagram
    facebook

    Grilled Peach and Crab Meat Salad

    Yield: makes 4 large salads or 6 small, side salads

    Ingredients

      For the dressing:
    • 2 teaspoons Mumbai nut & spice mix
    • 4 tablespoons olive oil
    • 1 small lemon, juice & zest
    • 2 tablespoons balsamic vinegar
    • 2 teaspoons dijon mustard
    • 2 teaspoons honey
    • 2 pinches sea salt
    • For the salad:
    • Mumbai nut & spice mix, for a final sprinkle
    • 1 head butter lettuce (also called bibb or boston lettuce)
    • 1 head frisée lettuce (also called curly endive or chicory)
    • 6 ripe peaches
    • 1/4 cup sunflower seeds, toasted
    • 8 oz. lump crab meat
    • dressing (recipe listed above)
    • olive oil
    • pinch of sugar
    • pinch of salt
    • squeeze of lemon

    Instructions

    1. In a bowl, whisk together all the ingredients for the dressing and set aside.
    2. Heat a small pan on the stove top and add the sunflower seeds. Gently toast them until they are just a tad brown. Stay close by because the seeds are small and can burn very quickly. Remove sunflower seeds from the pan and allow the seeds to cool completely.
    3. Slice each peach in half and gently remove each pit. Drizzle each peach with a bit of olive oil, rub the open flesh side with your hands to coat it with a bit of oil. Place the peaches flesh face side up on a baking tray. Sprinkle each with a pinch of salt and a generous pinch of sugar. Place each peach, face down, on to a hot grill and grill just until they are a bit caramelized and have grill marks. Remove from heat and allow to cool completely. As an alternative to grilling, you can lay the peaches face up on a baking sheet and place under a hot broiler in the oven. Broil just until the tops caramelize just a bit. Remove from oven and allow them to cool completely.
    4. Separate each leaf of the butter lettuce and place into a large mixing bowl. Drizzle with some of the pre-made dressing and with your hands, gently coat the lettuce leaves with a bit of dressing. Arrange the leaves in a circle onto each individual serving plate. Next, do the same with the frisée lettuce; remove the stems and break into bite sized pieces. Using the same dressing bowl, drizzle them with a bit of dressing and coat the leaves gently. Layer the frisée on top of the already arranged butter lettuce. Now take 3 half peaches and arrange them on top of the frisée lettuce. (If you are making small, side salads, I would use two half peaches per serving)
    5. Gently top each salad with a serving of lump crab meat, taking care not to break up the pieces and trying to keep the crab chunks intact. Top each salad with a generous amount of toasted sunflower seeds.
    6. Just before serving, drizzle each salad with additional dressing, give it a light squeeze of fresh lemon juice and finally, a sprinkle of additional Mumbai nut & spice mix. Serve immediately.

    Grilled Peach and Crab Meat Salad - Glory Kitchen
    Grilled Peach and Crab Meat Salad - Glory Kitchen
    Grilled Peach and Crab Meat Salad - Glory Kitchen
    Grilled Peach and Crab Meat Salad - Glory Kitchen
    Grilled Peach and Crab Meat Salad - Glory Kitchen
Updating…
  • No products in the cart.

JOIN US !
JOIN
close-link