• CRISPY MAPLE BACON

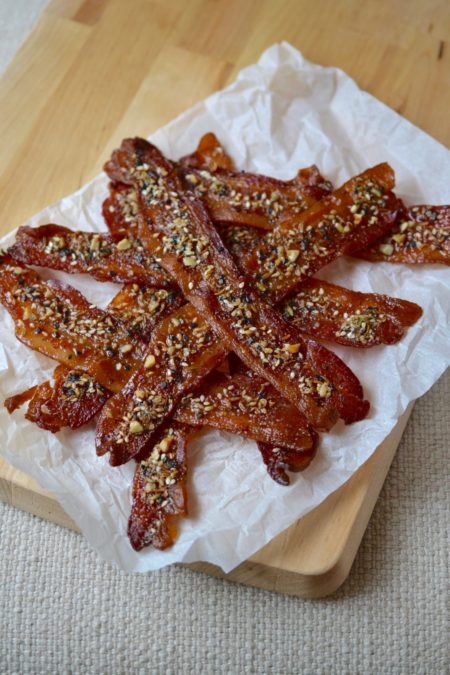
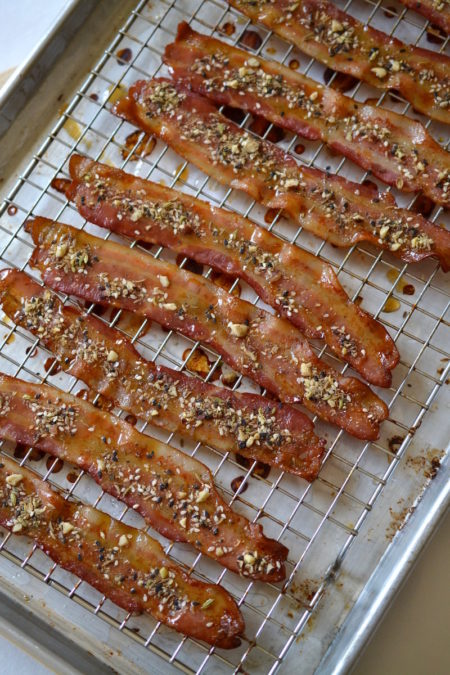
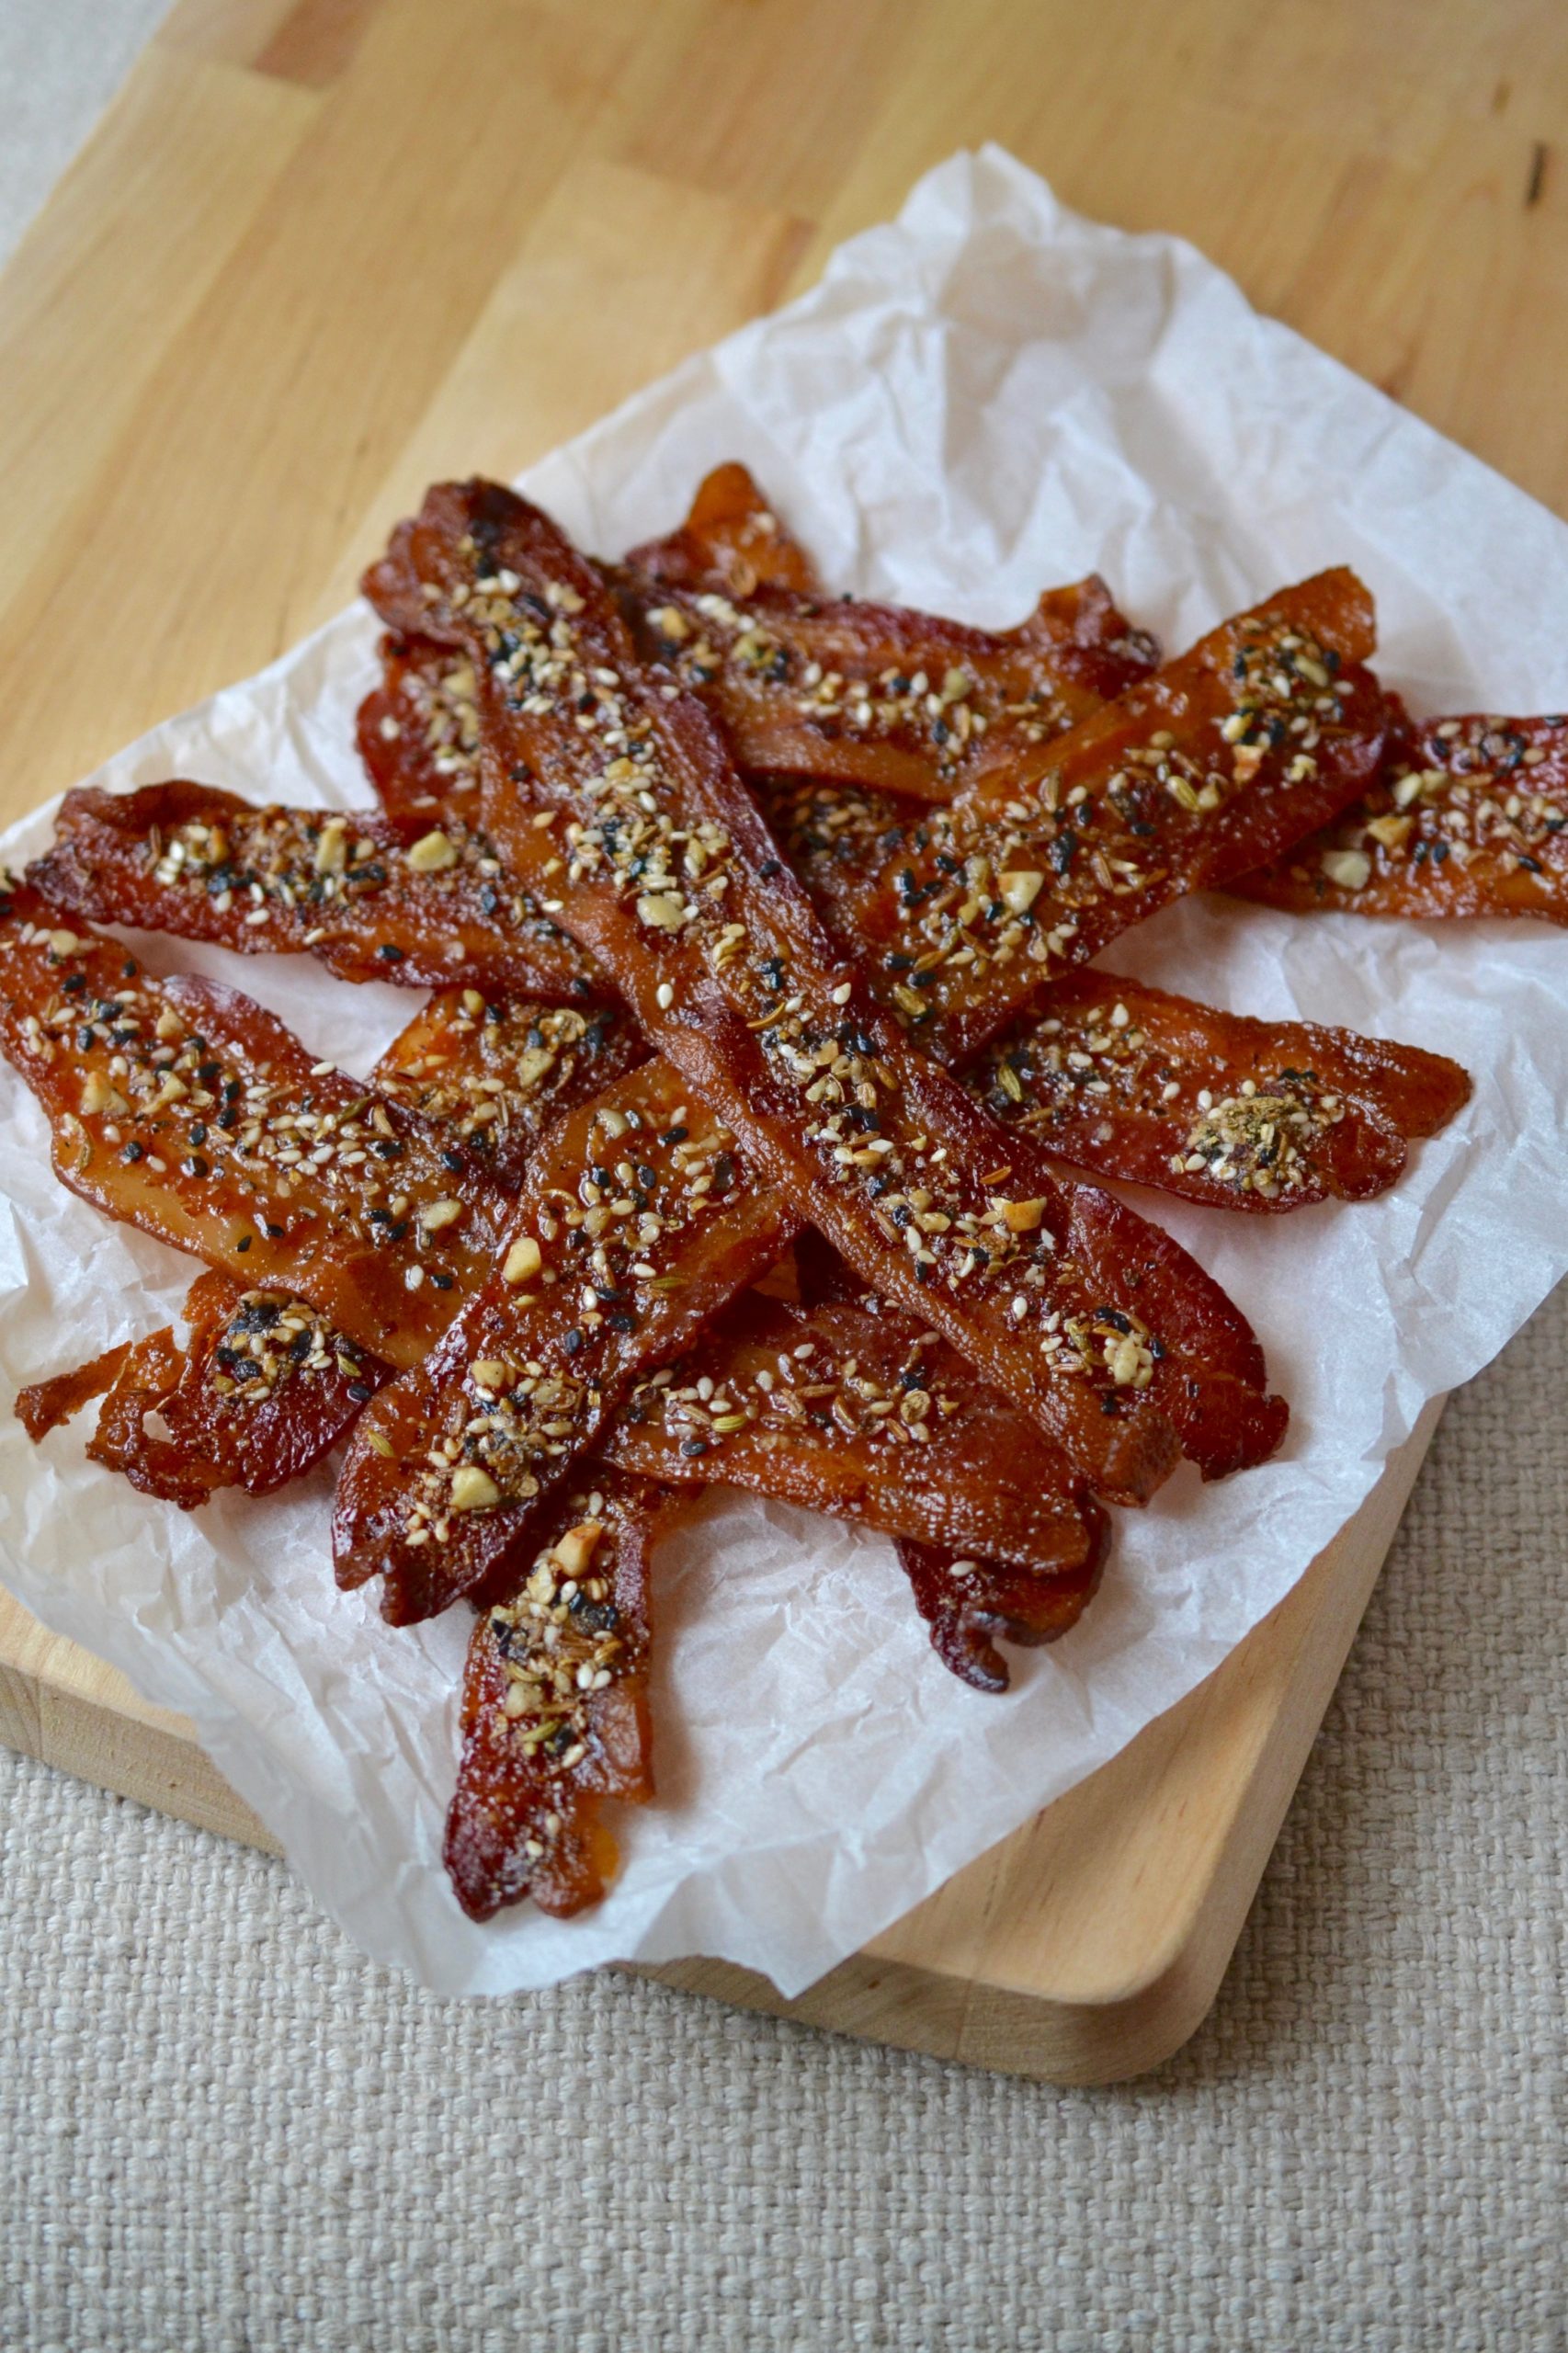
    This is a sweet and spicy twist on plain bacon, and who doesn’t love crispy bacon?  With only 3 ingredients, this Crispy Maple Bacon is quick, easy and will wow your guests when they taste the surprising touch of maple syrup sweetness paired with the spiciness and crunch of our Cairo nut & spice blend.

    The first time I tried a bit of sweetness on my traditional bacon I was a bit skeptical, but once I tasted the sweet, smoky, spicy combination I could not get enough.

    I like to serve this sweet and spicy bacon to guests as a fun appetizer.  Stack the bacon sticks into a pretty silver cup or glass and pass it around for guests to enjoy with their favorite cocktail, beer or glass of wine.

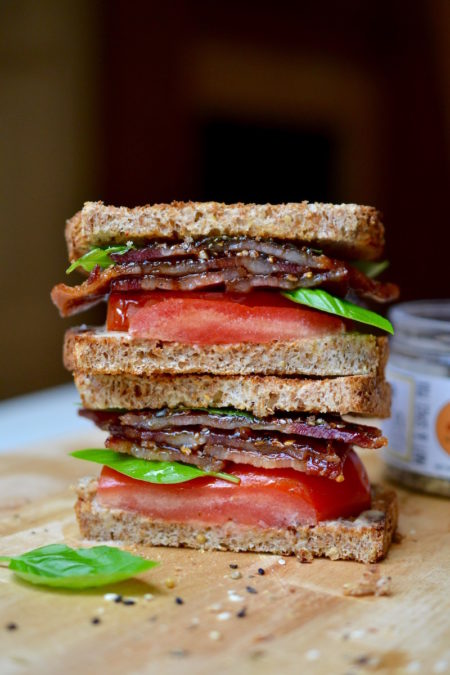
    This sweet and spicy bacon is perfect with your traditional favorite breakfast eggs and toast or piled and layered into a BLT sandwich.  By adding the sprinkle of Glory Kitchen nut & spice mix and the brush of sweetness from the maple syrup, you’ll find you’ve discovered a delicious new way to elevate your favorite breakfast food.

    Margie Bruner
    owner of Glory Kitchen

    instagram
    facebook

    Crispy Maple Bacon

    Ingredients

    Instructions

    1. Preheat oven to 400°.
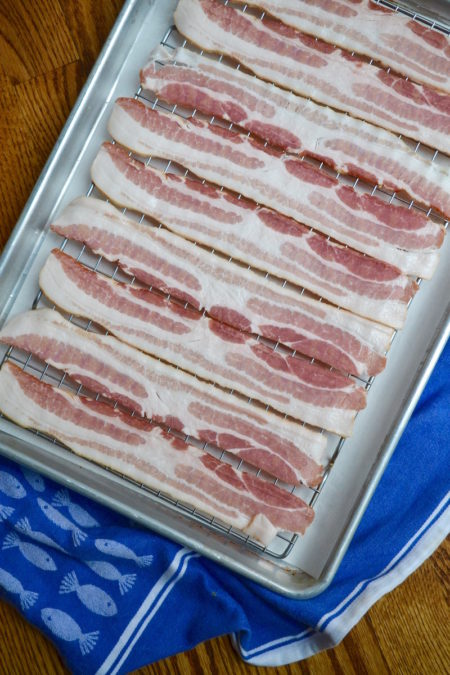
    2. Take the thick cut bacon and lay it out on a wire rack placed over a baking tray lined with parchment paper or aluminum foil. Elevating the bacon on a rack allows the air to circulate around and creates crispier bacon. Lining the tray with foil allows for a quicker cleanup.
    3. Place in the lower third of the oven and cook for 10-15 minutes, or until lightly browned.
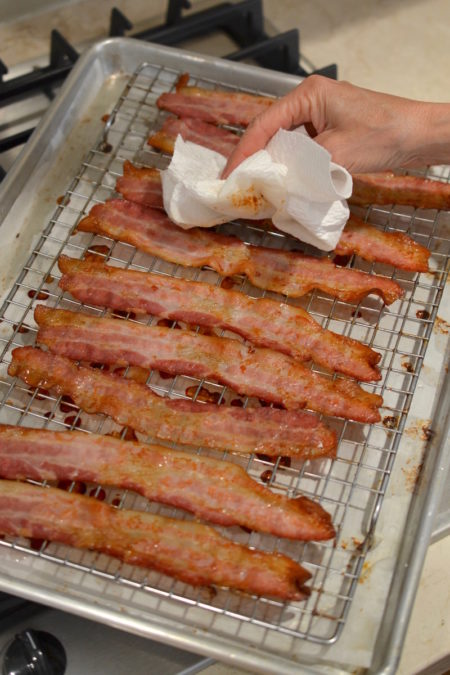
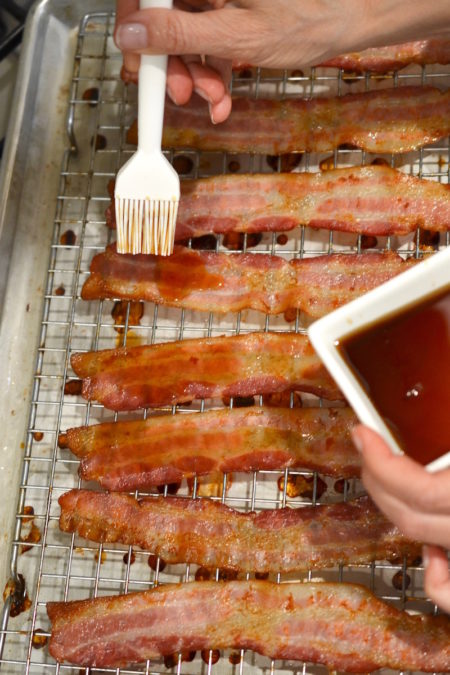
    4. Remove from the oven and pat the oil off the bacon strips with a dry paper towel. Using a pastry brush, brush each slice, on the side facing up, with a good amount of maple syrup. Carefully sprinkle each slice with Cairo nut & spice mix then place the baking sheet back into the oven and continue to bake until the slices are nicely browned and crispy. Remove from the oven, allow to cool and serve.

    Crispy Maple Bacon - Glory Kitchen
    Crispy Maple Bacon - Glory Kitchen
    Crispy Maple Bacon - Glory Kitchen
    Crispy Maple Bacon - Glory Kitchen
    Crispy Maple Bacon - Glory Kitchen
    Crispy Maple Bacon - Glory Kitchen
    Crispy Maple Bacon - Glory Kitchen
  • BEET AND AVOCADO SALAD

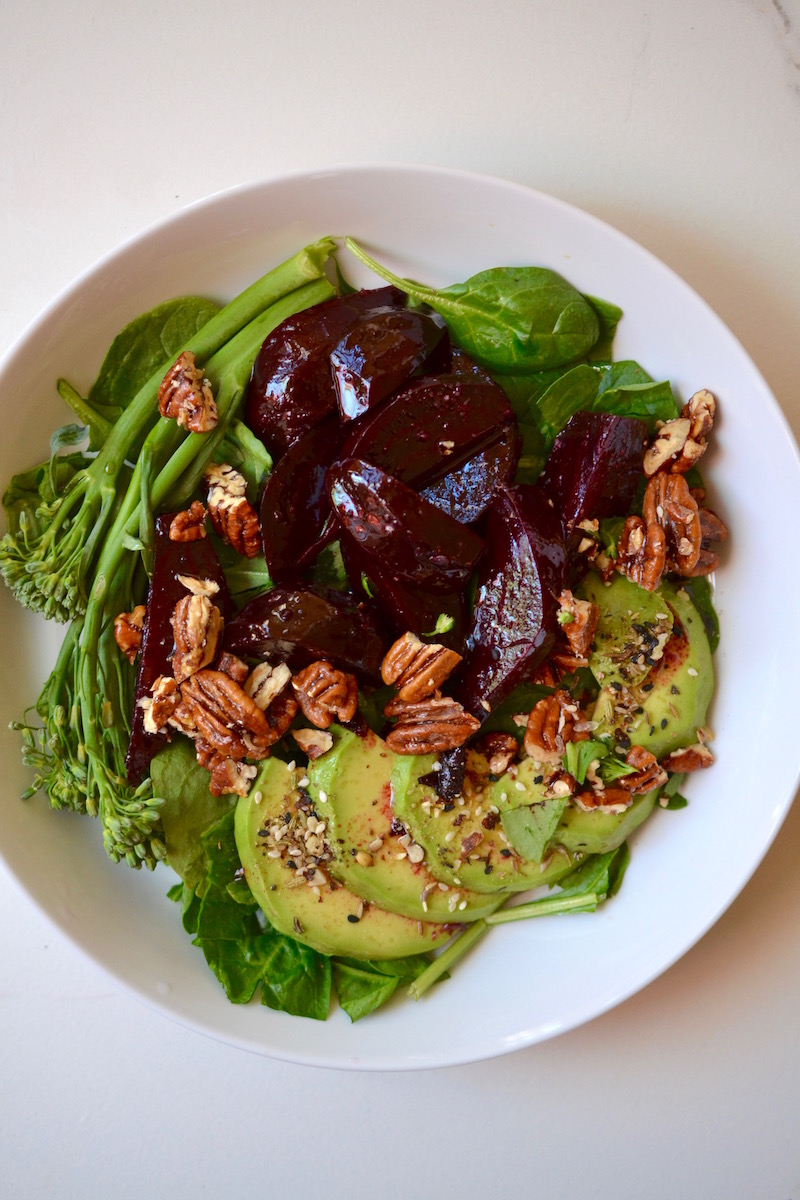
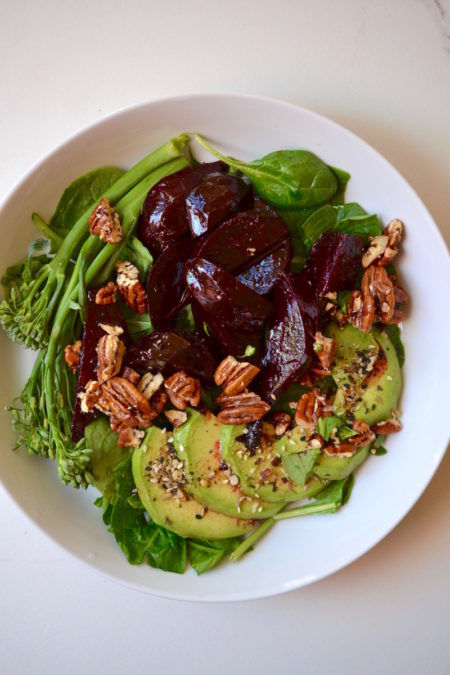
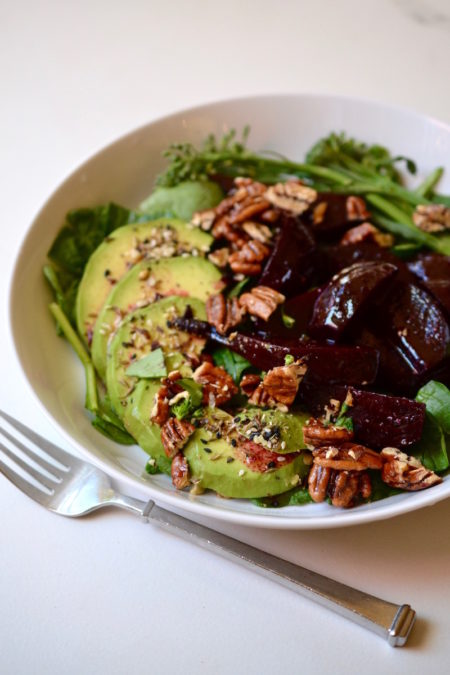
    Oh the fresh flavors of this Beet and Avocado Salad spiced up with our Middle Eastern blend of nut & spices.  Beets usually rank into two various camps.  Some people love them, and others have a strong aversion to them.  I have often heard those in the latter group say “they taste like dirt”.

    Obviously that sounds quite unappealling, and I am ashamed to say for a long time I fell into that “dirt” category – I had a true disliking for all things beet related.

    When beets became trendy in the chef  and culinary worlds, I thought there must be something more to these messy, red, root vegetables and I had a hunch I was missing out on something special.

    Once I learned the process of roasting with a bit of olive oil and sea salt, then marinating the beets in a tangy vinaigrette, I discovered the secret joys of this very popular veggie. The hot oven adds a wonderful roasted flavor and the marinade a sweet tanginess.

    I have also found them to be delicious eaten raw, much like a carrot stick, and dipping them into spinach dip, hummus, or a creamy tzatziki sauce .  Beets are often used to color food in a reddish/fuchsia pink hue, and with that dramatic presentation in mind, I often make beet hummus, beet vinaigrette dressing, and even beet muffins.

    I don’t believe there is another natural, plant-based food out there that can create such magic in tinting foods.  As an important side note, when working with beets, you’ll quickly find your hands will also get the red color treatment.  Not to worry, it washes out, and you can always wear plastic gloves.

    Beetroots are the bulbous portion (taproot) of the beet plant and can be either red or golden.  Both are beautiful, rich colors and I often mix them together in salads, or sometimes use just one color to add pizzazz to foods.  Every part of the beet plant is edible.  The leaves and stems can be chopped up and added into salads, whipped up into a pesto, or sauteed in a bit of fresh garlic and olive oil then served as a side dish.
    If you’ve not previously been a fan of beets, I urge you to try them again.  With a little finesse in the preparation, they’ll quickly become one of your very favorites.

    Margie Bruner - Glory Kitchen

    Margie Bruner
    owner of Glory Kitchen

    instagram
    facebook

    Beet and Avocado Salad

    4 large servings

    Ingredients

    • Cairo nut & spice mix
    • 4 beets, large (8 if small)
    • 6-8 cups fresh spinach
    • 2 ripe avocados
    • 4-6 sprigs baby broccoli
    • 2 tablespoons olive oil
    • 2 tablespoons balsamic vinegar
    • 1 generous pinch sea salt
    • candied pecans

    Instructions

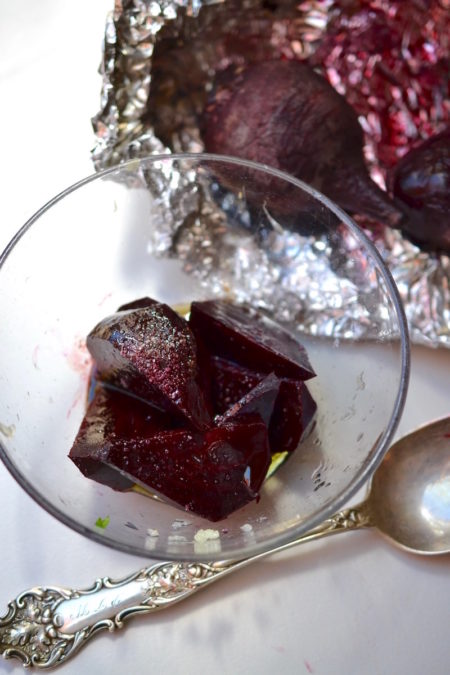
    1. Wrap beets in foil and bake in a 350° oven for about 30 minutes. After 30 minutes, pierce the beets with a fork and if they are tender, they are ready. If still firm, continue to cook until they are fork tender. Remove from the oven, open up the foil, and allow to cool completely.
    2. With a paring knife, gently remove the skin of the beets. Once cleaned, slice them in half (lengthwise), then slice each half again, forming pretty wedges. Place all the sliced beets into a large mixing bowl, add the olive oil, balsamic vinegar and sea salt. Toss these together gently then set aside to marinate and allow the juices to create a lovely vinaigrette dressing.
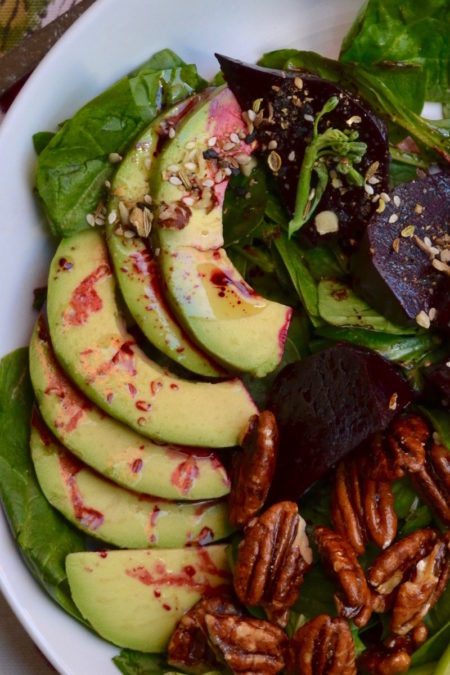
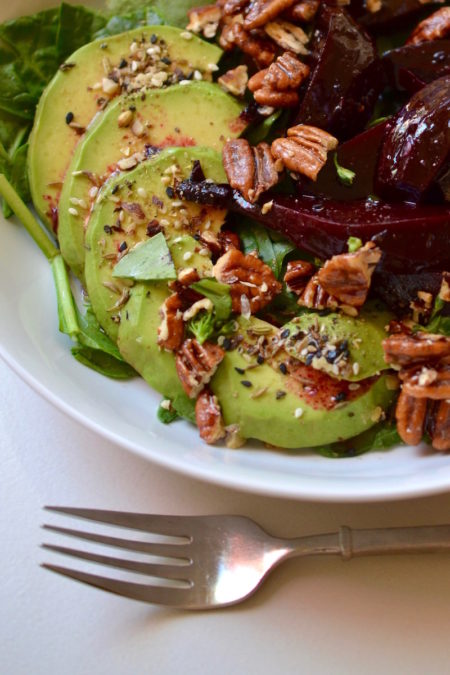
    3. Take the spinach and chop ever so slightly just to break it down and make a bit smaller - do not over chop. Arrange the spinach at the base of each individual salad bowl or plate. On top of the spinach, layer the marinaded beets (reserving the vinaigrette left behind), the sliced avocado, the full sprigs of baby broccoli, and the candied pecans. Sprinkle the beets and avocado with generous amounts of Cairo nut & spice mix, take the remaining vinaigrette left behind from the beets, and drizzle over each individual salad.

    Notes

    If you wish to have a greater amount of beet vinaigrette dressing, double the amounts of olive oil and balsamic vinegar when marinating the beets. This salad would also be wonderful using our Glory Kitchen Mumbai, Penang or Provence blends.

    Beet and Avocado Salad - Glory Kitchen
    Beet and Avocado Salad - Glory Kitchen
    Beet and Avocado Salad - Glory Kitchen
    Beet and Avocado Salad - Glory Kitchen
    Beet and Avocado Salad - Glory Kitchen
  • PICKLED JALAPEÑO PEPPERS

    Every refrigerator needs to be stocked with a jar of pickled jalapeño peppers.  I always have one and reach for it often to add a bit of heat and flavor to dishes – and not just Mexican meals.  I add chopped jalapeños to the obvious foods like nachos, enchiladas, quesadillas and beans of all types.

    I also, however, use them to spice up rice, salads, dressings, baked potatoes, soup bases, and the list goes on.  You never know when something needs an added note of heat and if you have a jar of jalapeño peppers handy, you’ll always be prepared.

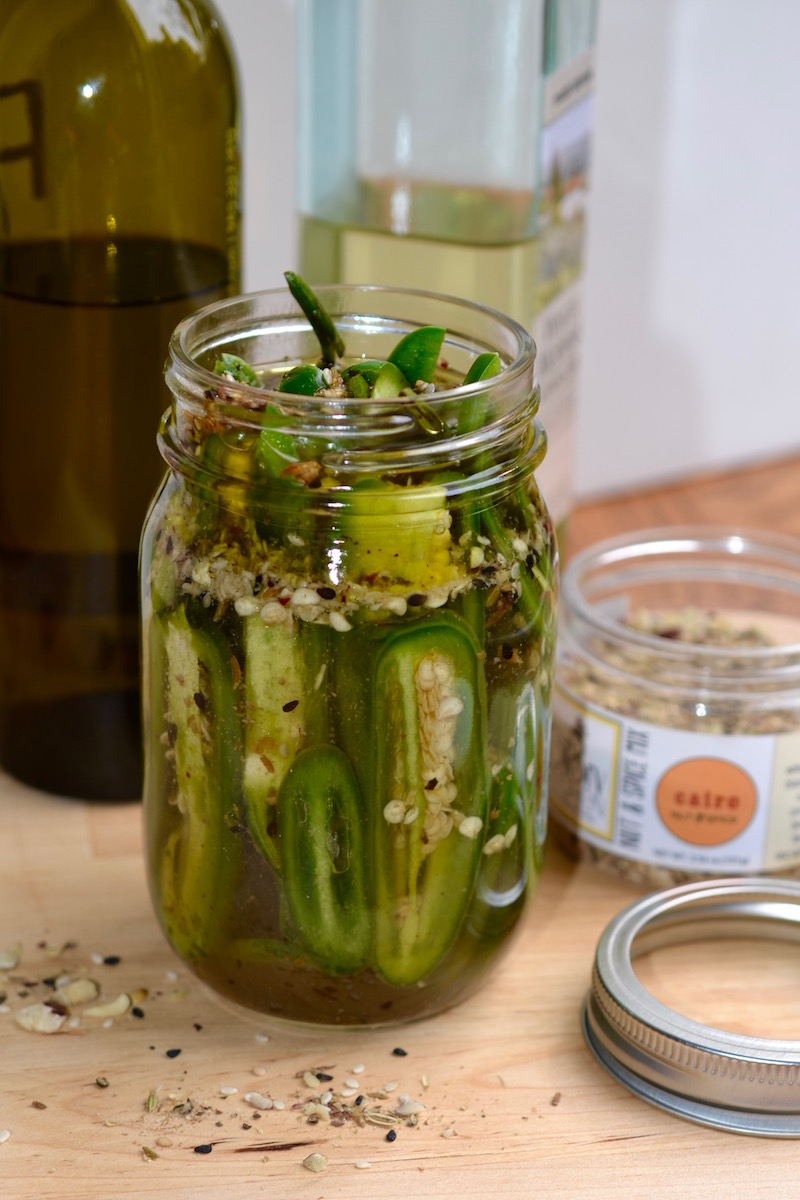
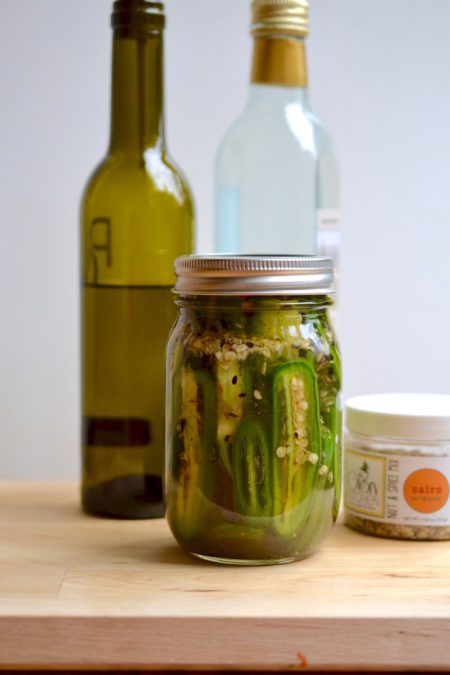
    My home refrigerator always has a jar, however, it wasn’t until I reached for them recently that I realized I was out and needed to run by the store to purchase another.  That was when it hit me that I needed to make my own homemade jalapeños, and of course, I wanted to add some interesting notes by flavoring the brine with our Cairo nut & spice mix.

    It had never crossed my mind to make my own pickled jalapeño peppers, but let me tell you, it is so, so easy.  I already had the few ingredients needed sitting in my pantry, it was quick, and the result was delicious.  So much fresher and so much more flavorful than anything I could buy at the local store.

    As a bonus, I’ve also found myself using the seasoned brine to add acid and flavor to salad dressings and all types of sauces.  When a recipe calls for vinegar, add a spoonful from this jar of jalapeños.  From here on out, homemade jalapeños will be a staple in my refrigerator and they should be in yours too!

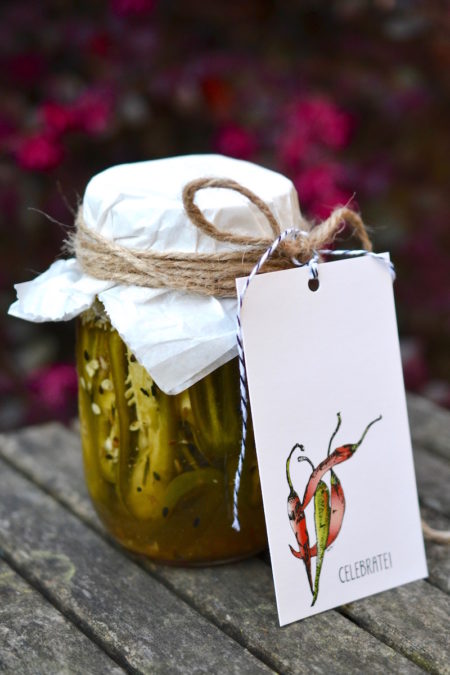
    And by the way, these jalapeños would make a perfect gift, especially if they are dressed up with our very own Glory Kitchen pepper gift tags!  You can order these chili pepper gift tags from our website here. 🙂

    Margie Bruner
    owner of Glory Kitchen

    instagram
    facebook

    Pickled Jalapeño Peppers

    one 16 oz jar of peppers

    Ingredients

    • 4-8 jalapeño peppers, fresh
    • 1 cup white wine vinegar
    • 1/8 cup olive oil
    • 1 tablespoon CAIRO nut & spice mix
    • 1 tablespoon sea salt, kosher style
    • ½ tablespoon sugar

    Instructions

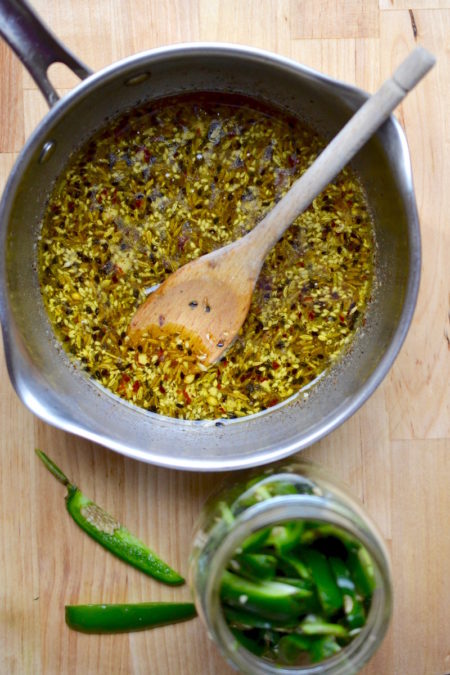
    1. In a medium saucepan, bring to a boil vinegar, oil, CAIRO nut & spice mix, salt, and sugar. Boil for about 3-4 minutes, making certain the salt and sugar are completely dissolved. Remove pan from heat and set aside to slightly cool.
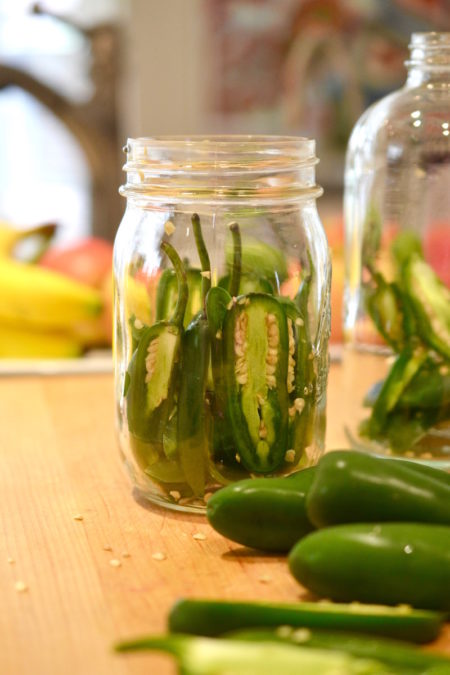
    2. Slice the fresh jalapeños (I like to slice them lengthwise - it makes a larger cut and also look prettier in the pickling jar) and layer them carefully into a 16 oz mason jar, arranging them so their sides are displayed nicely. If you are making these pepper jars as gifts, take extra time to stack them so they look visually appealing through the glass.
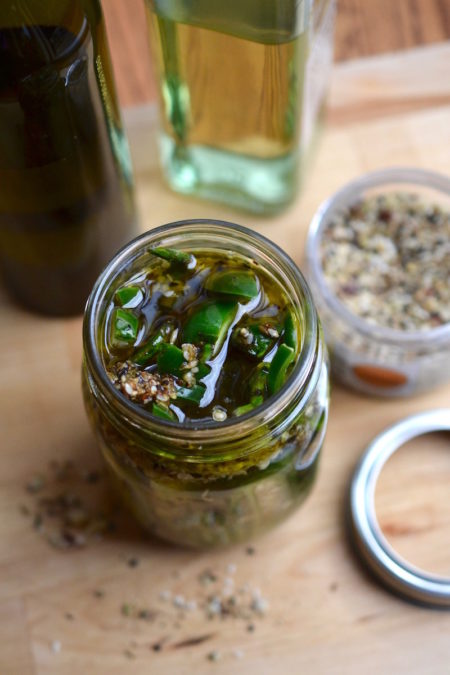
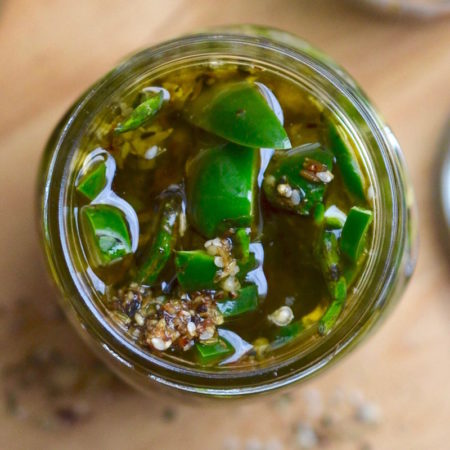
    3. Pour the liquid over the jalapeños until they are completely submerged and close with lid. You may do this even if the liquid is still a bit warm. Allow the jar to come to room temperature before refrigerating.
    4. If you are making these to use right away, you can place them in the refrigerator, allow to marinate for 3 or more days, and then use as needed. They should last in your fridge for up to a month or more.
    5. You can also use the same recipe if you are canning, using typically canning procedures. Doing it this way, they'll last up to a year!

    Notes

    I used the Glory Kitchen Cairo nut blend but these peppers would also work well with the Mumbai, Penang or San Miguel nut blends.

    Pickled Jalapenos - Glory Kitchen
    Pickled Jalapenos - Glory Kitchen
    Pickled Jalapenos - Glory Kitchen
    Pickled Jalapenos - Glory Kitchen
    Pickled Jalapenos - Glory Kitchen
    Pickled Jalapenos - Glory Kitchen
    Pickled Jalapenos - Glory Kitchen
  • INDIAN SPICED CHICKEN SKEWERS

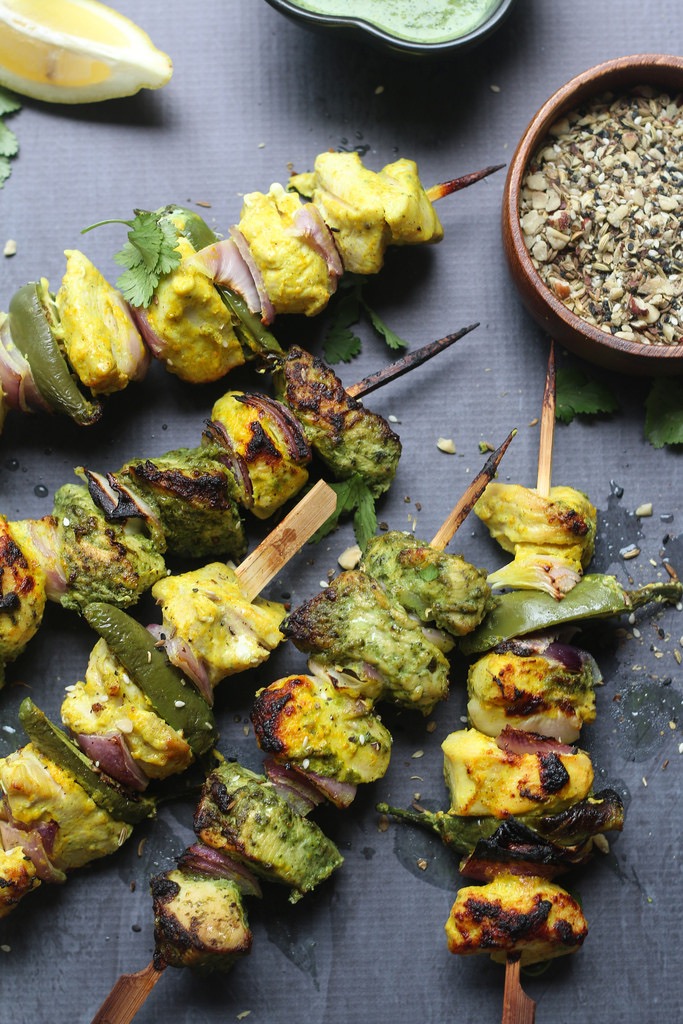
    Asha Shivakumar is a creative cook from San Francisco who takes the spices and flavors from her native country and modernizes them in amazing and flavorful ways.  Once you get to know her warmth and see her creations, you’ll understand why she has drawn so many to her social media sites and has won over many culinary hearts.

    Because I love the flavors of India but have always been a bit intimidated about creating them on my own, I’m always eager to learn from this sweet friend.  -Margie    (food and photos created by Asha)

    Asha Shivakumar,
    wife, mother, food blogger
    editor of @feedfeed

    @foodfashionparty
    www.foodfashionparty.com

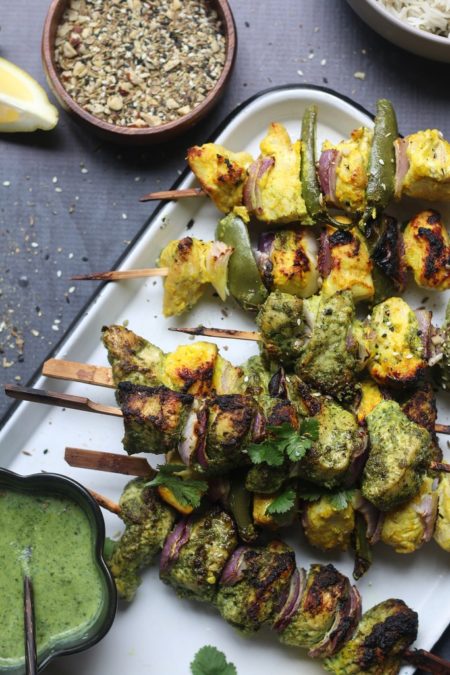
    Chicken is very versatile and I make it often.  Chicken Tikka and tandoori chicken are quite popular and I love to make versions of that all the time. With spice and nut mixes like the Bombay mix (Mumbai), the crunch and flavor elevates a dish. 

    It is not only easy, but using yogurt in your marinades tenderizes and coats the chicken so well.  The best thing about recipes like this is, the marinade takes minutes and all you do is add the chicken, let it sit and do it’s magic. They make the most juicy chicken bites and an easy flavorful meal. 

    You will be surprised at how with very few ingredients you are able to create the best Indian style chicken which is in fact perfect for entertaining too.

    Auto Draft

    Ingredients

      for the Turmeric & Cumin Yogurt Chicken:
    • 1 teaspoon Cairo nut & spice mix
    • 2 chicken breasts, large & skinless, cut into 1-2 inch cubes
    • ½ cup yogurt, full fat
    • 1 teaspoon cumin seeds, toasted, ground to powder
    • 2 teaspoons fresh turmeric, fresh, grated fine (you can substitute ? teaspoon turmeric powder)
    • ½ teaspoon white pepper
    • 1 teaspoon salt
    • 2 tablespoon oil
    • For the Cilantro Habanero Chicken:
    • 1 teaspoon Mumbai nut & spice mix
    • 2 chicken breasts, skinless, cut into 1-2 inch cubes
    • 1 cup cilantro, fresh (or 1 bunch)
    • 3 habanero peppers
    • 5-6 garlic cloves, whole
    • ginger, fresh, 2 inches of root
    • 1 teaspoon cumin seeds
    • 2 teaspoons lemon juice, fresh
    • 1 teaspoon salt, or to taste
    • 2 tablespoons oil

    Instructions

      Turmeric & Cumin Yogurt Chicken:
    1. Add the cut chicken cubes into a bowl with a tight fitting lid, or into a ziploc bag. Add all the ingredients for the marinade, seal tightly, and massage the chicken well. Let it sit overnight in the refrigerator.
    2. Skewer the chicken with alternating veggies or lay them on a baking tray and bake in a 450° oven for 25-30 minutes. You can grill this as well.
    3. Serve the Turmeric & Cumin Chicken with some rice or naan, yogurt raita and lemon wedges. Just before serving, sprinkle with additional Cairo nut & spice mix.
    4. Cilantro Habanero Chicken:
    5. Place all the ingredients, except chicken, into a food processor and grind everything into a coarse paste to make the marinade.
    6. Combine the marinade and chicken together into a bowl or a ziploc bag. Massage the chicken with the marinade and let it sit refrigerated for at least 6 hours to overnight.
    7. Skewer the chicken with alternating veggies or lay them on a baking tray and bake in a 450° oven for 25-30 minutes. Just before serving, sprinkle with additional Mumbai nut & spice mix
    8. Serve the Cilantro Habanero Chicken with some rice or naan, and lemon wedges.
    9. Both chicken dishes can be served with some green chutney which we make using the cilantro chicken marinade ingredients (fresh from another batch, not the one used to marinate the chicken) and mix together with some yogurt.

    Notes

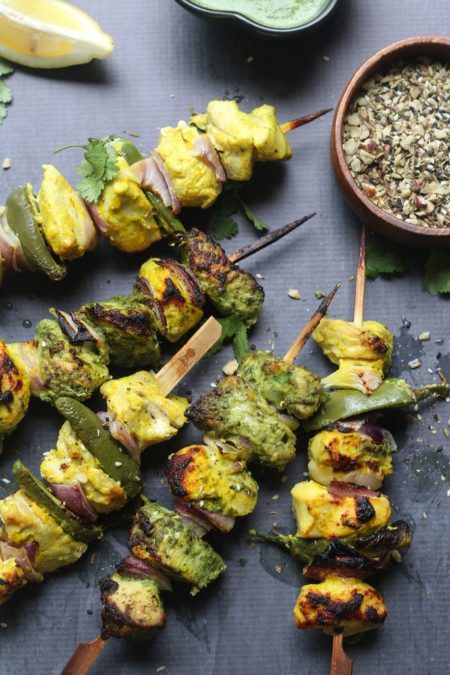
    These Indian spiced chicken skewers, made two ways, are made using both the Glory Kitchen CAIRO nut blend and the MUMBAI nut blend. Enjoy!

    Indian Spiced Chicken Skewers - Glory Kitchen
    Indian Spiced Chicken Skewers - Glory Kitchen
    Indian Spiced Chicken Skewers - Glory Kitchen
  • ROASTED CARROT SOUP

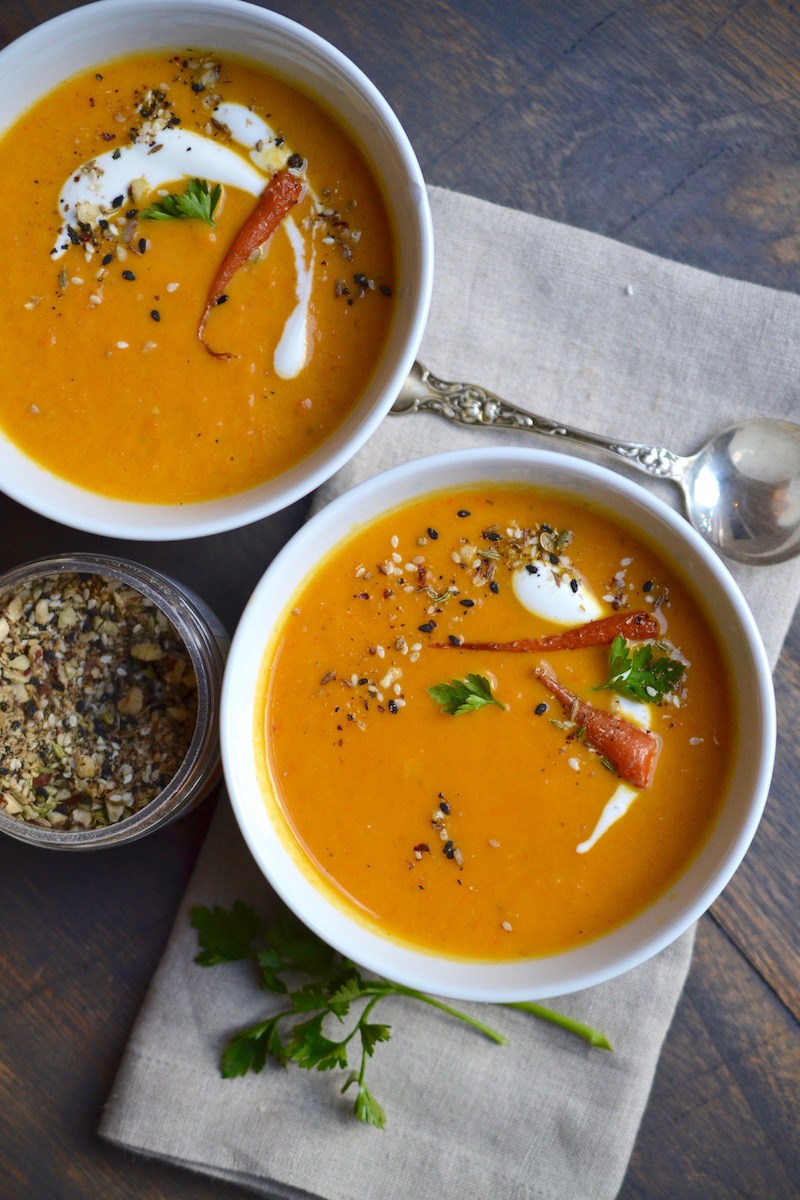
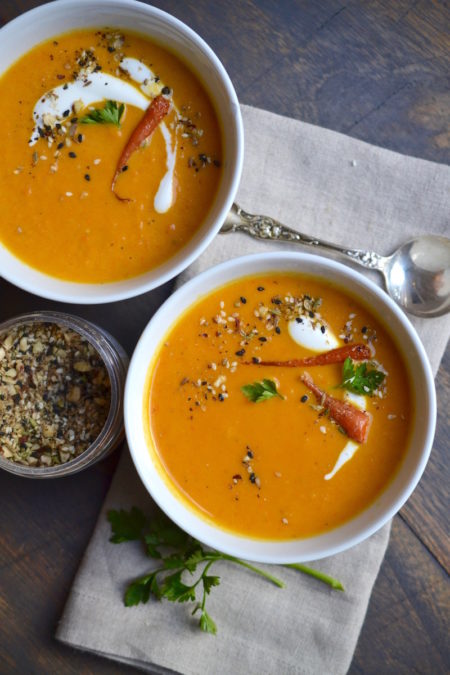
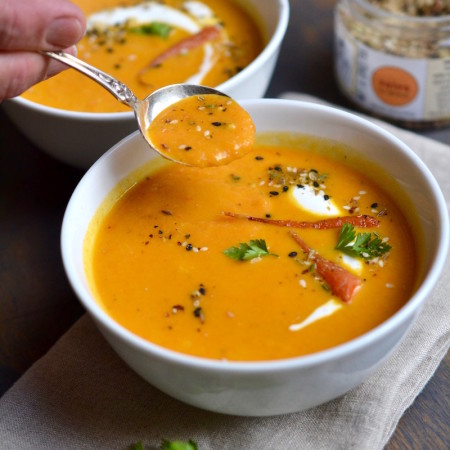
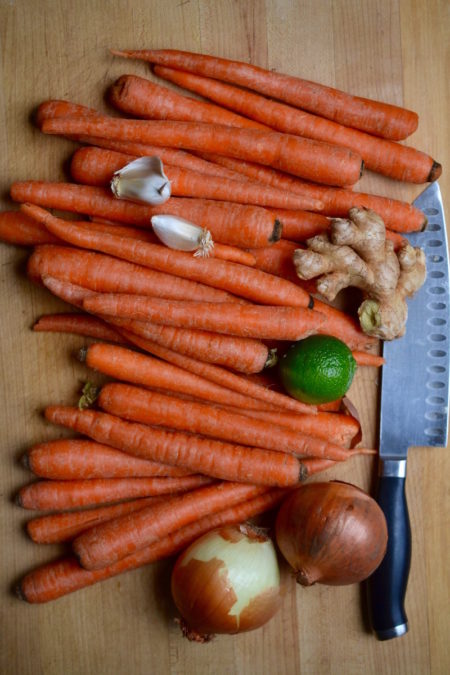
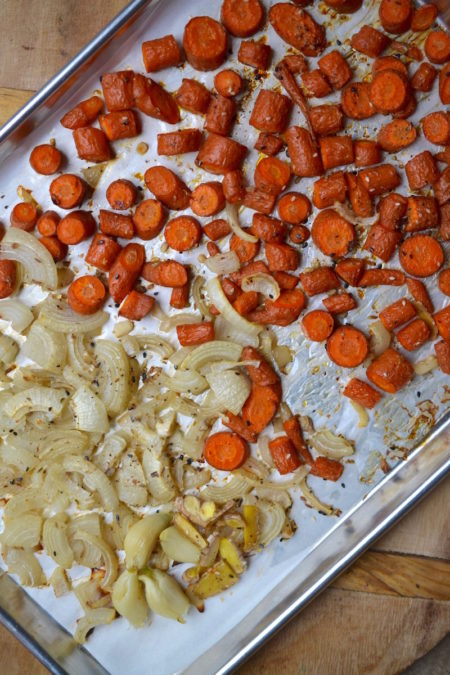
    The rich, orange color of this soup matches the delicious taste – deep, rich, roasted carrot flavor.  Carrots combined with caramelized onions and a touch of garlic and ginger, all roasted until they are intensely sweet and flavorful, makes for a smooth soothing meal on a cold winter day.

    Creamy soup always pairs beautifully with a side of toasted crostini for dipping and a bit of crunchy flavor, so we made some sourdough toasts topped with shredded white cheddar and hazelnut crunchy flavor from Cairo nut & spice mix.

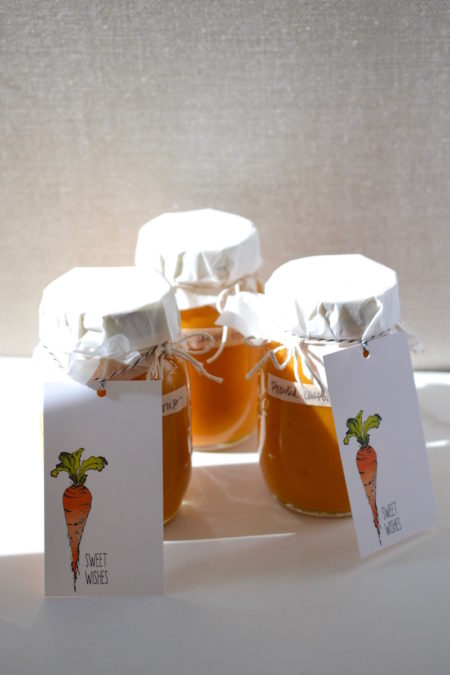
    This recipe yields quite a bit of soup, so it is perfect for jarring the extra soup and gifting it to neighbors and friends or set some aside into the freezer to have on hand for a busy day.  If you’re sharing your soup as a gift, what better way to package it than wrapping it with our Glory Kitchen hand drawn carrot tag!

    Margie Bruner
    owner of Glory Kitchen

    instagram
    facebook

    Roasted Carrot Soup

    Yield: 8 or more servings

    Ingredients

    • Cairo nut & spice mix
    • 2 lb carrots
    • 2 yellow onions
    • 4 garlic cloves
    • ginger, fresh, about 1 inch of root
    • 6 cups vegetable stock
    • olive oil
    • sea salt
    • 1 lime, freshly juiced
    • ½ teaspoon coriander, ground
    • ½ teaspoon nutmeg, ground
    • 1 cup half & half
    • fresh parsley, for garnish
    • yogurt, sour cream, or créme fraîche for garnish

    Instructions

    1. Preheat the oven to 425º. Cut tops off the carrots (where stem grows), then roughly chop all carrots and lay them out onto a parchment or foil lined sheet tray. Roughly chop all onions & do the same. Throw 4 whole garlic cloves, no need to peel, onto sheet tray. Slice about 1 inch of fresh ginger into very small pieces, no need to peel, and also place on sheet tray but keeping it separated in a corner of the tray so it can be found & removed later. Drizzle all the veggies with olive oil and toss with sea salt and a generous amount of Cairo nut & spice mix. Place in the hot oven and roast for 15 minutes.
    2. Remove the garlic & ginger from the sheet tray and place the carrot/onion mix back into the oven to roast for an additional 30-40 minutes or until the veggies turn a golden brown. Set aside the garlic & ginger and allow to cool, then remove the skin from the garlic cloves.
    3. Once the veggies are out of the oven and are somewhat cool, place them into a food processor, or for a very smooth purée, a blender, with about 2 cups of vegetable stock and puree until they are nice and smooth without any chunks. If your food processor/blender can't hold it all, you may need to split the veggies and process them in two separate batches. Add more stock as needed and then pour pureed vegetables into a large stock pot.
    4. Turn the heat on med/low and add any remaining vegetable stock, juice of 1 lime, coriander, nutmeg and salt. Bring to a low simmer for about 10 minutes, continuing to stir the pot. Remove soup from heat, add in the half & half to finish the soup. If it is too thick, you can add more stock or water until the proper soup consistency is reached.
    5. Serve in bowls garnished with a drizzle of sour cream, creme fraîche or yogurt and top with fresh parsley and a sprinkle of Cairo nut & spice mix. Serve with cheesy crostini toasts topped with melted cheese and Cairo nut & spice mix.

    Notes

    This soup would also work well with Mumbai, Penang or San Miguel nut & spice mixes.

    Roasted Carrot Soup - Glory Kitchen
    Roasted Carrot Soup - Glory Kitchen
    Roasted Carrot Soup - Glory Kitchen
    Roasted Carrot Soup - Glory Kitchen
    Roasted Carrot Soup - Glory Kitchen
    Roasted Carrot Soup - Glory Kitchen
    Carrot Gift Tag - Glory Kitchen
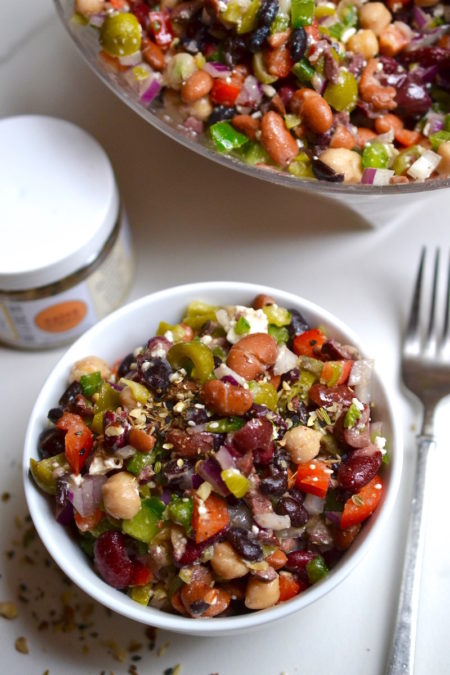
  • 4 BEAN SALAD

    After the holiday season, it always seems like it’s time to tidy up our eating habits.  This doesn’t mean, however, we need to stop enjoying meals.

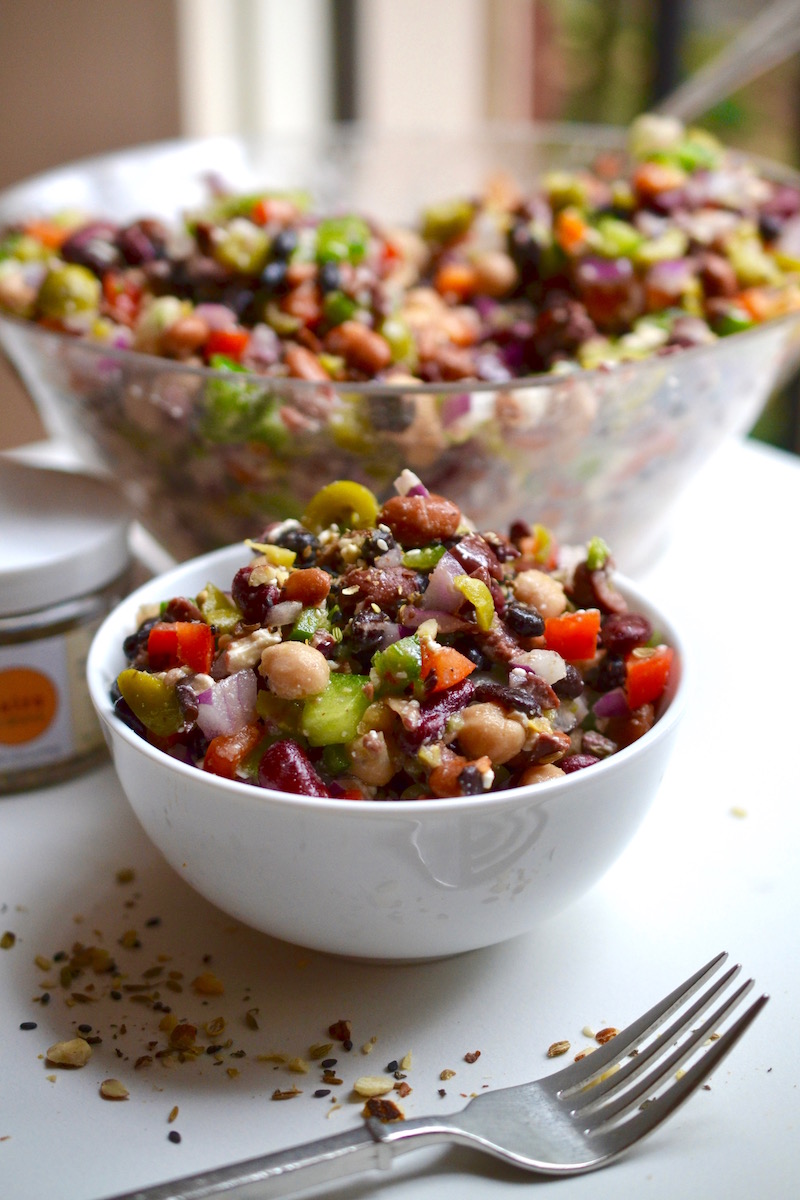
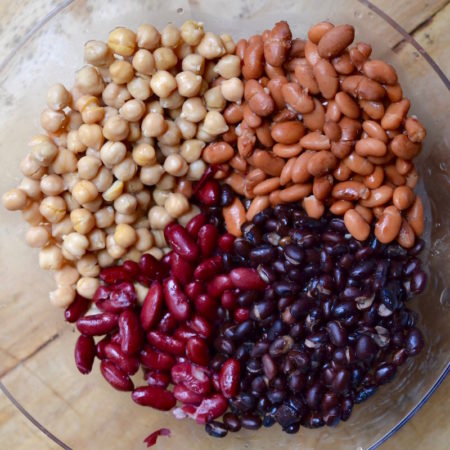
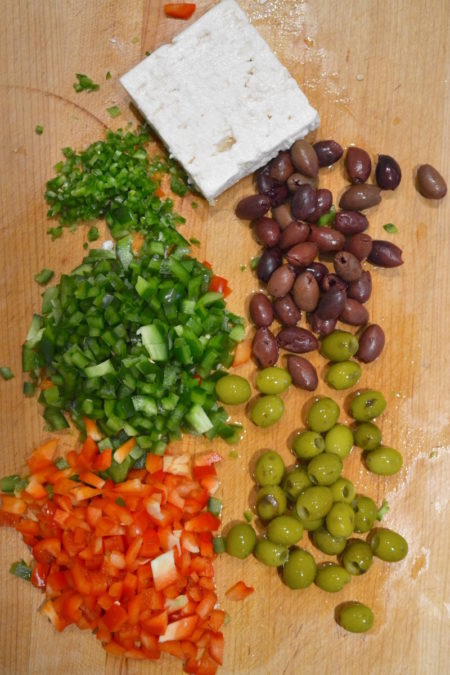
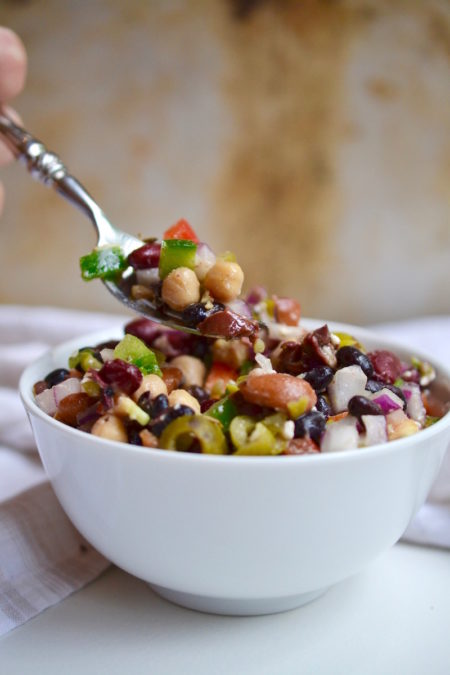
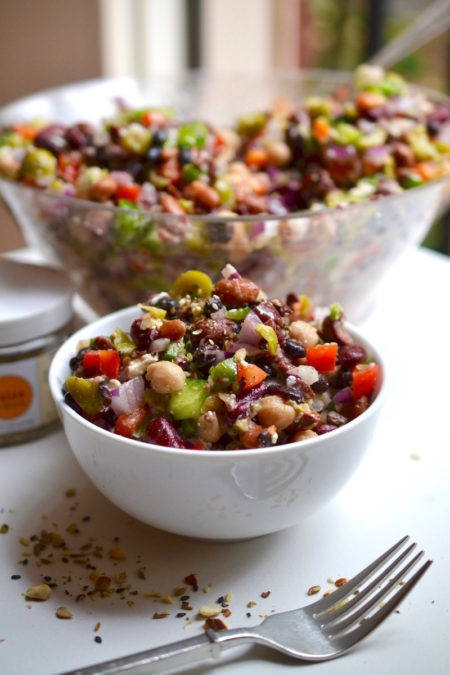
    This 4 bean salad is full of good-for-you ingredients but it is so delicious and enjoyable you just can’t stop eating it.  It is filling, tasty and nutritious.  The 4 different bean varieties add color and flavor, the peppers and onion add crunch, the feta cheese and olives add a salty note and the jalapeño gives the dish a touch of spicy heat.

    This recipe yields a large amount but it stores beautifully in the refrigerator so you can have it on hand and ready for quick spoonfuls when you have those afternoon hunger pangs.  Love, love, love this bean salad – it is a recipe I make often and enjoy it immensely every time.

    owner of Glory Kitchen

    instagram
    facebook

    4 Bean Salad

    8 -12 servings

    Ingredients

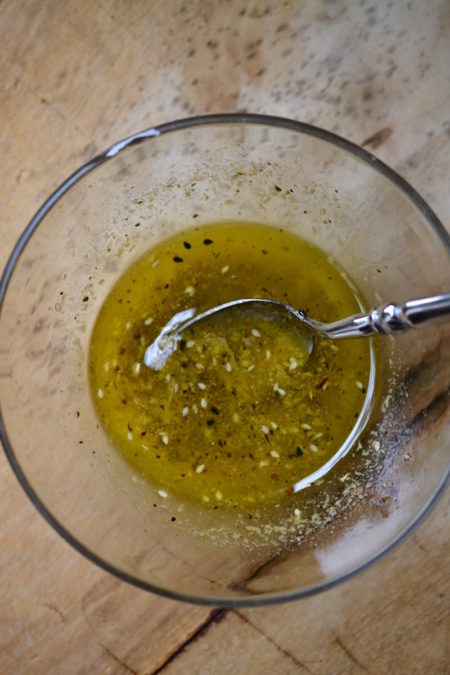
      For the vinaigrette dressing:
    • 2 teaspoons Cairo nut & spice mix
    • 2 tablespoons brine (vinegar liquid) from kalamata olives
    • 4 tablespoons olive oil
    • 1 ½ teaspoons dijon mustard
    • 1 teaspoon honey
    • ½ teaspoon salt
    • For the bean salad:
    • Cairo nut & spice mix
    • 1 can black beans, rinsed
    • 1 can red kidney beans, rinsed
    • 1 can pinto beans, rinsed
    • 1 can garbanzo beans (chickpeas), rinsed
    • 1 red onion, small, chopped
    • 1 green bell pepper, medium sized, chopped
    • 1 red bell pepper, medium sized, chopped
    • 1-2 jalapeño, fresh, chopped
    • 3 oz kalamata olives, chopped
    • 1-2 oz green olives, chopped
    • 8 oz feta cheese, crumbled
    • ½ cup parsley or cilantro, fresh & chopped
    • 1 tsp salt

    Instructions

    1. Mix all the ingredients for the dressing and set aside.
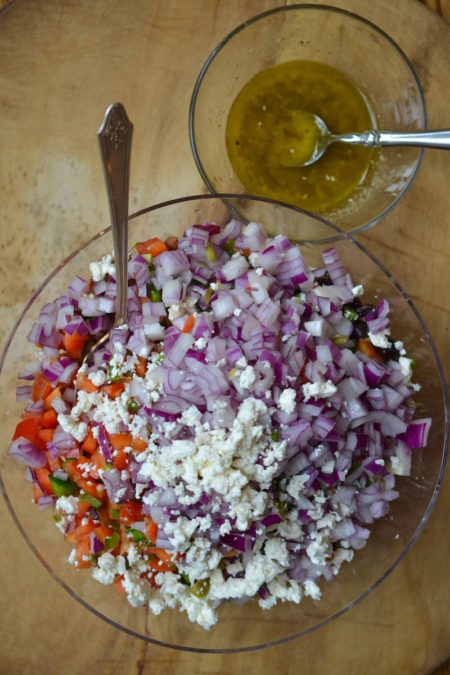
    2. After rinsing all the beans thoroughly, place all 4 varieties into a large mixing bowl. Add chopped red onion, all 3 chopped peppers, both chopped olives, chopped parsley (or cilantro), salt, 1 tablespoon Cairo nut & spice mix & crumbled feta cheese. Mix well and store in refrigerator until ready to serve. Can be made the day before.

    Notes

    This delicious recipe makes a large amount of bean salad and it stores well in the refrigerator so you can have it for several meals - or just grab a few spoonfuls when you need a quick and healthy bite for snacking. It can be served as a side to a sandwich but I love to serve a large amount tossed over fresh greens and enjoy it as a full meal.

    Also try this recipe using any of the other Glory Kitchen nut & spice mixes.

    4 Bean Salad - Glory Kitchen
    4 Bean Salad - Glory Kitchen
    4 Bean Salad - Glory Kitchen
    4 Bean Salad - Glory Kitchen
    4 Bean Salad - Glory Kitchen
    4 Bean Salad - Glory Kitchen
    4 Bean Salad - Glory Kitchen
  • GOAT CHEESE TRUFFLES

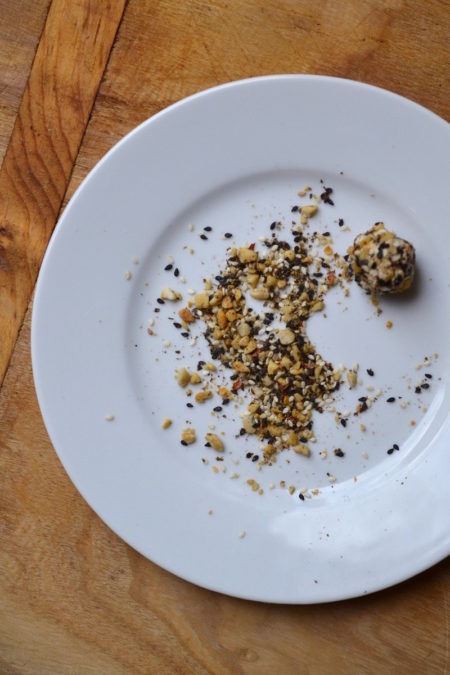
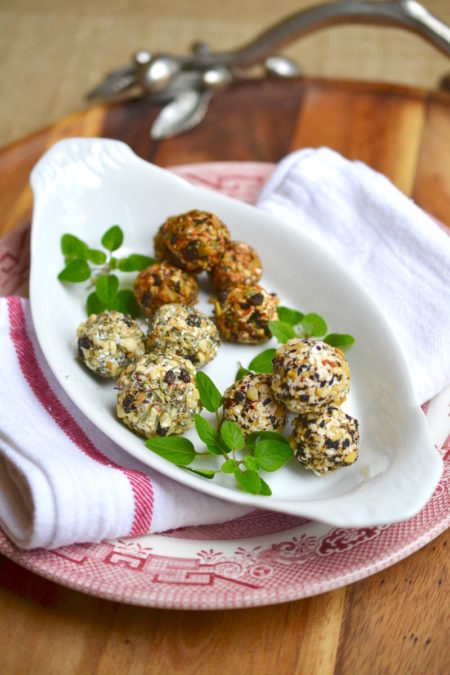
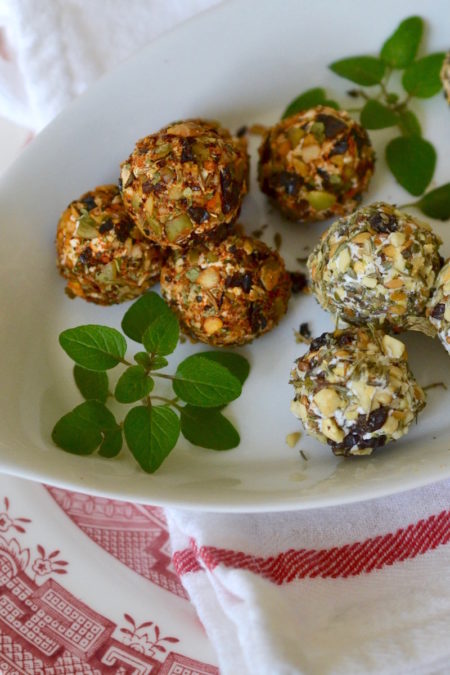
    Serving these little bite-sized goat cheese truffles crusted with nuts, herbs and spices is such a nice surprise combination of creamy tangy cheese, and crunchy nut flavor.  I was first introduced to the idea of making goat cheese truffles by the talented California duo,  Canyon Girls Catering, who serve these on their event cheese trays.  These little balls of goodness are simple and quick to make yet can be elegantly presented as an appetizer alongside a glass of wine and some crusty bread.

    The truffles can be made using any of our 6 blends of Glory Kitchen nut & spice mixes, stacked up and served on their own, or can be included as part of an elaborate cheese tray.  Each variety of cheese truffle offers a unique bite of spice, crunch and creamy flavor.  They are fun to present and even more fun for guests to sample the different varieties.

    Chévre is the french term for goat cheese and is obviously made from goat’s milk. It has a tart, tangy flavor and a lower fat content than cheese made from cow’s milk. As it ages, it becomes more robust and bolder in flavor.

    Most goat cheese originates from France and in addition to Chévre, other varieties include Chabis & Boucheron.  The next time you offer to bring an appetizer for a gathering of friends, bring an assortment of these flavorful cheese truffles for something unique and interesting.

    Margie Bruner
    owner of Glory Kitchen

    instagram
    facebook

    Goat Cheese Truffles

    Ingredients

    Instructions

    1. Bring the goat cheese to room temperature. Take a small spoonful of cheese, and with your hands, roll it into a small but compact ball. Take any of the Glory Kitchen nut & spice mixes and spread some out onto a small, flat plate. Roll the goat cheese ball into the nut blend until it is completely covered on all sides. Once all of your cheese truffles are finished, refrigerate to set and then serve cool or at room temperature alongside crackers or slices of crusty bread.

    Notes

    These little truffles are a great addition to a festive cheese tray or are quite special on their own served with a side of good bread and a glass of wine.

    Penang Asian nut & spice mix - Glory Kitchen
    Goat Cheese Truffles - Glory Kitchen
    Goat Cheese Truffles - Glory Kitchen
  • THANKSGIVING SQUASH CASSEROLE

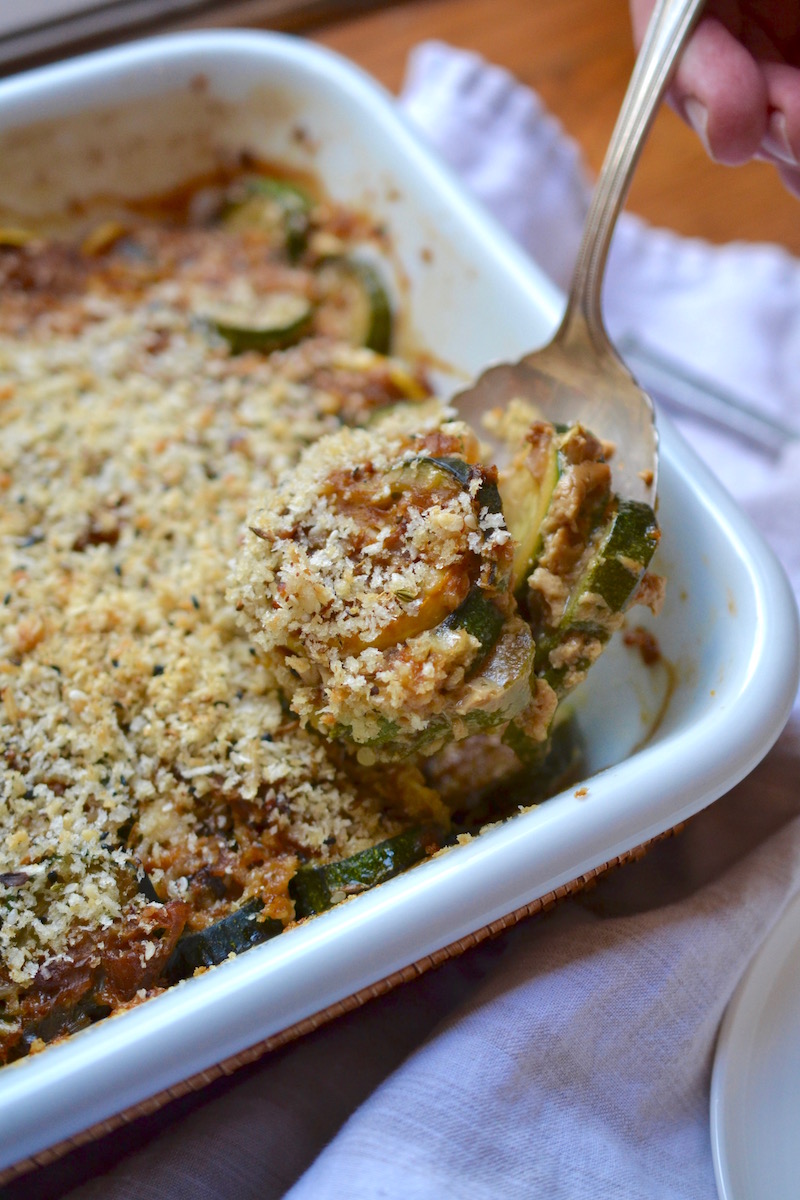
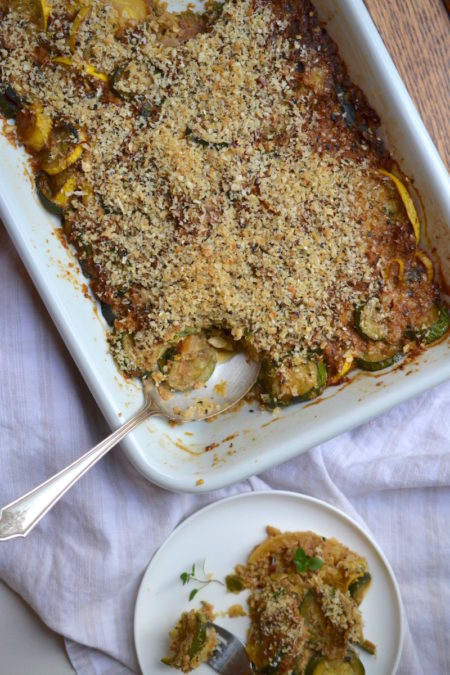
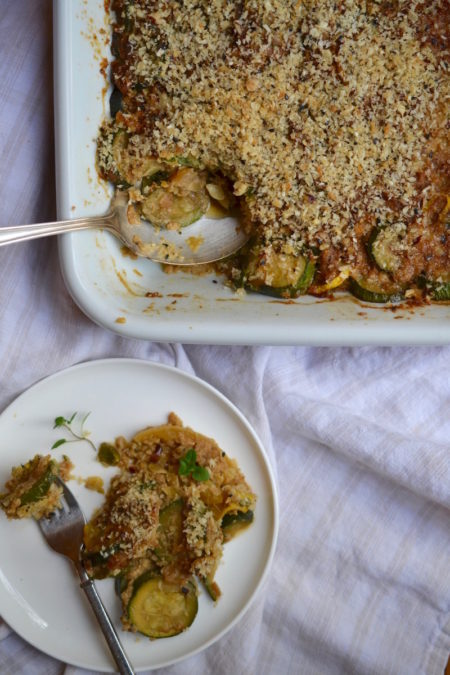
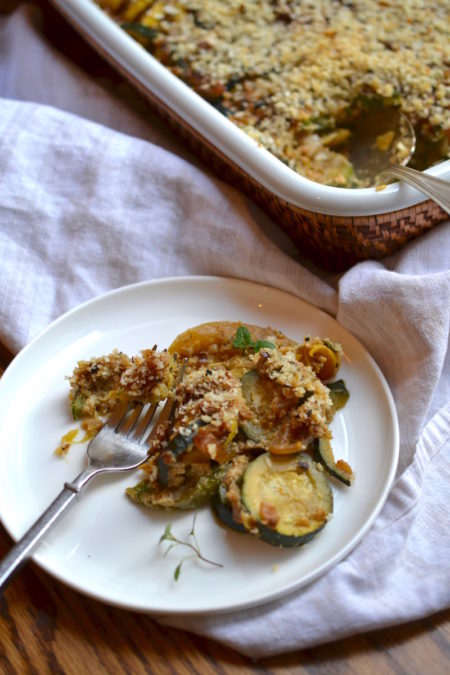
    I like to change up the menu a bit each Thanksgiving just to keep things interesting, however, there is one exception – it is never a true Thanksgiving without serving this squash casserole. It is my boys’ very favorite and they ask for it every year.

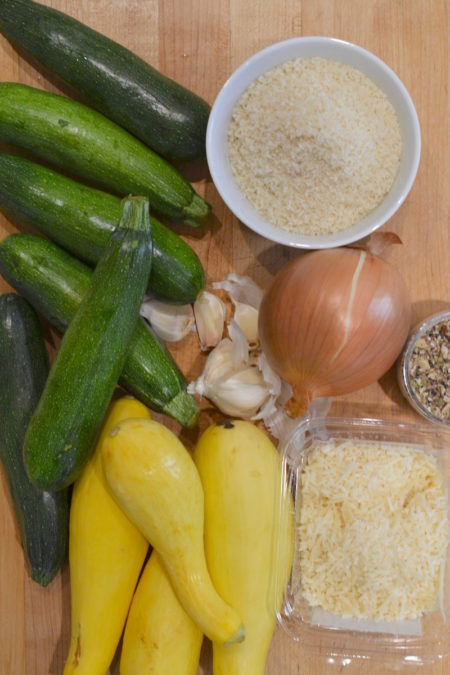
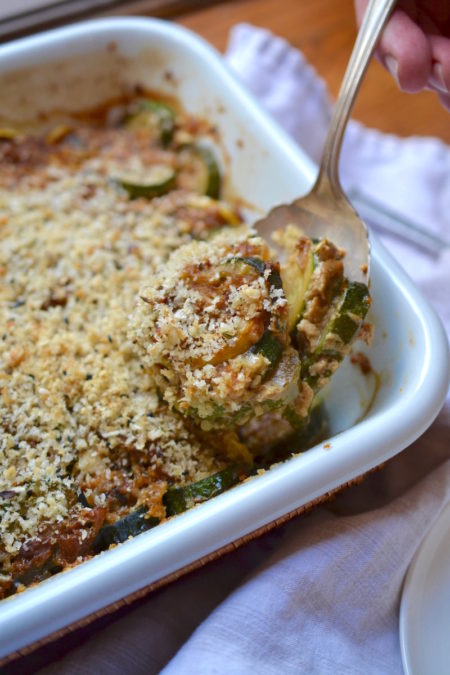
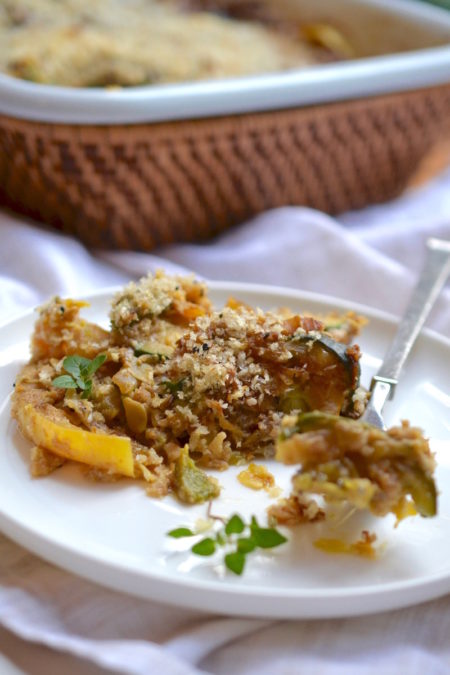
    Using both yellow squash and zucchini, it is prepared in a rather rustic manner. After making it over and over for many years, I actually prefer to make it without following the exact details of the recipe.  Once I gather the ingredients and review their proportions, the process just becomes a bit of this, and a bit of that.  It may turn out slightly different each time but it always gives that wonderful, satisfying casserole feeling – just plain squash goodness.

    And because it is made mostly of veggies, you don’t feel guilty going back for seconds or thirds.  The only problem is we rarely have leftovers.  I hope this simple squash casserole becomes one of your family favorites too.  Enjoy!

    Margie Bruner
    owner of Glory Kitchen

    instagram
    facebook

    Thanksgiving Squash Casserole

    Yield: 8-10 servings

    Ingredients

    • Cairo nut & spice mix
    • 3-4 yellow squash, sliced
    • 6-8 zucchini squash, sliced
    • 1-2 large sweet yellow onions, chopped
    • 4 garlic cloves, minced
    • 2 tablespoons olive oil
    • 3 eggs, whisked
    • 1 cup panko bread crumbs
    • 2 pinches sugar
    • 2 teaspoons salt
    • ½ teaspoon pepper
    • ¾ cup shredded parmesan cheese

    Instructions

    1. Pre-heat oven to 350°. Prep & slice all the veggies. Chop the onion in a large, loose chop & set aside. Chop both the yellow squash & zucchini & set aside in a large bowl (I like to cut these in circles, rather rustically). Chop the garlic and set aside.
    2. In a separate bowl, measure out ½ cup of the panko bread crumbs (feel free to use regular bread crumbs, but not seasoned), add ¼ cup parmesan cheese, add 1 tablespoon of Cairo nut & spice mix, add 1 tablespoon olive oil. Using your hands, massage this mixture until it is well combined. This will be your bread crumb topping which goes on last. Set aside.
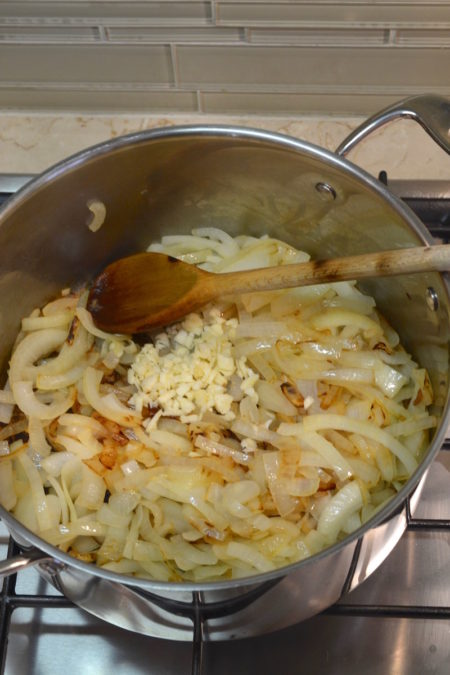
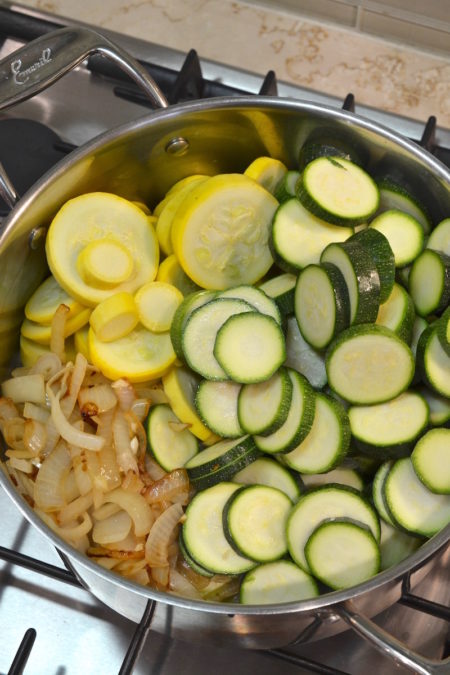
    3. In a large pot, sauté onion in 1 tablespoon olive oil until wilted and slightly brown. Add chopped garlic and brown both for about 3 minutes. Add both squashes, salt, pepper & pinch of sugar. Cook over a med - high heat until the veggies are slightly tender (keep them a bit firm because they will cook more in the oven). Remove from heat and let the squash cool.
    4. When slightly cooled, drain the excess liquid from squash in a colander. Pour the squash back into the large pot & mix in the whisked eggs, ½ cup bread crumbs and ½ cup parmesan cheese. Pour the entire squash mixture into a buttered 9 x 13 casserole dish. Cover with foil and place into a 350° oven for 30 minutes.
    5. After 30 minutes, remove the foil, top with the panko/parmesan/Cairo mixture and bake another 10-15 minutes or until the topping is lightly browned and toasted. Remove from oven and serve. *Can be prepared the day before and refrigerated. I would not bake until the day it is served and leave off the panko topping. Add the bread crumb topping the last 15 minutes of cooking - this will keep your topping nice and crunchy.

    Thanksgiving Squash Casserole - Glory Kitchen
    Thanksgiving Squash Casserole - Glory Kitchen
    Thanksgiving Squash Casserole - Glory Kitchen
    Thanksgiving Squash Casserole - Glory Kitchen
    Thanksgiving Squash Casserole - Glory Kitchen
    Thanksgiving Squash Casserole - Glory Kitchen
    Thanksgiving Squash Casserole - Glory Kitchen
    Thanksgiving Squash Casserole - Glory Kitchen
  • STUFFED ACORN SQUASH

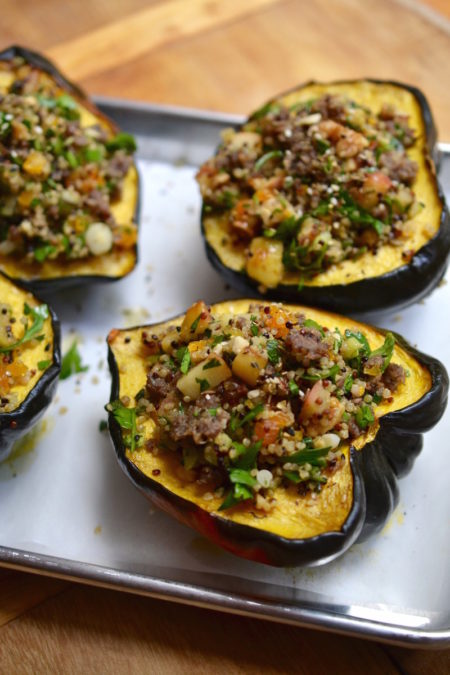
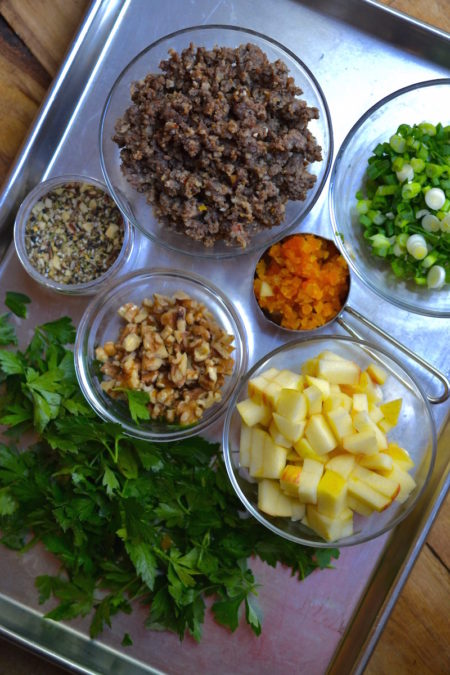
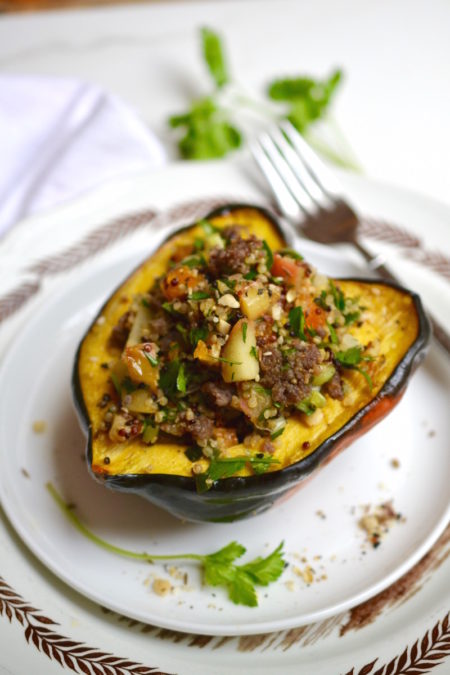
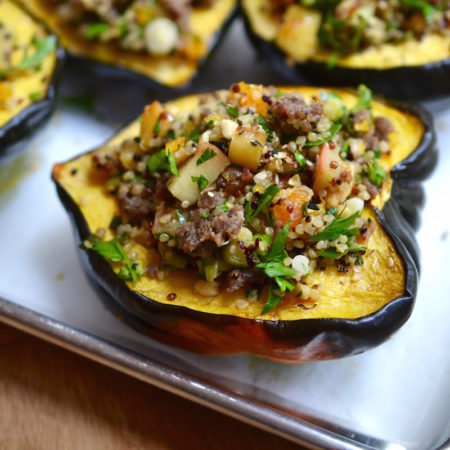
    This stuffed acorn squash celebrates the changing of the seasons from summer to fall.  Everything about it highlights the fall bounty – apples, walnuts, dried apricots, and of course, the acorn squash.

    It is an artful and appealing dish when the squash is used as the vessel for serving and the tender, roasted flesh inside is part of the meal.

    There is a real balance of flavors here, a little salty & savory from the sausage, a bit of sweet and tart from the apples and apricot, nuttiness from the walnuts and an amazing flavor of spices from the Cairo nut & spice mix.

    This flavorful recipe can serve as a full meal or a side dish.  Remember this at Thanksgiving – it would be a beautiful addition to a large family gathering.  Happy fall!

    Margie Bruner
    owner of Glory Kitchen

    instagram
    facebook

    Stuffed Acorn Squash

    4 servings

    Ingredients

    • Cairo nut & spice mix
    • 2 acorn squash
    • olive oil
    • 1 tablespoon butter
    • 1 cup quinoa, cooked
    • 6-8 oz. pork, chicken or turkey sausage, not flavored or spicy
    • 1 apple, diced into small squares
    • 5 scallions, chopped
    • ½ cup whole walnuts, lightly chopped
    • 1/3 cup dried apricots, roughly chopped
    • 1 cup Italian leaf parsley, fresh, roughly chopped
    • sea salt

    Instructions

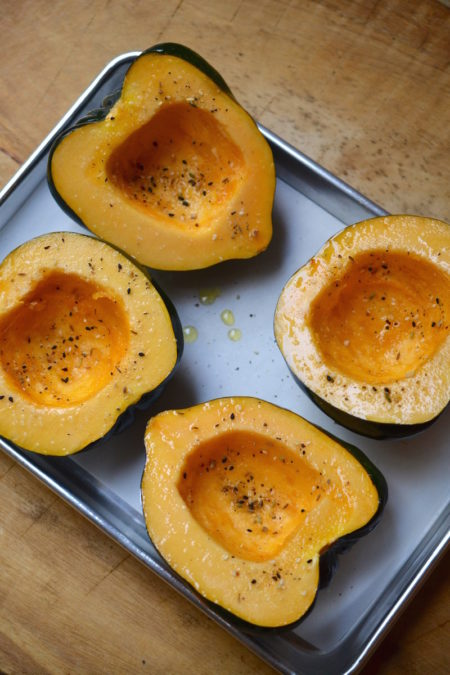
    1. Slice the two acorn squash lengthwise and scoop out the seeds to clean the cavity. Using your hands, rub a bit of olive oil on the inside & outside of each squash. (You should have 4 shells). Season with sea salt and a sprinkle of Cairo nut & spice mix . Assemble the squash on a baking sheet, face up, and bake in a 375° oven for 1 hour or until golden brown. When ready, remove and cool.
    2. While the squash is baking, in a medium sauté pan, cook the sausage as directed, breaking it up into small pieces as it cooks (a potato masher works well). If you are using a low fat sausage such as turkey or chicken, you may want to add a bit of water during the cooking to keep it moist and from burning the bottom of the pan. Just before it is cooked through, add 1-2 teaspoons of Cairo nut & spice mix . Taste and add more depending upon how spicy you like the sausage. Remove from heat and set aside.
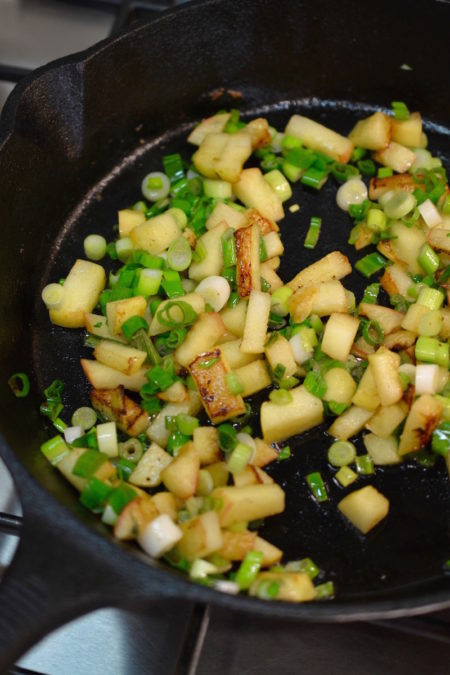
    3. In another pan (I like to use cast iron), heat 1 tablespoon butter and a drizzle of olive oil together. When hot and slightly browned, add the chopped apple, spread in the pan and let it sit on the heat not moving it around so it will brown the small pieces of apple. Toss in the scallions, sprinkle with a pinch of sea salt, heat just until wilted and remove the apple/onion mixture placing it into a separate bowl to cool.
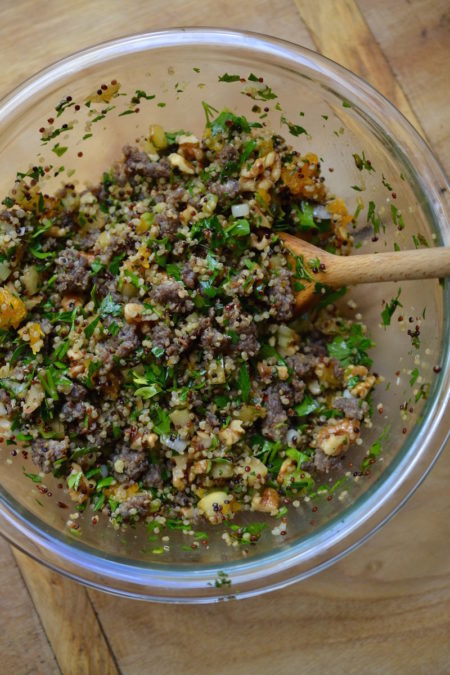
    4. In a large bowl, mix together cooked sausage, quinoa, walnuts, dried apricots, apples and scallions. Add the fresh parsley and toss together.
    5. Stuff each acorn half with the sausage mix, top each with another sprinkle of Cairo nut & spice mix and serve at room temperature or if you prefer to serve warm, return to the oven for 15 minutes or just until it is heated through.

    Stuffed Acorn Squash with CAIRO nut & spice mix
    Stuffed Acorn Squash with CAIRO nut & spice mix
    Stuffed Acorn Squash with CAIRO nut & spice mix
    Stuffed Acorn Squash with CAIRO nut & spice mix
    Stuffed Acorn Squash with CAIRO nut & spice mix
    Stuffed Acorn Squash with CAIRO nut & spice mix
    Stuffed Acorn Squash with CAIRO nut & spice mix
Updating…
  • No products in the cart.

JOIN US !
JOIN
close-link