• HOMEMADE PEANUT BUTTER

    Who knew making Homemade Peanut Butter could be so simple and so delicious? I never quite believed when I read or heard that you could take fresh, whole nuts and whirr them away in a food processor until creamy nut butter immerged, but it really is true.

    My husband has had a lifelong love and obsession for peanut butter.  After becoming more conscious about the foods we ate, we grew more diligent about reviewing ingredient lists on products, and discovered most commercial jars of peanut butter were loaded with chemicals.  We made the switch to buying pure almond and peanut butters at specialty grocery stores where the only ingredient coming out of these large nut crushing machines is pure almonds or peanuts.

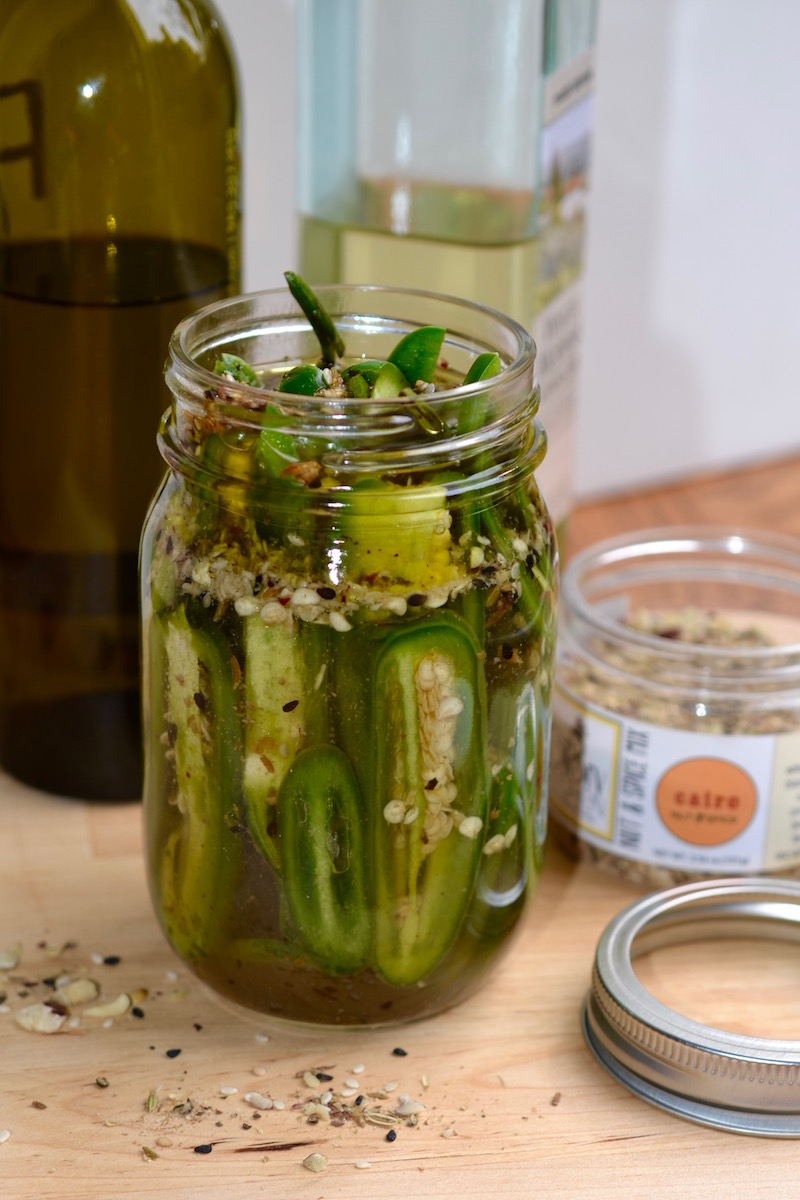
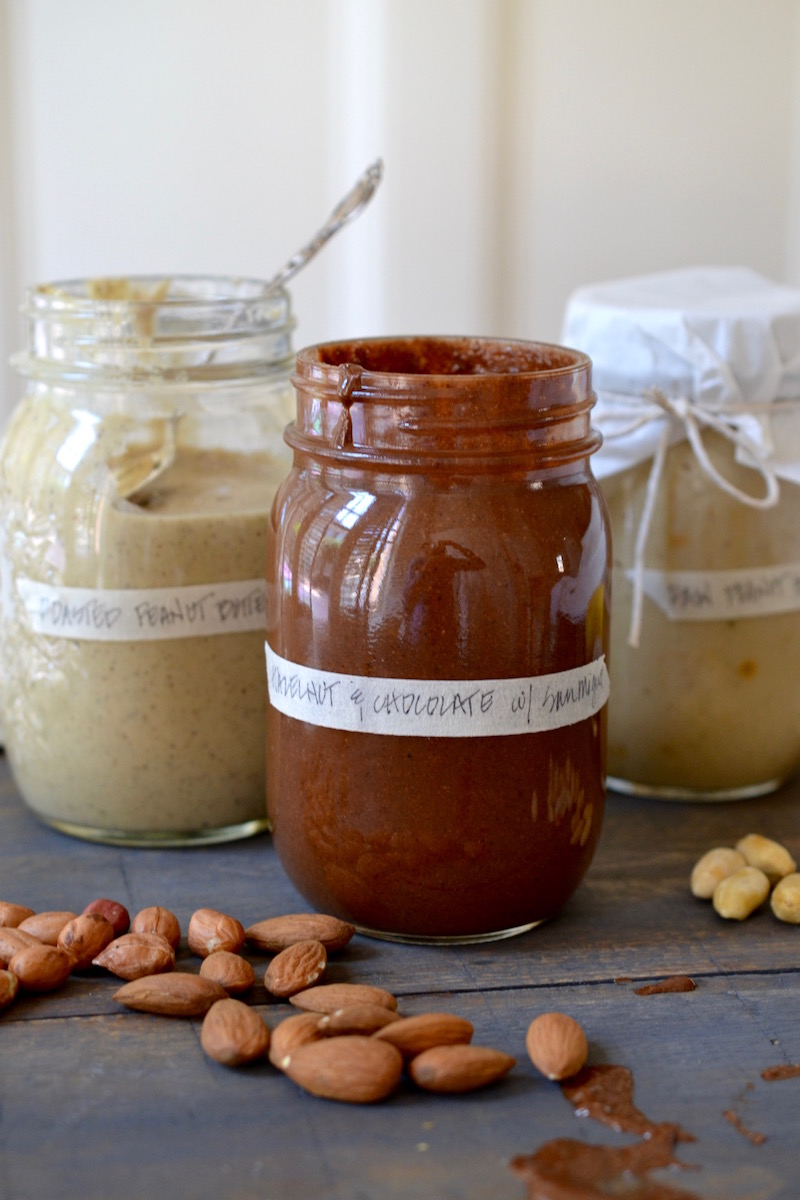
     This week I experimented with making my own nut butters using a variety of nuts and infusing them with spices, peppers and of course our Glory Kitchen nut and spice mixes.  My hazelnut & chocolate butter (does Nutella come to mind?) received a pop of heat from our San Miguel nut & spice mix.  The Asian peanut butter was blended with tahini and our Penang nut & spice mix, and the Middle Eastern flavored almond & peanut butter received an infusion of our Cairo nut & spice mix.

    All three nut butter varieties had their own unique flavor, but all were delicious and so much more interesting than a straight up version of peanut or almond butter.  We are loving the hazelnut & chocolate spread over bananas and strawberries.  The Asian peanut butter is great on crackers with a drizzle of honey and additional crunchy Penang nut & spice mix sprinkled on top.  The Middle Eastern nut butter is great in a peanut butter and jelly sandwich.

    If you have a food processor, you too can easily make your own homemade peanut butter.  The best part is you have delicious nut butters, made with real, plant-based ingredients and no chemicals, preservatives, or additives.

    I hope you’ll give it a try; it’s great fun to watch the transformation and you’ll be thrilled with the homemade result.

    Margie Bruner
    owner of Glory Kitchen

    instagram
    facebook

    Homemade Peanut Butter

    each blend makes 1-2 jars

    Ingredients

      Spicy Hazelnut & Chocolate Butter:
    • 1 tablespoon San Miguel nut & spice mix
    • 3 1/2 cups hazelnuts, roasted or raw
    • 1 cup dark chocolate chips, or less if you want it less sweet
    • 1/2 teaspoon cayenne pepper
    • 1/8 teaspoon sea salt
    • Middle Eastern Almond & Peanut Butter:
    • 1 tablespoon Cairo nut & spice mix
    • 2 cups peanuts, roasted or raw
    • 2 cups almonds, roasted or raw
    • 1 teaspoon sea salt
    • Asian Peanut Butter:
    • 1 tablespoon Penang nut & spice mix
    • 4 cups peanuts, roasted or raw
    • 1/2 cup tahini
    • 1 tablespoon soy sauce
    • 1/2 teaspoon sea salt

    Instructions

    1. If you prefer a more intense and roasted nut flavor, and you're working with raw nuts, spread your nuts onto a baking tray and place into a 375° oven. Toast the nuts just until they are lightly browned. Remove from the oven and allow to cool completely. If you prefer to keep your nuts raw, move forward with mixing them in a food processor.
    2. If you are working with whole nuts, place all the nuts into a food processor and pulse until the nuts break down into small pieces. Add the remaining ingredients and whirl away until the mixture turns into a creamy butter. The more you process, the creamier the mixture will get, so if you prefer a crunchy or thick butter, do not process as long. As it mixes, stop and taste your flavors. If you like more heat on the Hazelnut Butter, add more cayenne. If you like it a bit saltier, add more salt. Just a little pinch at a time because salt and cayenne can overpower the butters very quickly, so add cautiously.
    3. Pour your finished butters into canning jars and enjoy! They stay fresh longer if they are stored in the refrigerator, however, these can be left out on the counter at room temperature for about 1 week.

    Notes

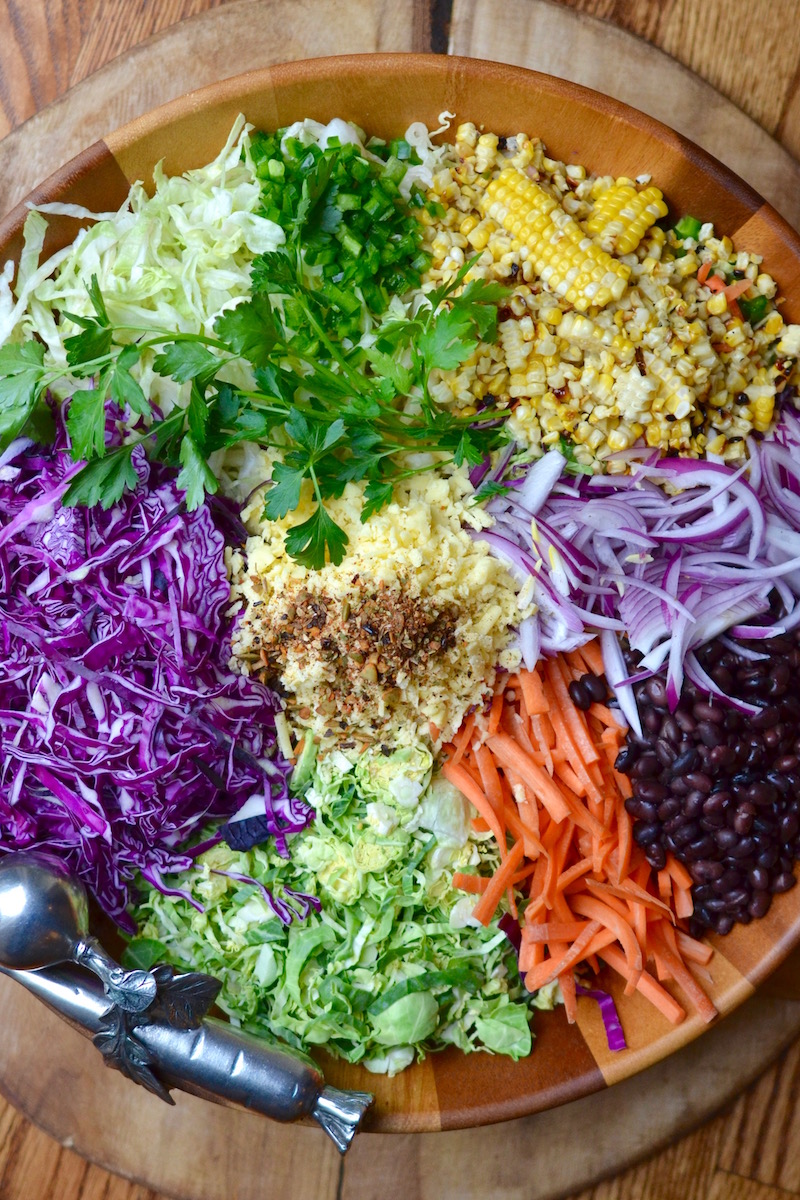
    You can really get creative on flavors for homemade nut butters. Don't be afraid to experiment! Our Glory Kitchen Mumbai nut blend would also work well in a nut butter.

    Homemade Peanut Butter - Glory Kitchen
    Homemade Peanut Butter
    Peanut Butter
    Homemade Peanut Butter - Glory Kitchen
    Homemade Peanut Butter - Glory Kitchen
    Homemade Peanut Butter - Glory Kitchen
    Homemade Peanut Butter - Glory Kitchen
    Homemade Peanut Butter - Glory Kitchen
    Homemade Peanut Butter - Glory Kitchen
    Homemade Peanut Butter - Glory Kitchen
  • PARTY SALAD

    The next time you offer to bring the salad for a gathering of friends and family, surprise everyone with this bright and colorful bowl.  All of the veggie variety and the combination of flavors make this an eye catching platter when it is sitting on a buffet table.

    This Mexican inspired salad is one that typically pleases everyone, even non-veggie loving guests because the tostada chips add a bit of sinfulness to the dish.  The key is to add in the tostada chips and dressing just before it is ready to serve so the chips and veggies stay fresh and crisp.  Your guests will request a repeat of this salad time and time again.

    I haven’t included any ingredient measurements because this is a salad that is meant to be large or small.  Obviously, it works perfectly for a large crowd, however, if your group is smaller, chop only the ingredients according to your needs and save the rest for another day.

    The dressing recipe will yield enough for a very large salad and more, so only use what you need and refrigerate the rest.  It can be used again later as a dipping sauce for raw veggies, to coat a chicken for roasting or drizzled into a wrap sandwich.

    Basically, this salad involves a little bit of this, and a little bit of that so get creative and add in other veggies you love.  Hope this big bright bowl adds some pizazz to your next party!

    Margie Bruner
    owner of Glory Kitchen

    instagram
    facebook

    Mexican Party Salad

    serves as few or as many as you wish

    Ingredients

      For the salad:
    • San Miguel nut & spice mix
    • iceberg lettuce, sliced very thin
    • brussels sprouts, sliced very thin
    • purple cabbage, sliced very thin
    • corn on the cob
    • carrots, julienned
    • red onion
    • fresh jalapeño pepper
    • canned black beans, rinsed
    • monterrey jack cheese, shredded
    • corn tostada chips
    • For the avocado dressing:
    • 2 teaspoons San Miguel nut & spice mix
    • ¼ cup olive oil
    • 2 limes, juiced
    • ½ avocado, ripe
    • 1 garlic clove
    • 2 slices pickled jalapeños
    • ¼ cup Greek yogurt
    • 4 tablespoons water, or more
    • 1 teaspoon salt
    • 1 tablespoon honey

    Instructions

    1. Using a blender, combine all the ingredients for the dressing and blend together until it is smooth and creamy. Add more water (1 tablespoon at a time) if you prefer your dressing thinner, until you reach the right consistency. Pour the dressing into a glass jar with a lid and refrigerate. When you're ready to toss into the salad, make certain it has reached room temperature and shake well before pouring.
    2. Clean each ear of corn by removing the skin and the silks. Drizzle each cob with a bit of olive oil and using your hands, rub the cobs up and down to coat the corn all over lightly. Place on a sheet tray and sprinkle each cob with a pinch of salt. Place the cobs under the broiler and stand by to turn them as the tops begin to brown. Do not step away because they can burn very quickly under an oven broiler. Using tongs, rotate the corn a bit until the entire ear is slightly browned all around. Remove from the oven and let the corn cool completely. Once they have cooled, slice the kernels from the cob and place the corn kernels into a bowl.
    3. Depending upon how large you wish for your salad to be, slice the iceberg lettuce, slice the purple cabbage, slice the small brussels sprouts, julienne the carrots, chop the jalapeño into very small pieces, slice the red onion very thin and set all these veggies aside into their own bowls.
    4. Shred the monterrey jack cheese and set aside. You can do all of this prep work well before the party begins - just place each ingredient into a bowl or a ziplock baggie and store in the refrigerator until just before you need to serve your salad.
    5. Just before the guests arrive, assemble all of your ingredients into a very large serving bowl, sectioning out each ingredient so it displays nicely. If you are taking this to a party, cover it with plastic wrap and take with you pre-assembled (just like the photo) Don't forget to take the bag of chips and the pre-made dressing to toss in just before you are ready to serve!
    6. When you're guests are ready to eat, take a handful of tostada chips and crush them in between both hands to sprinkle over the top of the salad. Add dressing and toss everything together. Serve immediately so the chips and the lettuces stay crunchy.

    Mexican Party Salad - Glory Kitchen
    Mexican Party Salad - Glory Kitchen
    Mexican Party Salad - Glory Kitchen
    Mexican Party Salad - Glory Kitchen
    Mexican Party Salad - Glory Kitchen
  • PICKLED JALAPEÑO PEPPERS

    Every refrigerator needs to be stocked with a jar of pickled jalapeño peppers.  I always have one and reach for it often to add a bit of heat and flavor to dishes – and not just Mexican meals.  I add chopped jalapeños to the obvious foods like nachos, enchiladas, quesadillas and beans of all types.

    I also, however, use them to spice up rice, salads, dressings, baked potatoes, soup bases, and the list goes on.  You never know when something needs an added note of heat and if you have a jar of jalapeño peppers handy, you’ll always be prepared.

    My home refrigerator always has a jar, however, it wasn’t until I reached for them recently that I realized I was out and needed to run by the store to purchase another.  That was when it hit me that I needed to make my own homemade jalapeños, and of course, I wanted to add some interesting notes by flavoring the brine with our Cairo nut & spice mix.

    It had never crossed my mind to make my own pickled jalapeño peppers, but let me tell you, it is so, so easy.  I already had the few ingredients needed sitting in my pantry, it was quick, and the result was delicious.  So much fresher and so much more flavorful than anything I could buy at the local store.

    As a bonus, I’ve also found myself using the seasoned brine to add acid and flavor to salad dressings and all types of sauces.  When a recipe calls for vinegar, add a spoonful from this jar of jalapeños.  From here on out, homemade jalapeños will be a staple in my refrigerator and they should be in yours too!

    And by the way, these jalapeños would make a perfect gift, especially if they are dressed up with our very own Glory Kitchen pepper gift tags!  You can order these chili pepper gift tags from our website here. 🙂

    Margie Bruner
    owner of Glory Kitchen

    instagram
    facebook

    Pickled Jalapeño Peppers

    one 16 oz jar of peppers

    Ingredients

    • 4-8 jalapeño peppers, fresh
    • 1 cup white wine vinegar
    • 1/8 cup olive oil
    • 1 tablespoon CAIRO nut & spice mix
    • 1 tablespoon sea salt, kosher style
    • ½ tablespoon sugar

    Instructions

    1. In a medium saucepan, bring to a boil vinegar, oil, CAIRO nut & spice mix, salt, and sugar. Boil for about 3-4 minutes, making certain the salt and sugar are completely dissolved. Remove pan from heat and set aside to slightly cool.
    2. Slice the fresh jalapeños (I like to slice them lengthwise - it makes a larger cut and also look prettier in the pickling jar) and layer them carefully into a 16 oz mason jar, arranging them so their sides are displayed nicely. If you are making these pepper jars as gifts, take extra time to stack them so they look visually appealing through the glass.
    3. Pour the liquid over the jalapeños until they are completely submerged and close with lid. You may do this even if the liquid is still a bit warm. Allow the jar to come to room temperature before refrigerating.
    4. If you are making these to use right away, you can place them in the refrigerator, allow to marinate for 3 or more days, and then use as needed. They should last in your fridge for up to a month or more.
    5. You can also use the same recipe if you are canning, using typically canning procedures. Doing it this way, they'll last up to a year!

    Notes

    I used the Glory Kitchen Cairo nut blend but these peppers would also work well with the Mumbai, Penang or San Miguel nut blends.

    Pickled Jalapenos - Glory Kitchen
    Pickled Jalapenos - Glory Kitchen
    Pickled Jalapenos - Glory Kitchen
    Pickled Jalapenos - Glory Kitchen
    Pickled Jalapenos - Glory Kitchen
    Pickled Jalapenos - Glory Kitchen
    Pickled Jalapenos - Glory Kitchen
  • CHILE CON QUESO

    This Chile con Queso recipe has been a family favorite for as long as I can remember.  My boys ask for it often – especially when they’re all gathered ’round watching a big sports event on TV.  Next weekend the Carolina Panthers play in the Super Bowl and Charlotte is heated with football fever, so I felt this was the perfect time to share this favorite family recipe.

    The basis for this queso is from a recipe we used when I was growing up, however, I tweaked it a bit using more veggies and a variety of real cheeses.

    I don’t use processed cheese in anything (just look at the ingredient list on that bright orange box and you’ll understand why).  I like to use Monterey Jack cheese because I love the creamy, stretchy cheese when it melts into the caramelized vegetables.  Sometimes I add half jack cheese and half gouda or white cheddar.  Feel free to experiment and combine various cheeses for more depth of flavor.

    When serving, it can be a bit messy, so I have found that placing it into individual sized ramekins makes it fun for each person to have their own little dish alongside a handful of crisp, firm tostada chips.  Right before serving, top it with a sprinkle of San Miguel nut & spice mix and fresh cilantro for a fresh and crunchy garnish.

    Margie Bruner - Glory Kitchen

    owner of Glory Kitchen

    instagram
    facebook

    Chile con Queso

    about 4 servings

    Ingredients

    • San Miguel nut & spice mix
    • olive oil
    • 1 red bell pepper, chopped
    • 1 medium yellow onion, chopped
    • 2 zucchini, chopped
    • 1 poblano pepper, chopped
    • ½ jalapeño pepper, minced
    • 1 cup cherry or grape tomatoes, sliced
    • 1 clove garlic, minced
    • sea salt
    • 2 tablespoons milk or cream
    • 2 cups monterey jack cheese, shredded

    Instructions

    1. Preheat the oven to 400º. Prepare all the veggies by washing & chopping, then set each aside into small bowls. Shred the cheese & set aside.
    2. In a deep pot (I use a 3 ½ qt. pot), heat 2 teaspoons or so of olive oil and when hot, add the onion, bell pepper, poblano pepper and a good pinch of salt. Let these veggies sweat and soften, but don't overcook, you want them to keep some firmness.
    3. Add in the garlic, minced jalapeño, zucchini & 1 teaspoon San Miguel nut & spice mix. Let these sauté just a bit.
    4. Add the chopped tomatoes, another pinch of salt and let these wilt just a bit.
    5. Remove the pot from the heat, stir in the milk/cream and shredded cheese, then spoon the mixture into individual ramekins, small cast iron pans, or a larger serving dish (make certain whatever you use is oven proof). Sprinkle with additional San Miguel nut & spice mix then place into the hot oven just to heat through and melt the cheese completely. Remove from the oven, sprinkle with fresh herbs (preferably cilantro) and serve with firm tostada chips or spoon onto warm tortillas to make cheesy burritos.

    Notes

    I have found it makes a tremendous difference to have all of the vegetables cut up before beginning to sauté them. The french call this "mise en place", which means, putting into place. Basically, it is having all of your ingredients prepped before you begin to cook. In this dish preparing first makes it easier and moves the process so much quicker - so chop away before you begin!

    Chile con Queso - Glory Kitchen
    Chile con Queso - Glory Kitchen
    Chile con Queso - Glory Kitchen
    Chile con Queso - Glory Kitchen
    Chile con Queso - Glory Kitchen
    Chile con Queso - Glory Kitchen
    Chile con Queso - Glory Kitchen
  • ROASTED CARROT SOUP

    The rich, orange color of this soup matches the delicious taste – deep, rich, roasted carrot flavor.  Carrots combined with caramelized onions and a touch of garlic and ginger, all roasted until they are intensely sweet and flavorful, makes for a smooth soothing meal on a cold winter day.

    Creamy soup always pairs beautifully with a side of toasted crostini for dipping and a bit of crunchy flavor, so we made some sourdough toasts topped with shredded white cheddar and hazelnut crunchy flavor from Cairo nut & spice mix.

    This recipe yields quite a bit of soup, so it is perfect for jarring the extra soup and gifting it to neighbors and friends or set some aside into the freezer to have on hand for a busy day.  If you’re sharing your soup as a gift, what better way to package it than wrapping it with our Glory Kitchen hand drawn carrot tag!

    Margie Bruner
    owner of Glory Kitchen

    instagram
    facebook

    Roasted Carrot Soup

    Yield: 8 or more servings

    Ingredients

    • Cairo nut & spice mix
    • 2 lb carrots
    • 2 yellow onions
    • 4 garlic cloves
    • ginger, fresh, about 1 inch of root
    • 6 cups vegetable stock
    • olive oil
    • sea salt
    • 1 lime, freshly juiced
    • ½ teaspoon coriander, ground
    • ½ teaspoon nutmeg, ground
    • 1 cup half & half
    • fresh parsley, for garnish
    • yogurt, sour cream, or créme fraîche for garnish

    Instructions

    1. Preheat the oven to 425º. Cut tops off the carrots (where stem grows), then roughly chop all carrots and lay them out onto a parchment or foil lined sheet tray. Roughly chop all onions & do the same. Throw 4 whole garlic cloves, no need to peel, onto sheet tray. Slice about 1 inch of fresh ginger into very small pieces, no need to peel, and also place on sheet tray but keeping it separated in a corner of the tray so it can be found & removed later. Drizzle all the veggies with olive oil and toss with sea salt and a generous amount of Cairo nut & spice mix. Place in the hot oven and roast for 15 minutes.
    2. Remove the garlic & ginger from the sheet tray and place the carrot/onion mix back into the oven to roast for an additional 30-40 minutes or until the veggies turn a golden brown. Set aside the garlic & ginger and allow to cool, then remove the skin from the garlic cloves.
    3. Once the veggies are out of the oven and are somewhat cool, place them into a food processor, or for a very smooth purée, a blender, with about 2 cups of vegetable stock and puree until they are nice and smooth without any chunks. If your food processor/blender can't hold it all, you may need to split the veggies and process them in two separate batches. Add more stock as needed and then pour pureed vegetables into a large stock pot.
    4. Turn the heat on med/low and add any remaining vegetable stock, juice of 1 lime, coriander, nutmeg and salt. Bring to a low simmer for about 10 minutes, continuing to stir the pot. Remove soup from heat, add in the half & half to finish the soup. If it is too thick, you can add more stock or water until the proper soup consistency is reached.
    5. Serve in bowls garnished with a drizzle of sour cream, creme fraîche or yogurt and top with fresh parsley and a sprinkle of Cairo nut & spice mix. Serve with cheesy crostini toasts topped with melted cheese and Cairo nut & spice mix.

    Notes

    This soup would also work well with Mumbai, Penang or San Miguel nut & spice mixes.

    Roasted Carrot Soup - Glory Kitchen
    Roasted Carrot Soup - Glory Kitchen
    Roasted Carrot Soup - Glory Kitchen
    Roasted Carrot Soup - Glory Kitchen
    Roasted Carrot Soup - Glory Kitchen
    Roasted Carrot Soup - Glory Kitchen
    Carrot Gift Tag - Glory Kitchen
  • GOAT CHEESE TRUFFLES

    Serving these little bite-sized goat cheese truffles crusted with nuts, herbs and spices is such a nice surprise combination of creamy tangy cheese, and crunchy nut flavor.  I was first introduced to the idea of making goat cheese truffles by the talented California duo,  Canyon Girls Catering, who serve these on their event cheese trays.  These little balls of goodness are simple and quick to make yet can be elegantly presented as an appetizer alongside a glass of wine and some crusty bread.

    The truffles can be made using any of our 6 blends of Glory Kitchen nut & spice mixes, stacked up and served on their own, or can be included as part of an elaborate cheese tray.  Each variety of cheese truffle offers a unique bite of spice, crunch and creamy flavor.  They are fun to present and even more fun for guests to sample the different varieties.

    Chévre is the french term for goat cheese and is obviously made from goat’s milk. It has a tart, tangy flavor and a lower fat content than cheese made from cow’s milk. As it ages, it becomes more robust and bolder in flavor.

    Most goat cheese originates from France and in addition to Chévre, other varieties include Chabis & Boucheron.  The next time you offer to bring an appetizer for a gathering of friends, bring an assortment of these flavorful cheese truffles for something unique and interesting.

    Margie Bruner
    owner of Glory Kitchen

    instagram
    facebook

    Goat Cheese Truffles

    Ingredients

    Instructions

    1. Bring the goat cheese to room temperature. Take a small spoonful of cheese, and with your hands, roll it into a small but compact ball. Take any of the Glory Kitchen nut & spice mixes and spread some out onto a small, flat plate. Roll the goat cheese ball into the nut blend until it is completely covered on all sides. Once all of your cheese truffles are finished, refrigerate to set and then serve cool or at room temperature alongside crackers or slices of crusty bread.

    Notes

    These little truffles are a great addition to a festive cheese tray or are quite special on their own served with a side of good bread and a glass of wine.

    Penang Asian nut & spice mix - Glory Kitchen
    Goat Cheese Truffles - Glory Kitchen
    Goat Cheese Truffles - Glory Kitchen
  • CHILI SPICED CAULIFLOWER

    The savory, spicy & crunchy flavors of this chili spiced cauliflower have made this a quick go-to dish I make over and over.  Making cauliflower in this way is just so tasty, you won’t even remember you’re making a vegetable.  The added crunch and smokiness from Glory Kitchen’s San Miguel nut & spice mix will season this veggie in such a lovely way.

    Cauliflower, a cruciferous vegetable, is in the same family as cabbage, kale & broccoli.  The large, bulbous and flowery head is called a “curd” and it is in peak season during the winter months between December and March.

    Cauliflower can become transformed when roasted with smoky chili flavors.  By adding the crunch of pepitas (pumpkin seeds) and the smokiness of ancho chilis, chipotle pepper and paprika, these little florets become melt-in-your-mouth irresistible.

    Margie Bruner - Glory Kitchen

    Margie Bruner
    owner of Glory Kitchen

    instagram
    facebook

    Chili Spiced Cauliflower

    Yield: 4 servings

    Ingredients

    • 1 tablespoon San Miguel nut & spice mix
    • 1 large head of cauliflower
    • 1 tablespoon extra virgin olive oil
    • 1 teaspoon smoked paprika
    • sea salt

    Instructions

    1. Preheat the oven to 400° and place the rack in the center of the oven.
    2. Cut the head of cauliflower into four quarters and then cut each quarter into small florets, making certain to carefully cut out the center stem. Layer the small cauliflower florets onto a baking sheet lined with either foil or parchment paper.
    3. Drizzle the florets with olive oil. Sprinkle with paprika, a generous pinch of sea salt & San Miguel nut & spice mix. Using your hands, gently toss the cauliflower until they are all completely covered with spices and oil. Distribute the florets evenly onto baking sheet and place the sheet into the hot oven.
    4. Roast the cauliflower for 20-30 minutes or until golden and slightly browned. Test the readiness by piercing a few florets with a fork to make certain they are soft & tender. Remove and serve warm.

    Notes

    This roasted cauliflower would also be delicious using Mumbai, Umbria, Cairo, Penang or Provence nut & spice mixes from Glory Kitchen.

    Chili Spiced Cauliflower - Glory Kitchen
    Chili Spiced Cauliflower - Glory Kitchen
    Chili Spiced Cauliflower - Glory Kitchen
    Chili Spiced Cauliflower - Glory Kitchen
    Chili Spiced Cauliflower - Glory Kitchen
    Chili Spiced Cauliflower - Glory Kitchen
  • GRILLED MEXICAN SALAD

    This salad is not only flavorful, its bright colors and various textures create a delicious and satisfying salad.

    Margie Bruner
    owner of Glory Kitchen

    instagram
    facebook

    Grilled Mexican Salad

    serves 4

    Ingredients

      For the Grilled Salad:
    • San Miguel nut & spice mix
    • 3-4 ears of corn
    • 2 Mexican white onions
    • 4 red bell peppers (or if you can find them, miniature peppers 12-20 depending upon size)
    • olive oil
    • 4 fresh jalapeño peppers
    • 1 bag arugula greens
    • 4 red radishes
    • 1 can black beans, rinsed
    • chipotle vinaigrette dressing
    • For the Dressing:
    • yields about 1/4 cup
    • San Miguel nut & spice mix
    • 3 tablespoons extra-virgin olive oil
    • 1 tablespoon red wine vinegar
    • 1 teaspoon dijon mustard
    • 1 teaspoon honey
    • 1 teaspoon San Miguel nut & spice mix
    • pinch of salt
    • pinch of ground chipotle

    Instructions

    1. Mix all of the ingredients for the chipotle dressing and set aside. Depending upon how spicy you desire the dressing, add more chipotle until you reach the preferred heat level. Add pinches and taste as you go.
    2. Slice the onions, drizzle them with a bit of olive oil, salt lightly and set aside in a bowl. Slice the bell pepper into large pieces, lightly oil and salt. If you have miniature peppers, use them whole. Clean the husks off the corn and drizzle with olive oil. Rub the ears with your hands to make certain the oil is spread over all of the kernels. Sprinkle with salt and set aside. Slice the jalapeños in half and lightly toss with a drizzle of oil and a sprinkle of salt. Slice the radishes very thin; I like to use a mandoline to get an even and very thin slice. Rinse the black beans and set these aside.
    3. Place the corn cobs, bell peppers, jalapeños and onion on a hot & well oiled grill. All of this can also be roasted in a hot 450° oven. I prefer to roast the onions if you don't have a vegetable basket for the grill. After you get a good grill with char marks, remove and let the vegetables cool.
    4. Toss the arugula in a bit of the chipotle dressing and place it on 4 large dinner plates. Take the grilled vegetables and lay them over the arugula arranging them into segmented areas. Add the beans and the sliced radishes. Drizzle the entire salad with chipotle dressing and sprinkle all over with a generous amount of San Miguel nut & spice mix.

    Grilled Mexican Salad
    Grilled Mexican Salad
  • CHERRY, CANTALOUPE, AND AVOCADO SALAD

    This salad has bright, bold flavors as well as beautiful colorations.  It is sweet, tangy, creamy, spicy & crunchy all in one bowl.  The sweet cherries & cantaloupe add a unique flavor profile to the tender spinach leaves and creamy avocado.  For a bit of heat and smoky flavor we added in a good sprinkle of San Miguel nut & spice mix – quite a combination of flavors and a lovely presentation.

    Margie Bruner
    owner of Glory Kitchen

    instagram
    facebook

    Cherry, Cantaloupe & Avocado Salad

    Ingredients

      For the Salad:
    • San Miguel nut & spice mix
    • 1 avocado
    • 1 small carton of fresh cherries
    • 1 small cantaloupe
    • 1 bag fresh spinach
    • 1 small red onion
    • 2 roasted chicken breasts, shredded (or a store bought roasted chicken)
    • vinaigrette dressing
    • For the Vinaigrette Dressing:
    • 1 teaspoon San Miguel nut & spice mix
    • 2 tablespoons balsamic, red wine or champagne vinegar
    • 4 to 5 tablespoons extra-virgin olive oil
    • 2 teaspoons Dijon mustard
    • 1 ½ teaspoons honey
    • large pinch of sea salt
    • fresh cracked pepper

    Instructions

    1. Whisk together dressing ingredients and set aside.
    2. Shred the roasted chicken into pieces and set aside.
    3. Slice half the red onion into thin slices.
    4. Seed the cantaloupe and using a melon baller, make small balls and place in a bowl. Use about ½ the cantaloupe, depending upon size.
    5. Using a cherry pitter (can be found at any kitchen supply store), pit a carton of fresh cherries. Slice them in half and set aside.
    6. In a large bowl, pour a small amount of dressing over the fresh spinach and toss well to coat the leaves. Add the chicken, cherries, cantaloupe, onion & toss well.
    7. Cut the avocado into bite size pieces and gently toss these into the salad.
    8. Place in a large serving bowl or on individual plates and sprinkle with additional San Miguel nut & spice mix just before serving.

    Cherry, Cantaloupe & Avocado Salad
    Cherry, Cantaloupe & Avocado Salad
    Cherry, Cantaloupe & Avocado Salad
Updating…
  • No products in the cart.

JOIN US !
JOIN
close-link