• Sriracha Spiced Cashews - Glory Kitchen

    SRIRACHA SPICED CASHEWS

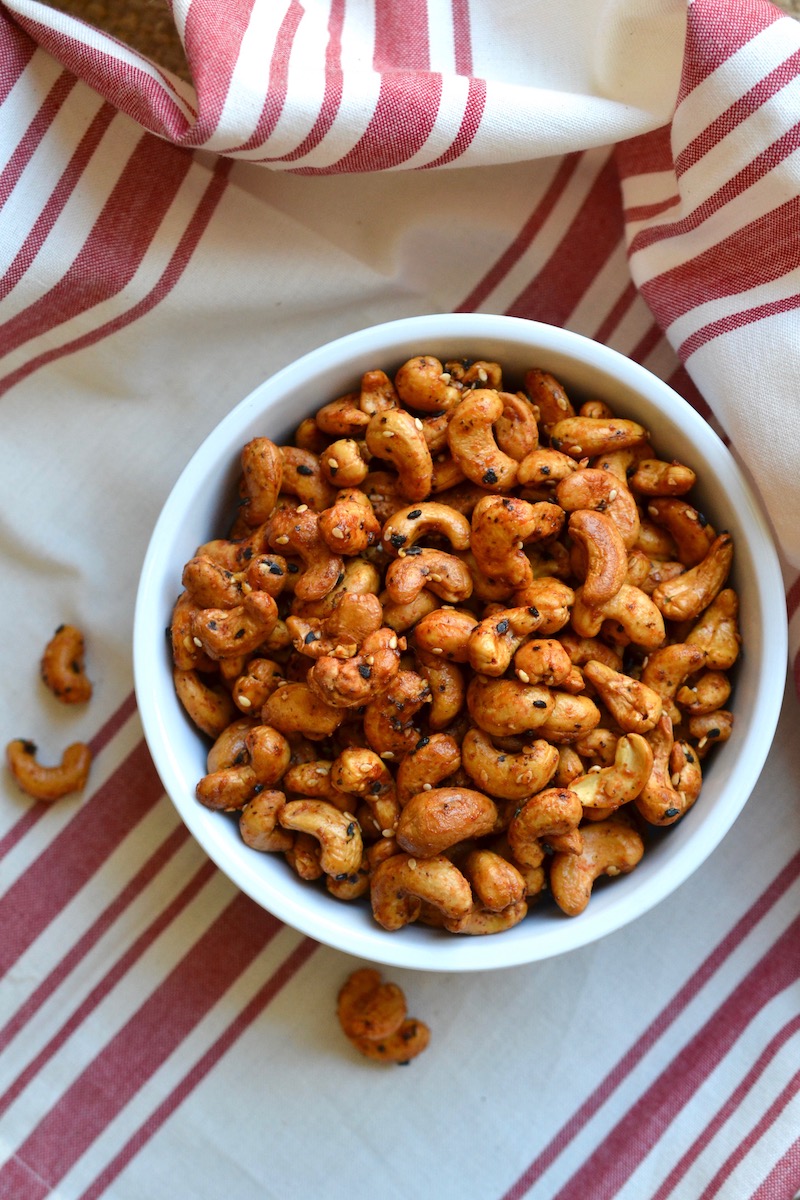
    This recipe for Sriracha Spiced Cashews is a special request from many of you I met at last week’s Christmas Bazaar.  We had great fun spreading Glory Kitchen Christmas cheer and I loved meeting so many new people and introducing you to our crunchy nut & spice mixes.  During the market I served a bowl of these cashew nuts seasoned with our Penang nut & spice mix, a blend of chopped peanuts and Asian seeds & spices. Paired with a touch of honey and sriracha chili, they make a great combination of sweet and spicy.

    Sriracha chili is a Thai or sometimes considered a Vietnamese chili sauce.  It has a garlic base and is widely available at most grocery stores.  If you don’t have Sriracha, don’t be afraid to substitute other chili pastes or sauces such as Gochujang (a Korean sweet & spicy chili paste), Adobo (a Mexican smoky jalapeno sauce), or Harissa (a North African chili paste). If you use Adobo, I would pair it with our Glory Kitchen San Miguel nut & spice mix. 🙂

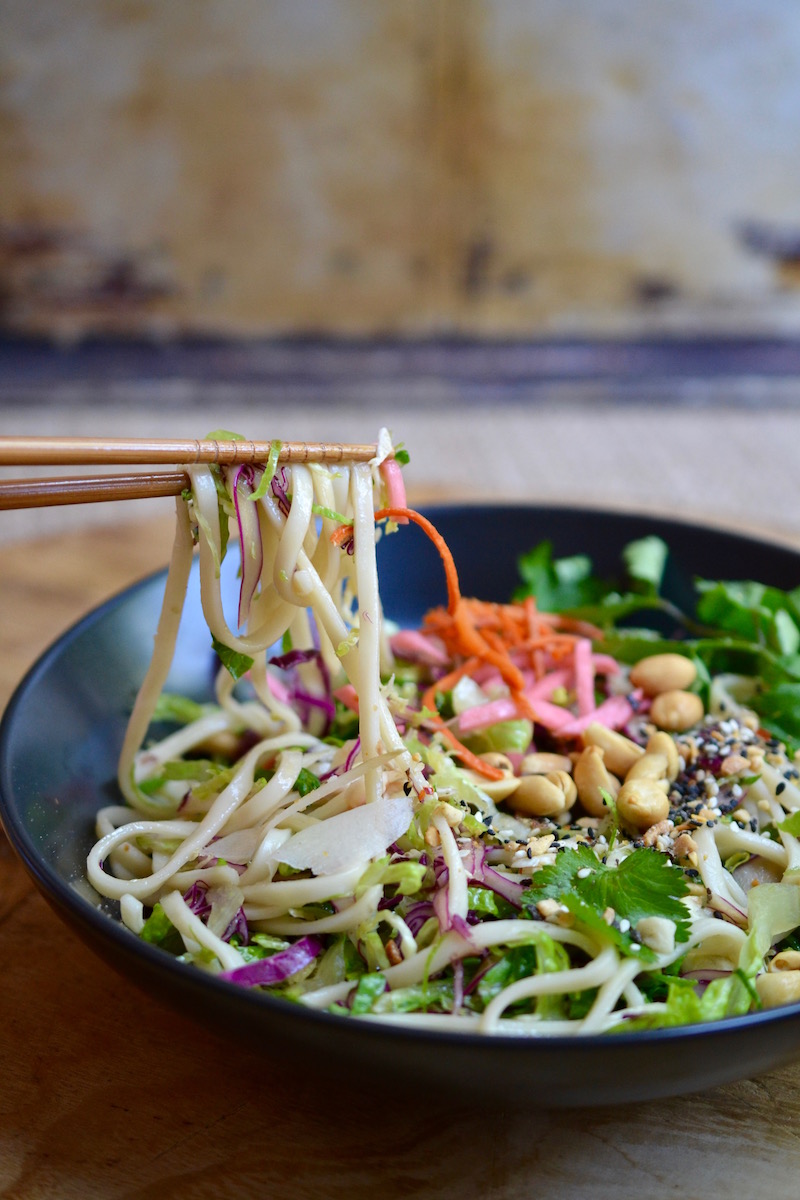
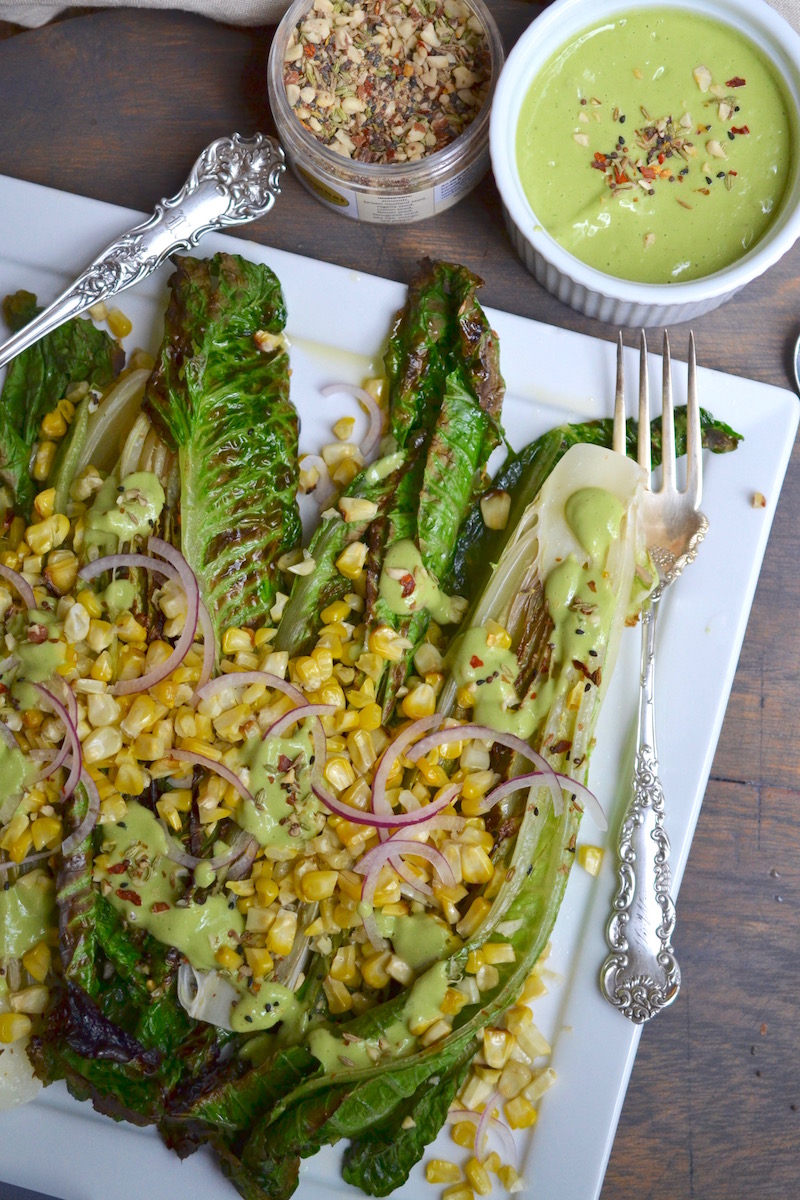
    These yummy Sriracha Spiced Cashews are made with honey, chili, and a squeeze of lime – that’s it.  I love to have these stored away in a zip-lock baggie in the freezer, so if you make them, consider doubling the recipe so you can have some stashed away and ready for an impromptu cheese board, to sprinkle in a salad, or just to snack on alongside a glass of wine.  Let the parties begin!

    Margie Bruner - Glory Kitchen

    Margie Bruner
    owner of Glory Kitchen

    instagram
    facebook

    Sriracha Spiced Cashews

    Yield: makes 3 cups of cashews

    Ingredients

    • 2 tablespoons Penang nut & spice mix
    • 1 egg white
    • 3 tablespoons honey
    • 2 tablespoons Sriracha or Gochujang sauce
    • 1/2 lime (juice and zest)
    • 1 teaspoon sea salt
    • 3 cups raw cashews

    Instructions

    1. Preheat the oven to 300°. Line a baking sheet with parchment paper and either spray the paper with a light cooking spray coating or drizzle a bit of oil (I like to use olive oil) on the parchment and rub it all over with your hands to give it a light coat. You can also use a silpat liner on your baking tray.
    2. Mix together the Penang nut & spice mix, egg white, honey, Sriracha, lime juice & zest, and sea salt.
    3. Using a large mixing bowl, combine the cashews and Sriracha mixture and toss well to coat the cashews. I like to use my hands to get it well mixed.
    4. Spread the cashews in an even layer on a large baking sheet. Reserve any extra sauce at the bottom of the bowl to coat the cashews again after they are half-way toasted. Place into the oven for 15 minutes.
    5. Remove the cashews from the oven, pour any remaining sauce over them, and gently move them around so they are turned and so they do not stick to the tray. Place back into the oven for another 15 minutes.
    6. Turn off the oven and leave the tray in the oven for an additional 30 minutes with the door shut to allow the warm heat to dry out the nuts. Remove from the oven, allow to cool completely and store in an airtight container until ready to use.

    Sriracha Spiced Cashews - Glory Kitchen
    Sriracha Spiced Cashews - Glory Kitchen
    Sriracha Spiced Cashews - Glory Kitchen
    Sriracha Spiced Cashews - Glory Kitchen
    Sriracha Spiced Cashews - Glory Kitchen
    Sriracha Spiced Cashews - Glory Kitchen
    Sriracha Spiced Cashews - Glory Kitchen
  • Cauliflower, Coconut and Basil Rice - Glory Kitchen

    CAULIFLOWER, COCONUT AND BASIL RICE

    This aromatic Cauliflower, Coconut, and Basil Rice is a new favorite.  The presentation is crisp and bright and my big secret  – it is made with half rice and half cauliflower. You really can’t tell there is a secret vegetable tucked inside.  The flavor is light and airy and I love the white color laced with bright green slivers of basil and then finished with the crunchy flavors from our Glory Kitchen Penang nut & spice blend.  The little bits of chopped peanuts, sesame seeds, and nori seaweed flakes give it such an interesting Asian and nutty flavor, not to mention, the color of those little sprinkles just pop against the pure white rice.

    Organic coconut milk is added as part of the liquid which gives this Cauliflower, Coconut and Basil Rice a wonderful rich and tropical flavor.  Coconut milk, as opposed to coconut water, comes from the inside flesh of the coconut (some call this the “meat”) combined with water.  This “milk” is thicker and more flavorful than the water found inside the coconut.  Because it has a higher fat content, there is no need to add oil or butter to the rice.  When you lift the lid after steaming your rice, it emits the most amazing floral aroma – that is the magic of the coconut.

    The reason it is hard to tell this rice is made up of half cauliflower is because it is steamed along with Jasmine rice, a long-grain type primarily grown in Thailand.  There is such a thing as a brown Jasmine rice, and yes, it does have a higher nutritional value than the white rice.  However, I prefer to use the white because of its clean color – especially when pairing it with cauliflower.  It is hard to differentiate between the actual rice and the cauliflower.

    I make this rice often to accompany a stir fry of vegetables like bok choy, mushrooms, peppers and snap peas .  It also makes a tasty bed for any type of white fish, salmon or shrimp.  The pure white color makes a beautiful backdrop for a perfectly baked fish or protein.  And if you’re lucky enough to have a bit left over, you can use it in your summer rolls or spread it on nori sheets topped with fresh vegetables and roll them up to make sushi rolls.  I hope you’ll try this lightened-up spin on rice.  It makes basic rice so much more interesting.

    Margie Bruner - Glory Kitchen

    Margie Bruner
    owner of Glory Kitchen

    instagram
    facebook

    Cauliflower, Coconut & Basil Rice

    Yield: 4-6 servings

    You can add the Penang nut & spice mix when you are steaming the rice, however, I like the nuts to stay crunchy so I add it in with the basil just before serving.

    Ingredients

    • 2 teaspoons or more Penang nut & spice mix
    • 2 cups jasmine rice
    • 2 cups cauliflower rice
    • 2 cups organic coconut milk (13.5 oz can)
    • 2 cups water
    • 2 teaspoons lime juice, fresh
    • 1/2 teaspoon salt
    • fresh basil, 1 bunch (about 3/4 - 1 cup)

    Instructions

    1. Either buy pre-"riced" cauliflower, or you can make your own by buying a full head of cauliflower, removing the stem, and break into small florets. Place the raw cauliflower florets into a food processor and pulse to break down until they are about the size of rice. I do not like to break it down too small, so after pulsing, I separate out the large pieces, pour the riced portion into a bowl and then re-pulse the larger pieces until they are all a similar consistency. Take your time in pulsing, otherwise, you risk making mushy cauliflower purée instead of creating a "riced" consistency.
    2. In a large pot, mix together the cauliflower rice, uncooked jasmine rice, coconut milk, water, lime juice, and 1/2 teaspoon salt. Place the pot on a burner at med/high heat and bring to a boil with lid on.
    3. Once it is at boil, turn down the heat to low and allow to simmer for 3-5 minutes (no more or the bottom will burn), remove pot from the heat, and let it sit completely covered for 20 minutes. Do not lift the lid; you want to allow the heat to steam cook the cauliflower rice. After 20 minutes, remove the lid & fluff the rice gently with a fork. Let the rice sit and cool for about 10 minutes or more.
    4. When the rice has cooled, add in the chopped basil and stir. It is important to add the basil only after it has cooled or the heat will wilt it and turn it dark. Mixing it in after cooling keeps the basil bright green and fresh. Just before serving, sprinkle generously with Penang nut & spice mix.

    Cauliflower, Coconut and Basil Rice - Glory Kitchen
    Cauliflower, Coconut and Basil Rice - Glory Kitchen
    Cauliflower, Coconut and Basil Rice - Glory Kitchen
    Cauliflower, Coconut and Basil Rice - Glory Kitchen
  • Summer Rolls - Glory Kitchen

    SUMMER ROLLS

    Every time I make Summer Rolls topped with our  Glory Kitchen Asian nut & spice blend called Penang I pledge to make them often because they are deliciously fresh, extremely filling, and good for you.  I’m not exactly certain how these crunchy rolls received their name but I do know this  – they are not just good in the summer.  Maybe it’s because we typically like to eat lighter in the summer, or because there is an abundance of fresh veggies available during the warm season.  Regardless, these rolls are certainly a year-round recipe.  And now that it is officially summer… it is time to roll!

    I was a bit intimidated to make these Summer Rolls for the first time but once I located the rice paper rolls, which by the way I discovered are easily available at most grocery stores, sometimes by the name of “spring rice paper”,  you just need a bit of creativity with ingredients and patience to learn the art of working with rice paper.   It is definitely something you get better at the more often you make them.

    There are so many choices of ingredients to fill up Summer Rolls, so feel free to substitute from this list but I probably wouldn’t do without the carrot or cucumber.  The refreshing crunch and color from these two veggies are perfect.  I also love the addition of fresh herbs, namely mint and basil.  There’s something about their freshness that adds a light, crisp flavor.  Other ingredient choices for Summer Rolls include radishes, sugar snap peas, enoki mushrooms, noodles or brown rice (either one in place of the quinoa), shrimp, ground pork, shredded chicken, and the list goes on.

    And by the way, if your first go at Summer Rolls produces messy results, don’t get discouraged.  Even a messy Summer Roll can be absolutely delicious and you’ll get better as you go, promise.  Let’s get rolling!

    Margie Bruner
    owner of Glory Kitchen

    instagram
    facebook

    Summer Rolls

    Yield: about 16 rolls

    Ingredients

      For the dipping sauce:
    • 2 tablespoons peanut butter (I used almond butter)
    • 1 tablespoon soy sauce
    • 1 tablespoon rice wine vinegar
    • 1 teaspoon oyster sauce
    • 2 teaspoons gochujang sauce (or other hot sauce like sriracha)
    • 2 teaspoons sesame oil
    • 1 teaspoon fresh ginger, minced
    • a few teaspoons water (or more)
    • For the rolls:
    • Penang nut & spice mix
    • 16 6-inch rounds rice paper
    • 3 carrots, julienned
    • 2 cucumbers, julienned
    • 2 cups shredded kale, red cabbage, or other lettuce
    • 2 cups green beans, slightly cooked or raw
    • 2 cups quinoa, cooked
    • 1/4 cup mint leaves
    • 1/4 cup basil leaves
    • 1/4 cup cilantro leaves
    • other items such as: shrimp, pork, green beans, radish, sugar snap peas, zucchini

    Instructions

    1. Mix all of the ingredients for the dipping sauce and set aside. Taste as you go and add a bit more of this or that depending upon your taste. I added a teaspoon of water at a time to get the right consistency - the peanut butter will make it creamy so you can thin it out with a touch of water, little bits at a time. You want to make it a bit creamy, but you also don't want it too thick.
    2. Cook the quinoa according to the package instructions and allow to cool. Prep all of the veggies, set each one in its own bowl and set up in an assembly line to make the rolling process systematic. I peeled the carrots, then cut into thin match sticks. Same with the cucumber. The green beans were left whole and roasted just a bit in the oven but you can certainly leave them raw for additional crunch.
    3. Get a pie dish and fill it almost half way with warm water. Take a rice paper round and dip it completely into the water for just a few seconds; this will soften the rice paper. Take it out and place it flat on a clean wooden cutting board. When you remove from the water it will be thin and sticky; work carefully, it is pretty forgiving. You may need to throw a few away if they rip, but you will get better as you go.
    4. Working on the bottom third of rice paper, spread a bit of quinoa, carrots, cucumber, lettuces, herbs and anything else you have prepped for the roll. Fold up bottom edge to cover, then fold in the sides, just like you would a burrito. Roll tightly all the way.
    5. Place the rolls on a serving platter, drizzle the top with a bit of sesame oil and then sprinkle the tops with Penang nut & spice mix. Garnish with fresh cilantro or mint. Serve the rolls right away, alongside the peanut dipping sauce. You can refrigerate, lightly covered, for up to 2 hours.

    Summer Rolls - Glory Kitchen
    Summer Rolls - Glory Kitchen
    Summer Rolls - Glory Kitchen
    Summer Rolls - Glory Kitchen
    Summer Rolls - Glory Kitchen
    Summer Rolls - Glory Kitchen
  • Perfect Deviled Eggs - Glory Kitchen

    PERFECT DEVILED EGGS

    Around Easter time each spring I get the urge to serve deviled eggs and I always rely on what I feel is the Best Deviled Egg Recipe.  This is one I keep handy always – I’ve used this as my base recipe for years and it never fails.  The creamy yolk mixture has a bit of tangy dijon mustard, it is lightened up with a touch of greek yogurt, and the splash of worcestershire sauce gives it great depth of flavor.  This version of deviled eggs has a bit of Asian flare with the Penang nut & spice mix topping which gave it a bit of heat and added crispy texture.

    The finishing touch with a prosciutto crisp is one of the best and adds great flare to the presentation, not to mention the added flavor of crispy cured ham.  I often use crisped up proscuitto because it is very thin and almost translucent once it is baked in the oven but bacon adds more of a punch and works great as well.  Another topping I like to use is a slice of fresh jalapeno which can give a note of heat to the egg bite.

    The sky’s the limit with deviled eggs and any of our Glory Kitchen nut and spice mixes works as a beautiful topping on deviled eggs.  If using the Mumbai blend, you could add turmeric to the yolk mixture.  If using the San Miguel blend, I would add guajillo pepper to the yolk mix and also add a sliver of fresh jalapeno on top alongside a chard of bacon.  Whichever blend you use, they all add great flavor and a pizazz to the presentation.  This Perfect Deviled Egg recipe is simple and a great choice when entertaining for a crowd.

    Margie Bruner
    owner of Glory Kitchen

    instagram
    facebook

    Perfect Deviled Eggs

    Yield: makes 12 deviled eggs

    Ingredients

    • Penang nut & spice mix
    • 6 slices proscuitto or bacon
    • 6 eggs, hardboiled & sliced in half
    • 1 tablespoon greek yogurt
    • 2 tablespoons mayonnaise
    • 1 tablespoon dijon mustard
    • 1 teaspoon worscestershire sauce
    • pinch of sea salt
    • pinch of pepper

    Instructions

    1. Place the prosciutto onto a baking sheet and bake in the oven at 375° until crispy. You can substitute bacon if you wish. Remove and allow to cool completely. Break into irregular shards and set aside to insert at the top of each finished deviled egg.
    2. Hardboil the eggs and then cool to room temperature. Do not overcook the eggs, I like to boil for about 8-9 minutes, then remove and place into an ice bath to stop the cooking. Carefully slice each egg in half & remove the center yolks into a mixing bowl.
    3. Using a fork, mash all the yolks well. To this add yogurt, mayonnaise, dijon mustard, worcestershire, good pinch of salt & pepper. Mix well. Add into a pastry bag and snip the end off. You can also place the mixture into a ziplock baggie, zip it tight, snip off one corner, and use this as your piping bag.
    4. Carefully pipe each egg white shell with the yolk mixture. Top with Penang nut & spice mix and add a sliver of bacon or prosciutto to the top.

    Notes

    Any of our Glory Kitchen nut blends would be wonderful on our deviled eggs. If you used the Mumbai blend, it would be great to add a bit of turmeric to the yolk mixture. If you used San Miguel, you could add a bit of guajillo pepper to the yolk mixture. Get creative and add a bit of interest to your typical deviled egg!

    Perfect Deviled Eggs - Glory Kitchen
    Perfect Deviled Eggs - Glory Kitchen
    Perfect Deviled Eggs - Glory Kitchen
    Perfect Deviled Eggs - Glory Kitchen
    Perfect Deviled Eggs - Glory Kitchen
    Perfect Deviled Eggs - Glory Kitchen
    Perfect Deviled Eggs - Glory Kitchen
    Perfect Deviled Eggs - Glory Kitchen
  • Honey Roasted Carrots - Glory Kitchen

    HONEY ROASTED CARROTS

    When I made my very first batch of our Glory Kitchen nut & spice mix, I created the Middle Eastern blend (now called Cairo) and used it to season a simple batch of oven roasted carrots.  As the hot, caramelized carrots came out of the oven, covered in crunchy spices and nuts, the smell was intoxicating and the flavor was even better – one bite and I was hooked.  Not only were the sweet carrots amazing but the crunchy seasoning that coated them gave them texture and a kick of flavor.

    We proceeded to finish the entire batch of carrots straight from the baking sheet, even before they had the chance to cool from the hot oven.  This simple Honey Roasted Carrot Recipe quickly became ingrained in my memory and became a routine side dish and sometimes snack in our home.  I change the variety of nut & spice mix just to keep things interesting and change up the flavor profile.  These roasted carrots are spiced up with our San Miguel nut & spice mix made of Mexican flavors  – the perfect combination of sweet, savory and a little spicy kick.

    All 6 of our Glory Kitchen varieties are perfect for roasted carrots, it just depends upon your mood of the day and flavor direction you wish to take.  My go-to flavors for carrots are the San Miguel, Cairo, Mumbai and Penang blends.

    Once they’re roasted you can serve them as a side to any protein, top them on salads, dip them in a sauce and eat as an appetizer, add them to a cheese platter, use in rice or quinoa bowls, they’re just plain good on everything.

    Margie Bruner
    owner of Glory Kitchen

    instagram
    facebook

    Honey Roasted Carrots

    Yield: serves 4-8

    Ingredients

    • 1 tablespoon San Miguel nut & spice mix
    • 2-3 lbs carrots
    • 2 tablespoons olive oil
    • 1 1/2 tablespoons honey
    • sea salt
    • 1 teaspoon smoked paprika or ground chipotle

    Instructions

    1. Preheat the oven to 425°.
    2. Prep the carrots by peeling and slicing into sticks, slicing in half, or leaving whole, depending upon how large they are and how you want to present them on the plate. In this photograph I used very small heirloom carrots, however, if they are quite large, I often cut them into sticks (much like french fries), or if they are medium sized, I might slice them in half lengthwise because this can present very well on a plate.
    3. Arrange all of the carrots onto a parchment or foil lined baking tray, close together. Drizzle the carrots with the honey and the olive oil, sprinkle with sea salt, paprika (or chipotle) and the San Miguel nut & spice mix. Using your hands, toss them gently to coat the carrots well. Spread them out on the tray. If the carrots are very crowded, you might want to consider using two trays. If you place them too close together, the carrots will steam a bit and will not brown and caramelize as well... that is the best part!
    4. Place the baking tray into the hot oven and roast for about 40 minutes. You might want to check on them after 25 minutes and toss them around a bit to brown them evenly. Remove from oven and enjoy hot or let them come to room temperature and add them into salads, rice bowls, as a side for proteins or use decoratively over a lovely piece of salmon or baked fish. You can sprinkle them with fresh chopped herbs just before serving.

    Notes

    Once you've made these a few times and get a feel for the ingredient ratios, you can just drizzle the oil and honey and add the seasonings without even measuring.

    Honey Roasted Carrots - Glory Kitchen
    Honey Roasted Carrots - Glory Kitchen
    Honey Roasted Carrots - Glory Kitchen
    Honey Roasted Carrots - Glory Kitchen
  • Radicchio Fish Cups - Glory Kitchen

    RADICCHIO FISH CUPS

    These Radicchio Fish Cups are a great way to enjoy fish tacos without the tortilla – a lighter version but just as satisfying and quite filling as well.  They are bright, colorful, and make a beautiful presentation when they are arranged on a platter and served tableside with a bowl of delicious peanut dressing and some crunchy Glory Kitchen Penang nut & spice mix to adorn the top of the little lettuce tacos.

    Radicchio is a bitter lettuce, sometimes called Italian chicory.  It is often confused with red cabbage, however, is actually quite different and much more delicate than cabbage.  The leaves separate and are more similar to Boston, butter, or iceberg lettuce.  You can gently separate the whole leaves individually and they are shaped in a cup-like manner which will hold a small amount of filling – in this case, delicate fish, rice and small cut veggies.

    Most of the work in making these colorful Radicchio Fish Cups is in the preparation of the rice and veggies.  A great way to shortcut the preparation is to bake the fish, make the rice, mix the dressing and prep all of the vegetables a day ahead.  Store all of the veggies individually in the refrigerator and when it’s time to eat, you’ll be ready to gather all of your ingredients and assemble.  Doing all of the pre-work ahead makes these Radicchio Fish Cups a snap and you’ll be quite surprised at how light and tasty they are.

    Margie Bruner - Glory Kitchen

    Margie Bruner
    owner of Glory Kitchen

    instagram
    facebook

    Radicchio Fish Cups

    Yield: about 4 servings

    Ingredients

      For the dressing:
    • 3 tablespoons sesame oil
    • 1 tablespoon soy sauce
    • 1.5 tablespoon creamy peanut butter
    • 1 tablespoon soy sauce
    • 2 teaspoons mirin
    • 2 tablespoons rice wine vinegar
    • For the fish cups:
    • Penang nut & spice mix
    • 1 - 1.5 lbs white fish, wild alaskan cod
    • 2 heads fresh radicchio
    • cooked jasmine rice (2 cups water, 1 cup rice)
    • handful of carrots, shredded
    • 1 fresh jalapeño, thinly sliced
    • 4-6 radishes, sliced into thin wedges
    • 3 tablespoons rice wine vinegar (for radish pickling)
    • pinch of salt & pinch of sugar (for radish pickling)
    • handful of snow peas
    • 1 scallion, chopped
    • handful of peanuts, barely chopped
    • peanut butter dressing (see recipe above)

    Instructions

    1. Take one cup of jasmine rice and add it into a saucepan with lid. Add 2 cups of water. Bring to a boil, then reduce to a low simmer for 10-15 minutes. Remove from the heat and allow the rice to steam in the saucepan with the lid on until it becomes tender. Flake with a fork and allow to come to room temperature by removing the lid.
    2. Whisk together all ingredients for the dressing. Taste first to make certain the ratios taste correct - add a bit more lime juice if additional acid is needed. Place the dressing into a small serving bowl with a small serving spoon for drizzling on the lettuce cups at the table. Set aside.
    3. On a baking tray or small baking dish, place the white fish and drizzle with a bit of olive oil or sesame oil, sprinkle it generously with Penang nut & spice mix and place into oven at 425° for 15-20 minutes or until the fish flakes. Although I used Alaskan cod, any type of white fish can be used: haddock, halibut, tilapia, sole, etc. If you overcook, it gets very tough - you want it to be light and flaky, so don't leave it in the oven too long. Remove from the oven and allow to cool.
    4. While the fish is baking in the oven, quick-pickle the radishes. Using about 4-6 radishes, slice them into small wedges and add them into a bowl with 3 tablespoons white wine vinegar or rice wine vinegar, a good pinch of salt and a good pinch of sugar. Let them marinate in this liquid while you are preparing the rest of the ingredients and this will quick-pickle the radishes.
    5. Slice the snow peas into long, thin slices, shred the carrots (I bought pre-shredded carrots), chop the scallions, rough chop the peanuts, and thinly slice about 1/2 a jalapeño. Prep all of these ingredients and place into their own small bowls to have ready when assembling the lettuce cups.
    6. Take the heads of radicchio and slice off the core end with a knife. Using your hands, gently remove each leaf, trying to keep them whole & intact so they create small cups to hold the fish and fillings.
    7. To assemble, take a radicchio cup & add in a scoop of jasmine rice, add a bit of baked fish, top with carrots, radishes, snow peas, scallions, peanuts, a slice of jalapeño and a generous sprinkle of Penang nut & spice mix. Arrange the little cups on a platter and serve with the peanut dressing for each person to drizzle over their lettuce cups.

    Radicchio Fish Cups - Glory Kitchen
    Baked Fish Radicchio Cups - Glory Kitchen
    Radicchio Fish Cups - Glory Kitchen
    Radicchio Fish Cups - Glory Kitchen
    Radicchio Fish Cups - Glory Kitchen
    Radicchio Fish Cups - Glory Kitchen
    Radicchio Fish Cups - Glory Kitchen
    Radicchio Fish Cups - Glory Kitchen
  • Pomegranate, Pine Nut and Apple Salad - Glory Kitchen

    POMEGRANATE, PINE NUT AND APPLE SALAD

    If you need a light meal following the Thanksgiving celebration, this Pomegranate, Pine Nut and Apple Salad is hands down one of the best salads I’ve had this fall.  And if you think you don’t like kale, you must try this salad and reevaluate your position.  This salad is simple to make but delicious on so many levels… a little sweet from the apples and maple dressing, a bit of red pepper heat from our Glory Kitchen Penang nut & spice mix, earthy flavors from the wild rice, and a burst of sweet juiciness from the bright red pomegranate seeds.  If you want a more substantial salad you could always add some leftover turkey, however, this was quite filling on its own.

    It seems that kale is on every menu these days and for good reason.  Not only is it a trendy green but it is loaded with all types of health benefits; vitamins A, K, C, B6, Manganese, Calcium, and the list goes on.  It’s filled with antioxidants and when prepared properly, it can be really delicious.

    The key is to pick the right type of kale, cut it well, and massage it with olive oil to break down the cells of the tough leaves.  My personal favorite kale leaf is Tuscan kale, also called lacinato, because of its dark color and smooth texture, but there are many other varieties such as curly, red leaf and others which are all worth a try.

    Add this salad as a side to your meal or make it large enough to enjoy as a salad entrée – I can’t wait to make this one again.

    Margie Bruner - Glory Kitchen
    Pomegranate, Pine Nut and Apple Salad

    Yield: serves 4

    Ingredients

      For the dressing:
    • 1 teaspoon Penang nut & spice mix
    • 1/2" fresh ginger, grated
    • 1 clove garlic, grated
    • 2 tablespoons apple cider vinegar
    • 1 1/2 teaspoons maple syrup
    • 1 teaspoon sea salt
    • pinch of black pepper
    • 1/4 cup extra-virgin olive oil
    • For the salad:
    • 1 bunch Tuscan (lacinato) kale
    • 1 1/4 cups wild rice (cooked)
    • 1 red apple, thinly sliced
    • 1/4 cup pine nuts
    • 1/2 cup pomegranate seeds
    • drizzle olive oil
    • sprinkle Penang nut & spice mix

    Instructions

    1. Mix all the ingredients for the dressing and set aside. To grate the ginger & garlic, I use a microplane and grate it right into the mixing bowl. I also don't bother peeling the ginger before grating, however, you may prefer to peel some of the skin off. TIP: I often buy a large root of fresh ginger at the market and cut it up into approximately 1" pieces. Then I store the small pieces in a zip lock freezer bag and keep it handy in the freezer to use whenever I need fresh ginger. I just use it frozen, grate it on a microplane and it works beautifully - this way you always have a knob of fresh ginger handy!
    2. After washing and drying your kale, stack the leaves upon one another then roll into a cigar-like fashion. Using a chef's knife, slice it into small pieces then place into a large mixing bowl. I like to remove the thicker part of the stalks located at the base of the leaf. Drizzle the kale with a bit of olive oil, sprinkle with 1 teaspoon of Penang nut & spice mix, sprinkle with a bit of sea salt, then massage the oil & spices into the kale.
    3. To the kale, add the wild rice, pine nuts, thinly sliced apples, and pomegranate seeds. Toss gently and serve.

    Notes

    other Glory Kitchen nut & spice blends which would work well with this salad are Cairo, Mumbai, Provence or San Miguel.

    Pomegranate, Pine Nut and Apple Salad - Glory Kitchen
    Pomegranate, Pine Nut and Apple Salad - Glory Kitchen
    Pomegranate, Pine Nut and Apple Salad - Glory Kitchen
    Pomegranate, Pine Nut and Apple Salad - Glory Kitchen
  • Noodle andCold Noodle Salad Bowls - Glory Kitchen Veggie Bowl - Glory Kitchen

    COLD NOODLE SALAD BOWL

    I’ve become quite fond of Cold Noodle Salads tossed together with lots and lots of fresh veggies and seasoned with an Asian dressing then topped with crunchy seeds and nuts from our Glory Kitchen Penang nut & spice mix.  The crunch of peanuts, sesame seeds and a bit of nori seaweed and ginger add a nice zing and texture to noodle bowls.

    Making a cold noodle bowl is very much like throwing together a salad.  You don’t really need a recipe, except for possibly the Asian dressing.  I think it is a good idea to commit to memory the main ingredients necessary for a noodle bowl and then peruse the produce aisle at your favorite market and gather fresh items which work well together.

    Dried noodles should become a pantry staple in your kitchen – ready and waiting for you when the noodle salad mood strikes.  Because of the array of choices, noodles can be confusing.  There are several types I prefer and keep in my pantry as my go-to favorites.

    I like to have on hand soba noodles, udon noodles and 100% whole wheat spaghetti noodles.  I’ve recently used brown rice noodles which are nice to have as well.  Soba noodles are somewhat brown in color, made of buckwheat flour, and are great for those who eat a gluten free diet.  When purchasing, the most important feature of soba noodles is that they are labeled 100% buckwheat because there are many imposters – just read the label carefully.

    Udon noodles are Japanese, thicker and larger than soba, lighter in color, and are made of wheat.

    In my salads I typically prefer soba noodles because they are more delicate, however, sometimes a heartier noodle is nice, especially when making homemade soups.  Others types of noodles include egg noodles, cellophane noodles, rice vermicelli and somen. Although these are nice to work with for special dishes, my go-to choices and the ones I stock in my pantry are soba, udon and spaghetti.

    The Asian dressing I make is also made up of ingredients I always have stocked in either my pantry or refrigerator.  I probably use these ingredients more often than I do ketchup or mayonnaise, so they are great to have on hand and to know how to use them.  The basic combination of flavors for an Asian dressing is something I think everyone should commit to memory.  The ratio of ingredients is very similar to your basic vinaigrette; 3 to 1 oil to vinegar (I often use 2 to 1 because I like the acidity of lime juice or vinegar) and then add in the extra flavors.

    I hope you’ll try making a cold noodle bowl and it becomes a routine dish in your home.

    Margie Bruner
    owner of Glory Kitchen

    instagram
    facebook

    Noodle and Veggie Bowls

    Ingredients

      For the Noodle Salad (choose your own variations):
    • Penang nut & spice mix (for the topping)
    • choice of noodles; soba, udon, or spaghetti
    • carrots, julienned
    • brussel sprouts, shredded
    • cabbage, shredded
    • napa cabbage, shredded
    • cucumber, thinly sliced
    • bean sprouts
    • pickled onions
    • sugar snap peas, sliced
    • fresh cilantro, chopped
    • scallions, chopped
    • radishes, thinly sliced
    • pickled ginger, chopped
    • fresh jalapeno, minced or thinly sliced
    • red bell pepper, sliced very thin
    • dried mushrooms, soaked and reconstituted
    • peanuts, toasted
    • For the Asian Dressing (for 2-4 salads):
    • 1 tablespoon sesame oil
    • 3 tablespoons avocado or olive oil
    • 2 tablespoons rice wine vinegar
    • 1 tablespoon soy sauce
    • 2 teaspoons mirin rice wine
    • 2 teaspoons honey
    • 1 teaspoon oyster sauce
    • 2 teaspoons Penang nut & spice mix
    • sriracha, sambal pepper sauce or red pepper flakes (for a touch of heat)

    Instructions

    1. In a small bowl, mix together the ingredients for the dressing. Taste and adjust the ingredients to your personal preference. Set the dressing aside.
    2. Cook the noodle of choice according to package directions. When al dente, rinse with cool water in a colander, drizzle with a touch of sesame oil and gently toss (to keep them from sticking). Set aside in a bowl to fully cool.
    3. Chop all the vegetables and gently toss with the noodles and the dressing. I like to keep a few of the colorful veggies such as radishes, carrots and cilantro sprigs to garnish the top and make a pretty presentation.
    4. Generously sprinkle the top with Penang nut & spice mix and serve.

    Noodle andCold Noodle Salad Bowls - Glory Kitchen Veggie Bowl - Glory Kitchen
    Cold Noodle Salad Bowls - Glory Kitchen
    Cold Noodle Salad Bowls - Glory Kitchen
    Cold Noodle Salad Bowls - Glory Kitchen
    Cold Noodle Salad Bowls - Glory Kitchen
    Cold Noodle Salad Bowls - Glory Kitchen
  • Charred Romaine with Green Goddess Dressing - Glory Kitchen

    CHARRED ROMAINE WITH GREEN GODDESS DRESSING

    If you love a good salad but want something new and different, try serving this Charred Romaine with Green Goddess Dressing.  The slight wilting of the romaine lettuce and charred leaves give it a nice, smoky, and intense flavor.

    This salad is garnished with fresh toasted corn and a creamy, herb flavored Green Goddess dressing with hints of Indian spices from our Glory Kitchen Mumbai nut & spice mix.  Sprinkled on the lettuce before it goes under the broiler, the nuts & spices intensify in flavor and they add a nice crunch to the salad.

    Trendy restaurants have recently popularized grilled romaine lettuce salads, however, here I’ve bypassed the grill and placed it under a hot broiler for just a few minutes to char the delicate edges and give the firm romaine just a bit of a wilt.  Once it is browned, I quickly remove it from the oven, allow it to slightly cool, and serve the salad right away topped with corn and some crunchy nut flavor from our nut blends.

    If you happen to have any leftover Green Goddess dressing it is also great for raw veggie dipping, a sauce drizzled over fish, or a spread on a sandwich.  I love the bright green color from the avocado and fresh herbs and the flavor is fresh and creamy.

    Experiment with this recipe and toss it with any of our other Glory Kitchen nut blends if you wish to move it in another flavor direction.  Enjoy!

    Margie Bruner - Glory Kitchen

    Margie Bruner
    owner of Glory Kitchen

    instagram
    facebook

    Charred Romaine with Green Goddess Dressing

    Yield: serves 4

    Ingredients

      For the dressing:
    • 1/2 avocado, ripe
    • 1/2 clove garlic
    • 1 1/2 tablespoons apple cider or white wine vinegar
    • 1/2 lemon
    • 2 teaspoons honey
    • 1 anchovy (or not if you dislike)
    • 1 cup fresh herbs (any combination) parsley, thyme, tarragon, cilantro, basil, chives, oregano
    • 1 teaspoon sea salt
    • 1/2 teaspoon pepper
    • water (1/4 -1/2 cup)
    • 1/2 cup olive oil
    • 1 tablespoon red onion, chopped very small
    • For the charred salad:
    • Mumbai nut & spice mix
    • 2 heads of romaine lettuce
    • 2 ears of corn
    • red onion, sliced very thin (for garnish)
    • olive oil
    • sea salt

    Instructions

      for the dressing:
    1. In a blender, mix together avocado, garlic, vinegar, lemon juice, honey, anchovy, herbs, water, salt & pepper until smooth. If you are not a fan of anchovies, you can certainly leave these out but I think they add a great salty flavor to the dressing. Slowly add in the olive oil until it is smooth. If it is too thick, add a bit more water (1 tablespoon at a time) until the right consistency is achieved for a creamy dressing. Taste and season with more salt and pepper if needed. Toss the chopped red onion into the blended dressing and stir in with a spoon. Set the dressing aside and allow to sit at room temperature while the salad is being prepared.
    2. for the charred salad:
    3. Set the oven to broil and place the oven rack on the upper third of the oven. Not the very top, but close.
    4. Clean the ears of corn and place them on a foil lined baking sheet. Drizzle with a bit of olive oil and a sprinkle them with a bit of sea salt. Place them in the oven, under the broiler, and allow them to brown a bit (but not burn). Using tongs, turn them a bit so all sides get a bit toasted. If they are put into a hot oven, this process should only take a few minutes so stay close to the oven. Remove from the oven and allow to cool completely. Using a large knife, cut the kernels off each ear. Place the toasted corn in a bowl.
    5. Leaving the cores intact, and using a large chef's knife, slice each head of romaine lettuce in half lengthwise. Place them cut side up on a foil lined baking sheet and drizzle each one with olive oil. Sprinkle with a bit of sea salt and some Mumbai nut & spice mix. Place in the oven, under the broiler and keep a close eye to make certain they do not burn. When the edges are charred and just a bit wilted, remove from the oven and let them cool.
    6. Arrange the charred romaine on a serving platter or on individual serving plates. Sprinkle the toasted corn across the lettuce heads. Top with very thin slices of red onion and then drizzle with the Green Goddess dressing. Top them with a sprinkle of Mumbai nut & spice mix and enjoy!

    Notes

    These charred romaine leaves would be wonderful with any of the other Glory Kitchen blends. If you choose to try the Provence blend, I would add a few sprinkles of currants or raisins over the whole dish which would add a nice sweetness to the salad.

    Charred Romaine with Green Goddess Dressing - Glory Kitchen
    Charred Romaine with Green Goddess Dressing
    Charred Romaine with Green Goddess Dressing - Glory Kitchen
    Charred Romaine with Green Goddess Dressing - Glory Kitchen
    Charred Romaine with Green Goddess Dressing - Glory Kitchen
Updating…
  • No products in the cart.

JOIN US !
JOIN
close-link